Table of Contents
Advertisement
Available languages
Available languages
Quick Links
Advertisement
Table of Contents

Related Manuals for AOC A724G


Summary of Contents for AOC A724G
- Page 1 Manual De Usuario Model: A724G...
-
Page 2: Aviso De Seguridad
1. Introducción 1.1 Agradecimientos Muchas gracias por elegir este producto. El producto es un dispositivo de Internet móvil, delicado, pequeño y también portátil. También está equipado con una pantalla táctil de alta definición, que se puede utilizar para ver videos e imágenes de alta definición. Es compatible con la instalación de varios programas de aplicación de oficina y el entretenimiento. - Page 3 Por favor, no use el dispositivo en lugares con alta temperaturas y gases inflamables (como las estaciones de gasolina). Por favor, coloque su dispositivo y sus accesorios en lugares más allá del alcance de los niños, por favor no deje que los niños usen el dispositivo sin supervisión. ...
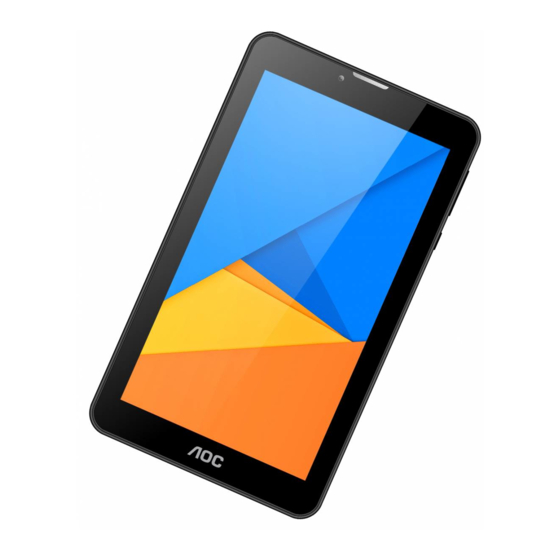
- Page 4 2. Breve introducción al producto MID (Dispositivo de Internet Móvil) 2.1.1 Estructura externa del dispositivo (frente)
- Page 5 2.1.2 Estructura externa del dispositivo (parte posterior) 2.1.3 Estructura externa del dispositivo (Etiquetas) Micro USB Port / Power Input Port = Puerto de entrada / alimentación micro USB Earphone Port = Puerto del auricular Earpiece = Auricular Front camera = Cámara frontal Micro SD Card Slot = Ranura para tarjeta Micro SD SIM Card Slot = Ranura para tarjeta SIM...
-
Page 6: Mid State And Notice
Power Button = Botón de encendido / potencia Volume - Button = Botón para bajar volumen Volume + Button = Botón para subir volumen Rear Camera = Cámara trasera 2.2 MID state and notice Iconograph for notification When a prompt message shows on your notice panel, please click the column box and slide on the screen with your finger to open the notice list. -
Page 7: Inicio Rápido
Bluetooth ya está conectado 3. Inicio rápido 3.1 Función de las teclas Las descripciones de las funciones clave: Tecla Pulse esta tecla durante unos segundos para encender encendido Pulse esta tecla durante unos segundos para que aparezca la opción de apagado ... - Page 8 3.3 Desbloqueo y cierre de la pantalla La máquina se cerrará automáticamente cuando la pantalla esté en desuso 1.Después de que el dispositivo se deja sin usar durante un período de tiempo, la pantalla se apaga de forma automática, a fin de ahorrar energía de la batería. 2.Bajo la pantalla de estado, presione la tecla de encendido, la pantalla se cerrará...
- Page 9 de la interfaz de la página principal como el programa de aplicacion, sólo utilice el dedo para hacer clic. Pulse sobre Si desea desbloquear la opción disponible de un determinado tema (como cuadro de texto o interrelación en la página web, o mover acceso directo en la interfaz de la página principal y el menú...
- Page 10 Wallpaper Habilidad: en los programas de aplicación, puede presionar la tecla página de inicio para volver a la interfaz principal. Interfaz Prinicpal personalizada Cambiar Fondo de pantalla Pulse en la interfaz de la página principal para que aparezca el menú. Cuando el menú...
-
Page 11: Conexión Usb
Figura 3-3 Figura 3-4 3.6 Conexión USB Almacenamiento de ajuste Antes de transmitir el documento, debe establecer el modo de almacenamiento para su MID... - Page 12 en primer lugar: Conecte su MID con el ordenador mediante el uso de la línea de transmisión USB. Haga clic en la barra de estado. Entre a las opciones de estado, haga clic para elegir USB conectado, A continuación, haga clic para abirir el dispositivo de almacenamiento USB. En este momento, USB ya ha sido conectado.
-
Page 13: Tarjeta De Memoria
el dispositivo de almacenamiento USB. Si quieres accesar la tarjeta de memoria en el MID, debe desconectarse el cable USB. 3.7 Tarjeta de memoria Copiar un documento a la tarjeta de almacenamiento Puede transmitir documentos entre MID y el ordenador, como la música y la imagen, etc. Si usted quiere ver los documentos de la MID, sólo haga clic en el explorador de archivos para buscar a través de contenidos en la tarjeta SD. -
Page 14: Conexión Bluetooth
En la interfaz de la página principal, haga clic en y seleccione la clave menu y aparecerá el menu de ajuste; Haga clic en y seleccione Configuración del sistema; Haga clic en Wi-Fi y encienda el interruptor de conexión wi-fi; Después de abrir el Wi-Fi, se mostrara todas las conecciones disponibles en la ventana de la derecha. - Page 15 móviles, pda y un ordenador portátil que soporte bluetooth. Puede conectar el teclado, el ratón y el joystick que sea compatible con bluetooth. Aplicación de bluetooth (Figura 4-3) Procedimiento para activar el bluetooth: - Ajustes> bluetooth, encienda el interruptor del bluetooth Nombre del equipo: se puede cambiar el nombre del dispositivo Bluetooth, pulsando La Tecla Menú., Detectabilidad: Haga click en el dispositivo del bluetooth, para permitir que otros...
- Page 16 Haga clic en y seleccione el botón de fotos y para tomar fácilmente las fotos; Establecer funciones tales como foto, lugar de almacenamiento, balance de blancos y de regulación de distancia focal; Función de fotografía Figura 5-1 Función Video Grabación Haga clic en el icono de la cinta de vídeo para cambiar a modo de grabación de vídeo;...
- Page 17 Cortar frente o parte posterior Figura 5-2 Grabación de Video Figura 5-3 5.2 Teléfono móvil / Datos Télefono móvil 1、Presionar la tecla de encendido para apagar el MID; 2、Insertar la tarjeta SIM;...
-
Page 18: Otras Aplicaciones
3、Presionar la tecla de encendido durante un largo tiempo para poner en marcha; 4、Detectar el servicio de red de comunicación inalámbrica; 5、Haga clic en el icono de teléfono, marcar números de teléfono. Función SMS 1、Presionar la tecla de encendido para apagar el MID; 2、Insertar la tarjeta SIM;... - Page 19 Figura 6-1 Cortar y copiar archivos En el explorador de archivos, pulse y seleccione el archivo que desea administrar. Abra el menú, incluyendo Cortar, Copiar, Borrar, Renombrar, Mover a, Copiar, reproducir música, Seleccionar todo, directorio y atributos casa Set, Etc. Haga clic en Cortar o Copiar archivo o carpeta.
- Page 20 Haga clic en Buscar icono. Abra el panel de búsqueda y escriba las palabras clave que usted necesita para encontrar. Haga clic en OK y la barra de progreso de la búsqueda aparecerá en la barra de notificaciones. Cuando se haya completado la búsqueda, aparecerá el cuadro de diálogo para confirmar si desea mostrar los resultados.
-
Page 21: Especificaciones
7. Especificaciones Tamaño 7 pulgadas IPS pantalla táctil capacitiva de la Pantalla LCD pantalla Resolución 1024*600 píxeles Android 5.1 INTEL® ATOM™ x3-C3230RK Quad-Core 1.2GHz WiFi 802.11b/g/n Cámara Frontal 0.3M, Trasera 2.0M Flash incorporado (ROM) Incorporado Ampliación de la Ranura micro del SD (máx. 32 GB) Capacidad Fuente De Incorporada 2400mAH batería de litio recargable, 5V@1.5A... - Page 22 DECLARACIÓN DE LA FCC Este equipo ha sido probado y cumple con los límites para un dispositivo digital de Clase B, de acuerdo con la Parte 15 de las Reglas de la FCC. Estos límites están diseñados para proporcionar una protección razonable contra las interferencias perjudiciales en una instalación residencial.
- Page 23 AOC Tablet User Manual Model: A724G...
-
Page 24: Safety Notice
1. Introduction 1.1 Acknowledgements Many thanks for you choosing this product. The product belongs to MID (Mobile Internet Device), which is a kind of mobile internet device, small and exquisite, and also portable. It is also equipped with a piece of touch LCD of high definition, which can be used to watch videos and pictures of high definition. - Page 25 Please don’t use MID in places with high temperature and inflammable gas (such as nearby gas station). Please put MID and its accessories in places beyond children’s touch, please don’t let children use MID without supervision. During using of this MID, please observe related laws and regulations, respect privacy and legitimate rights of others.
-
Page 26: Brief Introduction For Mid Product
2. Brief introduction for MID product 2.1.1 Wireframe for MID complete machine (front) - Page 27 2.1.2 Wireframe for MID complete machine (back) 2.2 MID state and notice Iconograph for notification When a prompt message shows on your notice panel, please click the column box and slide on the screen with your finger to open the notice list. Click options needing to check to see...
-
Page 28: Quick Start
detailed information. Then you may click the message box and slide upwards to close the message window. The following are iconography for icons in status bar: Mail notice Mute Gmail notice Without SD card Computer and MID are Uploading/Downloading connected through USB line Events waiting to be done Downloading finished General notice (for example:... -
Page 29: Starting Up And Turning Off
Power key Press this key for a long time to start up Under starting up state, press this key for a long time to pop up shutdown option Under starting up state, press this key to close the screen ... -
Page 30: Use Of Touch Screen
Figure 3-1 3.4 Use of touch screen Operating mode in MID There are various ways to skim the main screen, menu and application program, etc. on your MID. Click to select When you want to use screen keyboard entry, and you want to select items on the homepage interface such as application program, you only use your finger to click. -
Page 31: Homepage Interface
Aiming at most of pictures, only turn the MID in side direction, the screen direction can be shifted from cross direction to vertical direction. For example, when you input characters, watch cinema, etc. 3.5 Homepage interface All application programs on the machine will be displayed on the main menu screen. You may use application program, shortcut and user-defined mode to set wallpaper of your homepage interface Wallpaper... -
Page 32: Usb Connection
wallpaper”. Figure 3-3 Figure 3-4 3.6 USB connection Storage setting of MID... - Page 33 Please follow the below steps before uploading/ downloading files: Connect the tablet with the computer via USB cable. The Notice bar will prompt the notice information. The computer will install the MTP drive automatically (for win7 and above version. Drive need been download from the Internet for Windows XP system.). After the MTP drive is installed, the USB is connected then.
-
Page 34: Memory Card
device, you will not visit the memory card through MID, if you want to view memory card in MID, only disconnect USB cable. 3.7 Memory card Copy the document to storage card You can transmit document between MID and computer, such as music and picture, etc. If you want to see documents in MID, only click the file browser to look through content in the SD card. -
Page 35: Bluetooth Connection
Click Wi-Fi and open wi-fi switch; 10. After opening Wi-Fi, the Wi-Fi network can be scanned automatically from the equipment in the windows on the right. 11. Select the Wi-Fi network required to be connected, if the password is added, pop up the password input windows and input the corresponding password. - Page 36 Name of equipment: you can randomly change the name of bluetooth for your MID by pressing Menu key. Detectability: open this function by clicking the place for name of bluetooth, which indicates that your MID bluetooth can be searched by other bluetooth equipments, this default time for this opening is of 120 seconds.
- Page 37 Figure 5-1 Videotape function Click the videotape icon and turn it as video recorder mode; Click and select the camera button to take video; Click o n gear icon to set setting functions - resolution and video quality; Switch 720P and 480P high-definition video recording. 10.
- Page 38 Figure 5-3 5.2 Mobile phone / Data Mobile phone 6、Press power key to turn off the MID; 7、Insert the SIM card; 8、Press power key for a long time to start up; 9、Detect the Wireless communication network service; 10、Click on the phone icon, dial telephone numbers. SMS function 1、Press power key to turn off the MID;...
-
Page 39: Other Applications
Note: Your SIM card provider may offer data plans for connecting to Intenet when WiFi access is not available. 6. Other Applications 6.1 File Management Browse files Slide the desktop to locate the File browser (Explorer). You can use the file browser to manage, edit and delete the files and folders, or to create sharing and FTP server to achieve resource sharing. - Page 40 Delete files In the file browser, press the file you want to delete. Click Delete. Click OK to delete file. Folder setup In the file browser, pop up menu by pressing the Menu key. Click Create. Click Folder. 10. Click pop-up window and input the name of the new folder in the text box. 11.
-
Page 41: Specifications
7. Specifications Size 7 Inch IPS Screen Capacitive Touch Screen LCD Display Resolution 1024*600 pixels Android 5.1 INTEL® ATOM™ x3-C3230RK Quad-Core 1.2GHz WiFi 802.11b/g/n Camera Front 0.3M,Back 2.0M Built-in Built-in Flash Capacity Expansion Support Micro SD Slot (Max. 32GB) Power Supply Built-in 2400mAH Lithium rechargeable battery, 5V@1.5A Working temperature -4 ~ 40 ℃... - Page 42 FCC STATEMENT This equipment has been tested and found to comply with the limits for a Class B digital device, pursuant to Part 15 of the FCC Rules. These limits are designed to provide reasonable protection against harmful interference in a residential installation. This equipment generates uses and can radiate radio frequency energy and, if not installed and used in accordance with the instructions, may cause harmful interference to radio communications.
- Page 43 This Tablet PC meets the government’s requirements for exposure to radio waves. This phone is designed and manufactured not to exceed the emission limits for exposure to radio frequency (RF) energy set by the Federal Communications Commission of the U.S. Government. The exposure standard for Tablet PC employs a unit of measurement known as the Specific Absorption Rate, or SAR.
Need help?
Do you have a question about the A724G and is the answer not in the manual?
Questions and answers