Table of Contents
Advertisement
Quick Links
Instruction Manual
Model
TProfessional Basic Gradient
TProfessional Basic
TProfessional Basic XL Gradient
TProfessional Basic XL
Please read these instructions carefully before using this
Rudolf-Wissell-Str. 30
D-37079 Göttingen
Tel.: ++49 (0)551-50 68 6-0
Fax: ++49 (0)551-50 68 6-66
email: Info@biometra.com
Internet: http://www.biometra.com
Ver. 11/06
apparatus!
Biometra GmbH
Tel.: ++49 (0)551-50 68 6-10 or -12
Order No.
070-601
070-701
070-602
070-702
Service Department
Rudolf-Wissell-Strasse 14-16
D-37079 Göttingen
Fax: ++49 (0)551-50 68 6-11
email: Service@biometra.com
Advertisement
Table of Contents

Related Manuals for Biometra TProfessional Basic

Summary of Contents for Biometra TProfessional Basic
- Page 1 Instruction Manual Ver. 11/06 Model Order No. TProfessional Basic Gradient 070-601 TProfessional Basic 070-701 TProfessional Basic XL Gradient 070-602 TProfessional Basic XL 070-702 Please read these instructions carefully before using this apparatus! Biometra GmbH Rudolf-Wissell-Str. 30 Service Department D-37079 Göttingen Rudolf-Wissell-Strasse 14-16 Tel.: ++49 (0)551-50 68 6-0...
- Page 3 This document describes the state at the time of publishing. It needs not necessarily agree with future versions. Subject to change! Instruction Manual TProfessional Basic 06/2011...
-
Page 4: Table Of Contents
Initial self test (power on self test) ................13 Operating elements ......................14 TProfessional Basic Thermocycler front view............. 14 TProfessional Basic Thermocycler rear view.............. 14 The TProfessional Basic control panel ............... 15 High Performance Smart Lid (HPSL)................15 Operating........................... 17 The TProfessional Basic User Interface ..............17 5.1.1... - Page 5 Screen saver .......................50 System info........................51 6.3.1 System info......................51 6.3.2 View Log files of the last five runs ...............52 Service ........................52 6.4.1 View log files of Power on self test ..............53 6.4.2 Execute extended self test ..................53 Instruction Manual TProfessional Basic 06/2011...
- Page 6 View log files from extended self test ..............54 6.4.4 View Error log files....................54 6.4.5 Create Info file for Biometra Service Department ..........54 How to contact Biometra .................... 55 Supervisor system configuration................. 55 6.6.1 Change user PIN ....................55 6.6.2...
-
Page 7: Introduction
1.2.4 TProfessional Basic Housing The elegant TProfessional Basic housing is designed for heavy use. Due to an optimised air stream design even higher efficiency and better temperature uniformity is achieved. The instrument works quietly and consumes little power, which in turn leads to low heat emission. -
Page 8: Technical Specifications
Dimensions (WxDxH) 28 cm x 38 cm x 24 cm 13.0 kg Weight Working conditions 15 °C to 35 °C, 70 % air humidity, max 2.000 NN * Measured inside the block. ** TProfessional Basic Gradient Instruction Manual TProfessional Basic 06/2011... -
Page 9: Legal Notes
Biometra is pointing out that applied company and brand names are usually protected trade marks. 1.4.3 Liability Biometra is not liable for damages and injuries caused by use not considering these operating instructions in parts or completely. 1.4.4 Meaning of the Instructions Biometra recommends that you first read these instructions carefully. -
Page 10: Safety And Warning Notices
General safety precautions for laboratory work must be observed when working with the TProfessional Basic Thermocycler. • The TProfessional Basic does not produce a sound power level that could be hazardous for the user. The thermoblock and the heated lid will reach high temperatures during operation. - Page 11 Do not touch the heated lid. Use only suited plastic ware in the TProfessional Basic thermocycler. Tubes and plates must show good fit when placed in the thermoblock. Only use tubes that are suited for high temperatures (tight lids).
- Page 12 EN61010-1 certification, and create a potential safety hazard Place the TProfessional Basic Thermocycler on a stable, non flammable surface in a dry, safe environment. For details see working conditions in table “Technical specifications” (see chapter 1.3).
-
Page 13: Installation
3.3 Installation Conditions • Place the TProfessional Basic Thermocycler on a stable surface in a dry, safe environment. For details see working conditions in table “Technical specifications” (see chapter 1.3). • Let equilibrate the TProfessional Basic Thermocycler to room temperature before starting operation (1 to 6h). -
Page 14: Operation Voltage
The display contrast can be adjusted to local lightning conditions (6.2.2) 3.4 Operation Voltage Important: Prior to connecting the TProfessional Basic to the mains, make sure that the setting of the Voltage selector is in accordance with your mains Voltage. -
Page 15: Initial Self Test (Power On Self Test)
Power switch 3.5 Initial self test (power on self test) After switching on the TProfessional Basic serial number of the instrument and the software version is displayed. A log file of the power on self test is stored in the Thermocycler memory (see section 6.4.1). -
Page 16: Operating Elements
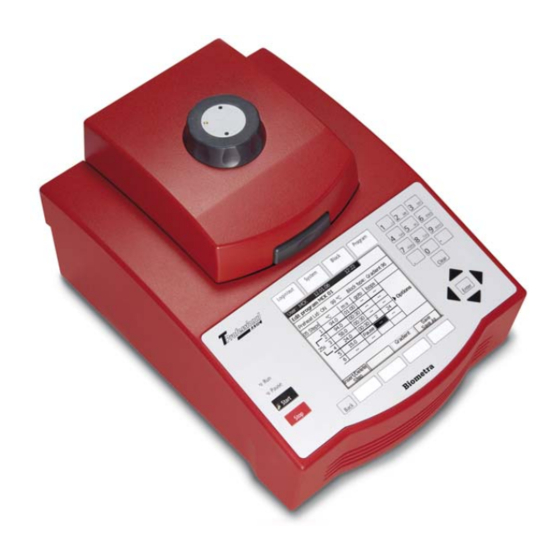
Operating elements 4.1 TProfessional Basic Thermocycler front view Lid pressure adjustment wheel Lid open button Display Start / Stop Keypad Button 4.2 TProfessional Basic Thermocycler rear view R232 serial Port Block release lever Mains plug Power on / off Instruction Manual TProfessional Basic 06/2011... -
Page 17: The Tprofessional Basic Control Panel
Back Back 4.4 High Performance Smart Lid (HPSL) To achieve optimum pressure on the tubes the TProfessional Basic is equipped with a height adjustable heated lid. Close the lid: After the samples have been placed in the block close the lid. Turn the wheel clockwise until you hear a clicking noise. - Page 18 Important: The lid should not be opened under pressure because this leads to damage of the locking mechanism. Instruction Manual TProfessional Basic 06/2011...
-
Page 19: Operating
Operating 5.1 The TProfessional Basic User Interface The TProfessional Basic User interface provides four Menu Buttons above the screen and four Soft Keys below the Screen, Menu buttons Softkeys 5.1.1 TProfessional Basic Menu Buttons The four MENU BUTTONS allow quick access to the TProfessional Basic Main Menus. These are: •... -
Page 20: Log In Menu
When the instrument is switched on, the Log in screen is displayed. To use the instrument a user has to be selected. Alternatively, a new user can be created. 5.1.4 Block Menu To enter the Block Menu, press the Menu Button [Block] above the display. Instruction Manual TProfessional Basic 06/2011... -
Page 21: System Menu
0, page 45. 5.1.6 Program Menu To enter the Program Menu, press the Program Button above the Display. Instruction Manual TProfessional Basic 06/2011... -
Page 22: Tprofessional Basic Software
5.2.2 Log in The TProfessional Basic manages up to 30 individual users. For each user a directory is created, where programs are stored. Programs from other directories (i.e. users) can be read but not modified. This allows to use all programs that are in the cycler memory, but to write only in the own user directory. - Page 23 Select User with cursor keys, or enter first initial. The cursor jumps to the first account starting with this letter. Press Soft Key [log in] and enter your PIN. Instruction Manual TProfessional Basic 06/2011...
-
Page 24: Create New User Account
To proceed with editing or running a program, select one of the Menu Buttons above the display 5.2.4 Create new user account Press Menu Button [Log in/out] above the Display. To create a new User account, press Soft Key [New User]. Instruction Manual TProfessional Basic 06/2011... -
Page 25: Supervisor Log In
User account. 5.3 Create program At Thermocyclers of the TProfessional Basic series programs can be created in two ways. You may use pre-installed program examples (see chapter 5.3.1) or create new programs without a template (see chapter 5.3.2). -
Page 26: Create Program From Template
Note: Please always, before starting a template protocol, check the single steps and adapt details (times, temperatures, loops, temperature- and time-increments) according to the required PCR conditions respectively. Biometra will not be liable if the PCR does not work if necessary adjustments have not been programmed. -
Page 27: Set Lid Pre-Heating Mode
However, if the program should start while the lid is heating, this can be set by pressing the Soft Key [preheat on/off]. After Lid settings have been made, confirm with [Enter] to enter the programming spreadsheet. Instruction Manual TProfessional Basic 06/2011... -
Page 28: Set Lid Temperature
Use cursor keys to navigate in the programming table. Note: Each setting is confirmed with [Enter]. The cursor moves automatically to the next field. Alternatively, you can confirm a value by moving forward with the cursor keys. Instruction Manual TProfessional Basic 06/2011... -
Page 29: Set Loop
Example: To set 2 minutes, 30 seconds enter “2”, “3”, “0”. Subsequently 2:30 [m:s] will be displayed in the programming table Note: For Biometra Thermocyclers a dot can be used as a shortcut to program minutes. Example: To set 2 minutes enter “2”, “.”. Subsequently 2:00 [m:s] will be displayed in the programming table 5.3.6... -
Page 30: Cool Below Ambient Temperature
Note: To save lifetime of Peltier elements, a temperature of 15°C for the final step rather than 4°C is recommended. 5.3.8 Program Pause To hold a temperature for an indefinite time enter “0”. After confirming with [Enter] the word “pause” is shown. 5.3.9 Save program Press button [Save / Save as]. Instruction Manual TProfessional Basic 06/2011... - Page 31 The first available program number is automatically pre-selected. Use cursor keys (or enter two digits) to move to a different program store. To enter a program name press button [edit name]. Enter program name and confirm name with button [ok]. Instruction Manual TProfessional Basic 06/2011...
- Page 32 Confirm program store number with Soft Key [Save]. Program number, name and date are shown in the file directory. To run this program press Menu Button [block] above the display. Instruction Manual TProfessional Basic 06/2011...
-
Page 33: Set Gradient
The easiest way to define a gradient is to enter the two temperatures of the block (left and right side) separated by “-“. Confirm with [Enter] or move cursor to the next field. Alternatively, move cursor to the field for temperature setting and press Soft Key [Gradient]. Instruction Manual TProfessional Basic 06/2011... -
Page 34: Program Linear Gradient
6 of a 96 well block). The temperatures for all other rows are calculated automatically. The temperature in row 01 (left side of the block) is the lowest and the temperature in row 12 (right side of the block) is the highest. Instruction Manual TProfessional Basic 06/2011... -
Page 35: Edit Programs
Insert program step Move cursor to the position, where a new step should be inserted To insert a program step press Soft Key [Insert/Del]. The step at which a new step will be inserted is highlighted. Instruction Manual TProfessional Basic 06/2011... - Page 36 Press Soft Key [insert step]. Confirm with Soft Key [Yes]. Enter temperature and time settings for new step. Instruction Manual TProfessional Basic 06/2011...
-
Page 37: Delete Program Step
Delete program step Move cursor to the step that should be deleted and press Soft Key [insert/delete step]. To delete the highlighted step press Soft Key [Insert/Del] Confirm deletion of step number 4 with Soft Key [YES] Instruction Manual TProfessional Basic 06/2011... -
Page 38: Copy Program
Copy program Press Menu Button [Program] and enter User directory. Move cursor to the program you want to copy. Press Soft Key [Copy Program]. The cursor automatically jumps to the next available (free) program store. Instruction Manual TProfessional Basic 06/2011... -
Page 39: Delete Program
(two digits) over the keypad. Edit name and confirm with Soft Key [Save Copy] 5.4.4 Delete program Select a program from your user directory Press Soft Key [Delete program]. Instruction Manual TProfessional Basic 06/2011... -
Page 40: Editing Programs In The Graphical Mode
Temperature and Time. In addition, programs can be edited in the graphical mode which provides a schematic temperature plot of the different steps. To enter this mode, press Soft Key [Graph]. Spread Sheet Mode [Table] Graphical Mode [Graph] Instruction Manual TProfessional Basic 06/2011... -
Page 41: Change Program Options
To change program options, move the cursor to the right side of the spreadsheet, labelled with “Options”. A new table is displayed. To go back to programming sheet, move the cursor to the left side of the display Instruction Manual TProfessional Basic 06/2011... -
Page 42: Heating And Cooling Rate
5.5.1 Heating and cooling rate Since the TProfessional Basic is a fast thermocycler it may be necessary to reduce the heating and cooling ramp to adapt protocols from slower thermocyclers. The average heating and cooling rates can be set in the column labelled with [°C/s]. -
Page 43: Temperature Increment Or Decrement Δt(°C)
Any program in the cycler memory can be used to start the thermocycler. In addition to the programs in the own User account, also programs from other User directories can be started. To select a program for start press [Program] Menu Button above the Display. Instruction Manual TProfessional Basic 06/2011... -
Page 44: Quick Start Programs From The Block Menu
5.6.2 Quick start programs from the block Menu The TProfessional Basic provides the last 5 programs that haven been run for quick start. Push the [block] Menu Button above the Display. Select one of the last five programs with the cursor keys. -
Page 45: Display During Operation
Note: In the view program mode, a program cannot be edited. To edit program press [Program] Menu Button above the Display. 5.6.4 Display during operation After the instrument has been started, the below display is shown Instruction Manual TProfessional Basic 06/2011... -
Page 46: Pause Program During Run
To show detailed information about the running program, press one of the Soft Keys [Show Graph] and [Show Table]. There are three different display modes available during the run. Show Time Show Graph Show Table 5.6.5 Pause Program during run To pause program press Soft Key [Pause Block]. Instruction Manual TProfessional Basic 06/2011... -
Page 47: Continue Program
Biometra recommends the following protocol templates for the optimization of dwells for the TProfessional Basic Thermocycler: Instruction Manual TProfessional Basic 06/2011... - Page 48 1000 bp long DNA fragment. Note: The proposed protocols are only applicable for the Thermocyler TProfessional Basic 96. To establish a Fast-PCR at the Thermocyclers TProfessional 96 and TProfessional Standard 96 please follow the instructions in the homologue chapter of the corresponding manual.
-
Page 49: System Settings
6.1.1 Set language The language settings are part of each User account. Available languages are English and German (second software release) 6.1.2 Change individual PIN The option allows changing the PIN of the current User. Instruction Manual TProfessional Basic 06/2011... -
Page 50: Delete Account
6.2 System configuration This option allows setting of the signal tone (beep), Display contrast and time settings. 6.2.1 Configure beep To switch beep on/off toggle between ON and OFF and confirm with Soft Key [Set Beep]. Instruction Manual TProfessional Basic 06/2011... -
Page 51: Configure Contrast
6.2.2 Configure Contrast The Display contrast can be set individually for each User. Change settings with Cursor keys and confirm with Soft Key [Save Contrast]. Instruction Manual TProfessional Basic 06/2011... -
Page 52: Set Time And Date
By erasing and creating PCR-protocols after a while new files may be stored fragmented in the memory of the TProfessional Basic Thermocycler. This leads to increased memory access times and the software reacts slower to user inputs. By defragmentation the information becomes sorted and is stored in order thus leading to decreased memory access times. - Page 53 6.3 System info This Menu provides information on the instrument and on the Log files of the last five runs. 6.3.1 System info Use this option to Display the instruments serial number, block type and software version. Instruction Manual TProfessional Basic 06/2011...
-
Page 54: View Log Files Of The Last Five Runs
View Log files of the last five runs During each run a log file is stored in the Thermocycler memory. The log files of the last five runs can be viewed in this window. 6.4 Service Instruction Manual TProfessional Basic 06/2011... -
Page 55: View Log Files Of Power On Self Test
6.4.1 View log files of Power on self test During boot up (Power on) the TProfessional Basic hard ware is checked (Self test). Here you can see the results of the last five self tests. 6.4.2 Execute extended self test In addition to the regular Power on –Self test, a more comprehensive test can be triggered by... -
Page 56: View Log Files From Extended Self Test
Note: Sever errors that require action by the User are displayed in the User Software Menu. 6.4.5 Create Info file for Biometra Service Department This option creates a Service file containing technical details for the Biometra Service Department. Instruction Manual TProfessional Basic 06/2011... -
Page 57: How To Contact Biometra
6.6.3 Change supervisor PIN Enter your actual PIN (the default Supervisor PIN is 000 000 0 (do not enter blanks)), enter your new PIN and repeat your input. Confirm with [PIN OK]. Instruction Manual TProfessional Basic 06/2011... -
Page 58: Set Boot Language
Delete all user accounts The supervisor can delete all user accounts and including all progams. In the next screen confirm with [OK] to delete all accounts. Note: Deleted user accounts and programs can not be reconstituted Instruction Manual TProfessional Basic 06/2011... -
Page 59: Short Manual
Soft Keys Soft Keys Log in After the TProfessional Basic has passed the initial self-diagnosis the login menu is displayed: Press [Log in] and log in as existing user Press [Supervisor Log in] and log in as supervisor Press [New User] and create new user account The language displayed in the user interface can be selected (English or German). - Page 60 Use the cursor keys to navigate in the program screen. In each case the activated field is displayed inverted. Corresponding to the activated field the assignment of the Soft Keys in the TProfessional Basic control panel will change accordingly.
- Page 61 (For gradient enabled units only) To define a gradient A) enter the two temperatures of the block (left and right side) separated by a minus under [°C] (e.g. 40-60) or B) press [Gradient] and then [Edit linear Gradient]. This activates the screen for programming linear gradients: Instruction Manual TProfessional Basic 06/2011...
- Page 62 Start, pause and stop programs The TProfessional Basic Thermocycler for each user stores the last 5 programs that have been run or modified. For quick start of one of these programs press the [Block] menu button. In the next screen select one of the last five programs by using the cursor keys <up>...
- Page 63 To stop an active program press the [Stop] button on the left side of the keypad and confirm with [OK] in the TProfessional Basic program screen. Programs with a pause in the last step have to be stopped manually as well.
-
Page 64: Trouble Shooting
8.1 Slow heating and cooling The TProfessional Basic is equipped with a strong ventilator for the cooling of the heat sink (see also chapter 9.1). The inlet of this fan is located at the bottom side of the instrument. Be sure that the inlet is not clogged by dust or other material (e.g. - Page 65 Open lid. Important: When the clutch mechanism is active (= optimum pressure is applied), do not use pin to further increase lid pressure. This would lead to damage of tubes and instrument! Instruction Manual TProfessional Basic 06/2011...
-
Page 66: Maintenance And Repair
9 Maintenance and repair 9.1 Cleaning and Maintenance The TProfessional Basic was built to operate for a long time without the need for periodical maintenance. Nevertheless, occasionally cleaning of the air inlet may be necessary to maintain the efficiency of the Thermocycler. Insufficient airflow may lead to reduced heating and cooling rates (see chapter 8.1). -
Page 67: Accessories
10 Accessories 10.1 Plasticware Biometra offers a broad range of plasticware for the use in PCR. The following table provides an overview for the product portfolio: Cat. no. Description Quantity Single tubes 050-310 0.2 ml tubes with caps 1000 pcs. -
Page 68: Service
• Return only defective devices. For technical problems which are not definitively recognisable as device faults please contact the Technical Service Department at Biometra (Tel.: +49 551- 50881-10/12, Fax: +49 551-50881-11, e-mail: service@biometra.com). • Please contact our service department for providing a return authorization number (RAN). -
Page 69: Packing Of The Thermocycler
Note: The Thermocycler is only protected from transport damage if the packing instructions are followed and the instrument is mounted in between the foils. Biometra will not be responsible for transport damage by improper packing. -
Page 70: Equipment Decontamination Certificate
NAME __________________________________ POSITION _______________________ (HEAD OF DIV./ DEP./ INSTITUTE / COMPANY) SIGNED ________________________________ DATE ____________________________ PLEASE RETURN THIS FORM TO BIOMETRA GMBH OR YOUR LOCAL BIOMETRA DISTRIBUTOR TOGETHER WITH THE EQUIPMENT. PLEASE ATTACH THIS CERTIFICATE OUTSIDE THE PACKAGING. INSTRUMENTS WITHOUT THIS CERTIFICATE ATTACHED WILL BE RETURNED TO SENDER. - Page 71 Please contact your responsible health & safety officer for details. Use of radioactive substances: Please contact your responsible person for details. Use of genetically change organism or parts of those: Please contact your responsible person for details. Instruction Manual TProfessional Basic 06/2011...
-
Page 72: Note For The Disposal Of Electric / Electronic Waste
EEA = European Economics Area, comprising all EU-members plus Norway, Iceland and Liechtenstein. ------------------------------------------------------------------------------------------------------------------------------------------------------------ -------------- Dieses Symbol (die durchgestrichene Abfalltonne) bedeutet, dass dieses Produkt von der Firma Biometra für eine kostenlose Entsorgung zurückgenommen wird. Dies gilt nur für Geräte, die innerhalb Deutschlands gekauft worden sind. -
Page 73: Declaration Of Conformity
Hiermit erklären wir, dass folgende Thermocycler: Herewith we declare that the following Thermocyclers: Typen / types: TProfessional Basic, TProfessional Basic Gradient, TProfessional Basic XL, TProfessional Basic XL Gradient Best.-Nr. / Order No.: 070-701, 070-702, 070-601, 070-602 den grundlegenden Anforderungen der... -
Page 74: Warranty
This warranty covers defects in materials or workmanship as described under the following conditions: This warranty is valid for 24 month from date of shipment to the customer from Biometra. This warranty will not be extended to a third party without a written agreement of Biometra. -
Page 75: Subject Index
35 create ........... 22 edit............33 delete ........23, 55, 56 Gradient..........31 User Account graphical mode........38 Delete........... 48 heating rate .......... 40 User interface........... 17 insert step..........33 Warranty ..........72 Instruction Manual TProfessional Basic 06/2011...
Need help?
Do you have a question about the TProfessional Basic and is the answer not in the manual?
Questions and answers
Vorrei ricevere un preventivo per il vostro professional basic thermocycler