
Related Manuals for Bosch BFL524MW0B


Summary of Contents for Bosch BFL524MW0B
- Page 1 Microwave BFL524MS0B BFL523MS0B BFL524MW0B BFL523MB0B Instruction manual Microwave [en]...
-
Page 3: Table Of Contents
Controls ........8 www.bosch-eshop.com... -
Page 4: Intended Use
Intended use 8Intended use (Important safety information R ead these instructions carefully. Only then I n t e n d e d u s e will you be able to operate your appliance G eneral information safely and correctly. Retain the instruction I m p o r t a n t s a f e t y i n f o r m a t i o n manual and installation instructions for future Warning –... -
Page 5: Microwave
Important safety information – Do not install the appliance behind a Food may catch fire. Never heat food in ■ decorative door or the door of a kitchen heat-retaining packages. unit. Do not leave food heating unattended in – The appliance must not be installed in a containers made of plastic, paper or other fitted kitchen unit. - Page 6 Important safety information Using the appliance for anything other than Unsuitable ovenware may crack. Porcelain ■ ■ its intended purpose is dangerous. or ceramic ovenware can have small You are not permitted to use it to dry food perforations in the handles or lids. These or clothing or to warm slippers, grain or perforations conceal a cavity below.
-
Page 7: Installation And Connection
Installation and connection 5Installation and connection ]Causes of damage T his appliance is designed for domestic use only. C aution! I n s t a l l a t i o n a n d c o n n e c t i o n C a u s e s o f d a m a g e If the seal is very dirty, the Heavily soiled seal:... -
Page 8: Getting To Know Your Appliance
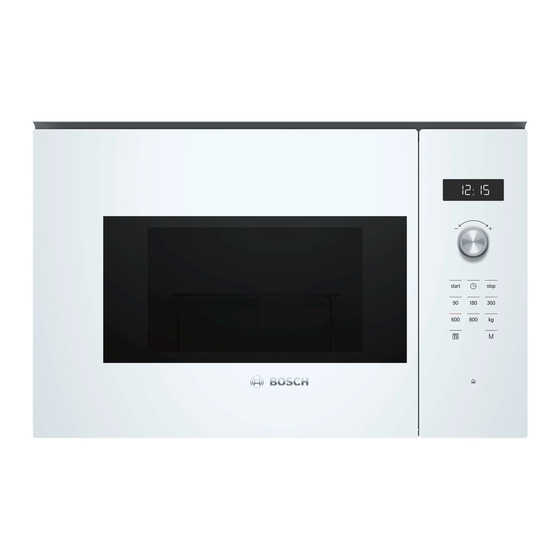
Getting to know your appliance Controls *Getting to know your You will find a brief explanation of the various buttons appliance below. These buttons allow you to set your appliance simply and directly. I n this section, we will explain the display and Buttons and their meaning G e t t i n g t o k n o w y o u r a p p l i a n c e controls.You will also find out about the various... -
Page 9: Changing The Signal Duration
Accessories Changing the signal duration KBefore using for the first You will hear a signal when the appliance is switched time off. You can change the duration of the acoustic signal. Press the "start" button for approx. 6 seconds. T his section tells you what you need to do before using The new signal duration is adopted. -
Page 10: Cleaning The Cooking Compartment And Accessories
Microwave Cleaning the cooking compartment and Make sure that there is no leftover packaging, such Tip: as polystyrene pellets, in the cooking compartment. accessories Wipe the smooth surfaces in the cooking compartment To eliminate the new-appliance smell, wipe down the with a soft, damp cloth. -
Page 11: Setting The Microwave
Memory Microwave power Suitable for BMemory setting 600 W Heating and cooking food T he memory function allows you to save the setting for M e m o r y 900 W Heating liquids a dish and call it up at any time. The memory function is useful if you prepare one dish You can set the 900 W microwave power setting Note:... -
Page 12: Programmes
Programmes Cancelling Press the "stop" button twice, or open the door and press the "stop" button once. PProgrammes Y ou can prepare food really easily using the various the Stop button will light up.After closing the door, touch P r o g r a m m e s programmes. -
Page 13: Cooking With The Automatic Programmes
Cleaning DCleaning Programme no. Weight range in kg Defrost W ith good care and cleaning, your appliance will retain P 01 Minced meat 0.20 - 1.00 C l e a n i n g its appearance and remain fully functioning for a long P 02 Pieces of meat 0.20 - 1.00... -
Page 14: Trouble Shooting
Trouble shooting Area Cleaning product Cooking compart- Hot soapy water or vinegar solution: Clean ment made of stain- using a dish cloth and then dry with a soft less steel cloth.Do not use oven spray or any other aggressive oven cleaners or abrasive materi- als. -
Page 15: Customer Service
Customer service Error message "E - 3" Fault in automatic door opening system. If an error message is displayed, switch the appliance off and on again; if the message disappears, it was a one-off problem. If the fault occurs again or the error message is still displayed, please contact the after- sales service and provide the fault code. -
Page 16: Tested For You In Our Cooking Studio
Tested for you in our cooking studio Caution! JTested for you in our Sparks: Metal, e.g. a spoon in a glass, must be kept at cooking studio least 2 cm from the oven walls and the inside of the door. Sparks could irreparably damage the glass on the inside of the door. -
Page 17: Heating Frozen Food
Tested for you in our cooking studio Defrosting Weight Microwave power Cooking Notes setting in watts time in min- utes Meat in pieces or slices of beef, veal or pork 200 g Separate any defrosted parts when turning 500 g 5-10 800 g 10-15... -
Page 18: Heating Food
Tested for you in our cooking studio Heating frozen food Weight Microwave power set- Cooking time in Notes tings in watts minutes Menu, plated meal, ready meal 300-400 g 8-11 (2-3 components) Soup 400 g 8-10 Stew 500 g 10--13 Slices or pieces of meat in sauce, e.g. -
Page 19: Microwave Tips
Test dishes Heat up dishes Weight Microwave out- Cooking Notes put in watts time in min- utes Stew 400 g 800 g 8-11 Vegetables, 1 portion 150 g Add a little liquid Vegetables, 2 portions 300 g Microwave tips You cannot find any information about the settings for the quantity of Increase or reduce the cooking times using the following rule of thumb: food you have prepared. - Page 20 *9001277612* 9001277612 980216(03)
Need help?
Do you have a question about the BFL524MW0B and is the answer not in the manual?
Questions and answers