Table of Contents
Advertisement
Quick Links
Advertisement
Table of Contents

Subscribe to Our Youtube Channel
Related Manuals for avertX ProConnect


Summary of Contents for avertX ProConnect
- Page 1 ProConnect High Definition Network Video Recorder User Manual...
- Page 2 The information in this publication is provided “as is” without warranty of any kind. The entire risk arising out of the use of this information remains with recipient. In no event shall AVERTX be liable for any direct, consequential, incidental, special, punitive, or other damages whatsoever (including without limitation, damages for loss of business profits, business interruption or loss of business information), even if AVERTX has been advised of the possibility of such damages or whether in an action, contract or tort, including negligence.
- Page 3 At AvertX’s discretion, defective products under warranty will be repaired or replaced at no cost. If AvertX determines that the product should be replaced, it may do so with new or refurbished products of equal or greater value. Product warranty does not cover product failure caused by misuse, alteration of the product, incorrect installation, electric surges or physical damage.
- Page 4 13. Damage Requiring Service – Unplug the unit from the outlet and refer servicing to qualified service personnel under the following conditions: • When the power-supply cord or plug is damaged. • If liquid has been spilled, or objects have fallen into the unit. If the unit has been exposed to rain or water.
- Page 5 MOISTURE CONDENSATION Moisture condensation damages the recorder. Read the following information carefully. Moisture condensation occurs during the following cases: • When this product is brought directly from a cool location to a warm location. • When this product is moved to a hot and humid location from a cool location. •...
- Page 6 CAUTION Elevated Operating Ambient – If installed in a closed or multi-unit rack assembly, the operating ambient temperature of the rack environment may be greater than room ambient. Therefore, consideration should be given to installing the equipment in an environment compatible with the maximum ambient temperature (Tma) specified by the manufacturer.
- Page 7 USERS OF THE PRODUCT ARE RESPONSIBLE FOR CHECKING AND COMPLYING WITH ALL FEDERAL, STATE, AND LOCAL LAWS AND STATUTES CONCERNING THE MONITORING AND RECORDING OF VIDEO AND AUDIO SIGNALS. AVERTX SHALL NOT BE HELD RESPONSIBLE FOR THE USE OF THIS PRODUCT IN VIOLATION OF CURRENT LAWS AND STATUTES.
-
Page 8: Table Of Contents
Advanced Camera Management ....................22 Settings ............................ 23 Networking ..........................29 Macros............................31 Sensor / Relay .......................... 33 AvertX Connect ........................35 Power Options .......................... 36 Support Tools (local) ........................37 To Enter Support Tools: ......................37 Advanced Network Management ..................... 37 LIVE SCREEN VIEWING PANE .......................... - Page 9 How Do I View an Archive? ...................... 55 How Do I Export from an Archive? ................... 55 How Do I View Exported Video Clips in AvertX Connect? ............56 How Do I Enable Email Alerts and push notifications for Motion, Sensor or Health Events? ... 56 How Do I View the User Permissions for Account Types? ............
-
Page 10: Introduction
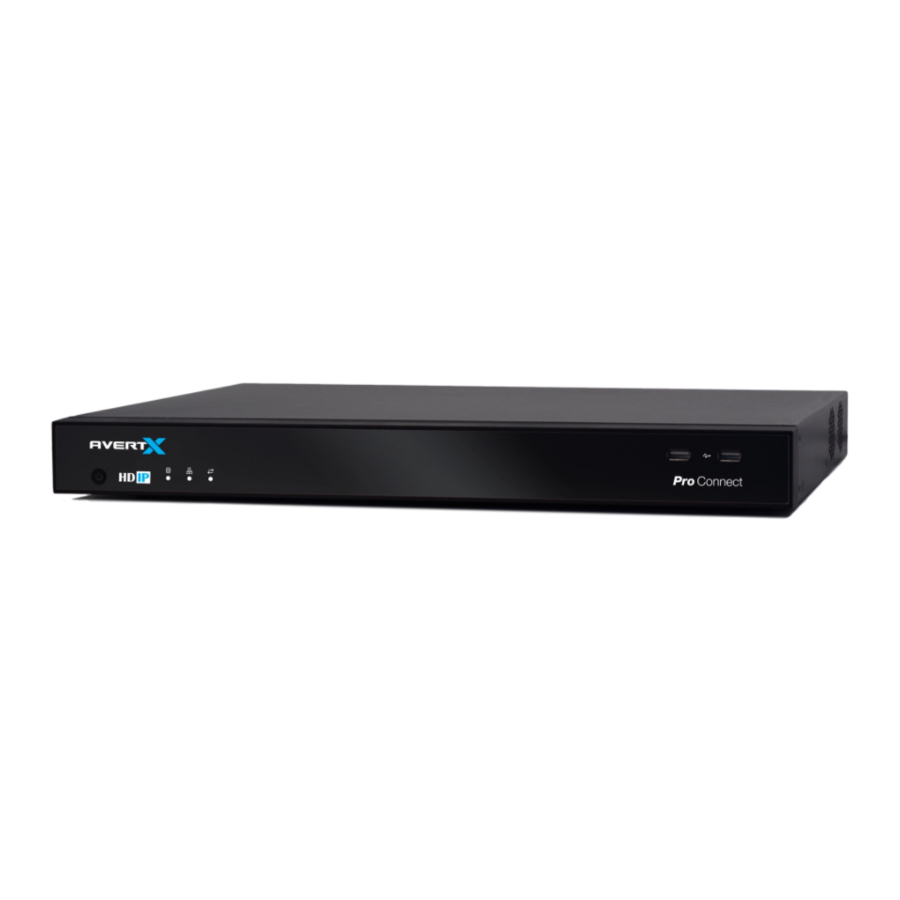
AvertX ProConnect cloud managed recorders are turn-key appliances designed for hassle free, plug-n-play installation. AvertX ProConnect model recorders come equipped with an integrated PoE switch for connecting IP cameras directly to the recorder and come preloaded with AvertX’s powerful ProConnect Software recording software. -
Page 11: Setting Up The Recorder For The First Time
SETTING UP THE RECORDER FOR THE FIRST TIME For information on setting up your recorder and creating an AvertX Connect account, refer to the quick start guide or visit the system setup page at: https://www.avertx.com/new-system-setup/ TURNING ON THE RECORDER Turn on the monitor connected to your recorder. -
Page 12: Web Interface System Requirements
WEB INTERFACE SYSTEM REQUIREMENTS ProConnect can be accessed locally via the ProConnect Local or remotely via the ProConnect Web Interface. The Web Interface runs in a HTML5 environment, making it compatible with a wide range of browsers and without additional software installation. -
Page 13: Installation And Setup
The First Time Wizard can be accessed from both the web interface and locally and will guide you through a basic setup of your ProConnect recorder. If you wish to make system changes after the initial setup process using the First Time Wizard, these options can be found in System Settings, User Management, and Network Configuration. -
Page 14: Setup Menu
SETUP MENU SYSTEM SETTINGS Cameras Camera Management Use Camera Management to perform basic and advanced camera functions. Edit Sort Order Multi-Camera Edit Add Cameras Camera List Camera List – List of cameras currently connected to the selected recorder. IP Address – The current IP address of the camera. State –... - Page 15 Add Cameras Click Setup Under the System Settings tab, click Cameras. Click Add Cameras. The add camera menu will appear, and automatically discover supported cameras available on the physically connected network. Check the appropriate boxes to select the camera(s) you wish to add. Enter the appropriate credentials (username and password) for the cameras you wish to add, and then click Add Selected Cameras.
- Page 16 Camera Auto-Discovery ProConnect recorders automatically configure cameras attached to the onboard PoE switch. Cameras not connected to the PoE switch will automatically be discovered, but need to be configured via the Add Camera menu. Note Automatic configuration Plug N Play (PnP) of cameras attached to the PoE switch can be disabled by navigating to Networking, clicking the Plug and Play tab, and unchecking the box labelled Enable Plug and Play.
- Page 17 Edit Cameras To edit an existing camera in the Camera List: Click the desired camera in the Camera List. In the camera window, make the desired changes, and then click Update Image to update the camera image. Click Apply, and then click Save. Note Automatic configuration Plug N Play (PnP) of cameras attached to the PoE switch can be disabled by navigating to Networking, clicking the Plug and Play tab, and unchecking the box labelled Enable Plug...
- Page 18 Live / Recording The Live Recording tab displays Recording Options, which determines when and how the camera will record. Motion – Record only motion detected by motion thresholds. Continuous – Records video stream continuously. Continuous + Motion – Record one Continuous stream, and then records a Motion stream in addition when motion is detected.
- Page 19 Image Settings The Image Settings tab displays Picture Adjustment Settings and Exposure Settings. These settings have a direct correlation to the camera performance and recorded video quality. The settings displayed here are options made available through the appropriate drivers. Making changes to these settings will then push the changes to the camera.
- Page 20 Motion AvertX cameras are set to register motion as events in the video timeline. By default, the entire camera will be configured as a motion area. You can customize areas of the field of view that will register motion events.
- Page 21 Fisheye Fisheye allows users to de-warp 360° fisheye camera lenses so that a user can pan the camera view in multiple directions even if the camera does not have moving mechanical parts. Enable Fisheye Support – Enabling this function will enable 360 de-warping for this camera if supported. Note Video over 9MP will automatically be transcoded to a smaller resolution for performance reasons when Enable Fisheye Support is checked.
- Page 22 Then click Save or Apply. Note Audio must be enabled on the IP camera itself with the G.711 or AAC codec for ProConnect to record audio from the camera. Check the manufacturers manual on how to enable audio on the IP camera.
-
Page 23: Advanced Camera Management
Adding Unsupported Cameras Single and multi-sensor cameras that are not AvertX or ONVIF compatible must be added using the RTSP stream(s) of the camera. Consult the camera manual for more detailed information regarding RTSP streams. When you know the URL for the RTSP stream(s) of your camera, follow the steps in the Add Cameras Manually section, selecting RTSP protocol. -
Page 24: Settings
In the General Settings tab, check the Use NTP checkbox. Enter the URL of the NTP Server. Click Save. Remote Assist Session The Remote Assist Session enables an AvertX Technical Support agent to remotely control your recorder, allowing them to assist you with troubleshooting your system. 35146AR... - Page 25 Export/Import Configuration This function exports most configuration options on the recorder to a file or to AvertX Connect. An exported file can then be imported as needed to restore the configuration options to the saved state, but the AvertX Connect account information is not exported and will therefore need to be manually configured upon import.
- Page 26 In the General Settings tab, click Export. When prompted, Save the exported configuration file. Note In the ProConnect Web Interface, the default location to save the .dat archive file is in the Downloads folder. To import recorder configuration settings: Click Setup , and then click Settings.
- Page 27 Click Save. Note Your ProConnect recorder will leave 10% free space on a drive by default; it is not recommended to lower this setting below 10% as this space is used for managing recorded data’s FIFO (First In, First Out) process.
- Page 28 AvertX strongly recommends that users be managed through AvertX Connect rather than on the local recorder. If the device is AvertX Connect enabled, it will be necessary to log in to AvertX Connect User Management to manage users who have access to the recorder. Users added this way will have an AvertX Connect account.
- Page 29 Local User Management Local User Roles The default User Roles include Administrator, Operator, and Live. Custom roles can also be created. Note Default roles cannot be modified Add Local Role Custom roles are user roles that have custom selected assigned permissions. Click Setup , and then click Settings.
-
Page 30: Networking
To make changes to a Network Port: Click Setup , and then click Networking. Click the Adapters tab. Click the desired network and make any necessary changes. Note The Ext Switch Network Port is not available on all ProConnect models. 35146AR... - Page 31 Diagnostics The diagnostics tab shows the operational status of various connections, ports, and relays for your recorder. This is a helpful tool for troubleshooting. Network Connection – Test pings the local gateway setup on the recorder. In some cases, this may fail if internal ICMP is disabled on the firewall/router.
-
Page 32: Macros
Macros Under the macro section you can create custom actions based on schedule’s and holidays. Managing Macros Create custom actions based on schedules and holidays in the macros section. Add a Macro Click Add A Macro. Enter the macro name in the Macro Name field Check the Enable Macro box. - Page 33 Schedules Add a Schedule Click the Add a Schedule button. Type the name of the schedule in the Schedule Name field. Select the Start Time and End Time on the desired days or click the copy button to copy a time range from a previous day.
-
Page 34: Sensor / Relay
Sensor Name – Name of the sensor associated with the ProConnect recorder. Sensor Origin – Origin of the sensor being used by the ProConnect recorded (typically internal to the recorder). Current State – Current state of the sensor (open or closed). - Page 35 Relays Relay Number – Relay number associated with the ProConnect recorder. Relay Name – Name of the relay associated with the ProConnect recorder. Relay Origin – Origin of the relay being used (typically internal to the recorder). Current State – Current state of the relay (open or closed).
-
Page 36: Avertx Connect
AvertX Connect AvertX Connect is a cloud-based service that enables you to turn your recorder into a cohesive platform, with online user and recorder management features. To begin using AvertX Connect, you will need to create an AvertX Connect account. -
Page 37: Power Options
2-Step Verification Enabling 2-Step Verification in Account Settings in AvertX Connect sends a unique code to a user’s associated mobile device. Completing log in requires both the user’s password and a code that is sent to the mobile device. Log Files Log files are loaded or downloaded in this section. -
Page 38: Support Tools (Local)
Access the router used for internet communication and forward TCP port 80 to the internal address of the ProConnect Software recorder. From AvertX Connect, click Recorders, and then click the Settings Icon next to the name of the desired recorder. -
Page 39: Live Screen Viewing Pane
LIVE SCREEN VIEWING PANE The Live screen displays the camera list and live video. Customize the Live screen to view specific cameras in different layouts. View Stream Feedback Main Menu Grid Mode Live Search Setup About Camera Full List Search Screen Camera List... -
Page 40: Navigation Bar
Live – Display Live video in the viewing panes Search – Playback recorded video in the viewing panes Setup – Access the General Configuration, Remote Services, and Tools/Logs menus. Feedback – Submit feedback directly to AvertX. About – View version and copyright information. RIGHT-CLICK MENU Right-clicking on a live camera tile while viewing live or recorded video will display the right-click options menu. -
Page 41: Customizing The Live Screen
CUSTOMIZING THE LIVE SCREEN How Do I Add / Remove Cameras from The Live Screen Display? Add Camera Click and drag a camera from the Camera List to the Viewing Pane to create a Camera Tile. Note Change the Live screen grid if more camera channels are desired. —OR—... -
Page 42: How Do I Collapse The Camera List
How Do I Collapse the Camera List? Click the arrow on the Camera List header to collapse and expand the Camera List. How Do I Manually Cycle Through Camera Views? Use the Left and Right arrows at the sides of the Viewing Pane to manually cycle through camera views. How Do I Adjust the Grid of Camera Tiles in The Viewing Pane? The Live screen display can be adjusted to show live video for 6, 8, 9, 10a, 10b, 10c, 13 ,17, 25 camera tiles. -
Page 43: How Do I Adjust The Live Video Stream Quality
How do I Adjust the Live Video Stream Quality? The Stream Quality option affects the resolution of live video as seen on the Live Screen. The stream resolution can be set to low, medium, high, or automatic. In the Live screen, click Stream. Click the desired streaming resolution (Low, Medium, High, or Auto). -
Page 44: Digital Zoom
Note Layouts will save Digital Zoom settings. HOW DO I DEWARP 360 CAMERAS? 360 cameras can be dewarped using ProConnect. These cameras display in 360 mode by default, but three additional views are available. To dewarp a 360 camera: On an applicable 360 camera tile, right-click to display the right-click menu. -
Page 45: Performing A Search
Date/Time Search – standard search feature available only through the local recorder. • Four different searches are available in ProConnect software: • Timebar Search – Advanced Date/Time search with visual tools. Only available through the ProConnect Web Interface. Thumbnail Search – Advanced thumbnail-based search. Only available through the ProConnect Web •... - Page 46 Customize the Camera Tile Grid Changing the Grid of the viewing pane allows for viewing multiple cameras. All cameras will begin playback of recorded video at the time designated on the horizontal Timebar Search Bar. Click the Grid button. Click on the desired grid. Assign the available cameras to the desired camera tiles.
-
Page 47: How Do I Perform A Timeline Search (Web Interface Only)
How Do I Perform a Timeline Search (Web Interface Only) Camera List Search Camera List Timeline Search Bar Thumbnail Export Export Event Timeline Object Search Manager Search Search Search 35146AR... - Page 48 Timeline Search Bar Playback Controls Timeline Pause/ Play Play Previewer Stop Timeline Backward Forward Date and Time Skip Skip Zoom Picker Forward Backward Export Timeline Playback Search Speed Export Manager Note The example Timeline Search Bar shows recorded video that is based on Continuous + Motion recording, meaning the higher resolution motion video is only recorded when a motion event is triggered.
- Page 49 Add Camera(s) to the Timeline Search Viewing Pane When the Search Screen is opened, the cameras that were in the Viewing Pane in the Live Screen will appear, however, cameras can be arranged separately in the Search Screen to facilitate the desired search. To add cameras to the Search Screen: In the Search Screen, click a camera in the Camera List.
-
Page 50: How Do I Perform An Event Search (Web Interface Only)
How do I Perform an Event Search (Web Interface Only)? Event Search is ideal for reviewing sensor or relay events such as motion in a filtered, easily consumable format. Perform an Event Search Under DATE / TIME select the Start, End and Duration. Select an Event Type from the list. -
Page 51: How Do I Perform A Thumbnail Search (Web Interface Only)
How Do I Perform a Thumbnail Search (Web Interface Only) Video Interval Thumbnail Time Range Thumbnail Search Search Date and Time Number of Thumbnails Time Range On-Screen Display Toggle Picker Preview search is ideal for viewing before and after comparisons at user-determined intervals. This search can help a user narrow down a time period during which something changed in the scene, such as vandalism or theft. -
Page 52: How Do I Perform An Object Search (Web Interface Only)
Note Your combination of thumbnail quantity and time range will determine the time interval between each snapshot displayed. For example, 25 thumbnails in a 24-hour time range will result in 1-hour time intervals between displayed pictures. Left-click on the desired thumbnail to narrow the time interval, opening new thumbnails. Note When the thumbnail is narrowed to the smallest time interval, left-clicking again will begin recorded video playback in the Timeline Search Screen. -
Page 53: How Do I Export From Search
During a Timeline Search, you have the option to export an image or a video clip. Resulting image files can be saved locally. • Resulting video files can be saved locally OR remotely to your AvertX Connect account where they can be • viewed and managed remotely. - Page 54 Locally exported video clips are saved in the Downloads folder by default as MP4 files. Export Video Clip to Cloud Exporting a video clip remotely saves the clip in your AvertX Connect account. For more information regarding viewing exported video clips, see the How Do I View Exported Video Clips in AvertX Connect? section.
-
Page 55: Export Archives Locally
Export Archives Locally Note Local exports will require an attached USB storage device. ProConnect will only recognize USB storage devices in NTFS, ExFAT or FAT32 formats. Apple users are recommended to use ExFAT format for best compatibility. Make sure the USB device is plugged into a USB port of the recorder. Blue USB 3.0 ports on the recorder are recommended for faster archives. -
Page 56: How Do I View An Archive
How Do I View an Archive? The Archive function displays video in the native format one recorder at a time. In timeline search or the standalone viewer click the LOAD option. Navigate to the archive var file, select the file and click Open. Note The stand-alone archive viewer will automatically load the latest var file if located in the same directory. -
Page 57: How Do I View Exported Video Clips In Avertx Connect
How Do I View Exported Video Clips in AvertX Connect? AvertX Connect allows you to view video clips exported during a search. These clips are stored in the Video Archive and can be watched, shared, and downloaded. Navigate to connect.avertx.com and login. - Page 58 Create an Action: Select the desired schedule under the Schedule dropdown. Select the action type Send to AvertX Connect under the Type dropdown. Set the duration of the event to trigger the action in the When Event Duration Exceeds field.
- Page 59 Enable Alerts in AvertX Connect: To enable email or push notification alerts to specific users, go to connect.avertx.com and Login. Click on Manage Users in the Main Menu. Click on the user you wish to receive alerts. In the User Profile, select Receive by Email or Receive by Push Notification (or both) for Health, Motion, Sensor, and Vehicle and Person Detection Alerts.
-
Page 60: How Do I View The User Permissions For Account Types
How Do I View the User Permissions for Account Types? When a user is assigned an account type (Admin, Power User, or User), different permissions will be granted to the account. You can view the permissions from your User Profile: Click User Profile from the Account Name dropdown menu. -
Page 61: How Do I Add Users To An Account
How Do I Add Users to an Account? If you have Admin permissions, you can add new users to an account and assign them user permissions. Under Manage Users, click Add New User. Enter the new user’s First Name, Last Name, Email Address, and Assign User Permission (Admin, Power User, or User). -
Page 62: How Do I Update Recorder Software From Avertx Connect
How Do I Update Recorder Software from AvertX Connect? Software Updates appear under the recorder name when there is a new update available. Clicking the Install Update button will direct the user to the Software Update page on the recorder where they can perform the update. -
Page 63: How Do I Connect To A Recorder Via A Local Ip Address
If you are on the same network as the recorder, you have the choice to connect via the Local IP address of the recorder or through a standard connection via AvertX Web Services. On the Recorders page, click the Connect icon. -
Page 64: How Do I View Saved Videos
How Do I View Saved Videos? The Videos page provides a list of saved videos. The total Storage Used and Available is displayed above the list. Hover over Preview for a thumbnail image of the video, click View to playback the video, or click Remove to delete the video. - Page 65 All rights reserved. No part of this publication may be reproduced by any means without written permission from AvertX. The information in this publication is believed to be accurate in all respects. However, AvertX cannot assume responsibility for any consequences resulting from the use thereof. The information contained herein is subject to change without notice.
Need help?
Do you have a question about the ProConnect and is the answer not in the manual?
Questions and answers