Table of Contents
Advertisement
Quick Links
Affordable Tools Achieve More
Visit Our Website at:
www.uwelding.com
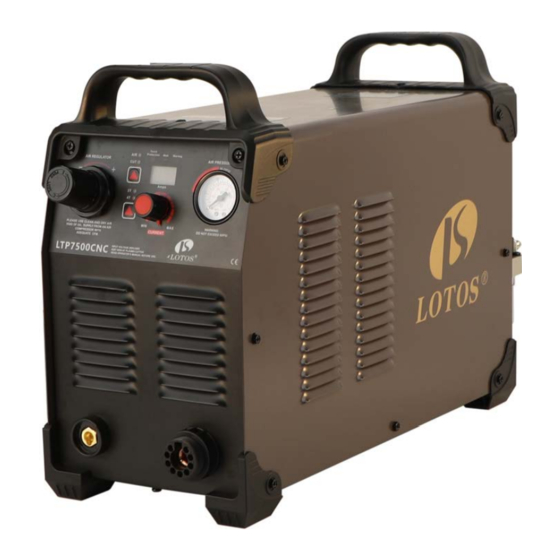
LTP7500CNC
OWNER'S MANUAL
Carefully read the operation manual prior to using, installing and maintaining the electric
welding machine
The contents of this manual may be revised without prior notice and without obligation.
This instruction manual is issued on 1st M ay 20 21 . Rev 01
Conforms with EMC
Directives:
Advertisement
Table of Contents

Related Manuals for Lotos Technology LTP7500CNC


Summary of Contents for Lotos Technology LTP7500CNC
- Page 1 Affordable Tools Achieve More Visit Our Website at: www.uwelding.com LTP7500CNC OWNER’S MANUAL Carefully read the operation manual prior to using, installing and maintaining the electric welding machine The contents of this manual may be revised without prior notice and without obligation.
- Page 2 IMPORTANT Save This Manual You will need the manual for safety warnings and precautions, assembly instructions, operating and maintenance procedures, parts list and diagram. Keep your invoice with this manual. Write invoice number and date of purchase on the inside of the manual.
-
Page 3: Table Of Contents
CONTENTS Safety………………………………………………………………………………………………………………..1 Specification..………………………………………………………………………………………………… 6 Main Parameter……………………………………………………………………………………………………… 8 Quick Setup …………………………………………………………………………………………………………1 1 I nstallation ……………………………………………………………………………………………………………..1 3 O peration …………………………………………………………………………………………………………..15 M a i n t e n a n c e … … … … … … … … … … … … … … … … … … … … … … … … … … … … … … … … … … … . 24 Troubleshooting..............................25 Reference................................26 Consumables..............................27... -
Page 4: Safety
SAFETY WARNINGS AND PRECAUTIONS intended. inappropriate PLEASE READ attachments in an attempt to exceed the UNDERSTAND THE FOLLOWING tool capacity. SAFETY HIGHLIGHTS. SURE THAT ALL INSTALLATION, Use the right tool for the job. Do not OPERATION, MAINTENANCE AND REPAIR attempt to force a small tool or attachment PROCEDURES ARE PERFORMED ONLY BY to do the work of a larger industrial tool. - Page 5 Remove adjusting keys and wrenches. by a qualified technician. Check that keys and adjustment wrenches Use proper size and type extension cord. are removed from the welder and work area If an extension cord is required, it must be before plugging in.
- Page 6 should you get a shock. ARC WELDER SAFETY WARNINGS AND PRECAUTIONS FUMES & GASES can be Warning: This product, when used for dangerous welding and similar applications, produces Plasma cutting may produce chemicals known to cause cancer and birth fumes and gases hazardous to health. Avoid defects (or other reproductive harm).
- Page 7 shielding gas for the process used and ARC RAYS can burn properly operating regulators designed for Avoid body the gas and pressure used. All hoses, damage. Arc rays and infrared fittings, etc. should be suitable for the radiation can cause injury to the application maintained good...
- Page 8 CALIFORNIA PROPOSITION 65 WARNINGS Welding cutting equipment For Gasoline Engines: produces fumes or gases which Engine exhaust contains contain chemicals known to the chemicals known to the State of State of California to cause birth defects and, in California to cause cancer, birth some cases, cancer.
- Page 9 ❖ THANK YOU! You had options for other plasma cutter machines and you chose LOTOS LTP7500CNC plasma cutter. We appreciate you as a customer and hope that you will enjoy years of use from your plasma cutter. Congratulations on your purchase.
- Page 10 WHAT’S INCLUDED ❖ ✓ Power Supply: ✓ Cutting Torch with ✓ Ground Clamp & Central Connector: Cable: ✓ Consumables:...
-
Page 11: Specification
POWER SUPPLY RATINGS ❖ LTP7 500CNC Specification 220V±15% Inverter Type IGBT Maximum Rated Output 75 A Start Type Blow-Back Type Torch Type I PT 8 0 Non HF Plasma Torch Duty Cycle @ Rated Amps/Volts (40° C) 60% @ 75 A 100% (Output V/A) 100% @ 5 0 A No load voltage (V) - Page 12 Front & Rear Panel Layout...
- Page 13 Torch protection indicator, It illuminates when the consumable parts of the machine are not well installed or the torch head is shorted. Meanwhile the Machine stops working. Power indicator, It illuminates when the machine is powered on And it glitters after arc is successfully ignited. Warning Overheating indicator, It illuminates when the working temperature of the IGBT is overly high.
-
Page 14: Quick Setup
Quick Setup 1. Connect the IPT80 Plasma torch to the machine. Insert the torch connection into the torch connection receptacle at the front of the machine and screw up hand tight. Caution: Do not to bend the pins located insde the torch connector. 2. - Page 15 Consumable Installation...
-
Page 16: Installation
INSTALLATION PLEASE READ ENTIRE INSTALLATION SECTION BEFORE STARTING INSTALLATION. BE SURE THAT ONLY QUALIFIED PERSONNEL PERFORM THIS INSTALLATION. MACHINE SETUP ❖ ELECTRIC SHOCK can be fatal Have a qualified electrician install and service this equipment. Turn the input power OFF and unplug the machine from the ... - Page 17 ➢ OUTPUT CABLE CONNECTION: Make sure copper screw at end of torch is connected to gas-electrical integration terminal, then tighten them clockwise (prevent from leaking gas). Connect the ground cable to the positive terminal in front panel, then tighten it. Note: The receptacle is keyed.
-
Page 18: Operation
OPERATION PLEASE READ AND UNDERSTAND THIS ENTIRE SECITON BEFORE OPERATING YOUR MACHINE. ONLY QUALIFIED PERSONNEL SHOULD OPERATE THIS EQUIPMENT. OBSERVE ALL SAFETY INFORMATION THROUGHOUT THIS MANUAL. SAFETY OPERATIONS ❖ ELECTRIC SHOCK can be fatal Have an electrician install and service this machine and its equipment. ... - Page 19 OPERATION STEPS ❖ Turn on the system: Set the ON/OFF switch to the ON (I) position. Screen will turn on and will show the current volume after 5 Seconds. Set the 2T/4T model switch 2T/4T Locks the torch in the ON (fire) position. ...
- Page 20 Operating the I PT 8 0 Torch with Stand Off Guide ❖ The standoff guide is placed on the cutting surface. This maintains an optimal 1/8" standoff distance between the plasma cutting tip and the work, this is especially suitable if your hands are unsteady, or if you wish to use a straight edge guide or pattern guide.
- Page 21 ➢ Hand torch cutting suggestions It is easier to pull the torch through the cut than to push it. To cut thin material reduce the amperage until you get the best quality cut. Use the correct size tip orifice for the amperage being used. ...
- Page 22 STARTING A CUT ❖ 1. Hold the torch 90° to the edge of the work piece. 2. Press the trigger of the torch to start the pilot arc. Hold the torch at the edge (Do not continue the cut) until the arc has cut completely through the work piece. 3.
- Page 23 PIERCE A WORK PIECE ❖ Recommend using 2T function while piercing 1. Hold the torch at an approximate 30° to the work piece, the distance between the torch tip and the work piece should be within 1/16 inch (1.5 mm). 2.
- Page 24 ❖ CUT QUALITY RELATED FACTORS The best quality cut will be produced when all these variables are set correctly for the material thickness and type of material being cut. • Amperage Standard rule of thumb is the thicker the material the more amperage required. On thick material, set the machine to full output and vary your travel speed.
- Page 25 The required air pressure and volume can vary from model to model and the manufacturer will provide the specs. The LOTOS LTP7500CNC air pressure is pre-set at 4.5 psi and requires a flow rate of 6.0 CF/M. The volume capacity of your compressor is...
- Page 26 CAUSES OF COMMON HAND-CUTTING ISSUES ❖ The work piece is not cut completely through. This can be caused by: The amperage setting is too low for the thickness of the work piece. The cutting speed is too fast. ...
-
Page 27: Maintenance
MAINTENANCE Remove dust by using compressed air regularly. If plasma cutter is placed in environment where condition is polluted with smoke and dust, the plasma cutter must have dust removed every day. Pressure is adequate to cutting in order to protect smaller components. ... -
Page 28: Troubleshooting
TROUBLESHOOTING For Customer Service, please contact us by support@lotostechnology.com or Call us at 408-739-2329. Issues Resolvable Methods ✓ Over voltage protection is working. Turn off Digital display is on, fan is not working, the machine then turn on it again after several and control knob is not working. -
Page 29: Reference
REFERENCE Note: LOTOS collects its data under laboratory test conditions using new consumables. User experience may vary if the operation conditions are different. PSI SETTING REFERENCE TABLE ❖ Output AMP Air Pressure(PSI) 15-35 A 4 0 -50 35-55 A 4 0 -50 55-75 A 6 0 -70 CUTTING SPEED REFERENCE TABLE... -
Page 30: Consumables
CONSUMABLES The following accessories and consumables can be purchased on www.uwelding.com, or call 408-739-2329 to order. Cutting Consumables...