Advertisement
Quick Links
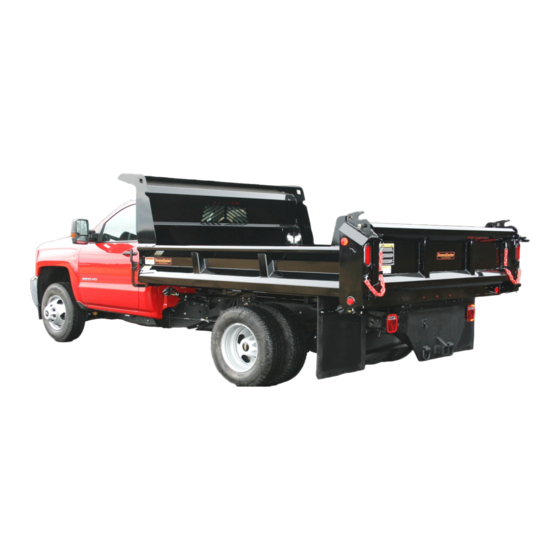
DED LP DUMP BODY SCISSOR HOIST SERIES
Owner's Information:
Owner's Name :
Purchase Date :
Trailer Part # :
Serial #
Other:
OWNER'S & OPERATOR'S MANUAL
Contact your local dealer or distributor for replacement parts and technical
Printed in USA
/
/
support or visit
www.downeastermfg.com
PRICES SUBJECT TO CHANGE WITHOUT NOTICE. NOT RESPONSIBLE FOR TYPOGRAPHICAL ERRORS.
Dealer :
(
)
Phone :
Weight #
empty :
Rated
capacity :
Payload :
-
Booklet Part # --------15
Rev A
3/29/2016
Advertisement

Summary of Contents for Downeaster DED LP
- Page 1 DED LP DUMP BODY SCISSOR HOIST SERIES Owner's Information: Owner's Name : Dealer : Purchase Date : Phone : Weight # Trailer Part # : empty : Rated Serial # capacity : Other: Payload : OWNER'S & OPERATOR'S MANUAL Contact your local dealer or distributor for replacement parts and technical support or visit www.downeastermfg.com...
-
Page 2: Table Of Contents
Foreword The DownEaster Lo-Pro dump body is designed and intended for straight frame, 34" wide, Cab & chassis trucks only! DownEaster does not recommend mounting of such unit onto a standard pick up truck frame, (box delete). The unit bodies are solely designed for Cab to Axle (CA) dimensions of 60", 72" 84" and 96". All body lengths have a 95"... -
Page 3: Check List
CHECK LIST Your DownEaster dump body will be shipped with the hoist and sub frame assembled to tub unit, with hydraulic pump and hoses installed and ready for electrical hook up. -The Cab Shield will be shipped inside tub, unless otherwise specified. -
Page 4: Safety
Carefully read this manual. Learn how to safely operate the DownEaster body and how to use the controls properly. Do not allow anyone to operate the body without proper training and instruction. Unauthorized modification to the DownEaster body may impair the function and/or safety of the machine. -
Page 5: Warnings
WARNINGS Never exceed the Gross Vehicle Weight Rating of truck. Failure to do so may limit the vehicle's handling characteristics. Make certain the load is evenly distributed. Always inspect the area around the truck for safe dumping prior to operating the hoist. Operate the hoist only when the truck is on a firm, level surface. - Page 6 WARNING LABEL & LIGHTING LOCATIONS LBL146 LBL110 LBL131 LBL140 LBL110 LBL112...
- Page 7 WARNING LABEL & LIGHTING LOCATIONS SIDE DRIVER SIDE REAR FRONT DRIVER SIDE LBL146...
- Page 8 ELECTRICAL Pump & optional vibrator POSITIVE DO NOT USE VEHICLE CHASSIS OR SUBFRAME AS GROUND GROUND For rated performance, the voltage at the power unit must be a minimum of 12VDC. This should be measured between the large terminal of the start solenoid (where the battery cable is connected) and the power unit base. NOTE: Grounding of the power unit is just as important as the installation of the positive battery cable.
- Page 9 ELECTRICAL Locate the push-button control, in the cab and route the cable out of the back side of cab, through a hole in the back of the cab. Connect the push-button control to the electric power unit using the 3-pin or 4 pin connector set, or manually tie in each terminal, depending on pump model series.
- Page 10 INSTALLATION Your DownEaster dump body will come fully assembled to the SUB frame and hoist attached. (unless ordered otherwise). This body was designed for Cab & Chassis trucks with a frame width of 34" only. Any other frame width will require custom mounting, responsible by the installer.
- Page 11 INSTALLATION Prepping Frame Prep rear of chassis frame, ensuring all fuel lines, wiring, hoses and brake lines are protected or covered from flames or sparks. NOTE: If the truck frame has rivets in the top flange, where the hoist saddle brackets will be mounted, add spacers provided (rivet shims) between the truck frame and hoist mounting pads.
- Page 12 INSTALLATION Place the body/hoist/sub frame on the truck with a minimum of 2.5" inches of cab clearance. Note: Installing temporary jumper cables to the pump, will ease installation of 0/1 cables, as to lift the body up to better access the pump solenoid. If rear bolt on option was chosen, align holes in rear hinge with holes drilled in chassis.
- Page 13 INSTALLATION Cab Shield Using the hardware kit provided, loosely mount the cab shield, starting with the outer bolts to the side plates, with the 3/8-16 stainless hex head bolts, lock washers and flat washers. Loosely install the 3/8-16 carriage bolts through the front facing back, so just the head is protruding out.
- Page 14 INSTALLATION Once body is installed and bolted/welded to chassis, use the jumper cables to lift body to position the safety prop. WARNING: DO NOT POWER DOWN ON SAFETY PROP! Connect cables as shown in the electrical section of this manual. Cycle body up and down and check for leaks and any clearance issues pertaining to wiring or components on vehicle.
-
Page 15: Introduction 2 Operation
PRE CHECKS & OPERATIONS WARNING! NEVER PLACE ARMS, HANDS, OR OTHER BODY PARTS UNDER THE BODY WHILE RUNNING. Never go under a raised body without the safety prop in the raised position, failure to do so may result in a serious injury or even death. - Page 16 PUMP PRESSURE BULLETIN Rev C...
- Page 17 TROUBLE SHOOTING If malfunction of the power unit should occur, inspect all hydraulic lines and electrical connections, and check for a good ground. Many malfunctions are caused by loose connections. Check the reservoir for proper fluid level (approximately 1/2” from top of tank when dumper is down). If fluid must be added, use clean Dextron lll. Please keep in mind when servicing this unit that the most common cause of system failure is dirt!!! Keep service area clean.
- Page 18 DEDM517 Upper lift shaft, HD-515 only KEY PART # DESCRIPTION DEDM518 Lower lift shaft and pad HD515 only LBL148 DownEaster logo DEDM640 Prop Rod, 25", round style LBL131 Label, failure to support the tailgate top DEDM630 Linkage Rod, 9' body LBL110 Label Caution make sure handle mechanisms…….
-
Page 19: Warning Labels 6, 7 Materials Chart
MATERIAL CHART... -
Page 20: Electrical 8, 9 Warranty
Contact your local dealer or distributer for replacement parts and technical support or visit www.downeastermfg.com F:\Owners manuals\Dump Body Owner's manual\Excel\Dump body Manual 2016...
Need help?
Do you have a question about the DED LP and is the answer not in the manual?
Questions and answers