Table of Contents
Advertisement
Advertisement
Table of Contents

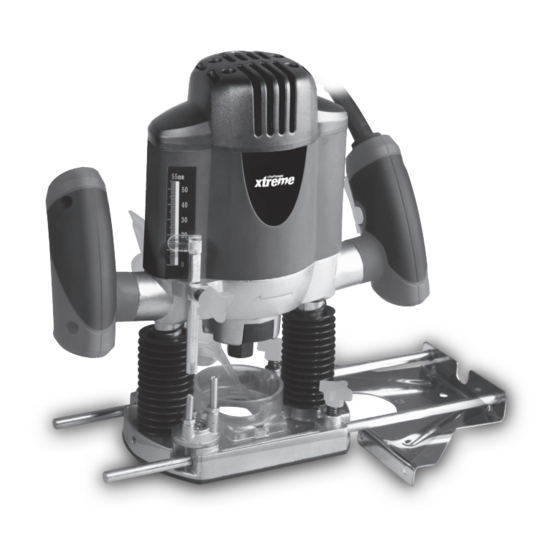
Summary of Contents for Challenge Xtreme PRT1204.1
- Page 1 1200W ROUTER PRT1204.1 ORIGINAL INSTRUCTIONS...
-
Page 2: General Power Tool
OrIgINaL INstructIONs gENEraL POwEr tOOL 3. PErsONaL safEty a) stay alert, watch what you are doing and safEty warNINgs use common sense when operating a power warNINg! read all safety warnings tool. Do not use a power tool while you are and all instructions. -
Page 3: Router Safety Warnings
OrIgINaL INstructIONs with the power tool or these instructions 6. Always direct the cable to the rear away from the to operate the power tool. Power tools are machine. dangerous in the hands of untrained users. 7. Contact with electric lines can lead to fire and e) Maintain power tools. - Page 4 OrIgINaL INstructIONs syMBOLs To reduce the risk of injury, user must read instruction manual Warning Double insulation Wear eye protection Wear ear protection Wear dust mask This product has been marked with a symbol relating to removing electric and electronic waste. This means that this product shall not be discarded with household waste but that it shall be returned to a collection system which...
-
Page 5: Component List
OrIgINaL INstructIONs cOMPONENt LIst Variable Speed Switch Handle On/Off Switch Lock On Button Spindle Lock Button Collet Nut Parallel Guide Parallel Guide Locking Knob Router Base 10. Triple Depth Stop 11. Fixing Screw 12. Plunge Lock Lever 13. Depth Stop 14. -
Page 6: Technical Data
OrIgINaL INstructIONs tEcHNIcaL Data Type Prt1204.1(rt-designation of machinery, representative of router) Rated voltage 230-240V~50Hz Power 1200W No load speed 11,000-30,000/min Collet size 6.35mm Max plunge depth 55mm Protection class Machine weight 3.6kg NOIsE aND vIBratION Data A weighted sound pressure... - Page 7 OrIgINaL INstructIONs accEssOrIEs Collet Parallel guide Center pin Template guide Dust extraction tube Depth guide Spanner Router bits( Straight bit /V Groove bit each one) We recommend that you purchase your accessories from the same store that sold you the tool. Use good quality accessories marked with a well-known brand name.
- Page 8 OrIgINaL INstructIONs OPEratION INstructIONs screws and connect a suction hose. The suction Fig. B Fig. A hose can be connected to the vacuum cleaner NOtE: Before using the tool, read the through an extraction adapter. instruction book carefully. INtENDED usE The machine is intended for routing grooves, edges, profiles and elongated holes as well as for copy routing in wood, plastic and light building...
- Page 9 OrIgINaL INstructIONs 4. aDJustINg DEPtH Of cut Tighten the Depth Stop Fixing Screw (11) and (see fig. f-H) release the Plunge Lock Lever to return the router back to its original position. The depth of cut is The depth of cut is the distance between the Fig.
- Page 10 OrIgINaL INstructIONs Turn the appropriate screw with a screwdriver to from left to right as you face the workpiece and obtain fine adjustment (See Fig. J). counterclockwise for outside edges. 6. startINg tHE rOutEr (see fig. k) Depress to start and release to stop your tool. Fig.
- Page 11 OrIgINaL INstructIONs 13. fIttINg tHE ParaLLEL guIDE (see writing. Use this feature only with a shallow depth Fig. M of cut. fig.r, s) NOtE: As the router rotates in a clockwise Before using the Parallel Guide you will need to direction always move the tool in a left to right assemble the guide.
- Page 12 Fig. R OrIgINaL INstructIONs warNINg: choose a router bit with a smaller diameter than the inner diameter of the template guide. Set the router with Template Guide against the template. Release the clamping lever by turning in clockwise direction and slowly lower the router toward the work-piece until the adjusted depth- of-cut is reached.
-
Page 13: Maintenance
OrIgINaL INstructIONs MaINtENaNcE PLug rEPLacEMENt (uk & IrELaND ONLy) remove the plug from the socket before carrying out any adjustment, servicing or Your power tool is supplied with a fitted plug, maintenance. however if you need to fit a new plug follow the Your power tool requires no additional lubrication instruction below. -
Page 14: Environmental Protection
OrIgINaL INstructIONs ENvIrONMENtaL PrOtEctION This product has been marked with a symbol relating to removing electric and electronic waste. This means that this product shall not be discarded with household waste but that it shall be returned to a collection system which conforms to the European Directive 2002/96/CE. It will then be recycled or dismantled in order to reduce the impact on the environment.
Need help?
Do you have a question about the PRT1204.1 and is the answer not in the manual?
Questions and answers