Table of Contents
Advertisement
Available languages
Available languages
Advertisement
Table of Contents

Summary of Contents for salling 80000321
- Page 1 INSTRUCTION MANUAL SOUS VIDE WITH WIFI 80000321 / 89633971...
- Page 2 INTRODUKTION Mange tak fordi du har valgt et produkt fra Epiq. Dermed har du erhvervet et kvalitetspro- dukt som opfylder alle gældende krav til præstation og sikkerhedsstandarder i EU. For at sikre en korrekt behandling og en lang levetid anbefaler vi, at du overholder nedenstående anvisninger.
-
Page 3: Bortskaffelse Af Produktet
LEDNING OG STIK • Lad ikke ledningen hænge ud over bordkanten. • Hold ledningen og produktet væk fra varmekilder, varme genstande og åben ild. • Tag stikket ud af stikkontakten før rengøring, og hvis apparatet ikke er i brug. Undlad at trække i ledningen, når du tager stikket ud af stikkontakten, men tag fat om selve stikket. -
Page 4: Før Første Brug
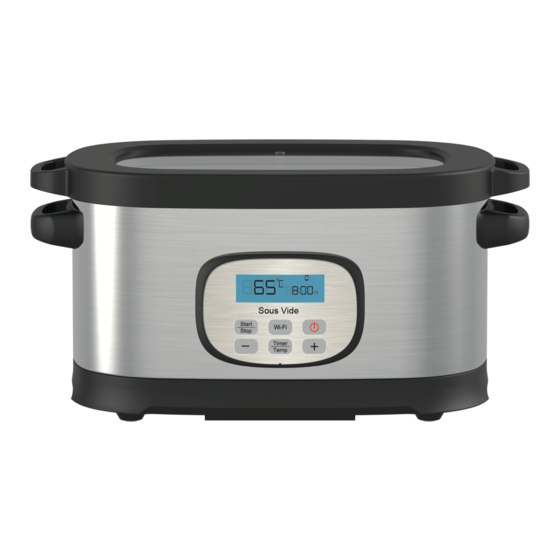
A. Sous Vide-karet: Sous Vide-karet har en yderside af rustfrit stål med Easy Lift-håndtag, og den indeholder et varmelegeme og en temperaturmåler. Inden i Sous Vide basen sidder Sous Vide-karet med et transparent låg. Det enkle kontrolpanel er placeret på forsiden af baseenheden. - Page 5 SAMLING FØR BRUG: 1. Placer Sous Viden på en robust, jævn over ade. 2. Fjern låget ved hjælp af håndtagene på hver side og løft lige op. Placer på over aden. 3. Fyld tanken med varmt vand (under tilberedningstemperatur) imellem minimums- maksimum fyldningslinjen.
- Page 6 Betjen enheden fra app. 1.Download appen “TuyaSmart” fra App Store. 2.Telefonen opretter forbindelse til wi- . 3.Sæt ledningen i stikkontakten, og tryk på afbryderknappen for at tænde enheden. Tryk på knappen “Wi- ” i 3-5 sekunder, hvorefter telefonikonet blinker på displayet. 4.Klik på...
- Page 8 SOUS VIDE TILBEREDNINGSTABEL...
- Page 9 TIPS & TRICKS TIL MADLAVNING MED SOUS VIDE • Tykkelsen på kød, fjerkræ og sk bestemmer længden af tilberedningstiden. Brug et stegetermometer efter fjernelse af kogeposen for at få garanti for, at der er opnået en tilstrækkelig temperatur. • Fødevaresikkerhed ved håndtering og madlavning er altid en prioritet. Hvis du er usikker på, om maden har fået tilstrækkeligt, så...
-
Page 10: Tekniske Data
Aftør med en blød klud og lad den tørre. 4. Hvis Sous Videen ikke fungerer, så tjek om den er korrekt tilsluttet. Tryk på start/ stop-knappen, og hvis den ikke starter, så sæt ngeren på og tryk igen. TEKNISKE DATA: Model: 80000321 / 89633971 220-240 volt 520 watt... -
Page 11: Safety Precautions General
INTRODUCTION Thank you for choosing a product from Epiq. You have acquired a quality product which meets all applicable performance and safety standards in the EU. In order to ensure proper treatment and a long product life, we recommend that you comply with the instructions below. -
Page 12: Product Disposal
CORD AND PLUG • Do not let the cord hang over the edge. • Keep the cord and the product away from heat sources, hot objects and open • Unplug the power cord before cleaning and if the appliance is not in use. Do not pull the cord when removing the plug from the socket, rather grasp the plug itself. -
Page 13: Before First Use
A. Sous vide oven Base: The sous vide base has a stainless steel exterior with easy lift handles and houses the heating unit and temperature probe. The base holds the sous vide oven water tank with transparent lid. The simple set control panel is housed on the front side panel of the base. - Page 14 ASSEMBLE BEFORE USE: 1.Place the sous vide oven base on a sturdy, level surface. 2.Remove the lid, using the handles on each side, lifting straight up. Place on the counter. 3.Fill the tank with warm water(below the cooking temperature) in-between the minimum ll line and the maximum ll line.
- Page 15 Control the device from App. 1.Download the ”TuyaSmart” APP from App store; 2.The phone connects to the wi . 3.Plug in, press power button to turn on the unit, press the button ”Wi ” for 3-5 seconds and the phone icon ash on the display. 4.On APP ”TuyaSmart”, click “add an appliance”, choose “kitchen appliance”, then choose “sous vide cooker”;...
-
Page 16: Food Prep & Cooking Guide
STEP-BY-STEP OPERATING INSTRUCTIONS 1.After assembly and setting the time and temperature, press the Start/stop button. The oven will preheat the water to the set temperature. (The display will show the increasing water temperature.) 2.When the water reaches the set temperature, the oven will beep three times. Remove the lid up and away from your face. - Page 17 SOUS VIDE OVEN COOKING CHART...
-
Page 18: Water Displacement Method
Hints & tips for sous vide cooking • The thickness of meat, poultry, and sh will determine the length of cooking time. Use an instant-read thermometer after removing from the cooking bag to guarantee that a safe-food temperature is indicated. •... -
Page 19: Maintenance
Wipe with a soft cloth to dry. 4.If the sous vide oven will not work, ensure that it’s plugged in. Press the start/stop button and, if it doesn’t start, re-position your nger and press again. TECHNICAL DATA: Model: 80000321 / 89633971 220-240 volt 520 watt.
Need help?
Do you have a question about the 80000321 and is the answer not in the manual?
Questions and answers