
Summary of Contents for Muton Falcon II RJ-8000
- Page 1 Falcon II RJ-8000 Operation Instructions MUTOH EUROPE NV AP-75080, Rev : 1.1 , 04/12/2002 Downloaded From ManualsPrinter.com Manuals...
- Page 2 Falcon II RJ-8000 Operation Instructions AP-75080, Rev. 1.1, 04/12/02 Downloaded From ManualsPrinter.com Manuals...
- Page 3 This document may not be reproduced by any means, in whole or in part, without written permission of the copyright owner. This document is furnished to support the Mutoh Falcon II RJ-8000 Printer. In consideration of the furnishing of the information contained in this document, the party to...
- Page 4 Falcon II RJ-8000 Operation Instructions AP-75080, Rev. 1.1, 04/12/02 Downloaded From ManualsPrinter.com Manuals...
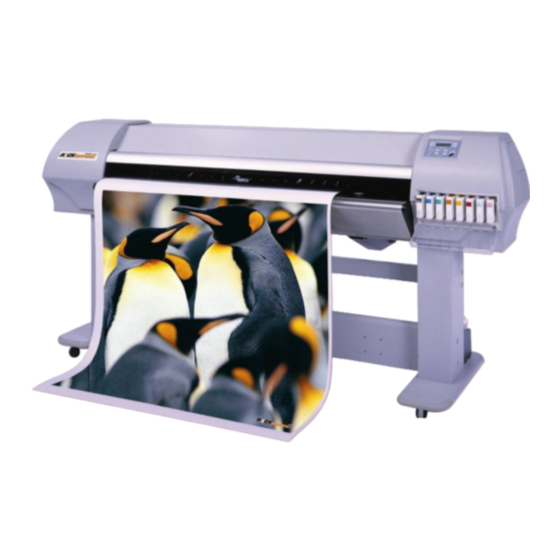
- Page 5 Falcon II RJ-8000 Operation Instructions Dear Customer, Incorporating the very latest developments in piezo-electric drop-on-demand inkjet printing technology, the Falcon II combines high speed and high-resolution output, making it equally suitable for short-run production printing and high-quality photographic reproduction. The Falcon II offers you maximum application versatility, thanks to a variety of ink configuration options. The Falcon II has a 4, 6 and 8 colour channel output.
- Page 6 Falcon II RJ-8000 Operation Instructions AP-75080, Rev. 1.1, 04/12/02 Downloaded From ManualsPrinter.com Manuals...
-
Page 7: Table Of Contents
Falcon II RJ-8000 Operation Instructions TABLE OF CONTENTS 1. Regulatory and safety information....................9 1.1. EMC statement for CE marking....................9 1.2. Precautions..........................9 1.3. Safety Labels Safety Labels, Symboles de sécurité, Sicherheitssymbole.......10 1.3.1. Location and types of warning labels on front part............10 1.3.2. - Page 8 Falcon II RJ-8000 Operation Instructions 4. Daily Maintenance.........................49 4.1. Replacing ink cartridges......................49 4.2. Changing ink types.........................50 4.3. Replacing the cutting blade.....................52 4.4. Replacing the waste liquid tank....................55 4.5. Cleaning the printer.........................57 4.6. Head Cleaning.........................58 4.7. Cleaning the wiper........................60 5.
-
Page 9: Regulatory And Safety Information
Falcon II RJ-8000 Operation Instructions 1. REGULATORY AND SAFETY INFORMATION 1.1. EMC STATEMENT FOR CE MARKING. WARNING : • This is a Class A product approved for industrial environments. In a domestic environment this product may cause radio interference in which case you may be required to take adequate measures. -
Page 10: Safety Labels Safety Labels, Symboles De Sécurité, Sicherheitssymbole
Falcon II RJ-8000 Operation Instructions 1.3. SAFETY LABELS SAFETY LABELS, SYMBOLES DE SÉCURITÉ, SICHERHEITSSYMBOLE Safety Labels are attached to the internal and external area of the printer to alert you to potentially hazardous situations or conditions. The following safety labels are used in and on the printer: La partie externe et interne de l’imprimante porte des leveele de sécurité... -
Page 11: Location And Types Of Warning Labels On Back Part
Falcon II RJ-8000 Operation Instructions CAUTION VORSICHT ATTENTION > To avoid injury, keep fingers away from the cutter blade. > Um Verletzungen zu vermeiden, berürhen Sie das Schneidemesser nicht. > Ne touchez pas la lame afin d'éviter des blessures. > To avoid injury, do not touch the edge of the steel belt. -
Page 12: Location And Types Of Warning Labels On Scroller
Falcon II RJ-8000 Operation Instructions Type CAUTION VORSICHT ATTENTION > When replacing the absorbent wads, which contain the waste liquid, make sure you replace them all. > If not, the warning system will malfunction and the waste liquid might overflow. -
Page 13: Operation Procedure Labels
Falcon II RJ-8000 Operation Instructions 1.4. OPERATION PROCEDURE LABELS. The handling, attachment locations and types of operation procedure labels are explained below. Your printer has labels which give simple explanations of operations that require particular care. Read and understand the locations and contents of these labels thoroughly before performing your work. - Page 14 Falcon II RJ-8000 Operation Instructions AP-75080, Rev. 1.1, 04/12/02 Downloaded From ManualsPrinter.com Manuals...
-
Page 15: Installation Procedures
Falcon II RJ-8000 Operation Instructions 2. INSTALLATION PROCEDURES. WARNING : Make sure to connect the power cable only after all the steps of the installation procedure are completed. 2.1. INSTALLATION REQUIREMENTS : SELECTING AN ADEQUATE PLACE FOR SETTING UP YOUR EQUIPMENT. -
Page 16: Required Space
Falcon II RJ-8000 Operation Instructions 2.1.2. Required space. Install the product on a flat surface that fulfills the following conditions. AP-75080, Rev. 1.1, 04/12/02 Downloaded From ManualsPrinter.com Manuals... -
Page 17: Unpacking Your Rj-8000 Printer
Falcon II RJ-8000 Operation Instructions 2.2. UNPACKING YOUR RJ-8000 PRINTER. Caution : • When unpacking this product, always work with at least four people. • When removing this product from the packaging box, always remove the vinyl plastic while holding the side of the product. Holding the unit with the vinyl plastic wrapping can result in slippage and dropping the unit, resulting in damage. -
Page 18: Unpacking The Stand Packaging Box
Falcon II RJ-8000 Operation Instructions 2.2.2. Unpacking the stand packaging box. Unpack the package of the stand according to the following procedure. Step 1 : Move the packaging box of the stand to the location to unpack. Step 2 : Open the package and take out the foot, stay and the four packaging materials. -
Page 19: What Is In The Box
Falcon II RJ-8000 Operation Instructions 2.3. WHAT IS IN THE BOX? After unpacking the package box, inspect to make sure that the unit is not damaged and that all necessary parts are present. 2.3.1. Packaging box of the main unit. -
Page 20: Stand Packaging Box
Falcon II RJ-8000 Operation Instructions 2.3.3. Stand packaging box. Stay 1 set Foot Take-Up System AP-75080, Rev. 1.1, 04/12/02 Downloaded From ManualsPrinter.com Manuals... -
Page 21: Getting To Know The Printer Parts And Components
Falcon II RJ-8000 Operation Instructions 2.4. GETTING TO KNOW THE PRINTER PARTS AND COMPONENTS 2.4.1. Front Name Function Operation Panel This panel is used to set operational conditions, the status of the printer and other functions. Ink compartment This is the place for installing ink cartridges. -
Page 22: Back
Falcon II RJ-8000 Operation Instructions Media guide This is used to feed the media smoothly when setting the media and when printing. There is a built-in ink drying device built in. Media cut groove Used to cut the media straight when it is cut manually :... -
Page 23: Assembling The Printer
Falcon II RJ-8000 Operation Instructions 2.5. ASSEMBLING THE PRINTER. When assembling the printer, please follow the instructions below. Caution : • When assembling this product, always work with four people or more. 2.5.1. Assembling the stand. Assemble the stand according to the following procedure. -
Page 24: Installing The Stand
Falcon II RJ-8000 Operation Instructions 2.5.2. Installing the stand. Install the stand to the main unit according to the following procedure. Step 1 : Place the stand with its feet on the floor. Step 2 : With at least four persons, lift up the main unit by holding it by the handles. - Page 25 Falcon II RJ-8000 Operation Instructions Step 5 : Using the assembly tool, tighten the hexagon socket head cap screws to install the stand. Step 6 : It is possible that there is some space between the stand and the unit. If this is the case, please follow the instructions mentioned below : a.
-
Page 26: Installing The Scroller Receiver
Falcon II RJ-8000 Operation Instructions 2.5.3. Installing the scroller receiver. Install the scroller receiver according to the following procedure. Remove the handles from the main unit according to the following procedure. Using the assembly tool, loosen the eight hexagon socket head cap screws. -
Page 27: Installing The Waste Fluid Tank
Falcon II RJ-8000 Operation Instructions 2.5.4. Installing the waste fluid tank. Install the waste fluid tank according to the following procedure. Step 1 : Install the tank tray to the stand. Step 2 : Install the waste fluid tank in the tank tray. -
Page 28: Removal Of Protective Packaging Material
Falcon II RJ-8000 Operation Instructions 2.5.5. Removal of protective packaging material. Protective packaging material is attached on following locations of this product. Remove all protective packaging materials according to the following procedure. Step 1 : Remove tape from all parts of the product. -
Page 29: Installing The Printer
Falcon II RJ-8000 Operation Instructions 2.5.6. Installing the printer. To install the printer, follow the instructions below. Step 1 : Move the product to where it will be installed. Step 2 : Lock the four casters. Step 3 : Rotate the four adjusters of the following models (64-inch and 87-inch) in the direction shown on the figure to make the printer stable. - Page 30 Falcon II RJ-8000 Operation Instructions AP-75080, Rev. 1.1, 04/12/02 Downloaded From ManualsPrinter.com Manuals...
-
Page 31: Preparing For A Job
Falcon II RJ-8000 Operation Instructions 3. PREPARING FOR A JOB. 3.1. CONNECTING THE POWER CABLE / DISCONNECT DEVICE. WARNING : Make sure that the recommended Mutoh Power Cable is used. Using another cable may result in electric shock or fire. -
Page 32: Connecting The Printer To Your Pc
Falcon II RJ-8000 Operation Instructions 3.3. CONNECTING THE PRINTER TO YOUR PC. 3.3.1. System requirements. To use your printer with the driver, you need a PC that fulfills the following system requirements. System OS Windows2000 Professional Pentium III 1 GHz or higher... -
Page 33: Connecting The Network Interface
Falcon II RJ-8000 Operation Instructions 3.3.4. Connecting the network interface. The procedure for connecting the network interface is explained below. To connect the printer to the network environment, follow the steps below. Step 1 : Turn the printer off. Step 2 : Plug the connector of the Ethernet cable into the connector of the network interface board at the back of the printer. -
Page 34: Turning The Power On
Falcon II RJ-8000 Operation Instructions 3.4. TURNING THE POWER ON. Turn the power of the unit ON according to the following procedure. Step 1 : Press the [POWER] key on the control panel, to turn the unit ON. • The POWER lamp of the control panel will light (red). -
Page 35: Installing Ink Cartridges
Falcon II RJ-8000 Operation Instructions 3.6. INSTALLING INK CARTRIDGES. To install ink cartridges, follow the steps below. Step 1 : Turn the printer on. Step 2 : The printer starts the initialize operation. • The following message is displayed on the operation panel. - Page 36 Falcon II RJ-8000 Operation Instructions For 87-inch specification printers Number of Slot Number of Ink Cartridge the colours Type Dye only / Pigment Black Cyan Magenta Yellow Black Cyan Magenta Yellow only Alternate Black Cyan Black Cyan Magenta Yellow Magenta...
- Page 37 Falcon II RJ-8000 Operation Instructions Step 7 : The printer starts ink replenishment. • During replenishment, the printer executes ink replenishment and pauses alternately. Step 8 : When the ink replenishment is completed, the following message is displayed on the operation panel.
-
Page 38: Media Handling
Falcon II RJ-8000 Operation Instructions 3.7. MEDIA HANDLING. 3.7.1. Loading roll media. The procedure for attaching roll media to the printer is explained below. To load roll media, use the scroller that comes with your printer. Notes : You can attach roll media with a 2 inch (outer diameter: 103 mm or smaller; mass maximum 50 kg) or 3 inch media tube (outer diameter: 150 mm or smaller;... - Page 39 Falcon II RJ-8000 Operation Instructions Step 3 : Insert the fixed flange into the roll media. Note that the media end is on the left side of the media when viewed from the flange side. 1 = Fixed flange 2 = Roll media Step 4 : Insert the flange until the right end meets the media tube of the roll media.
-
Page 40: Loading Roll Media
Falcon II RJ-8000 Operation Instructions Step 7 : Hold the scroller so that the fixed flange is on the left side, and set both ends of the scroller to the scroller receivers on the printer. Notes : Set the scroller correctly onto the printer by referring to the figure below. - Page 41 Falcon II RJ-8000 Operation Instructions Step 4 : Press [F2] key to raise the pressure roller. • MEDIA SET lamp is lit. (orange) • The following message is displayed on the operation panel. Notes : When raising or lowering the pressure roller, you can use the foot switch instead of the control panel.
- Page 42 Falcon II RJ-8000 Operation Instructions Step 6 : Load the roll media into the insertion slot at the back of the printer. If there is a part not wounded tightly on the end of the roll media, wind it tightly and then (re)load it.
- Page 43 Falcon II RJ-8000 Operation Instructions Notes : • The media loading position is a guide for setting up the media. • If the right edge of the roll media is 5 mm or more from the media setting position, a media set error may result if the media has not been detected.
-
Page 44: Loading Sheet Media
Falcon II RJ-8000 Operation Instructions Step 9 : Press the [F2] key on the control panel to lower the pressure roller. • The MEDIA SET lamp will turn off. Step 10 : Close the front cover. 1 = Front cover Step 11 : The media initial menu is displayed on the control panel. - Page 45 Falcon II RJ-8000 Operation Instructions 1 = Foot switch Step 5 : Open the front cover. 1 = Front cover Step 6 : Load the sheet media into the insertion slot in the front of the printer. 1 = Sheet media...
-
Page 46: Setting Media Type
Falcon II RJ-8000 Operation Instructions Step 8 : Press [F2] key on the control panel to lower the pressurizing roller. • The MEDIA Set lamp will turn OFF. Step 9 : Close the front cover. 1 = Front cover Step 10 : The media initial menu is displayed on the control panel. - Page 47 Falcon II RJ-8000 Operation Instructions Media type User 1 Set media type for printing. User 2 For setup values of printing operation, eight settings of User 3 “user 1 – 8” can be set. User 4 User 5 User 6...
- Page 48 Falcon II RJ-8000 Operation Instructions AP-75080, Rev. 1.1, 04/12/02 Downloaded From ManualsPrinter.com Manuals...
-
Page 49: Daily Maintenance
Falcon II RJ-8000 Operation Instructions 4. DAILY MAINTENANCE. 4.1. REPLACING INK CARTRIDGES. Follow the steps below to replace ink cartridges. Caution : When handling ink cartridges, be careful that ink does not get in your eyes or on your skin. However, if this happens, flush the eyes immediately with water. Otherwise, your eyes may become slightly congested or inflamed slightly. -
Page 50: Changing Ink Types
Falcon II RJ-8000 Operation Instructions 4.2. CHANGING INK TYPES. This chapter explains the procedure to change the ink types. Follow the procedure below to change the ink types for printing. Step 1 : Check the following when the power of the printer is ON. - Page 51 Falcon II RJ-8000 Operation Instructions Step 11 : The unit will start to discharge the cleaning solvent. Step 12 : After the discharge of the cleaning solvent, the unit will move to normal status. Step 13 : Turn the power OFF.
-
Page 52: Replacing The Cutting Blade
Falcon II RJ-8000 Operation Instructions 4.3. REPLACING THE CUTTING BLADE. Follow the steps below to replace the cutting blade. Step 1 : If the printer is turned on, make sure that: • Printing or other operations are not performed. •... - Page 53 Falcon II RJ-8000 Operation Instructions Step 6 : Take out the cutting blade. Caution : Do not touch the edge of the cutting blade to avoid injury. Do not drop the cutting blade or apply the edge of it to hard material. Doing so may damage or break the cutting blade.
- Page 54 Falcon II RJ-8000 Operation Instructions Step 8 : While slightly pressing the cutting blade holder tab, return the cutting blade lever to its original position. Notes : Do not strongly push the cutting blade holder tab strongly or release it suddenly.
-
Page 55: Replacing The Waste Liquid Tank
Falcon II RJ-8000 Operation Instructions 4.4. REPLACING THE WASTE LIQUID TANK. Follow the steps below to replace the waste liquid tank. Step 1 : Check the following if the power of the printer is ON. • Printer is not printing. - Page 56 Falcon II RJ-8000 Operation Instructions 1 = Waste liquid tank 2 = tank tray Step 6 : Install a new waste liquid tank to the printer. Step 7 : Press the [ENTER] key on the operation panel. • The printer returns to the normal status.
-
Page 57: Cleaning The Printer
Falcon II RJ-8000 Operation Instructions 4.5. CLEANING THE PRINTER. Clean the outer case once a month. Remove dust or smudges on the outer case with a soft cloth. Clean the inside of the printer once a month. The following instruction is for cleaning the inside of the printer. -
Page 58: Head Cleaning
Falcon II RJ-8000 Operation Instructions 4.6. HEAD CLEANING. If printouts become faint or partially missed, perform head cleaning to clean the surface of the head and the nozzles. Follow he steps below to perform head cleaning. Notes : Remove media before performing head cleaning. If you perform head cleaning with media installed, the head may contact the media. - Page 59 Falcon II RJ-8000 Operation Instructions Step 7 : Press the [ENTER] key on the operation panel to start the head cleaning. Notes : If the [CANCEL] key is pressed instead of the [DECISION] key after changing the parameter, the printer returns to the normal status without performing the head cleaning.
-
Page 60: Cleaning The Wiper
Falcon II RJ-8000 Operation Instructions 4.7. CLEANING THE WIPER. The following steps are instructions for cleaning the wiper. Follow the steps below to clean the cleaning wiper. Step 1 : Replace an ink cartridge. Step 2 : If the printer is turned on, make sure of the following. - Page 61 Falcon II RJ-8000 Operation Instructions Step 8 : Remove the carriage cover. 1 = carriage cover 2 = screw Step 9 : Use the wiper cloth dampened with purified water to wipe off ink on the cleaning wiper. 1 = cleaning wiper...
- Page 62 Falcon II RJ-8000 Operation Instructions AP-75080, Rev. 1.1, 04/12/02 Downloaded From ManualsPrinter.com Manuals...
-
Page 63: Understanding The Control Panel & Printer Controls
Falcon II RJ-8000 Operation Instructions 5. UNDERSTANDING THE CONTROL PANEL & PRINTER CONTROLS. 5.1. GUIDED TOUR AROUND THE CONTROL PANEL. The operation panel is used to set operation conditions, display the status of the printer and set other functions. The names and functions of the operation keys and status lamps are explained below. -
Page 64: Lcd Monitor And Status Lamps
Falcon II RJ-8000 Operation Instructions 5.1.2. LCD monitor and status lamps. Name Colour Status Function LCD monitor The monitor displays the operation status and error messages of the printer. POWER lamp Green The printer is on. The printer is off. -
Page 65: Menu Mode Operations
Falcon II RJ-8000 Operation Instructions 5.2. MENU MODE OPERATIONS. Setup item Description Ink status Displays information on the ink cartridge installed in the ink cartridge slot. Origin setting Makes settings on the print head position at the start of printing. - Page 66 Falcon II RJ-8000 Operation Instructions Media set Makes various media settings. Media Makes settings for media type used for test printing. User1 ThinOut 50% to 100% Adjusts the ink discharge amount during printing depending on the time the media requires for printing.
- Page 67 Falcon II RJ-8000 Operation Instructions Direction Makes settings for the operation direction of the UniDir head during printing. BiDir Repeat Count Once to 99 Makes settings for the times number of print repeat on a print data. Interval 0.0 sec to 0.1 to Makes settings for the end of 5.0 sec...
- Page 68 Falcon II RJ-8000 Operation Instructions Roll media Makes various roll media settings. setting Roll media Makes settings for roll media Disable Roll 1 Roll 2 Roll 3 Centronics Centronics / Bi Makes various Centronics Centro interface settings. setting Network setting Makes various network interface settings.
- Page 69 Falcon II RJ-8000 Operation Instructions Initialise setting Returns the parameters to the the factory default settings.. OK / No Returns all parameters to the factory setting. MediaSet OK / No Returns parameters in the media setup menu to the factory default setting.
- Page 70 Falcon II RJ-8000 Operation Instructions AP-75080, Rev. 1.1, 04/12/02 Downloaded From ManualsPrinter.com Manuals...
Need help?
Do you have a question about the Falcon II RJ-8000 and is the answer not in the manual?
Questions and answers