Table of Contents
Advertisement
Available languages
Available languages
Quick Links
Indice / contents
Brevi manuali d'uso............................................................................ 1 - 4
POS Safe RT 500.............................................................................. 1
POS Safe RT 600.............................................................................. 1
POS Safe RT 650.............................................................................. 2
POS Safe RT 750.............................................................................. 3
Resumed Instruction manuals........................................................... 5 - 8
POS Safe RT 500.............................................................................. 5
POS Safe RT 600.............................................................................. 5
POS Safe RT 650.............................................................................. 6
POS Safe RT 750.............................................................................. 7
ratiotec POS Safes
Pagina / page
0
Advertisement
Table of Contents

Subscribe to Our Youtube Channel
Summary of Contents for ratiotec RT 500
-
Page 1: Table Of Contents
POS Safes Indice / contents Pagina / page Brevi manuali d‘uso…………………………………………………….…………… 1 - 4 POS Safe RT 500…………………………………………………………………… 1 POS Safe RT 600…………………………………………………………………… 1 POS Safe RT 650…………………………………………………………………… 2 POS Safe RT 750…………………………………………………………………… 3 Resumed Instruction manuals……………………………………………..…… 5 - 8 POS Safe RT 500……………………………………………………………………... -
Page 2: Brevi Manuali D'uso
Questa cassaforte meccanica è corredata di due serrature. Fissaggio ed istruzioni per l’uso La POS Safe RT 500 è facile da installare, si fissa sotto il banco cassa o banco bar, rimanendo al di fuori della vista dei malintenzionati. Consigliamo di ridurre regolarmente le banconote di taglio alto nel cassetto cassa, depositandole al sicuro della cassaforte. -
Page 3: Pos Safe Rt 650
Breve Manuale d’uso POS Safe RT 650 La certezza della sicurezza nel punto di vendita è importante per il personale, specialmente nei punti cassa con un alto volume di contanti. Specifiche La cassaforte POS Safe RT 650 è prevista per proteggere l'incasso, riducendo il rischio di perdita dovuta a rapine o furto interno e così... -
Page 4: Pos Safe Rt 750
Breve Manuale d’uso RT 750 Il fissaggio della cassaforte Per fissare la cassaforte RT 750 potete usare la bulloneria in dotazione. La cassaforte è dotata di fori per il fissaggio, collocati sia sulla parte superiore che inferiore. Nota bene: Il posizionamento ideale è vicino alla cassa, ma fuori dalla vista se possibile. Apertura della cassaforte Digitare il vostro codice a 4 numeri confermando col tasto (#). - Page 5 Tabella tempi: nessun tempo apertura immediata 30 secondi 1 minuto 1 minuto e 30 secondi 2 minuti e 30 secondi 3 minuti 3 minuti e 30 secondi 4 minuti 4 minuti e 30 secondi Due segnali acustici confermeranno la vostra scelta. Svuotamento della cassaforte Aprire la porta come indicato, rimuovere il contenitore interno che è...
-
Page 6: Resumed Instruction Manuals
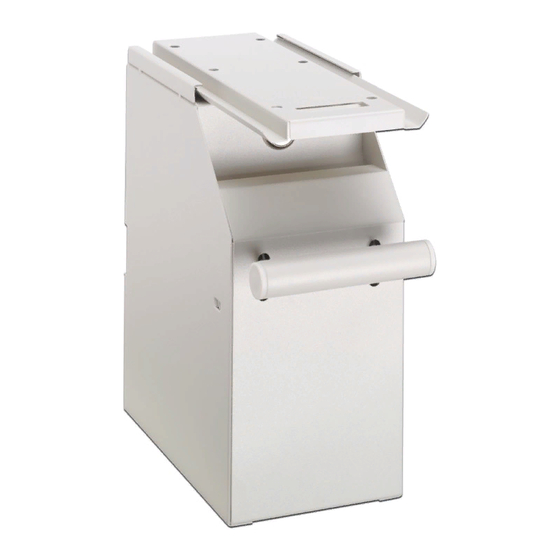
This mechanical safe works with two locks. Installation and operation The RT 500 can be easily installed, under the sales counter or a bar, and can still remain out of sight. It is recommended to regularly empty the cash register in order to secure the banknotes in the Safe. -
Page 7: Pos Safe Rt 650
Resumed Instruction manual POS Safe RT 650 The POS Safe RT 650 offers additional security at the Point of Sale and increases the sense of security among all employees, especially when it comes to higher cash volume. Equipment The POS Safe RT 650 with key system and banknote slot is ideal for the safe custody of higher banknote volume and provides an additional safety at the desired area. -
Page 8: Pos Safe Rt 750
Resumed Instruction Manual POS Safe RT 750 Fasten the Safe To fasten the RT 750 please use the enclosed fastening screws. Fix them into the specific openings found on top and on the lower side of the Safe. Fix the screws to the desired area in the Point of Sale. - Page 9 no time interval 30 seconds 1 minute 1 minute, 30 seconds 2 minutes 2 minutes, 30 seconds 3 minutes 3 minutes, 30 seconds 4 minutes 4 minutes, 30 seconds A signal tone arises to confirm the time interval. Empty the Safe Open the Safe as indicated below.

Need help?
Do you have a question about the RT 500 and is the answer not in the manual?
Questions and answers