Table of Contents
Advertisement
Quick Links
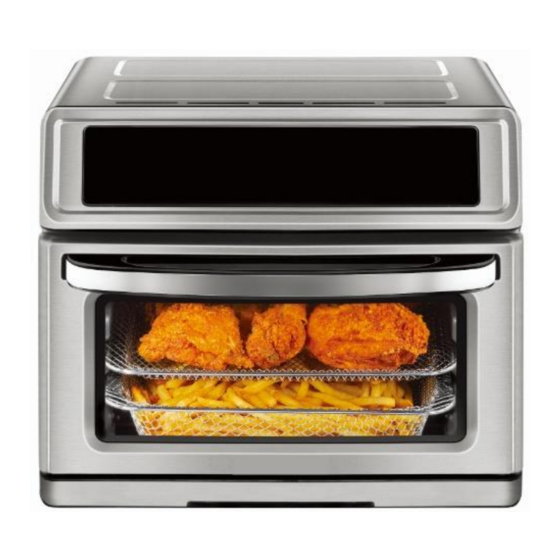
KATO-1700A-D1
Air Fryer Toaster Oven
USER MANUAL
Thanks for your purchase. Any questions please don't hesitate to
contact us, we will handle all your problem ASAP. Your feedback
is vital to us! And we will always try to do better. For more details,
please contact us by email via support@rovsun.com (Write your
seller's Order # on the subject of the email, so that we can find
your order and better assist your issue) Or call us at (1)855-882-
2333.
Advertisement
Table of Contents

Summary of Contents for Zokop KATO-1700A-D1
- Page 1 KATO-1700A-D1 Air Fryer Toaster Oven USER MANUAL Thanks for your purchase. Any questions please don't hesitate to contact us, we will handle all your problem ASAP. Your feedback is vital to us! And we will always try to do better. For more details, please contact us by email via support@rovsun.com (Write your...
- Page 2 ENERAL DESCRIPTION Brand ZOKOP Model KATO-1700A-D1 Power Supply 120V/60Hz Watt 1700W Net weight 15.87 lbs/7.2 kg Product dimension(L×W× 15.9 x 15.8 x 14.4 in 40.5 x 40.0x 36.5 cm Oven Timer Settings: 1-60mins Timer Range Dehydrator Timer Settings: 1-72hrs Oven Temperature Settings: Temperature Range 90-450°...
-
Page 3: Getting Started
Getting Started Initial Set Up • Read all Important Safeguards in in this manual. Failure to do so may result in property damage and/or personal injury. • Remove all packaging material from in and around the toaster oven. • Remove the crumb tray and check the cooking chamber for loose packing material before first use. - Page 4 Getting Started Product and Parts The AIR FRYER Toaster Oven combines the delicious results of air fryers, toasters and convection ovens into one easy-to-use appliance. Air Fryer Toaster Oven is a multi-function countertop oven that provides 11 Smart Programs and 2 cooking methods in one small appliance.
- Page 5 Getting Started Accessories Rotating Mesh Basket Cooking Pan Rotisserie Spit & Forks Rotisserie Lift Dehydrate Net Adjustable Skewers Racks Skewers Note: Illustrations are for reference only and may differ from the actual appliance. CAUTION The external metal surfaces will get hot during the cooking process. The oven is equipped with a side fan to cool the appliance.
- Page 6 Getting Started Control Panel The Air Fryer Toaster Oven control panel features an LED touch screen display , 8 touch screen buttons, and 11 cooking method indicator. Menu indicator Control button...
- Page 7 Features Function Description 11 Cooking mode It provides 11 Smart Programs (Air Fry, Toast, Bagel, Bake, Convection bake ,Broil, Warm, Slow Cook, Warm, Fermentation, Dehydrate, Pizza). Push the to switch the cooking mode, the select the mode will start flash and push the to start cooking.
-
Page 8: Initial Test Run
Cooking Air Fryer Toaster Oven Initial Test Run Follow these steps to ensure your oven is operating properly. 1. Open the oven door. Place the cooking pan on the bottom of the cooking chamber. Close door. 2. Plug the power cord into a 120V power source. Display in Standby mode. - Page 9 Cooking Times and Temperatures Cooking Temperature Time Pre- Convection Mode Range Range Heat 1 min - 60 Air Fry 190 F - 450 F High 1 min - 20 Broil Low/High 400F Hi: 450F 1 min - 4 Bake 190 F - 450 F hours Convection 1 min - 4...
-
Page 10: Rotisserie Cooking
Rotisserie Cooking Always insert rotisserie accessories and food before preheating the oven. To use the Rotisserie Spit and Forks Remove the forks and screws from the package. Push the food item onto the spit. Slide the forks onto both ends of the spit, ensuring the prongs are inserted into the food item. - Page 11 Rotisserie Cooking Rotisserie Cooking under Air Fryer/Bake Mode With the oven door open, slide the rotisserie spit into the guides in the cooking chamber. Insert the rotisserie arm with the pointed end in the rotisserie catch on the right, then place the square end in the rotisserie catch on the left side.
- Page 12 Rotisserie Cooking Removing your rotisserie food Use caution when opening oven door. Door and accessories will be hot. Position the rotisserie lift hooks beneath the left and right arms of the rotisseries spit where the indents are location (see illustration). Lift the rotisserie spit slightly on the left, and slide it left to remove it from the catch on the right.
- Page 13 Rotisserie Cooking Pull the accessory towards you and carefully remove the accessory from the cooking chamber, then place your food on a tray or heat resistant surface. Use the oven mitts to unscrew the rotisserie forks and remove them from the food, then remove the food from the spit.
-
Page 14: Cooking Tips
Cooking Tips The Air Fryer Toaster Oven cooks all your favorite fresh and frozen oven-baked and air fried snacks—fast! • Use the Smart Programs as a starting point and experiment with cooking times and temperatures to get the results you prefer. •... - Page 15 Recommended Cooking Times For a Variety of Popular Food Options The following cooking times are recommendations only. Always follow a trusted recipe. Cooking Food Setting Cooking Time* Accessory & Placement Temperature* Thin-cut fries 14 – 18 minutes Air Fry 400° F / 205° C Rotisserie Basket (Frozen) Thin-cut fries 18 –...
-
Page 16: Care And Cleaning
Care and Cleaning CAUTION Unplug your Toaster Oven and let it cool to room temperature before cleaning. Never use harsh chemical detergents, scouring pads, or powders on any of the parts or components as this may lead to damage. Failure to do so may lead to injury. Note: To remove baked on grease residue from accessories and the cooking chamber, unplug the appliance and wait for it to cool. -
Page 17: Troubleshooting
Troubleshooting Scenario Possible Reason Possible Solution The appliance is not Ensure the power cord is plugged firmly into a 120V properly plugged in. outlet. Plug in another appliance to the same outlet to check the outlet for power. Toaster Oven is Move the Toaster Oven to another outlet to ensure plugged in but will Bad power connection or... - Page 18 Troubleshooting Scenario Possible Reason Possible Solution Cooking foods with excess Avoid air frying foods with a high fat content. fat, such as bacon, sausage, and burgers may result in Check the cooking pan for excess oil or fat and white smoke. carefully remove as needed after cooking.
-
Page 19: Important Safeguards
IMPORTANT SAFEGUARDS When using electrical appliances, basic safety precautions should always be followed: READ THE GETTING STARTED GUIDE AND ALL INSTRUCTIONS, SAFEGUARDS, AND WARNINGS BEFORE OPERATING THE FAILURE TO FOLLOW THESE SAFEGUARDS AND INSTRUCTIONS. Always operate the appliance on a stable, non-combustible, level surface. The appliance’s outer surfaces may become hot during CAUTION use. - Page 20 IMPORTANT SAFEGUARDS 10. For household countertop use only. Do not use outdoors. Not for commercial use. CAUTION Spilled food can cause serious burns. A short power- supply cord is provided to reduce the hazards resulting from grabbing, entanglement and tripping. •...
- Page 21 IMPORTANT SAFEGUARDS 21. Do not store any materials other than authorized SELLER accessories in the appliance. 22. When cooking, do not place the appliance against a wall or against other appliances. Leave at least 5” of free space on the back, sides, and above the appliance.
- Page 22 IMPORTANT SAFEGUARDS SAVE THESE INSTRUCTIONS. WARNING To avoid injury, read and understand instruction manual before using this appliance. Failure to do so may result in injury. WARNING Electrical shock hazard. Use grounded outlet only. DO NOT remove ground. DO NOT use an adapter.