
Summary of Contents for Seuic AUTOID PAD
- Page 1 SEUIC Reference Manual AUTOID PAD Air Rugged Tablet PC AUTOID product manual Version 1.2 Jiangsu SEUIC Technology Co., Ltd.
- Page 2 If you need more product information and support, please contact our sales representative or directly to our website. Jiangsu SEUIC Technology Company Co. , Ltd. No. 15 Xinghuo Road, high-tech Industrial Development Zone, Jiangsu Province POSTCODE: 210061...
- Page 3 V1.0 Android 9.0 initial version of Chinese instructions 20190918 Jiang Mingan V1.1 Add options, and modify the graphics 20191202 Jiang Mingan, Zhou Zhen V1.2 Change the relevant content 20200610 Jiang Mingan, Zhou Zhen Jiangsu SEUIC Technology Co., Ltd.
-
Page 4: Table Of Contents
目录 Chapter 1, notes for use .......................1 1.1 points to note for laser scanning engines ............1 1.2 safety precautions....................1 1.3 maintenance considerations ................1 Chapter 2, Appearance Introduction ..................4 Chapter 3, the keyboard .......................6 Chapter 4, quick use ........................7 4.1 initial use ...................... - Page 5 7.8 sounds ......................35 7.9 apps ......................... 36 7.10 storage ......................37 7.11 batteries ......................38 7.12 location information ..................39 7.13 clear ....................... 40 7.14 accounts......................41 7.15 language and input methods................42 7.16 backup and reset .................... 43 7.17 date and time ....................
-
Page 6: Chapter 1, Notes For Use
Chapter 1, notes for use 1.1 points to note for laser scanning engines Laser radiation, users should not look directly at the laser beam. 1.2 safety precautions Your equipment can only use the batteries and chargers specified by our company; ... -
Page 7: Maintenance Considerations
This device complies with part 15 of the FCC rules. Operation is subject to the following two conditions: (1) this device may not cause harmful interference, and (2) this device must accept any interference received, including interference that may cause undesired operation. 1.3 maintenance considerations This product has the function of water-proof and dust-proof grade, but it should be ... - Page 8 digital device, pursuant to part 15 of the FCC Rules. These limits are designed to provide reasonable protection against harmful interference in a residential installation. This equipment generates uses and can radiate radio frequency energy and, if not installed and used in accordance with the instructions, may cause harmful interference to radio communications.
-
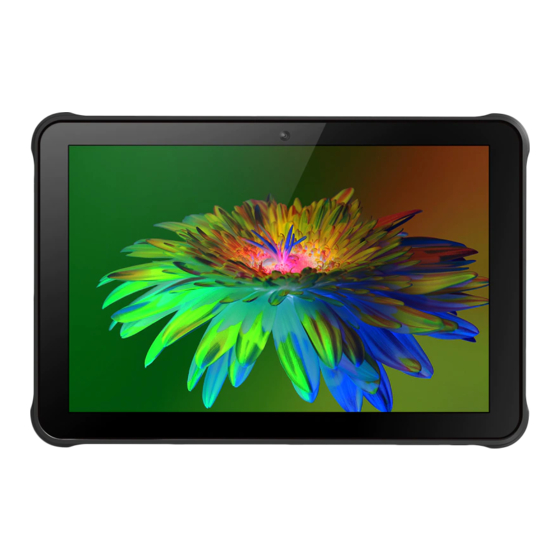
Page 9: Chapter 2, Appearance Introduction
Chapter 2, Appearance Introduction Figure 2-1 front view Figure 2-2 side view... - Page 10 Figure 2-3 back view...
-
Page 11: Chapter 3, The Keyboard
Chapter 3, the keyboard The new Pad Air device has a total of five keys, including three virtual buttons on the screen touchpad (Back, Home, Menu) and two buttons on the side of the device (power and volume) . Button description: Table 3-1 key presentation Push the Primary function... -
Page 12: Chapter 4, Quick Use
Chapter 4, quick use 4.1 initial use Long press the Power key 3S to Power up, short press the Power key when the system is working, and the device will go into hibernation. 4.2 boot You can turn the machine on by pressing the power button. In deep sleep mode, short press the power button to wake up the system. - Page 13 plug. Figure 4-1 placement of SIM card Figure 4-2 turn on the USB plug...
- Page 14 Figure 4-3 inserts Catto into the device Figure 4-4 fastening USB plug...
-
Page 15: Install The Memory Card
4.6 install the memory card To install a memory card, follow these instructions: Place the memory card in the Kato as shown in figure 4-5. Insert Catto in figure 4-2,4-3,4-4. Figure 4-5 placement of Memory Card Note: 1. The PSAM card is not supported on this computer 2. -
Page 16: Chapter 5, On Charging
Chapter 5, on charging Since the battery only has a small amount of power for testing when it leaves the factory, it must be recharged before you use it when you receive the machine. 5.1 charging time BATTERY: It takes about 3.5 hours for the battery to be first charged through the adapter, and the LED lights turn red when charged and green when fully charged. -
Page 17: Led Indicator
that the standby time of the device has been greatly reduced, please replace the battery. Battery charging time varies with temperature conditions and battery life. Please charge within a reasonable temperature range. When the battery is low, the device will pop up a low power prompt. When the battery is too low, the device will automatically shut down. -
Page 18: Chapter 6,Main Screen
Chapter 6,Main screen Find this icon and set it to use, click on the settings button in the upper right corner to enter the settings home screen, the new padAir default has two home screen, can be set ① ② ③... -
Page 19: Status Bar Icons
Table 6-1 home screen items 1 Status Bar: displays notifications and status icons. 2 Display Area: for placing application icons, desktop folders, and widgets. 3 SHORTCUT BAR: Click to enter the corresponding application. 4 APP TRAY: Click or swipe up to go to the home screen to view all APPS. 6.1 status bar icons The status icon and notification bar icon at the top of the screen display device status information and notifications, as shown in the following table. -
Page 20: Chapter 7, Settings
Chapter 7, settings 7.1 Wlan FIND THIS ICON: - Settings - Internet and Internet - WLAN WI-FI 2.4 g provides up to 450ft 150M, and 5G provides up to 300ft 100m of Wi- Fi access. To use Wi-Fi on your device, you must connect to a wireless access point or hotspot. - Page 22 Figure 7-1wi-fi menu 4. Wlan Band Settings Wlan preference settings at the bottom-WLAN preferences- advanced-WLAN advanced-WLAN band settings-WLAN band settings, select only 5 Ghz / 2.4 Ghz Band, only 5 Ghz / 2.4 Ghz Band of AP can be found. Figure 7-2 WLAN band Turn on the wireless Wi-Fi interface and touch scan.
-
Page 23: Bluetooth
displayed in the list of Wi-Fi networks. Touch another Wi-Fi network to connect to it 7.2 Bluetooth FIND THIS ICON: - Settings - connected devices - Connection Preferences - Bluetooth 1. Click the Bluetooth close / Open Button, click pair with new device, open and search other Bluetooth Devices;... - Page 24 Figure 7-3 Bluetooth Menu Click the settings button on the right to rename and unpair a successful device, and you can do as needed:...
- Page 25 Figure 7-4 Paired Bluetooth device settings 5. Bluetooth transmission: You can choose to send files, pictures, videos, MP3 files, and send them through Bluetooth, such as: share pictures, select a picture, long press the picture to be shared, in the sharing interface to select a good pair of Bluetooth, for details, Click send, as shown in the image below:...
- Page 26 Figure 7-5 Bluetooth transfer 6. When sending, there is an Arrow at the top of the left screen, which you can pull down to see the transmission, as shown in the image below:...
- Page 27 Figure 7-6 Bluetooth transfer progress bar 7. You'll be prompted when the file has been sent. Figure 7-7 Bluetooth shared results view 8. Bluetooth headset, the same pair with Normal Bluetooth, Bluetooth headset can be used for Voice Communications, multimedia playback and so on.
-
Page 28: Sim Card
7.3Sim card FIND THIS ICON: - Settings - Internet and Internet - Mobile Network The main interface looks like this: Figure 7-8sim card interface 7.4 traffic usage FIND THIS ICON: - Settings... - Page 29 - Internet and Internet - TRAFFIC USAGE Figure 7-9 traffic usage...
-
Page 30: More
7.5 more - Settings - Network and Internet - Advanced Figure 7-10 More Menus 7.5.1 flight mode When flight mode is checked, the wireless module will automatically shut down. 7.5.2NFC NFC, enabled, allows wireless data terminals to exchange data as they come in contact with other devices, as long as their device is attached to another NFC enabled device, you can share your apps with each other in sync. -
Page 31: Android Beam
Figure 7-11nfc features 7.5.3 ANDROID BEAM Android Beam is enabled, and devices can share files via Android Beam. 7.5.4 network sharing and portable hotspots (1) portable hotspot function, using the unit as a Wi-Fi hotspot to provide signal access to mobile phones and computers with Wi-Fi modules within a certain area of the vicinity. -
Page 32: Vpn
Figure 7-12 modifying WLAN hotspots This interface allows you to click on the changes you want to make. 7.5.5 VPN When you start a VPN, you need to add your own VPN private network (for example, you want to access the company's internal file server and other network- shared resources) , and you can connect to the company's VPN server through a VPN client wherever you are, after getting the VPN account, you can dial through the VPN client, and after successful dialing, you can access the company's shared resources. -
Page 33: Mobile Networks
Figure 7-13 VPN settings 7.5.6 mobile networks 1. Turn on: data traffic can be switched directly to the roaming state after entering the roaming environment. - Page 34 Figure 7-14 mobile data network roaming 2. Preferred network type: After selecting the corresponding network type priority, the taskbar will display the corresponding network signal indicating g 2g priority, 3g 3G priority, 4g 4G priority, such as Unicom Card choosing network type 2G priority, devices will be forced to downgrade to 2G networks even in areas with 3G coverage.
-
Page 35: Reset Network Settings
Access Point Name, the general mobile default is cmnet, Unicom default is 3gnet, telecom default is ctnet, as shown in figure: Figure 7-16 access point APN 4. Add a dedicated APN, click this button, pop up the interface as shown below, general add name (custom) , APN (network access point) , user name, Password, etc. - Page 36 reset settings button, jump to confirm the reset network settings interface, click on the reset settings, prompt reset success, as shown in the following figure:...
-
Page 37: Display
Figure 7-17 resetting network settings Note: 1. The device is connected to Wifi. After resetting the network settings, the device clears the AP Password and disconnects 2. Turn off the enhanced 4G LTE mode in your mobile data network and turn on the enhanced 4G LTE mode by default when you reset the network 3, Bluetooth Default name changes, has been paired, reset the network after the device Bluetooth Name Recovery, Bluetooth pairing off... - Page 38 Figure 7-18 shows 2. Wallpaper, enter, you can set the wallpaper source to be modified, library, album or memory card on the picture, wallpaper: The system default with pictures. Figure 7-19 wallpaper 3. Automatically rotating screen, select the direction of rotating screen content, equipment rotation, according to the rotation angle for horizontal, vertical screen conditions.
- Page 39 Figure 7-20 auto-rotating screen 4. Sleep, the system sleep time to change the settings for the time, the system will automatically sleep. Figure 7-21 dormancy 5. Font size, according to their own needs to adjust the system font size, divided into small, default, large, maximum.
-
Page 40: Notification
7.7 notification FIND THIS ICON: - Settings - Applications and notifications The settings for an application notification message are notification, default application, application permissions, and special application permissions. HERE'S THE CHART: Figure 7-23 notification 7.8 sounds FIND THIS ICON: - Settings - Sound Volume, ring tone, and default notification tone settings. -
Page 41: Apps
like: Figure 7-24 sounds 7.9 apps FIND THIS ICON: - Settings - Applications and notifications Management application. Go to the interface, click the application you want to uninstall, and you will enter the following application information interface, click uninstall, and then you can remove the application from the device. -
Page 42: Storage
Figure 7-25 application 7.10 storage FIND THIS ICON: - Settings - Storage To see the available storage space, clear the memory card (format the Ram) and select the option to perform a media scan on the external memory card or external USB device. -
Page 43: Batteries
Figure 7-26 storage 7.11 batteries FIND THIS ICON: - Settings - Batteries You can see the current capacity of the battery and whether the on-off status bar shows the charge. -
Page 44: Location Information
Figure 7-27 batteries 7.12 location information FIND THIS ICON: - Settings - Security and location information Check Google's location service, turn on GPS, and download your own third party location software. -
Page 45: Clear
Figure 7-28 location information usage rights 7.13 clear FIND THIS ICON: - Settings - Security and location information Set screen lock, Display Password, Device Manager, application actions, unknown source, unknown source application installation password settings, trusted credentials, etc. . -
Page 46: Accounts
Figure 7-29 safe 7.14 accounts FIND THIS ICON: - Settings - accounts Create an account and sync information (you can sync contacts, calendars, etc. to other products in the cloud, you need to set up accounts and server side) . -
Page 47: Language And Input Methods
Figure 7-31 adding an account 7.15 language and input methods FIND THIS ICON: - Settings - language and input methods Language selection, text input and auto error correction options, select your favorite keyboard and input method, and set the text to language output, pointer speed, if you install other input method, will be displayed in this interface. -
Page 48: Backup And Reset
Figure 7-32 language and input method 7.16 backup and reset FIND THIS ICON: - Settings - backup and reset Back up or restore data to factory settings. -
Page 49: Date And Time
Figure 7-33 restore factory settings 7.17 date and time FIND THIS ICON: - Settings - date and time You can use the time or time zone provided by the network, or manually set the date and time, select the time zone, or you can choose the time and date display format. -
Page 50: Accessibility
Figure 7-34 date and time 7.18 accessibility FIND THIS ICON: - Settings - Accessibility Here you can set zoom gestures, high-contrast text, press the power button to end a call, mono audio, color inversion, color calibration, and touch and hold delays. -
Page 51: Developer Options
Figure 7-35 accessibility 7.20 developer options FIND THIS ICON: - Settings - developer options Set-for Wireless Data terminal-version number, click the version number several times to open the developer option, then get some other information on the device, android general. -
Page 52: About Wireless Data Terminals
Figure 7-36 developer options 7.21 about wireless data terminals FIND THIS ICON: - Settings - On wireless data terminals Device details:... - Page 53 Figure 7-37 on wireless data terminals 1. The Sim Status Information can view the current network, signal strength, Imei number, etc. as shown in figure 7-39 2. Model number: display the model number of the machine; Function number: display the function number of this machine; 4.
- Page 54 6. TOUCHSCREEN firmware version number: Touchscreen version number; 7. Device serial number: display the local S / N Number; Kernel version: Device Kernel Information; Version number: device system software version. Figure 7-38 MODELS & Hardware Figure 7-39...
-
Page 55: Chapter 8, Introduction Of Typical Application
Chapter 8, introduction of typical application 8.1 scanning tools 1. Find this icon , open the interface into this scan can be normal scan. Figure 8-1 scanning tool home screen 2. Select [ Bar Code Settings ] , you can enter the bar code type settings interface, the bar code type needed to set;... - Page 56 Figure 8-2 Bar Code Settings 3. Open basic settings to set background light intensity, exposure, collimation mode, and more:...
- Page 57 Figure 8-3 basic settings Open application settings to set the basic scan switch, as shown in figure 8-4: (1) scan sound: Open the scan will sound prompt; (2) vibration: If opened, the scanner will vibrate to prompt; (3) Bar Code append: Open Bar Code can be continuously output; (4) auto-erase: The last Barcode will be automatically erased when the Barcode is scanned;...
- Page 58 (11) Bar Code suffix: can add bar code output suffix (can be numbers, letters, special characters, etc.) ; (12) Bar Code Prefix: can add bar code output prefix (can be numbers, letters, special characters, etc.) ; (13) end characters: You can choose the end of the bar code output characters, including: Enter, Tab, Space, None;...
- Page 59 Figure 8-4 application settings Figure 8-5 restores bar code default settings...
- Page 60 Figure 8-6 developer items 5.Program hide or exit (1) select [ hide ] , the program is run in the background, in any editing interface by scanning parts can be scanned; (2) select [ Exit ] , the program will exit close. Figure 8-7 hiding and exiting...
-
Page 61: System Upgrade
8.2 System upgrade This application enables remote upgrades for the convenience of customers. Find this icon and go to system upgrade, as shown below: Figure 8-9 system upgrade When the network is clear, click the check update button. If there is no update, it will prompt you to find the latest version. - Page 62 Figure 8-10 check for updates and downloads Click download, after the download is successful, click update immediately, the device automatically restarts to upgrade status, as shown in figure: System upgrade settings, as shown in figure:...
-
Page 63: Mobile Butler
Figure 8-13 system upgrade 8.3 Mobile Butler This product is designed to enable users to set android handheld terminal permissions and not allow users to use non-specified applications. Find this icon setting -- APP, click the settings button in the upper right corner, home screen APP -- Select Mobile Butler, press the home button to exit to enter the Mobile Butler launcher interface... - Page 64 Figure 8-14 default launcher The administrator sets and modifies passwords (1) move the housekeeper interface, Short press the lower right corner of the three points (Menu) button to add desktop project operations. The above diagram shows, did not set administrator Password, need to set first, click OK button jump to change password interface, as follows:...
- Page 65 Figure 8-16 initial password settings Set the administrator initial password as required, for example: 123456, click the confirm button, the password is set successfully. Note: Can Not Be Blank and the updated password field must be the same as the confirmation password field. (2) short press the Menu button Enter the appropriate administrator Password (123456) .
- Page 66 Figure 8-19 main interface (3) administrator, Password Change Add the application interface, click on the top right corner [ settings ] to enter the settings interface, click on [ change Password ] to change the password screen:...
- Page 67 Figure 8-20 change password (4) administrator, name change Go to settings and Click Mobile Butler to change the name of the Mobile Butler. Figure 8-21 name change (5) wallpaper replacement Go to the settings screen, click wallpaper changes, and the following image appears:...
- Page 68 Figure 8-22 wallpaper modification (6) remove the default launcher settings Method 1: Enter [ settings ]-[ application ]-select [ reset application preferences ] , Click [ reset application ] can be lifted.
- Page 69 Figure 8-23 deactivating default launcher setting 1 Method 2: The Mobile Butler setting interface will be"Mobile Butler boot self- start"modified to"Mobile Butler boot self-start", as follows:...
-
Page 70: Quick Configuration
Figure 8-24 deactivating default launcher setting 2 Note: Method 2 is recommended, and method 1 resets other application settings as well 8.4 quick configuration In order to realize the same type of equipment, this application copies the configuration information of one equipment quickly to another equipment, making the related configuration of two equipment exactly the same. -
Page 71: Import
QR code,click to open it Figure 8-25 shortcut configuration home screen 8.4.1 import 1. File Import Will meet the conditions of the configuration pack placed in the External SD card specified directory, you can achieve. External SD Card System Path is: External SD card / SysSetting / setinfo. - Page 72 Figure 8-26 configuring the ZIP directory 2) go to the shortcut configuration, Click [ file import ] , pop up the following prompt, Click [ confirm ] ; Figure 8-27 file import 3) after successful import, pop-up file import project and status, click confirm, pop-up restart prompt, click [ restart immediately ] can be completed (without restarting...
- Page 73 some configuration will not take effect immediately) . Figure 8-28 file configuration import successful 2. Qr Code Import This function can scan the form of Qr Code to import external configuration files, you can call camera scan other external qr code to import configuration files. (1) to access the shortcut configuration, click [ Qr code import ] , and place the Qr Code you want to import into the scan box, as shown below:...
- Page 74 Figure 8-29 Qr Code Import Window (2) scan transfer successful, pop-up Qr code import items and status, click confirmation, pop-up restart prompt, click [ restart immediately ] can be completed (without restarting some configuration will not take effect immediately) .
-
Page 75: Export
Figure 8-30 Qr code import successful 8.4.2 export 1. File export This function will be the local import and export tools in the configuration of all configuration items can be exported to the local internal SD card or external SD card specified directory. - Page 76 Figure 8-31 file export The exported file is called SETINFO. Tarr. GZ, go to file management -- internal shared storage -- OR SD CARD -- SYSSETTING:...
- Page 77 Figure 8-32 file export path 2. QR Code Export The QR Code is exported to generate the qr code, which is scanned to connect to the Bluetooth Channel and transfer the configuration file. (1) enter quick configuration, click on [ Qr code export ] , pop up the following interface that export successful, click confirmation can:...
- Page 78 Figure 8-33 Qr code export (2) the generated Qr Code picture in the bottom of the application, click on the Qr code small icon, you can view. Figure 8-34 Qr code image...
-
Page 79: Feature Settings
8.5 feature settings This application is used for the quick realization of the special needs of customers, to facilitate the quick use of customers. Figure 8-37 feature settings 8.5.1 no state drop down This function is enabled This function takes effect immediately and can not be pulled down from the menu. This function is disabled The function takes effect immediately and can be pulled down normally 8.5.2 disables passing the key value of the scan key to the application... -
Page 80: Display The Scan Hover Button
In some cases, disabling applications such as the Telnet program passes all the keys pressed to the server 8.5.3 display the scan hover button This function is disabled The scan hover button does not appear below the interface This feature is turned on The scan hover button hovers below any interface of the device. - Page 81 Figure 8-38 white list of digital certificates Import certificates from APK files The application searches all the APK files in the internal storage device directory and displays the file name and directory. The certificate from the selected APK file can be imported into the system by clicking the import button after checking the single or multiple display items.
- Page 82 Figure 8-39 APK file import list IMPORT CERTIFICATES FROM INSTALLED PACKAGES The APP displays the name of the installed third-party APP and its package name, and the user can import the certificates from the selected APK file into the system by clicking the import button after checking the single or multiple display items.
-
Page 83: Chapter 9, Troubleshooting
3. REMOVE CERTIFICATES FROM THE WHITELIST The application displays the name of the added certificate. Check single or multiple display items and click remove to remove the corresponding certificate from the system white list. The item that appears grey and unchecked is the system's default certificate and can not be removed. - Page 84 System Failure Perform a soft reset Return to factory for repair and Battery failure replacement of batteries Rechargeable battery longer charges Keep the battery at room Battery temperature too / too low temperature There's no sound Volume set too low or turned off Adjust the volume After a period of inactivity, the mobile data terminal closes.
- Page 85 space" storage locations Go to settings and enable the Mobile data not enabled data network UNABLE Incorrect Network Mode Go to the settings and select the MOBILE DATA selection, unregistered SIM card correct network mode ACCESS THE INTERNET Recharge the SIM card in a Sim Card debt timely manner...
-
Page 86: Introduction Of Optional Accessories
INTRODUCTION OF OPTIONAL ACCESSORIES Please keep the original packing box and packing material for future maintenance or storage of the machine. The following accessories can better improve your work, you can buy according to need. A new PADAir series product One USB cable (one USB TYPE A, one USB TYPE C) One QC3.0 adapter One PD adapter (for use with USB TYPE C data cable for quick charging of PD)
Need help?
Do you have a question about the AUTOID PAD and is the answer not in the manual?
Questions and answers