
Related Manuals for Clarke CECS405B


Summary of Contents for Clarke CECS405B
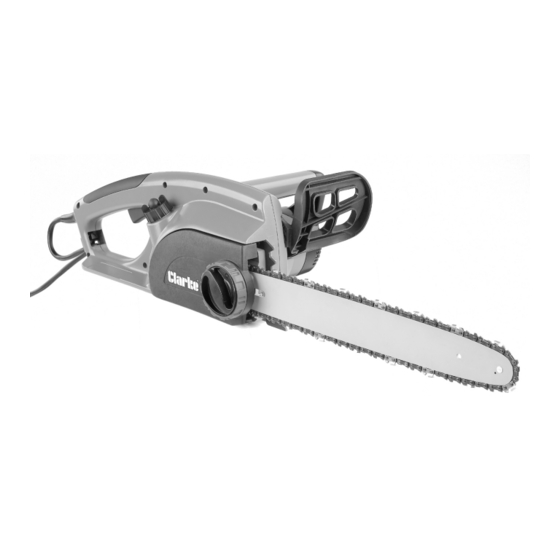
- Page 1 WARNING: Read these instructions before using the machine ELECTRIC CHAINSAW MODEL NO: CECS405B PART NO: 3402072 OPERATION & MAINTENANCE INSTRUCTIONS LS0612...
-
Page 2: Specifications
GUARANTEE This CLARKE product is guaranteed against faulty manufacture for a period of 12 months from the date of purchase. Please keep your receipt as proof of purchase. -
Page 3: Safety Precautions
SAFETY PRECAUTIONS WARNING: READ ALL INSTRUCTIONS. FAILURE TO FOLLOW ALL INSTRUCTIONS LISTED BELOW MAY RESULT IN ELECTRIC SHOCK, FIRE AND/ OR SERIOUS INJURY. THE TERM “POWER TOOL” IN ALL WARNINGS LISTED BELOW REFERS TO YOUR ELECTRIC CHAINSAW. WORK AREA 1. Keep work area clean and well lit. Cluttered and dark areas invite accidents. - Page 4 3. Avoid accidental starting. Ensure the switch is in the off position before connecting to the power supply. 4. Do not overreach. Keep proper footing and balance at all times. This enables better control of the power tool in unexpected situations. 5.
-
Page 5: Chainsaw Safety Warnings
CHAINSAW SAFETY WARNINGS: 1. Keep all parts of the body away from the saw chain when the chainsaw is operating. Before you start the chainsaw, make sure the saw chain is not contacting anything. A moment of inattention while operating chainsaws may cause entanglement of your clothing or body with the saw chain. -
Page 6: Causes And Prevention Of Kickback
CAUSES AND PREVENTION OF KICKBACK Kickback may occur when the nose or tip of the guide bar touches an object, or when the wood closes in and pinches the saw chain in the cut. Tip contact in some cases, may cause a sudden reverse reaction, kicking the guide bar up and back towards the operator. -
Page 7: Warning Symbols
WARNING SYMBOLS The following symbols are displayed on the chainsaw in order to remind you of the safety precautions you should take when operating the chainsaw. Warning! - When using this chainsaw, basic safety precautions, including those in this user guide, should be observed to reduce the risk of fire, electric shock and personal injury. -
Page 8: Electrical Connections
ELECTRICAL CONNECTIONS WARNING! Read these electrical safety instructions thoroughly before connecting the product to the mains supply. Before switching the product on, make sure that the voltage of your electricity supply is the same as that indicated on the rating plate. This product is designed to operate on 230V AC 50Hz. - Page 9 OVERVIEW Chain Oil Filler Cap Chain Bar Oil Level sightglass Chain Brake Lever Chain Scabbard Front Handle Gripping Teeth Trigger Lock Air Intake On/Off Switch Blade Tensioning Dial Rear Handle Cover Locking Screw Cable Retainer Housing Cover Parts & Service: 020 8988 7400 / E-mail: Parts@clarkeinternational.com or Service@clarkeinternational.com...
-
Page 10: Filling The Chainsaw With Oil
5. Wipe up any spillage before continuing. 6. The oil level should be checked frequently during use and topped up as necessary. • Chainsaw oil is avainable from your Clarke dealer (part number 3050865) Parts & Service: 020 8988 7400 / E-mail: Parts@clarkeinternational.com or Service@clarkeinternational.com... -
Page 11: Attaching The Chain Bar And Chain
ATTACHING THE CHAIN BAR AND CHAIN 1. Place the chainsaw on a stable surface. 2. Loosen the cover locking screw and remove the housing cover. 3. Put the chain onto the bar. • The chain bar is marked with an arrow, showing the direction in which the chain will travel. - Page 12 To adjust the chain tension, proceed as follows: 1. Ensure the chain brake handle is in the disengaged position (the chain brake handle should be pulled back towards the handle). 2. Loosen the housing cover by slightly rotating the cover locking screw, (do not remove).
-
Page 13: Using The Chainsaw
WARNING: IF THE CHAIN FAILS TO STOP WHEN THE CHAIN BRAKE IS ENGAGED. DO NOT USE THE CHAINSAW. YOU SHOULD RETURN YOUR CHAINSAW TO YOU CLARKE DEALER FOR ADVICE. Parts & Service: 020 8988 7400 / E-mail: Parts@clarkeinternational.com or Service@clarkeinternational.com... -
Page 14: Personal Protective Equipment
PERSONAL PROTECTIVE EQUIPMENT The following Personal Protective Equipment (PPE) available from you local Clarke Dealer has been designed for use with chainsaws should be worn when using the chainsaw. • A safety helmet with mesh visor. • Ear defenders. • Specialist chainsaw gloves •... -
Page 15: Operating The Chainsaw
HOLDING THE CHAINSAW CORRECTLY Hold the chainsaw firmly with both hands. Always keep your left hand on the front handle and your right hand on the rear handle. Use a firm and proper grip when holding the handles to maintain control, your finger and thumbs should encircle the handles Keep your body to the left of the blade at all times. -
Page 16: Felling, Limbing And Bucking
FELLING, LIMBING AND BUCKING WARNING: WHEN BUCKING AND FELLING OPERATIONS ARE BEING PERFORMED BY TWO OR MORE PERSONS AT THE SAME TIME, THE FELLING OPERATIONS SHOULD BE SEPARATED FROM THE BUCKING OPERATION BY A DISTANCE OF AT LEAST TWICE THE HEIGHT OF THE TREE BEING FELLED. WARNING: DO NOT CUT DOWN A TREE DURING HIGH OR CHANGING WINDS OR IF THERE IS A DANGER TO PROPERTY. -
Page 17: Felling A Tree
FELLING A TREE Trees should not be felled in a manner that would endanger any person, strike any electrical utility line or cause any property damage. If the tree does make contact with any utility line, the utility company should be notified immediately. -
Page 18: Limbing A Tree
LIMBING A TREE Limbing is removing the branches from a fallen tree. When limbing leave larger lower limbs to support the log off the ground. Remove the small limbs in one cut as illustrated below. Branches under tension should be cut from the bottom up to avoid binding the chainsaw. -
Page 19: Bucking A Log
BUCKING A LOG Bucking is cutting a log into lengths. It is important to make sure your footing is firm and your weight is evenly distributed on both feet. When possible, the log should be raised and supported by the use of limbs, logs or chocks. Follow the simple directions for easy cutting. - Page 20 SUPPORTED ON BOTH ENDS When the log is supported on both ends, as illustrated below, cut 1/3 the diameter from the top (overbuck). Then make the finished cut by underbucking the lower 2/3 to meet the first cut. When bucking on a slope always stand on the uphill side of the log, as illustrated ibelow.
-
Page 21: Bar Maintenance
MAINTENANCE WARNING: MAKE SURE THAT THE CHAINSAW IS DISCONNECTED FROM THE MAINS SUPPLY BEFORE CONTINUING. BAR MAINTENANCE The following maintenance procedures must be performed to keep the chain bar in good working order. 1. After approximatley 5 hours use, the bar should be turned, to ensure even wear on the top and bottom of the bar. - Page 22 Only fit recommended bars and chains. Replacement chain bars (part number: HTCECS405B64) and chains (part number: 3402080) can be obtained from your CLARKE dealer. REMOVING THE EXISTING BAR AND CHAIN WARNING: Make sure that the chainsaw is disconnected from the mains supply before continuing.
- Page 23 FITTING A NEW BAR AND CHAIN 1. Fit the tensioning wheel (removed from the old bar) to the new bar as shown below. 2. Push the tensioning wheel and bar into position as shown below. 3. Place the chain over the sprocket, ensuring that the chain is pointing in the correct direction.
-
Page 24: Spare Parts List
SPARE PARTS LIST Description Part Number Chain HTCECS405B65 Chain Bar HTCECS405B64 Chain Scabbard HTCECS405B66 Tensioning Wheel HTCECS405B18-3 Housing Cover HTCECS405B15 Oil Filler Cap HTCECS405B09 Parts & Service: 020 8988 7400 / E-mail: Parts@clarkeinternational.com or Service@clarkeinternational.com... -
Page 25: Declaration Of Conformity
DECLARATION OF CONFORMITY Parts & Service: 020 8988 7400 / E-mail: Parts@clarkeinternational.com or Service@clarkeinternational.com... - Page 26 DECLARATION OF CONFORMITY Parts & Service: 020 8988 7400 / E-mail: Parts@clarkeinternational.com or Service@clarkeinternational.com...
-
Page 27: Popular Accessories
POPULAR ACCESSORIES The following accessories are available from you local Clarke dealer: PERSONAL PROTECTIVE EQUIPMENT A Wide range of Personal Protective Equipment suitable for use when using a chiansaw. CHAINSAW OIL 1 Litre (Part number 3050865) SPARE CHAIN Replacement Oregon Chain (Part number 3402080)
Need help?
Do you have a question about the CECS405B and is the answer not in the manual?
Questions and answers