Advertisement
Table of Contents
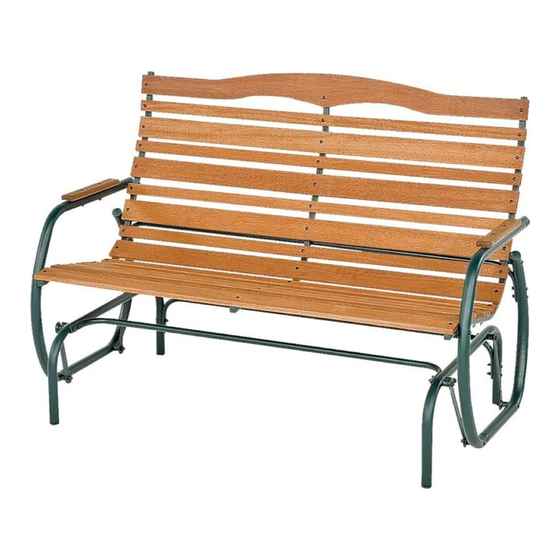
Country Garden
Mecedora Country Garden
Fauteuil coulissant Country Garden
Assembly Instructions – Model CG-10, CG-44
(14 SLATS ON MODEL CG-44 ARE THE SAME WIDTH
Instrucciones de armado – Modelo CG-10, CG-44
(14 LISTONES EN EL MODELO CG-44 TODOS DEL MISMO HANCHO)
Instructions d'assemblage – Modèle CG-10, CG-44
Open outer hardware bag HB-4430. Do not open inner bags until instructed.
Abra la bolsa exterior de ferretería HB-4430. No abra las bolsas internas hasta que se le indique.
Ouvrez le sac de quincaillerie extérieure HB-4430. N'ouvrez pas les sacs intérieurs avant que ceci ne soit indiqué.
You will need the following tools: screwdriver, 7/16" wrench, or pliers or adjustable wrench.
Necesitará las siguientes herramientas: destornillador, llave de 1,11 cm, o pinza o llave ajustable.
Vous aurez besoin des outils suivants : tournevis, clés de 1,11 cm, ou pinces ou clé réglable.
NOTE: Save assembly instruction sheet for future reference. Replacement parts can be purchased by calling customer service.
NOTA: Guarde la hoja con las instrucciones de armado para referencia futura. Puede comprar piezas de repuesto llamando al
departamento de atención al cliente.
REMARQUE : Conservez le feuillet d'instructions d'assemblage à titre de référence à venir. Vous pouvez obtenir des pièces de rechange en
appelant le service à la clientèle.
LARGE PARTS
(NOT TO SCALE)
PIEZAS GRANDES
(NO A ESCALA)
PIÈCES GRANDES
(PAS À L'ÉCHELLE)
SEAT BRACE (1)
SHAPED TOP SLAT (1)
TIRANTE DEL ASIENTO (1)
LISTÓN SUPERIOR MODELADO (1)
RENFORT DU SIÈGE (1)
LATTE SUPÉRIEURE FORMÉE (1)
ARMREST (2)
WIDE SLAT (7)
APOY O DEL POSABRAZOS (2)
LISTÓN ANCHO (7)
ACCOUDOIR (2)
LATTE LARGE (7)
NARR OW SLAT (7)
BASE BRACE (2)
LISTÓN ANGOSTO (7)
TIRANTE DE LA BASE (2)
LATTEÉTR OITE (7)
RENFOR T DE LA BASE (2)
HARDWARE PARTS LIST
(SHOWN TO SCALE)
*Standard hardware items may be replaced locally.
LISTA DE PIEZAS DE FERRETERÍA
*Los artículos estándar de ferretería se pueden reemplazar en forma local.
LISTE DE PIÈCES DE QUINCAILLERIE
*Les articles de quincaillerie standard peuvent être remplacés localement.
*
*
2-1/2" • 62mm (4)
1-1/2" • 39mm (45)
*
*
2-5/8" • 65mm (10)
1-5/8" • 40mm (4)
*
1-3/4" • 44mm (4)
SQUARE PLASTIC SPACER (6)
SEPARADOR CUADRADO DE PLÁSTICO (6)
ENTRETOISE CARRÉE DE PLASTIQUE (6)
*
2" • 52mm (4)
*
LOCKNUT (26)
2-3/8" • 60mm (4)
CONTRATUERCA (26)
CONTRE-ÉCROU (26)
Protected by Pending U.S. Patent Application.
NOTE: As with all bearings, those on your glider
will need lubrication from time to time to ensure
smooth, silent operation. A drop of heavy
household oil will provide the necessary lubrication.
NOTE: Your Country Garden
®
hardwood Hi-Back
Glider comes with a natural wood protective finish
already applied. When new, natural wood products
may have a surface deposit or residue. To prepare
for initial use, it is recommended that the wood be
wiped with a light coating of standard household
®
furniture polish, such as Pledge
. As an
alternative, the product can be cleaned with a liquid
detergent and water solution followed by a
thorough rinse.
Over time, depending on actual weather conditions
and exposure, the protective wood finish will need
to be renewed. Clean thoroughly and refinish as needed with a penetrating exterior
stain or natural wood finish, available at retail paint stores.
Protegido por solicitud de patente pendiente de los EE.UU.
NOTA: al igual que con todos los rodamientos, los de la mecedora necesitarán lubricación
ocasionalmente para asegurar un funcionamiento suave y silencioso. Una gota de aceite lubricante pesado de uso
doméstico proporcionará la lubricación necesaria.
NOTA: su mecedora de madera dura con respaldo alto Country Garden
madera natural ya aplicado. Los productos de madera natural, cuando son nuevos pueden presentar depósitos o residuos
en su superficie. Para prepararlos para su uso inicial, se recomienda limpiar la madera con una fina capa de
lustramuebles común, como por ejemplo Pledge
agua y detergente líquido seguido por un buen enjuague.
Con el paso del tiempo, dependiendo de las condiciones y la exposición a las inclemencias climáticas, es posible que sea
necesario volver a aplicar un acabado de protección para madera. Limpie bien y vuelva a darle terminación según sea
necesario con un producto penetrante para exteriores, natural o con color, disponible en tiendas de pintura al por menor.
Protégé par une demande de brevet américain en instance.
REMARQUE : Comme pour tous les paliers, ceux de votre fauteuil coulissant devront être lubrifiés de temps à autres
pour assurer un fonctionnement silencieux et en douceur. Une goutte d'huile lourde d'usage domestique fournira la
lubrification voulue.
REMARQUE : Votre fauteuil coulissant à dossier élevé de bois dur Country Garden
bois naturel déjà appliqué. Les produits de bois naturel neufs ont parfois un résidu ou un dépôt de surface. Pour préparer
le produit à la première utilisation, il est recommandé d'essuyer le bois d'un léger revêtement de poli à meuble résidentiel
®
standard, tel que Pledge
. Vous pouvez aussi nettoyer le produit avec une solution de détergent liquide et d'eau suivie
d'un rinçage en profondeur.
Avec le temps et selon les conditions météorologiques actuelles et l'exposition, le fini protecteur du bois devra être
réappliqué. Nettoyez bien et refinissez au besoin avec une teinture extérieure pénétrante ou un fini de bois naturel,
disponible dans les magasins de peinture au détail.
Glider
®
®
CENTER SEAT
SUPPORT (1)
APOYO CENTRAL
DEL ASIENTO (1)
SUPPORT DE SIÈGE
CENTRAL (1)
ARM (2)
POSABRAZO (2)
BRAS (2)
(SE MUESTRAN A ESCALA)
(À L'ÉCHELLE)
TUERCA HEXAGONAL (22)
ÉCROU HEXAGONAL (22)
*
GLIDER STOP (4)
TOPE DE LA MECEDORA (4)
SEPARADOR PLÁSTICO (8)
BUTÉE DU FAUTEUIL
ENTRETOISE DE PLASTIQUE (8)
COULISSANT (4)
®
se entrega con un acabado de protección para
®
. Como otra opción, el producto se puede limpiar con una solución de
®
est fourni avec un fini protecteur de
STEP 1A Open inner hardware bag IB-4160 and plastic parts bag PP-4085.
Attach base braces to bases with hardware shown. The base braces are shorter than the seat brace.
Attach glider stops to bases with hardware shown. BE SURE TO ATTACH STOPS TO INSIDE HOLE AT
®
FRONT OF BASE AS SHOWN.
NOTE: If glider is to be used on soft surface, turn round part of the rear base brace to the bottom. If
glider is to be used on hard surface, assemble rear brace as shown below.
PASO 1 A Abra la bolsa de ferretería interna IB-4160 y la bolsa de piezas PP-4085.
Instale los tirantes de la base a las bases con la ferretería que se muestra. Instale los topes de la mecedora a las
con la ferretería que se muestra. ASEGÚRESE DE INSTALAR LOS TOPES EN EL ORIFICIO
bases
INTERNO EN EL FRENTE DE LA BASE COMO SE MUESTRA.
NOTA: Si la mecedora se va a usar sobre una superficie blanda, coloque hacia abajo la parte redonda
del tirante trasero de la base. Si se va a usar sobre una superficie dura, arme el tirante trasero como se
muestra debajo.
ÉTAPE 1A Ouvrez le sac de quincaillerie intérieure IB-4160 et le sac de pièces de plastique PP-4085.
Fixez les cales de base aux bases avec la quincaillerie indiquée.
Fixez les butées de patin aux bases avec la quincaillerie indiquée. ASSUREZ-VOUS DE FIXER LES
BUTÉES AU TROU INTÉRIEUR À L'AVANT DE LA BASE TEL QU'INDIQUÉ.
REMARQUE : Si le fauteuil sera utilisé sur une surface douce, tournez une partie de la cale de la base
arrière jusqu'au bas. Si le fauteuil sera utilisé sur une surface dure, assemblez la cale arrière tel
qu'indiqué plus bas.
TIRANTE TRASERO DE LA BASE
CALE DE BASE ARRIÈRE
END SEAT
SUPPORT (2)
APOYO LATERAL
60mm
DEL ASIENTO (2)
SUPPORT DE SIÈGE
D'EXTRÉMITÉ (2)
40mm
LOCKNUT
CONTRATUERCA
CONTRE-ÉCROU
BEARING (4)
R ODAMIENTO (4)
R OULEMENT (4)
STEP 1B
BASE (2)
Attach bearing assemblies to base using hardware and plastic spacers shown. Note different screw
BASE (2)
lengths for front and rear. TIGHTEN ALL HARDWARE IN STEP 1A AND 1B.
BASE (2)
PASO 1 B
Instale los ensambles de los rodamientos a la base usando la ferretería y los separadores plásticos que
se muestran. Tenga en cuenta los diferentes largos de tornillos para la parte delantera y trasera.
APRIETE TODA LA FERRETERÍA EN EL PASO 1A Y 1B.
ÉTAPE 1B
Fixez les assemblages de roulement à la base avec la quincaillerie et les entretoises de plastique
indiquées. Notez les différentes longueurs de vis pour l'avant et l'arrière.
ACORN NUT (27)
TUERCA CIEGA (27)
ÉCROU BORGNE (27)
*
HEX NUT (22)
PLASTIC SPACER
SEPARADOR PLÁSTICO
ENTRETOISE DE PLASTIQUE
60mm REAR
TRASERO 60mm
60mm ARRIÈRE
PLASTIC SPACER (8)
BEARING
RODAMIENTO
ROULEMENT
65mm FRONT
DELANTERO 65mm
RIBS F ACING
OUTSIDE
ACANALADURAS
HACIA AFUERA
NER VURESVERS
L'EXTÉRIEUR
HOLE IN
DOWN POSITION
ORIFICIO HACIA
AB AJO
TR OU EN
POSITIONVERS
LE B AS
©Jack-Post Corporation
© 2007 Jack-Post Corporation
REAR BASE BRACE
CONTRATUERCA
CONTRE-ÉCROU
FRONT BASE BRACE
TIRANTE DELANTERO DE LA BASE
65mm
CALE DE BASE AVANT
LOCKNUT
CONTRATUERCA
CONTRE-ÉCROU
PLASTIC
GLIDER STOP
TOPE PLÁSTICO
BUTÉE DE PATIN DE
B ASE
PLASTIQUE
B ASE
B ASE
PLASTIC SPACER
SEPARADOR PLÁSTICO
ENTRETOISE DE PLASTIQUE
100
1100CONTRATUERC
A
LOCKNUT
CONTRATUERCA
CONTRE-ÉCROU
B ASE
B ASE
B ASE
65mm AVANT
IMPORTANT NOTE:
On both sides of the glider, the two (2) protruding ribs
on the bearing assembly must face outward and the
hole must be at the bottom.
NOTA IMPORTANTE:
En ambos lados de la mecedora, las 2 (dos)
acanaladuras que sobresalen en el ensamble del
rodamiento deben estar hacia afuera y el orificio debe
estar en la parte inferior.
REMARQUE IMPORTANTE :
Des deux côtés du patin, les deux (2) nervures
sortantes sur l'assemblage de roulement doivent faire
face vers l'extérieur et le trou doit être au bas.
CORPORATION
800 East Third Street
Buchanan, Michigan 49107-1803
Customer Service 1-800-800-4950
Mon. thru Fri. 8:00am – 4:30pm EST
E-mail cs@jack-post.com
Toda comunicación es solamente en inglés.
Toute communication sera seulement en anglais.
YQ-ZA-1140-5
ZA-1140-4
60mm
65mm
40mm
PLASTIC GLIDER STOP
TOPE PLÁSTICO
BUTÉE DE PATIN DE PLASTIQUE
LOCKNUT
60mm REAR
TRASERO 60mm
60mm ARRIÈRE
65mm FRONT
DELANTERO 65mm
65mm AVANT
BEARING
RODAMIENTO
ROULEMENT
PLASTIC SPACER
SEPARADOR PLÁSTICO
LOCKNUT
ENTRETOISE DE PLASTIQUE
CONTRATUERCA
CONTRE-ÉCROU
PLASTIC SPACER
SEPARADOR PLÁSTICO
ENTRETOISE DE PLASTIQUE
B ASE
B ASE
B ASE
BEARING
RODAMIENTO
ROULEMENT
Do not overtighten! Two (2) threads should extend
beyond the nylon in the end of the nut. Bearing
should move freely.
¡No apriete en exceso!
Deben quedar 2 (dos) roscas sobresaliendo del nilón
en el extremo de la tuerca. El rodamiento debe
moverse libremente.
Ne resserrez pas trop !
Deux (2) filets doivent sortir au-delà du nylon à la fin
de l'écrou. Le roulement doit se déplacer librement.
7
CG-10, CG-44
03/11
10/10
CG-10, CG44 12/07
Advertisement
Table of Contents

Related Manuals for Jack-Post CG-10


Summary of Contents for Jack-Post CG-10
- Page 1 (14 SLATS ON MODEL CG-44 ARE THE SAME WIDTH Instrucciones de armado – Modelo CG-10, CG-44 PASO 1 A Abra la bolsa de ferretería interna IB-4160 y la bolsa de piezas PP-4085.
- Page 2 BOTTOM 6 WITH HEX NUT 6 INFERIORES CON TUERCAS Toda comunicación es solamente en inglés. HEXAGONALES 6 DU BAS À ÉCROU HEX. Toute communication sera seulement en anglais. ©Jack-Post Corporation YQ-ZA-1140-5 CG-10, CG-44 10/10 03/11 © 2007 Jack-Post Corporation ZA-1140-4 CG-10, CG44 12/07...
Need help?
Do you have a question about the CG-10 and is the answer not in the manual?
Questions and answers