Table of Contents
Advertisement
Available languages
Available languages
Quick Links
Advertisement
Table of Contents

Summary of Contents for Nexxt Solutions NHA-P600
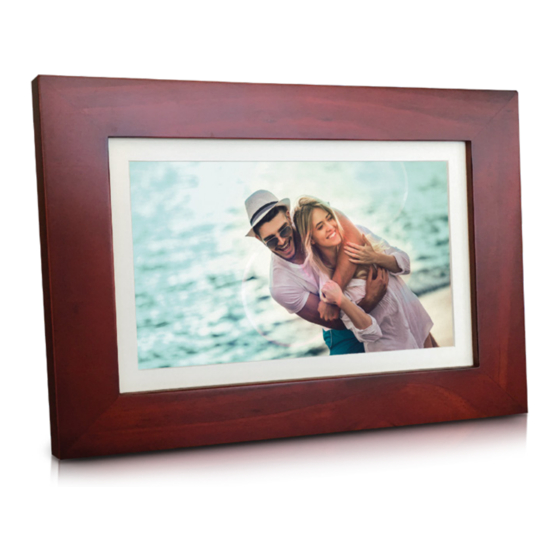
- Page 1 YEAR WARRANTY nexxtsolutions.com/warranty Smart Wi-Fi photo frame...
-
Page 2: Package Content
Thank you for purchasing the Smart Wi-Fi photo frame this jack from Nexxt Solutions. We are excited to be part of making 7. Power button: turns the frame on and o your life easier, safer and bringing peace of mind inside and 8. -
Page 3: Initial Setup
Initial setup Plug the adaptor into a standard wall outlet. You must connect to a 2.4GHz Wi-Fi network. Enter your Tap on the Setting button on the display to con gure the network password. Wi-Fi network. - Page 4 Installing the Nexxt Solutions Step 1 Home App 9:41 AM 60 % 9:41 AM 60 % 9:41 AM 60 % Nexxt Home Cancel Nexxt Home Cancel Register by email Nexxt Solutions Home App Nexxt Solutions Home App INSTALL Accvent LLC...
-
Page 5: Set Password
Step 2 Step 3 9:41 AM 9:41 AM 60 % 60 % Set Password Enter veri cation code 6-20 characters, including letters and numbers Completed Veri cation code has been sent to your Create a new password and then select Completed. Enter the veri cation code you received. -
Page 6: Add Device
Add device Step 4 Step 1 9:41 AM 60 % 9:41 AM 60 % 9:41 AM 60 % Select Add device, followed by the smart photo frame. The Nexxt Solutions Home account has been successfully set up. - Page 7 Step 2 Step 3 9:41 AM 60 % Important: During this process, make sure to maintain the Use your phone to scan the QR code on the frame screen. router and the frame as close as possible, and free from any obstructions not to degrade the quality of the signal.
-
Page 8: Device Name
Device name Step 4 9:41 AM 60 % 9:41 AM 60 % Smart WiFi Frame Device added successfully will be displayed. Click on the It allows the user to rename the device. To change the default name, click on Device name. pencil icon to change the device name if desired. - Page 9 Main frame interface Step 2 Step 1 9:41 AM 60 % 9:41 AM 60 % Smart WiFi Frame To add pictures, touch the + icon on the bottom of the Power button: use to turn on/o the frame through the screen.
- Page 10 9:41 AM 60 % 9:41 AM 60 % This screen will be displayed to request con rmation if you want to continue with the upload, tap on it to continue. An "uploaded successfully" screen will pop up once images are uploaded successfully.
-
Page 11: Schedule Setup
Schedule setup Step 1 9:41 AM 60 % 9:41 AM 60 % 9:41 AM 60 % Smart WiFi Frame When an individual image is selected, a new screen will be Click on the schedule icon to access the Add schedule displayed with the options to Delete it, Download it to screen. - Page 12 Step 2 Delete setup 9:41 AM 60 % 9:41 AM 60 % 9:41 AM 60 % 9:41 AM 60 % Set the time you wish to schedule. Select Repeat to set days of the week. Select Switch to schedule on/o status. Enable the Noti cation button to receive an alert on a scheduled activity of the frame.
- Page 13 Settings Device information: will show the data related to the Wi-Fi photo frame. Click on the pencil icon on the upper right-hand corner. Tap-To-Run and Automation: links the Wi-Fi photo frame with other smart products to automatically control them through a customized command. 9:41 AM 60 % O ine noti cation: selection button designed to...
- Page 14 Click on Delete. A noti cation con rming you your smart frame. don’t want to share the device with this user will be Note: family or friends will need their own Nexxt Solutions displayed. Click on Con rm to nish. Home Account to access the device.
- Page 15 Notes FCC ID#: X4YHASP600 Nexxt Solutions® is a registered trademark. All rights reserved. Amazon, Alexa and all related logos are trademarks of Amazon.com, Inc. or its a liates. Google, Android and Google Play are trademarks of Google Inc. All other brand names and trademarks are the...
-
Page 16: Descripción Del Producto
Gracias por adquirir el Portarretrato inteligente con compatible conexión Wi-Fi de Nexxt Solutions. Nos complace ser parte 6. Entrada de CC: inserte en este conjuntor el adaptador de la solución destinada no sólo a simpli car su vida, sino de corriente que se incluye con la unidad 7. -
Page 17: Configuración Inicial
Configuración inicial Enchufe el adaptador en un tomacorriente estándar de la pared. Pulse el botón de Con guración en la pantalla con el n de Debe conectarse a una red Wi-Fi de 2.4GHz. Ingrese la integrarlo a la red Wi-Fi. contraseña de su red. - Page 18 Instalación de la aplicación Paso 1 Nexxt Solutions Home App 9:41 AM 60 % 9:41 AM 60 % 9:41 AM 60 % Nexxt Home Cancel Nexxt Home Cancel Register by email Nexxt Solutions Home App Nexxt Solutions Home App INSTALL...
- Page 19 Paso 2 Paso 3 9:41 AM 9:41 AM 60 % 60 % Set Password Enter veri cation code 6-20 characters, including letters and numbers Completed Veri cation code has been sent to your Cree una contraseña nueva y seleccione Completo a Ingrese el código de veri cación que recibió.
- Page 20 Agregar dispositivo Paso 4 Paso 1 9:41 AM 60 % 9:41 AM 60 % 9:41 AM 60 % La cuenta Nexxt Solutions Home ha sido con gurada Seleccione Agregar dispositivo y a continuación, el satisfactoriamente. portarretrato inteligente.
- Page 21 Paso 2 Paso 3 9:41 AM 60 % Importante: Durante este proceso, asegúrese de mantener Con su teléfono, escanee el código QR desplegado en la el router y el portarretrato lo más cerca entre sí, en un área pantalla del marco. donde no existan obstrucciones con el n de evitar degradar la calidad de la señal.
- Page 22 Denominación del dispositivo Paso 4 9:41 AM 60 % 9:41 AM 60 % Smart WiFi Frame Aparecerá en la pantalla se agregó el dispositivo con éxito. Le permite al usuario cambiar el nombre del dispositivo. Oprima en el ícono del lápiz para cambiar al nombre del Con el n de cambiar la denominación predeterminada, dispositivo si lo desea.
- Page 23 Interfaz principal del Paso 2 portarretrato Paso 1 9:41 AM 60 % 9:41 AM 60 % Smart WiFi Frame Para agregar fotos, oprima el ícono + en la parte inferior de la pantalla. Botón de conexión: se utiliza para encender y apagar el marco a través de la aplicación.
- Page 24 9:41 AM 60 % 9:41 AM 60 % Esta pantalla aparece desplegada para solicitar con rmación de si quiere continuar cargando las fotos. Una pantalla de "cargadas con éxito" aparecerá una vez que las Esta pantalla mantiene un registro de todas las imágenes imágenes se carguen satisfactoriamente.
- Page 25 Programación de horarios Paso 1 9:41 AM 60 % 9:41 AM 60 % 9:41 AM 60 % Smart WiFi Frame Cuando se selecciona una imagen individual, se despliega una nueva pantalla con las opciones para Borrar dicha Haga clic en el ícono del horario para abrir la pantalla imagen, Descargarla a su dispositivo móvil o para Cerrar Agregar horario.
- Page 26 Paso 2 Borrar horario 9:41 AM 60 % 9:41 AM 60 % 9:41 AM 60 % 9:41 AM 60 % De na el horario que desea programar. Seleccione Repetir para programar los días de la semana. Seleccione Cambiar para alternar el estatus del horario entre activo e inactivo. Habilite el botón de Noti cación si desea recibir alertas relativas a las acciones que han sido programadas en el Con el nde eliminar un horario, deslice el ítem a la...
- Page 27 Configuración Activación rápida y automatización: enlaza el portarretrato Wi-Fi con otros productos inteligentes para controlarlos en forma automática mediante un comando Pulse el ícono del lápiz ubicado en el borde superior especial. derecho de la pantalla. Noti cación de desconexión: botón selector a través del cual es posible habilitar/inhabilitar esta función.
- Page 28 Nota: familiares o amigos necesitan establecer su propia aparecer en pantalla. Seleccione Con rmar al nal. cuenta de Nexxt Solutions Home para tener acceso al dispositivo.
- Page 29 Notas FCC ID#: X4YHASP600 Nexxt Solutions® es marca registrada. Todos los derechos reservados. Amazon, Alexa y todos los logos relacionados son marcas registradas de Amazon.com, Inc. o sus a liados Google, Android y Google Play son marcas registradas de Google Inc. Todas las demás marcas y nombres comerciales son propiedad de sus respectivos dueños.
- Page 30 Smart Wi-Fi photo frame...
Need help?
Do you have a question about the NHA-P600 and is the answer not in the manual?
Questions and answers