Table of Contents
Advertisement
Quick Links
Advertisement
Table of Contents

Summary of Contents for Portwell LEAD-PD-2150
- Page 1 LEAD-PD-2150/LEAD-PD-2360 (LED Backlight)
-
Page 2: Table Of Contents
Safety ..................................3 National Conventions ............................3 Power ................................4 Installation ................................5 Cleaning................................6 Other .................................. 7 Setup ..................................8 Content of the Box ............................. 8 Setup Stand ............................... 9 Adjusting Viewing Angle ........................... 10 Connecting the Monitor ............................ 11 Multi-Touch Screen ............................ -
Page 3: Safety
Safety National Conventions The following subsections describe notational conventions used in this document. Notes, Cautions, and Warnings Throughout this guide, blocks of text may be accompanied by an icon and printed in bold type or in italic type. These blocks are notes, cautions, and warnings, and they are used as follows: NOTE: A NOTE indicates important information that helps you make better use of your computer system. -
Page 4: Power
Power The monitor should be operated only from the type of power source indicated on the label. If you are not sure of the type of power supplied to your home, consult your dealer or local power company. The monitor is equipped with a three-pronged grounded plug, a plug with a third (grounding) pin. This plug will fit only into a grounded power outlet as a safety feature. -
Page 5: Installation
Installation Do not place the monitor on an unstable cart, stand, tripod, bracket, or table. If the monitor falls, it can injure a person and cause serious damage to this product. Use only a cart, stand, tripod, bracket, or table recommended by the manufacturer or sold with this product. -
Page 6: Cleaning
Cleaning Clean the cabinet regularly with cloth. You can use soft-detergent to wipe out the stain, instead of strong-detergent which will cauterize the product cabinet. When cleaning, make sure no detergent is leaked into the product. The cleaning cloth should not be too rough as it will scratch the screen surface. -
Page 7: Other
Other If the product is emitting a strange smell, sound or smoke, disconnect the power plug IMMEDIATELY and contact a Service Center. Make sure that the ventilating openings are not blocked by a table or curtain. Do not engage the LCD monitor in severe vibration or high impact conditions during operation. Do not knock or drop the monitor during operation or transportation. -
Page 8: Setup
Setup Content of the Box Monitor Adapter Power Cable Analog Cable HDMI Cable USB Cable Audio Cable Not all signal cables (Analog , Audio, USB and HDMI cables) will be provided for all countries and regions. Please check with the local dealer for confirmation. -
Page 9: Setup Stand
Setup Stand Please setup or remove the Stand following the steps as below. Setup Remove:... -
Page 10: Adjusting Viewing Angle
Adjusting Viewing Angle For optimal viewing it is recommended to look at the full face of the monitor, then adjust the monitor's angle to your own preference. Hold the stand so you will not topple the monitor when you change the monitor's angle. You are able to adjust the monitor's angle from 15°... -
Page 11: Connecting The Monitor
Connecting the Monitor Cable Connections In Back of Monitor and Computer Power Earphone out Audio in D-Sub HDMI 2 HDMI 1 USB Downstream USB Upstream Connect to PC Connect the power cord to the back of the display firmly. Turn off your computer and unplug its power cable. Connect the display signal cable to the video connector on the back of your computer. -
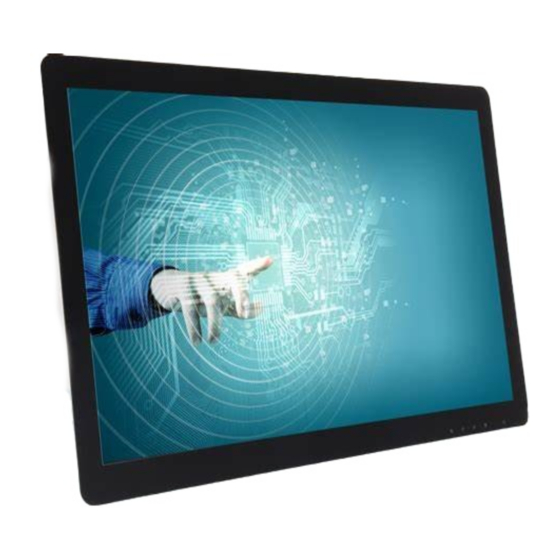
Page 12: Multi-Touch Screen
Multi-Touch Screen User can use Display Multi-touch Function under operating system higher than Window 7 home premium. Before using Display Multi-touch Function, user need to connect basic wires ( power cable, VGA cable, USB cable). Then user can fully enjoy Multi-touch Function. Part of specific use, please see the following drawings. -
Page 13: Wall Mounting
Wall Mounting Preparing to Install An Optional Wall Mounting Arm. This monitor can be attached to a wall mounting arm you purchase separately. Disconnect power before this procedure. Follow these steps: Fold the stand Follow the manufacturer's instructions to assemble the wall mounting arm. Place the wall mounting arm onto the back of the monitor. -
Page 14: Adjusting
Adjusting Hotkeys Source/Auto/Exit ECO/< Volume/> Menu/Enter Power Auto / Exit / Source hot key 1. When OSD menu is off, press to activate the Auto Adjustment function.The Auto Adjustment function is used to optimized the H.Pos, V.Pos, Clock and Focus. 2. -
Page 15: How To Adjust Setting
How to adjust setting Press the MENU button to display the OSD menu. Press + or - to navigate through the menu items. Once the desired item is highlighted, press the MENU button to enter. Press + or - again to navigate through the sub-menu. Once the desired item is highlighted, press MENU button to activate it. -
Page 16: Adjusting The Picture Settings
Adjusting the picture settings The descriptions for function control: Main Menu Main Menu Sub Menu Sub Menu Description Item Icon Item Contrast Contrast from Digital-register 0-100 Brightness Backlight Adjustment 0-100 Standard Standard Mode Text Text Mode Internet Internet Mode Luminance Eco Mode Game Game Mode... - Page 17 Main Menu Main Menu Sub Menu Sub Menu Description Item Icon Item Warm Recall Warm Color Temperature from EEPROM Normal Recall Normal Color Temperature from EEPROM Cool Recall Cool Color Temperature from EEPROM sRGB Recall sRGB Color Temperature from EEPROM Color Temp.
-
Page 18: Troubleshoot
Troubleshoot Problem & Question Possible Solutions Power LED Is Not ON Make sure the power button is ON and the Power Cord is properly connected to a grounded power outlet and to the monitor. Is the power cord connected properly? Check the power cord connection and power supply. - Page 19 The Computer Power Switch should be in the ON position. The Computer Video Card should be snugly fitted in its slot. Make sure the monitor's video cable is properly connected to the computer. Monitor Is Stuck In Active Inspect the monitor's video cable and make sure no pin is bent. Off-Mode"...
-
Page 20: Specification
Specification General Specification Product name LEAD-PD-2150 Driving system TFT Color LCD Viewable Image Size 54.7cm diagonal Pixel pitch 0.24825mm(H) x 0.24825m(V) Panel Video R, G, B Analog lnterface & Digital Interface Separate Sync. H/V TTL Display Color 16.7M Colors Dot Clock... - Page 21 Product name LEAD-PD-2360 Driving system TFT Color LCD Viewable Image Size 60.0cm diagonal Pixel pitch 0.2715mm(H) x 0.2715mm(V) Panel Video R, G, B Analog lnterface & Digital Interface Separate Sync. H/V TTL Display Color 16.7M Colors Dot Clock 170MHz Horizontal scan range 30 kHz - 83 kHz Horizontal scan Size(Maximum) 521.28mm...
-
Page 22: Preset Display Modes
Preset Display Modes Standard Resolution H. Frequency (kHz) V. Frequency (Hz) 640 x 480@60Hz 31.469 59.940 MAC MODE.VGA 640 x 480@67Hz 35.000 66.667 640 x 480@72Hz 37.861 72.809 640 x 480@75Hz 37.500 75.000 IBM MODE DOS 720 x 400@70Hz 31.469 70.087 800 x 600@56Hz 35.156... -
Page 23: Pin Assignments
Pin Assignments 15-Pin Color Display Signal Cable Pin No. Signal Name Pin No. Signal Name Video-Red Video-Green Ground Video-Blue N.C. N.C. DDC-Serial data Detect Cable H-sync GND-R V-sync GND-G DDC-Serial clock GND-B 19-Pin Color Display Signal Cable Pin No. Signal Name Pin No. -
Page 24: Plug And Play
Plug and Play Plug & Play DDC2B Feature This monitor is equipped with VESA DDC2B capabilities according to the VESA DDC STANDARD. It allows the monitor to inform the host system of its identity and, depending on the level of DDC used, communicate additional information about its display capabilities. -
Page 25: Regulation
Regulation FCC Notice FCC Class B Radio Frequency Interference Statement WARNING: (FOR FCC CERTIFIED MODELS) NOTE: This equipment has been tested and found to comply with the limits for a Class B digital device, pursuant to Part 15 of the FCC Rules. These limits are designed to provide reasonable protection against harmful interference in a residential installation. -
Page 26: Weee Declaration
WEEE Declaration Disposal of Waste Equipment by Users in Private Household in the European Union. This symbol on the product or on its packaging indicates that this product must not be disposed of with your other household waste.Instead, it is your responsibility to dispose of your waste equipment by handing it over to a designated collection point for the recycling of waste electrical and electronic equipment.The separate collection and recycling of your waste equipment at the time of disposal will help to conserve natural resources and ensure that it is recycled in a manner that protects human health and the environment. -
Page 27: 臺灣 Rohs
臺灣 RoHS 限用物質及其化學符號 單元 鉛 汞 鎘 六價鉻 多溴聯苯 多溴二苯醚 (Pb) (Hg) (Cd) (PBB) (PBDE) 塑料外框 ○ ○ ○ ○ ○ ○ 後殼 ○ ○ ○ ○ ○ ○ 液晶面板 - ○ ○ ○ ○ ○ 電路板組件 - ○ ○ ○...
Need help?
Do you have a question about the LEAD-PD-2150 and is the answer not in the manual?
Questions and answers