
Related Manuals for Aitchison SEEDMATIC PROFESSIONAL 8124A


Summary of Contents for Aitchison SEEDMATIC PROFESSIONAL 8124A
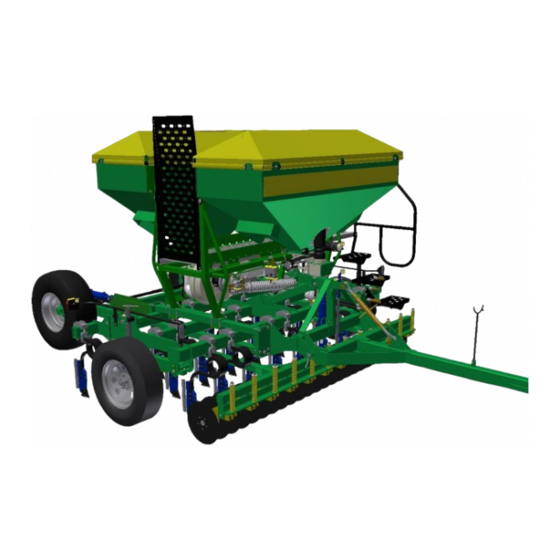
- Page 1 AITCHISON SEEDMATIC PROFESSIONAL 8124A DRILL REESE ENGINEERING LTD 41 KELVIN GROVE ROAD – PO BOX 5056 PALMERSTON NORTH, NEW ZEALAND PHONE: +64 6 357 9323 FAX: +64 6 354 3155 www.reeseagri.com...
- Page 2 P a g e...
-
Page 3: Table Of Contents
Table of Contents INTRODUCTION WARRANTY INFORMATION TO THE OWNER & OPERATOR TECHNICAL SPECIFICATION SAFETY FIRST GENERAL OPERATION IN THE FIELD PASTURELAND FARMING WITH THE AIR-PRO MANAGEMENT CONSIDERATIONS TECHNIQUES AND TIMING FOR PASTURE RENOVATION SIMPLE RULES TO FOLLOW FOR SUCCESSFUL PASTURE RENOVATION MICRO INSECTICIDE GRANULES IN PASTURE SOWING IN CULTIVATED SOILS SETTING UP SEEDMATIC FOR USE... -
Page 4: Introduction
It has often been said: “when all else fails-read the operators manual” and to ensure you get the best from your new Aitchison drill it is very important that you thoroughly read through the entire contents of the manual. Please also pay attention to the maintenance recommendations, understand the calibration system and consider the design features and their specific functionality. -
Page 5: Warranty Information
Subject to such other conditions, warranties, and/or undertakings which may apply from time to time under any applicable law, REESE warrants with respect to each new AITCHISON Machine sold by its accredited agents, that for a period of twelve months from the dates of original retail... -
Page 6: To The Owner & Operator
When ordering spare parts, quote the model and serial number of the drill and use the Aitchison part number given in the parts section. Reference to the right hand and left hand is taken from behind in the direction of travel. -
Page 7: Technical Specification
TECHNICAL SPECIFICATIONS Model 8124A Transport Width 3.30m 10.8ft Sowing Width 3.00m 9.8ft Height 2.50m 8.2ft Weight Empty 2150kg 4221lb Length 5.12m 16.8ft Seed Capacity 700lt 19.8bu Fertiliser Capacity 700lt 19.8bu Number of Coulters & row 125mm / 5” 24 Rows @ spacings Optional Accessories: Small Seeds Box. -
Page 8: Safety First
Replace missing or damaged safety signs, these can be ordered from your local Aitchison dealer. Learn how to operate the machine and how to use controls properly. Do not let anyone operate it without instruction. - Page 9 An implement safety lighting kit is available from Aitchison Industries. TRANSPORT SAFELY Do not exceed transport speed for machine; see your local Aitchison dealer. Never transport at any speed which does not permit adequate control of steering and stopping.
- Page 10 PRACTICE SAFE MAINTENANCE Understand service procedure before doing work. Keep area clean and dry. Never lubricate, service or adjust machine while it is moving. Keep hands, feet and clothing from power driven parts. Disengage all power and operate controls to relieve pressure.
-
Page 11: General Operation In The Field
GENERAL OPERATION IN THE FIELD The drill should always be moving forward when lowered or raised from work. Avoid stopping and never reverse with drill in work. These precautions will avoid blocking outlets; however, make periodic checks for blockages while drilling. The speed of travel is governed by the conditions e.g. -
Page 12: Techniques And Timing For Pasture Renovation
The basic requirement for seed germination is a warm moist seed bed. The aim should be to sow the seed at a time when there is sufficient moisture for quick germination, and little likelihood for later drought. The Aitchison opener/coulter however will promote germination in much drier soils than any other known coulter when used correctly. -
Page 13: Simple Rules To Follow For Successful Pasture Renovation
SIMPLE RULES TO FOLLOW FOR SUCCESSFUL PASTURE RENOVATION 13 | P a g e... -
Page 14: Micro Insecticide Granules In Pasture
MICRO INSECTICIDE GRANULES IN PASTURES In New Zealand where grass grub is a problem, excellent control has been attained with the use of Gesapon, Dasanit, Dysiston, Mocap, and Lindane in control of this pasture destroyer. Normal rates applied on the pasture surface can be as high as 30 kg/ha (26 lb/acre) but when sown in the soil and hence away from neutralizing effect sunlight, rates as low as four and five kg/ha can be used. -
Page 15: Sowing In Cultivated Soils
Green-feed Maize – Carry out in early spring and the same rules apply as with wheat, barley and oats. You may wish to seed in 30 or 45 cm (12” or 18”) rows and the technique for achieving that is shown under the section SPECIAL PURPOSE SEEDING shown later in this booklet. -
Page 16: Setting Up Seedmatic For Use
SETTING UP SEEDMATIC FOR USE. Connect the Seedmatic Drawbar to the tractors Towbar. Make sure you use a safety clip on the drawbar pin. If you are to travel on public roads, ensure you fit a SAFETY CHAIN between the Seedmatic Drawbar and the tractor’s Towbar. - Page 17 17 | P a g e...
-
Page 18: Setting The Depth Wheels
SETTING THE DEPTH WHEELS. With the Seedmatic sitting on hard flat ground, the depth wheels should be 10- 50mm clear of the ground, depending on your desired seeding depth. There is an adjustment handle at the top of each depth leg, use this to adjust the legs. There is a depth gauge at the top of each depth leg, check that both depth legs are set at the same height When the drill is in work, the best way to check your seeding depth is to have a... -
Page 19: Disc Coulter Kitset
DISC COULTER KITSET The Disc Coulters are designed to help cut trash/residue or stubble that may be present in the field. This trash/residue or stubble is cut into short lengths by the Disc Coulters, allowing the trash/residue or stubble to flow more efficiently past the Seed Openers with fewer blockages. -
Page 20: Tine Placement
TINE PLACEMENT 8124CTE Tine Placement 20 | P a g e... -
Page 21: Tine Clamps
TINE CLAMPS The 8000 Series Seedmatic is fitted with new 75mm Saddle Clamps, these clamps have been designed to stop the tines from “walking” along the tool bars. Some care needs to be taken when fitting these new clamps. When fitting or adjusting ensure that the M16 bolts are tightened evenly so both the Saddle Clamp and the straight leg of the tine are parallel to each other. -
Page 22: Electronic Drive Head Unit & Calibration
AITCHISON SEEDMATIC Electric Drive Head Unit 22 | P a g e... - Page 23 Introduction: The Aitchison E-Drive Head Unit provides a simple and convenient means of monitoring and controlling your seed drill. The interface has been designed to efficiently convey all relevant information on the home screen. All functionality is at most a few clicks away, with all the key features easily accessible.
- Page 24 Settings: This menu is used to set the display units, start calibration, access advanced system settings, view this user manual Empty hoppers and refresh the interface. This menu is accessed from the home page by clicking the top right “Settings” button. See: Units, Calibration, Advanced Settings Empty...
- Page 25 [top right]. The Download button saves the job information and report to a connected USB flash drive under: “:\aitchison\reports”. If the device is not avalable, plug it back in and wait 10s. The Delete button deletes the job from the job manager.
- Page 26 Dashboard: The dashboard has been designed to efficiently convey information to the operator. A tile-based layout organises related information into clusters, making it easy to navigate and interact with. This model has three clusters: General, Seed Hopper and Fert Hopper. The Seed Hopper and Fert Hopper clusters provide monitor and control for the respective hoppers and are fundamentally the same.
- Page 27 • Settings: Used to alter the settings of the tiles contained by the cluster. The hopper cluster tiles are used to set the application rate as well as monitor: the perceived rate, the shaft speed and the area covered by the hopper. •...
- Page 28 Accessed using the “Settings” Menu. See: Settings. Calibration: The Aitchison E-Drive Calibration provides an easier and faster means of setting up your Seed Drill compaired to the traditional calibration process. This section describes how to set up and complete the calibration process.
- Page 29 Advanced Settings: The advanced settings menu is used for system configuration. This is where the wheel circumference can be set, and the dedicated-on screen keyboard can be enabled/disabled. At the top of the advanced settings menu, a tile cluster shows the: Top Speed, Total Seed Area and Total Fert Area for the lifetime of the system.
- Page 30 dropdown menu. Note: To find this job in the future, it is important to give the Job a Name or set the customer. 6. Calibrate: For the best results, it is important to calibrate often. For a detailed description see Calibration. 7.
-
Page 31: Seed & Fertiliser Rates
SEED & FERTILISER RATES Your 8124ACT is fitted with two adjustable fluted rollers; these fluted rollers gauge the amount of seed/fertiliser that is to be dispensed into the airstream. This chart can be used as a guide; the variable speed motors will take care of the rest. -
Page 32: Fine Seed Setting
FINE SEED SETTING Each fluted roller-metering unit has a FINE SEEDS setting; this fine seed setting is used for the metering of fine seeds or granules at low rates. The fine seed lever works on from 0 to 25 on the fine seed scale “Z”, if higher rates than this are needed the fine seeds lever needs to be locked out and the STANDARD SOWING SCALE “A”... -
Page 33: Seed & Fertiliser Delivery System
SEED & FERTILISER DELIVERY SYSTEM The Seedmatic Professional 8124A AirSeeder is fitted with one blower fan, this fan is powered by the tractor’s hydraulics. This system requires continuous oil flow. One PRIORITY hydraulic bank with the lever locked on, (motor spool) setting. It’s very important that the fan maintains a constant speed especially when the seed drill is lifted for the headlands. -
Page 34: General Maintenance
GENERAL MAINTENANCE LUBRICATION Machines Grease Points: • 2 per Disc Coulter Pod assembly. • Drive Leg assembly • Depth Leg assembly • Seed Shaft drive. • Fertiliser Shaft drive. • Rear Transport assembly. Greasing location points are labelled on the drill with the “Grease” sticker (shown above). -
Page 35: Parts Breakdown
PARTS BREAKDOWN 35 | P a g e... - Page 36 36 | P a g e...
- Page 37 37 | P a g e...
- Page 38 38 | P a g e...
- Page 39 39 | P a g e...
- Page 40 40 | P a g e...
- Page 41 41 | P a g e...
- Page 42 42 | P a g e...
- Page 43 43 | P a g e...
- Page 44 LH of Turnstile A3544-01 Bearing 6009-2rs A3544-54 RH of Turnstile A3544-02 Safety Ring 75 A3544-37 Covering A3544-03 Safety Ring 45 A3544-38 Cylinder A3544-04 M6 Washer 9023 Cover A3544-05 M6 Washer 9022 Curtain A3544-06 Flexible Pin 4x32 A3544-33 A3544-07 M6 Washer 9022 Door A3544-08...
- Page 45 45 | P a g e...
- Page 46 46 | P a g e...
- Page 47 47 | P a g e...
- Page 48 48 | P a g e...
- Page 49 49 | P a g e...
- Page 50 50 | P a g e...
Need help?
Do you have a question about the SEEDMATIC PROFESSIONAL 8124A and is the answer not in the manual?
Questions and answers