
Related Manuals for TERK Technologies TUNVR2

Summary of Contents for TERK Technologies TUNVR2
- Page 1 TUNVR2 HD DIGITAL TV TUNER WITH RECORDING SETUP GUIDE Check out setup videos at www.TERK.com/Setup...
-
Page 2: What's Included
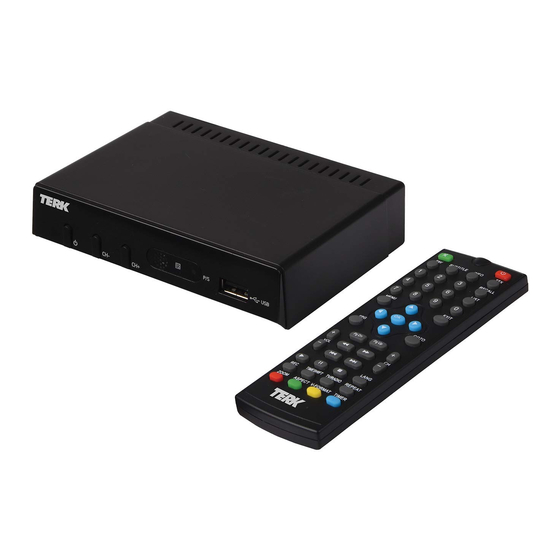
WELCOME Congratulations on your purchase of the Terk HD Digital TV Tuner with Recording! This product combines an HDTV Tuner with Recording Capability to let you get the most from your FREE local HD channels. This Setup Guide takes you through the steps to get started. What’s included: What’s NOT included: • HD Television Tuner... - Page 3 SETTING UP TV Antenna Connect the HD Digital TV Tuner to an antenna. HD Digital TV Tuner Back Panel Connect the coaxial cable from your TV antenna to the ANTENNA IN jack on the back of the HD RF IN RF OUT VIDEO DC IN Digital TV Tuner. Note: For best results, we recommend Terk TV antennas. Connect the HD Digital TV Tuner to your TV, monitor, or projector.
- Page 4 SETTING UP (continued) (Optional) Pass through the antenna TV Antenna signal to your HDTV. HD Digital TV Tuner If your HDTV has its own tuner, you can “pass through” your antenna’s signal to it so that both the HD Digital TV Tuner and your HDTV can use the same antenna. RF IN RF OUT RF OUT VIDEO DC IN (That means you can watch one channel on your TV while the HD Digital TV Tuner records another.) Connect a coaxial cable (not included) to the HD HDTV Digital Tuner’s RF OUT jack. Connect the other end to your HDTV’s antenna jack. To watch your HDTV while the HD Digital To watch the TV or recordings from TV Tuner records something else: your HD Digital TV Tuner:...
- Page 5 SETTING UP (continued) Plug in the HD Digital TV Tuner. HD Digital TV Tuner Back Panel Plug one end of the included AC adapter into the DC IN jack on the back of the HD Digital RF IN RF OUT VIDEO DC IN TV Tuner. Plug the other end into a working AC outlet or surge protector. Install batteries in the tuner’s remote. Open the battery compartment on the back of the remote. Then insert 2 AAA batteries (not included) in the battery compartment, matching the batteries to the (+) and (–) marks on the inside of the compartment. Turn on your TV and make sure it’s on the correct input. Press the power button for your TV, monitor, or projector (either on the remote that came with it or on the device itself). Then press the button that changes input on this device or its remote until you see the input you used for the tuner. For example, if you...
- Page 6 SETTING UP (continued) Turn on the HD Digital TV Tuner (if it’s not already on). Press the button on the front of the tuner or on the tuner’s remote to turn it on. The power indicator on the front of the tuner lights up and CH– the TERK screen appears on your TV, monitor, or projector. CH– Go through the Installation Guide to perform a Channel Search. The first time you turn it on, the tuner will take Installation Guide you through an Installation Guide. Use the arrow buttons on your remote to choose your preferred OSD Language English language for the menus (OSD Language) and Country...
- Page 7 SETTING UP (continued) Channel Search The tuner launches the auto search for channels. This 473.0MHz/6MHz allows your tuner to program all of the broadcast DTV: 003 channels you receive into its channel memory. This 001 WTHR-HD 002 COZI TV step could take up to 30 minutes. The Progress bar 003 Me-TV shows how much of the search has been completed. IMPORTANT: Make sure you have your antenna connected to the tuner and pointed toward where Progress your broadcasts are coming from. EXIT Skip EXIT...
- Page 8 SETTING UP (continued) (Optional) Connect a USB drive to the tuner for recording. Connect a USB drive to the USB port on the tuner’s front panel. CH– Note: Not all USB drives are compatible with this tuner. For best results, use USB 3.0 portable Hard Drives and Flash drives. CH– (Optional) Configure the USB drive for your preferences. Press the PVR button on the remote. Use the arrow buttons to highlight the PVR Configure PVR Configure...
-
Page 9: Remote Control
TOUR OF THE HD DIGITAL TV TUNER Remote Control MUTE POWER SUBTITLE INFO MUTE / Mutes and unmutes the audio from the tuner. RECALL POWER / Turns the tuner on or puts it in standby mode. DVR LIST FAV Displays the Favorite Channel List (see page 22 for more information). SUBTITLE Turns on subtitles (if available). MENU EXIT INFO Shows/hides program info. Press once to show program info. Press twice to show detailed info with signal meter. While recording or watching GUIDE GOTO a recording, displays detailed record info. CC Turns on closed captioning (if available) and selects from available CC PgDn PgUp types. 0-9 Inputs numbers, including channels to watch. LANG RECALL Goes back to the previous channel. TIMESHIFT TV/RADIO REPEAT DVR LIST Displays the list of DVR recordings on the USB device. - Page 10 GUIDE Displays the tuner’s program guide and recording setup schedule. GOTO Goes to a selected program time during playback of a recorded program (see page 19 for more information). PgDn / PgUp Goes up or down one page in a multipage list (like the Guide or Recordings list). VOL+/– Adjusts volume. Scans in reverse or forward. Repeated presses select the scan speed (2X, 4X, 8X, 16X, 32X). Goes to the next or previous file or recording. CH+/– Changes channel. Starts/pauses playback of a recording. While watching a program or when recording a program, pressing pause starts Timeshift mode (see page 20 for more info). Stops video playback or recording. LANG Selects from the available audio modes. REC Starts a DVR recording. TIMESHIFT Goes into timeshift mode for live TV. TV/RADIO Has no function with this tuner. REPEAT Chooses a repeat playback mode (repeat program, repeat the folder, or play random from folder). ASPECT Changes the aspect ratio of currently displayed video. V-FORMAT Selects the resolution of the tuner’s output. DVR TIMER Enters Timer mode to schedule a program recording.
-
Page 11: Back Panel
TOUR OF THE HD DIGITAL TV TUNER (continued) HD Digital TV Tuner Back Panel Front Panel CH– RF IN RF OUT VIDEO DC IN Power/status indicator RF IN jack Connects to a TV antenna to receive button Turns the tuner on or puts it in standby local broadcasts. mode. RF OUT jack Connects to your TV using a coaxial CH+/– buttons Goes up and down through the cable (not included) so you can watch one tuner’s channel list. channel while the TERK tuner records another. Note: Your TV must have its own tuner for this Power/status indicator Shows when the tuner is functionality. This output does not play back... -
Page 12: Everyday Operation
EVERYDAY OPERATION The Program Guide The HD Digital TV Tuner offers a program guide for each channel, showing the upcoming schedule for that channel To see an program guide for the current P ro g r a m G u i d e channel: Press the GUIDE button on the 6-1 WRTV-HD Mon. 21 Nov 2016 11:23 AM 21 Nov 11:00AM - 12:00PM The View The View remote. - Page 13 EVERYDAY OPERATION (continued) Info Banners WRTV-HD 11:25AM 11:00AM - 12:00PM The View 12:00PM - 12:30PM THE NEWS at Noon on RTV6 When you change channels or press the 16:9 720P INFO button, the Info banner appears briefly Info Banner (first press) on the top of the screen. If you press INFO a second time, the detailed WRTV-HD Info screen appears. This screen has more 11:00AM-12:00PM The View Frequency:539MHz information about the channel, including a 12:00PM-12:30PM THE NEWS at Noon... Bandwidth:6MHz signal meter that shows the quality of the Page: 1/1...
- Page 14 EVERYDAY OPERATION (continued) Recording and Timeshifting Programs (PVR) The HD Digital TV Tuner can record your favorite programs or timeshift regular TV while you’re watching. To start recording, however, you need to connect and set up a USB drive (not included, see page 15 for more information) as a recording device. Configuring a Record Device Before you use the PVR function of the tuner, Set Up make sure you’ve configured your USB drive the way you want it to be used by the tuner. PVR Configure 1. Press MENU on the remote. 2. Press the right arrow buttons to highlight PVR Configure the Setup icon. Record Device Return Confirm EXIT 3. In the Set Up menu, highlight PVR Format Configure and press OK. 4. In the PVR Configure menu, highlight Record Device and press OK. Return Confirm EXIT...
- Page 15 EVERYDAY OPERATION (continued) 5. In the Record Device screen, highlight the Record Device option you want to change, then use the left/ right arrows to adjust it. Disk C: (USB1) Timeshift Size 1.0 GB Disk lets you choose where the recordings are Media Type FAT32 stored (the only option for this is C: (USB1)). Disk Total Space 931.25 GB Disk Free Space 897.55 GB Timeshift Size sets the size of the memory allocated to the Timeshift mode (for when you pause/play live TV without recording it). EXIT Confirm EXIT Formating a USB device (Flash Drive or HD) You don’t need to re-format a USB drive in order to use it with the tuner.
-
Page 16: Recording Programs
EVERYDAY OPERATION (continued) Recording Programs The HD Digital TV Tuner offers several ways of recording programs. You can record the program you’re watching (real-time recording), schedule a program to record from the program guide, or set a timer to record a program. Real-Time Recording You can start recording at any time while you’re watching a program. To start recording: Press the REC button on the remote. The tuner will start recording and a record timer will appear in the top left corner of the screen. (To clear the timer from the screen, press EXIT. To bring it back, press INFO.) To stop recording: Press the button on the remote. For information on accessing your recorded programs, see the Playing Back Recordings section on page 19. - Page 17 EVERYDAY OPERATION (continued) Scheduling Recording from the Program Guide You can schedule a program to record by selecting it in the program guide. 1. Press the GUIDE button on the remote to P ro g r a m G u i d e 6-1 WRTV-HD Mon. 21 Nov 2016 11:23 AM access the program guide. 21 Nov 11:00AM - 12:00PM The View The View 21 Nov 12:00PM - 12:30PM THE NEWS..
- Page 18 EVERYDAY OPERATION (continued) Scheduling Recording with a Timer You can manually schedule a program to record—you’ll need to enter the channel, date, and time manually. 1. Press the GUIDE button on the remote to P ro g r a m G u i d e access the program guide. 6-1 WRTV-HD Mon. 21 Nov 2016 11:23 AM 2. In the Program Guide, press the INFO button 21 Nov 11:00AM - 12:00PM The View The View 21 Nov 12:00PM - 12:30PM THE NEWS..
-
Page 19: Playing Back Recordings
EVERYDAY OPERATION (continued) Playing Back Recordings The tuner stores all of the programs you’ve recorded on your USB drive. To access a list of recordings: Press the DVR LIST button on the remote. A list of recordings appears. To preview one of the recordings in the list: Click on a program in the list. It starts playing in the preview window. You can fast forward, reverse, pause, and stop the preview. To watch a program from the list: Click on a program in the list and press the red button on the remote to view the program full screen. To delete a program: Press the GUIDE button. To rename a program: Press the TIMER button. Controlling Playback There are several ways you can control a recording while it’s playing. -
Page 20: Timeshifting Live Tv
EVERYDAY OPERATION (continued) Timeshifting Live TV The Timeshift function lets you pause a program you’re watching or recording. The program holds its place during the pause and continue from this spot when you’re ready to start again. To start timeshifting: Press the button on the remote. To continue the program: Press the or button while the program is paused. To scan forward or reverse through the timeshifted material: Press the or button. IMPORTANT: Timeshifting live TV doesn’t store the program you’re watching in your recordings—it just stores it temporarily so you can play and pause it at your convenience. -
Page 21: The Menu System
THE MENU SYSTEM The HD Digital Tuner Menu System Most of the tuner’s functions can be accessed and adjusted through its menu system, which has the following seven different submenus, accessible via icons at the top: • Program • Picture • Channel Search • Time Program • Option • System Program Edit • Set Up Guide To access the menus: Press the MENU button on the remote. Then use the left/right arrow buttons to highlight the menu you want. Return Confirm EXIT To exit the menus: Press the MENU button again. To return to a previous menu: Press the EXIT button on the remote. -
Page 22: Program Menu
THE MENU SYSTEM (continued) Program Menu Program The Program menu lets you access the Program Guide. It also lets you change, edit, or favorite the Program Edit channels in your channel list. Guide Editing Your Channel List 1. In the Program Menu, highlight Program Edit and press the OK button. The tuner will ask for Return Confirm EXIT a password—if you haven’t set one yet, enter “000000.” 2. In the Program Edit screen, highlight the channel in the list you want to edit or make a favorite. To move it in the list: Press To skip it in the list: Press To lock it (password protect): Press To delete it from the list: Press To make it a favorite: Press FAV. Then select... -
Page 23: Picture Menu
THE MENU SYSTEM (continued) Picture Menu Picture The Picture menu lets you set the aspect ratio and resolution of the tuner’s output to match Aspect Ratio 16:9 Wide Screen your TV. Resolution 1080P (60Hz) Changing Aspect Ratio or Resolution 1. In the Picture Menu, highlight the option you want to change, Aspect Ratio or Resolution. Return Confirm EXIT 2. Use the left/right arrows to go through the options available. Aspect Ratio: Auto, 16:9 Pillar Box, 16:9 Pan&Scan, 4:3 Letter Box, 4:3 Pan&Scan, 4:3 Full, 16:9 Wide Screen Resolution: 1080i, 1080p (60Hz), 480i, 480p, and 720p Note: You can also change the tuner’s resolution by pressing the V-FORMAT button on its remote. - Page 24 THE MENU SYSTEM (continued) Channel Search Menu Channel Search The Channel Search menu gives you several options for finding channels to add to the tuner’s Auto Search channel list. Manual Search Auto Search Add Channels Auto Search scans and adds all digital channels found (used in the initial setup). Manual Search lets you go through channel Return Confirm EXIT frequencies manually to find and add individual digital RF channels. Use right/left arrows to go through channels and check the strength of their Channel Search signal (“Quality”). 473.0MHz/6MHz Manual Search DTV: 003 001 WTHR-HD Note: The Frequency channel listed is the RF 002 COZI TV 003 Me-TV...
- Page 25 THE MENU SYSTEM (continued) Time Menu Time The Time menu lets you set your time zone, your daylight-saving time setting, and set up sleep Time Offset Auto and power on/off timers. Country Region Eastern Time Zone GMT –5 IMPORTANT: Leave the Time Offset in the Auto Sleep Daylight Time setting at first. The tuner should be able to pull Power On/Off your region, time zone, and daylight-saving time settings from broadcast information and set...
-
Page 26: Option Menu
THE MENU SYSTEM (continued) Option Menu Option The Option menu lets you set your preferences for menu and audio language, as well as your OSD Language English closed captioning preference and the kind of Close Caption Audio Language English digital audio the tuner outputs. Digital Audio To set your language preference for menus and audio: Highlight OSD Language (for menus) or Audio Language, then use the left/right arrows Return Confirm EXIT to choose from the options. Setting Close Captioning Options 1. In the Option menu, highlight Close Caption and press OK to select it. - Page 27 THE MENU SYSTEM (continued) CC Display CC Off, CC2, CC3, CC4, CC5, Close Caption CC Position Auto, Top, Bottom CC Display CC OFF Font Size Default, Small, Medium, Large CC Position Auto Font Size Default Font Color Default, White, Black, Red, Font Color Default Green, Blue, Yellow, Magenta, BG Color Default Cyan CC Transparency Default Background Default, White, Black, Red, Return Confirm...
- Page 28 THE MENU SYSTEM (continued) System Menu System The System menu lets you set your own password and establish parental guidance Parental Guidance settings. It also lets you access information about Set Password Restore Factory Default the tuner, restore factory settings, and update Information the tuner’s software. Software Update Setting Parental Guidance Controls Return Confirm EXIT 1. In the System menu, highlight Parental Guidance and press OK to select it. 2. Enter your password to access the Parental System Guidance menu. (If you haven’t entered a Parental Guidance Input Password Set Password password already, enter “000000.”) - - - - - - Restore Factory Default...
-
Page 29: Setting Your Password
THE MENU SYSTEM (continued) MPAA lets you use MPAA ratings for parental controls. Parental Guidance TV lets you set the limits for TV ratings for System Lock parental controls. Rating Region MPAA Return Confirm EXIT Setting Your Password 1. In the System menu, highlight Set Password Set Password Input Old Password - - - - - - and press OK to select it. Input New Password - - - - - - 2. Enter your old password to access the Set Confirm Password - - - - - -... -
Page 30: Restoring Factory Defaults
THE MENU SYSTEM (continued) Restoring Factory Defaults Restoring factory defaults returns the tuner to the same settings it when it originally came from the factory. This can be useful for troubleshooting, if nothing else seems to work. 1. In the System menu, highlight Restore Factory Defaults and press OK to select it. 2. Enter your old password. (If you haven’t entered a password already, enter “000000.”) Getting System Information and Performing a Software Update The last two items in the System menu are for technical help. The System Information screen tells you the software and hardware versions your tuner is using. The Software Update option allows you to update the tuner software from a USB device. -
Page 31: Troubleshooting
TROUBLESHOOTING Problem Possible Cause What to do No sound and no picture The TUNVR2 is in standby mode. Press the Power button to turn it on. No signal Antenna not connected Connect your antenna Picture with no audio The TV or the TUNVR2 is muted Check that both the TUNVR2 or volume is turned down on TV and the TV are unmuted and that or TUNVR2 their volumes are turned up Picture is mosaic or intermittent Weak reception Adjust the antenna and check antenna connections. Remote does not work Weak batteries or remote not Replace batteries and check aimed at the TUNVR2 for obstructions blocking the TUNVR2 TUNVR2 will not power up with USB device may draw too much Try connecting the USB device USB Hard Drive or Flash Drive power or have a communications after the TUNVR2 has powered connected, error. up. Some USB Extreme devices require that the tuner be on first. - Page 32 TROUBLESHOOTING (continued) No picture or sound HDMI or video/audio cable not Check HDMI or video/audio connected cable connections Program stopping during record USB device not fast enough. USB device should be USB 3.0 or playback Tuner locks up Tuner software crash Unplug the tuner, wait 30 seconds, then plug it back in. Recordings don’t play back The TUNVR2 is connected to Use the TUNVR2’s HDMI or your TV via the RF Out jack. VIDEO output jacks to connect to your TV. The RF OUT jack does not play back recordings. TUNVR2 IB 03...
Need help?
Do you have a question about the TUNVR2 and is the answer not in the manual?
Questions and answers