Table of Contents
Advertisement
Advertisement
Table of Contents

Summary of Contents for Titan WCBX62S IM-CHUTE62 IM
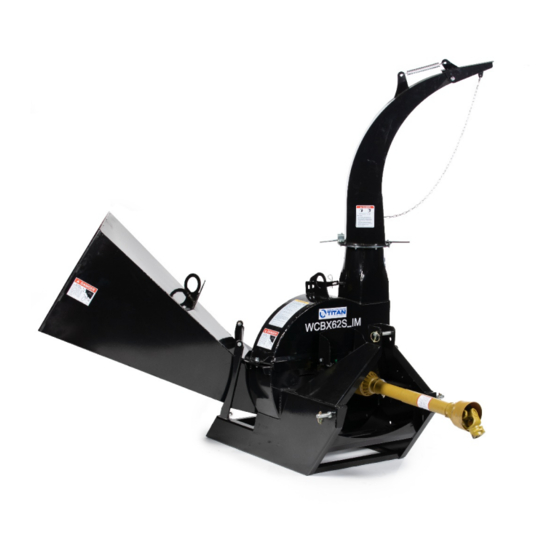
- Page 1 3PT PTO 6” WOOD CHIPPER WCBX62S_IM-CHUTE62_IM 198268 Operator’s Manual Read the Operator’s Manual entirely. When you see this symbol, the subsequent instructions and warnings are serious follow without exception. Your life and the lives of others depend on it!
-
Page 2: Important Safety Information
IMPORTANT SAFETY INFORMATION THESE ARE STANDARD PRACTICES THAT MAY NOT APPLY TO THE PRODUCTS DESCRIBED IN THIS MANUAL. SAFETY AT ALL TIMES Thoroughly read and understand the instructions given in this manual before operation. Refer to the “Safety Label” section, read all instructions noted on them. Do not allow anyone to operate this equipment who has not thoroughly read and comprehended this manual. -
Page 3: For Your Protection
BE AWARE OF SAFETY ALERT WORDS DANGER: Indicates imminently hazardous practices. A situation that, if not avoided, will result in death or severe injury. The signal word is limited to the most extreme situation, typically for machine components that, for functional purposes, cannot be guarded. WARNING: Indicates a potentially hazardous situation that, if not avoided, could result in death or severe injury, and includes hazards that are exposed when guards remove. -
Page 4: Prepare For Emergencies
KEEP RIDERS OFF MACHINERY Riders obstruct the operator’s view; they could be struck by foreign objects or thrown • from the machine. Never allow children to operate equipment. • Practice Safe Maintenance • Understand procedure before doing work. Use proper tools and equipment; refer to •... -
Page 5: Tire Safety
TIRE SAFETY Tire changing can be dangerous, and trained personnel should be the only ones using • correct tools and equipment. When inflating tires, use a clip-on chuck and extension hose long enough to allow you to • stand to one side and NOT in front of or over the tire assembly. Use a safety cage if available. -
Page 8: Section 1: Assembly And Set-Up
INTRODUCTION APPLICATION (WCBX62S) The WCBX62S woodchipper is built by TITAN to reduce unwanted tree limbs into useful landscape mulch typically found in flower beds, gardens or just about anything you want to help retain moisture or just to aid in decomposition. It has uses and applications in farming, ranching, nurseries, campuses, estates, and construction sites. - Page 9 PACKAGING DESCRIPTION 1. REMOVE AND CHECK a. Remove the packing, check goods without defect and omission. Figure 1-1: Your New Woodchipper as It Is Shipped to You Figure 1-2: The Main Body of Woodchipper and Accessory in The Shipping Crate 1 Figure 1-3: The Self-Feed Hooper Assy in The Shipping Crate 2...
-
Page 10: Packing List
2. PACKING LIST a. The detailed packing list as the following table 1 & 2. The detailed description of Self-Feed Hooper Assy and Fittings Table 1-3: Self-Feed Hooper Assy and Fittings List... - Page 11 ASSEMBLY INSTRUCTIONS The assembly instructions will guide you to finish the final assembly of your new woodchipper easily. 1. Tool Required 2. ½” Ratchet wrench with 19mm sleeve, Allen wrench 5mm 8#-10# spanner, 17#-19# Spanner 3. Torque Application 4. Refer to “Bolt Torque” on page 30. 5.
- Page 12 STEP 2: INSTALLING SELF-FEED HOOPER ASSY AND FITTINGS Remove the packaging of Self-Feed Hooper Assy and fittings. Use item5 and item6 to fix the Self-Feed Hooper assembly to the main body of woodchipper Tighten item5 appropriately to ensure item1 could turn freely. Use Item 2 to item4 to fix the Self-Feed Hooper assembly to the main body of woodchipper Tighten item4 completely.
-
Page 13: Tractor Hook - Up
TRACTOR SHUT DOWN PROCEDURE The following are basic tractor shutdown procedures. Follow these procedures and any additional shutdown procedures provided in your tractor Operator’s Manual before leaving the operator’s seat. 1. Reduce engine speed and disengage power take-off if engaged. 2. -
Page 14: Section 2: Operating Instructions
SECTION 2: OPERATING INSTRUCTIONS TRANSPORTING Note: Always disengage PTO before raising woodchipper to transport position. 1. When raising the woodchipper to transport position, be sure that driveline does not contact tractor or implement. Adjust and set tractor lift arms height so that the driveline does not contact implement in the fully raised position. - Page 15 5. With engine speed at a low idle, engage power take-off and then slowly increase engine speed to 540 rpm. 6. Untangle product before inserting it into the feed chute. Slowly slide one piece at a time into the feed chute toward the rotor knives. 7.
- Page 16 take-off drive shaft. Check to make sure everything is running smoothly. If not, safely shut the tractor down to make necessary corrections. If everything is in proper working condition, you are ready to move to the work site. At the work site you should rotate the discharge chute to direct product away from the •...
-
Page 17: Section 3: Adjustments
SECTION 3: ADJUSTMENTS DISCHARGE CHUTE ANGLE 1. Push down on rotation chute lock lever (#1) and hold together with handle (#3). 2. Rotate discharge chute (#2) in small increments until desired angle of discharge is achieved. 3. Release lock lever (#1). Make sure lever has locked into position and chute cannot rotate. - Page 18 1. Make certain gear selector is in park and park brake is set. Disengage power take-off, shut tractor engine off, remove switch key, and wait for all moving parts to come to a complete stop before working on this unit. 2.
-
Page 19: Section 4: Maintenance And Lubrication
Figure 3-4: Cut Away View or Rotor, Ledger Knife, and Rotor Knife NOTE: Credit card can be used to set gap. Tolerances in manufacturing vary due to weld pull. Set closest rotor knife to ledger with 1mm shim and lock ledger in place. Rotate rotor and check all other rotor knives for clearance. - Page 20 To avoid serious injury or death: Do not operate woodchipper with an out-of- • balance rotor, damaged or worn knives. Internal parts can work loose or break at high • speeds. Always replace all blades at the same time. Perform scheduled maintenance. Check for loose hardware, missing parts, broken parts, •...
- Page 21 REVERSE ROTOR KNIVES Flip rotor knives over so that the sharp edges are leading in rotation and reattach them with existing bolts. Continue with step 6-8 on this page. RE-SHARPEN ROTOR KNIVES Refer to Figure 4-1: All rotor knives should be sharpened at the same original angle of 45° and must be sharpened at the same service time to maintain proper balance.
-
Page 22: Shear Bolt Protection
TWIG BREAKER BAR The twig breaker bar does not require any special maintenance and should last a long time. Replace twig breaker bar if it becomes damaged or worn thin. 1. Shut tractor down properly before dismounting. Refer to “Tractor Shutdown Procedure” on page 14. -
Page 23: Long Term Storage
1. Always determine the cause of the problem and fix it before putting the chipper back into service. 2. Shear bolt storage holes are located on frame rails on either side. See Figure 1-7 on page LONG TERM STORAGE Clean, inspect, service, and make necessary repairs to the implement when storing it for long periods and at the end of the season. -
Page 24: Section 5: Troubleshooting
SECTION 5: TROUBLESHOOTING... -
Page 26: Section 6: Appendix
SECTION 6: APPENDIX BOLT TORQUE The tables shown below give correct torque values for various bolts and cap screws. Tighten all bolts to the torques specified unless otherwise noted. Check tightness of bolts periodically, using bolt torque chart as a guide. Replace hardware with the same strength bolt. - Page 27 WOODCHIPPER PARTS DIAGRAM / EXPLODED VIEW...
- Page 28 WOODCHIPPER PARTS DIAGRAM / EXPLODED VIEW...
- Page 29 DISCHARGE CHUTE PARTS DIAGRAM / EXPLODED VIEW...
- Page 30 SELF-FEED HOOPER PARTS DIAGRAM / EXPLODED VIEW...
- Page 31 ROTATE ROTOR PARTS DIAGRAM / EXPLODED VIEW...
- Page 32 Titan, its insurers, employees, officers, directors, associates, and agents from any and all claims, demands, damages, rights of action, or causes of action, present or future, whether the same be known or unknown, anticipated, or unanticipated, resulting from or arising out of the use of said equipment.
- Page 33 NEED HELP? CONTACT US FIRST. 1-800-605-7595 info@palletworks.com www.palletforks.com © 2021 Titan Brands...
Need help?
Do you have a question about the WCBX62S IM-CHUTE62 IM and is the answer not in the manual?
Questions and answers