
Summary of Contents for AGCO AP Cumberland VariFlame VF-16–EPS
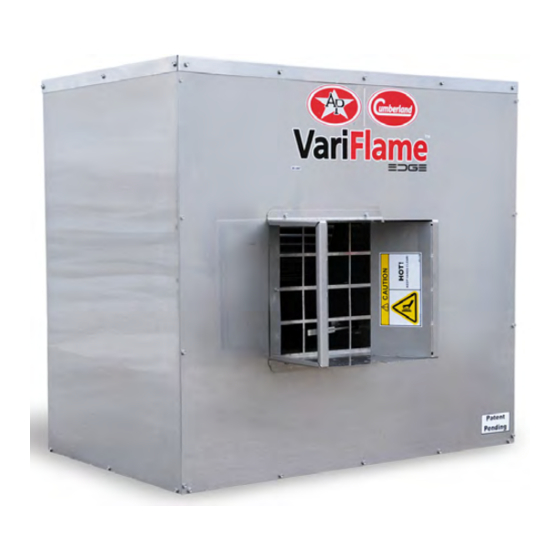
- Page 1 VariFlame ™ Heater with EDGE ® Connect Patent Pending Models: VF-16–EPS, VF-16–EPP, VF-16–EPG VF-16–ENG, VF-16–ENS, VF-16–ENP Owner’s Manual PNEG-2092 Version 1.0 Date: 09-14-16 PNEG-2092...
- Page 2 Use of this Equipment Information page will help you identify your equipment in the case that you need to notify the company. For this reason, this information should be filled out and kept on record. Equipment Information Model Number: Serial Number: Date Purchased: Dealer Name and Phone Number:...
-
Page 3: Table Of Contents
Contents Chapter 1 Safety Precautions ........................5 Safety Guidelines ........................5 Cautionary Symbol Definitions......................6 Safety Precautions ........................7 Safety Decals ...........................12 Safety Sign-off Sheet.........................14 Chapter 2 Specifications .........................15 VariFlame vapor propane specifications ..................15 VariFlame natural gas specifications ...................16 Chapter 3 System Overview ........................17 User Interface ...........................18 Typical Controller Connections ....................21 Heater component functions ......................22... - Page 4 Chapter 9 Parts List ..........................75 VariFlame EDGE Controller Parts ....................75 Switch and Probe Parts ......................76 Gas Parts ..........................77 Motor and Blower Wheel Parts ....................78 GSI Group, LLC Limited Warranty ...................79 Pneg-2092 VariFlame Heater with Edge Connect...
-
Page 5: Chapter 1 Safety Precautions
Safety Precautions Topics Covered in this Chapter ▪ Safety Guidelines ▪ Cautionary Symbol Definitions ▪ Safety Precautions ▪ Safety Decals ▪ Safety Sign-off Sheet Safety Guidelines Safety guidelines are general-to-specific safety rules that must be followed at all times. This manual is written to help you understand safe operating procedures and problems that can be encountered by the operator and other personnel when using this equipment. -
Page 6: Cautionary Symbol Definitions
Chapter 1: Safety Precautions Cautionary Symbol Definitions Cautionary symbols appear in this manual and on product decals. The symbols alert the user of potential safety hazards, prohibited activities and mandatory actions. To help you recognize this information, we use the symbols that are defined below. Table 1-1 Description of the different cautionary symbols Symbol Description... -
Page 7: Safety Precautions
Chapter 1: Safety Precautions Safety Precautions Use Personal Protective Equipment • Use appropriate personal protective equipment: Respiratory Foot Protection Protection Protection Hearing Head Fall Protection Protection Protection Hand Protection • Wear clothing appropriate to the job. • Remove all jewelry. •... - Page 8 Chapter 1: Safety Precautions Follow Safety Instructions • Warning: If the information in the manual is not followed exactly, a fire or explosion can result, causing property damage, personal injury or loss of life. • Carefully read all safety messages in this manual and safety signs on your machine.
- Page 9 Chapter 1: Safety Precautions Maintain Equipment and Work Area • Do not attempt maintenance or repairs on the heater unless you are competent to do so. Understand service procedures before doing work. • Use only genuine Cumberland/AP parts when maintaining the heater.
- Page 10 Chapter 1: Safety Precautions Install and Operate Gas-Fired Equipment Properly • Gas-fired equipment should be installed by a qualified pipe fitter and must conform with local codes. • For Canada: The equipment shall be installed in accordance with the Natural Gas and Propane Installation Code, CSA B149.1, or the Propane Storage and Handling Code, CSA B149.2, or applicable provincial regulations, which should be carefully followed in all cases.
- Page 11 Chapter 1: Safety Precautions Install and Operate Electrical Equipment Properly • The electrical connections and grounding of the appliance shall be in compliance with the National Electric Code ANSI/ NFPA 70 for the United States or the Canadian Electrical Code for Canada, as well as all local and state codes. •...
-
Page 12: Safety Decals
Chapter 1: Safety Precautions Safety Decals The safety decals on your equipment are safety indicators which must be carefully read and understood by all personnel involved in the installation, operation, service and maintenance of the equipment. Location Decal No. Decal Description Warning Electrical Hazard Inside door... - Page 13 Chapter 1: Safety Precautions Location Decal No. Decal Description On Door DC-2429 Caution Warning: Hot Surface On Door DC-2430 To replace a damaged or missing decal, contact us to receive a free replacement. GSI Decals 1004 E. Illinois St. Assumption, IL 62510 Tel: 1-217-226-4421 Pneg-2092 VariFlame Heater with Edge Connect...
-
Page 14: Safety Sign-Off Sheet
Chapter 1: Safety Precautions Safety Sign-off Sheet Below is a sign-off sheet that can be used to verify that all personnel have read and understood the safety instructions. This sign-off sheet is provided for your convenience and personal record keeping. Date Employee Name Supervisor Name... -
Page 15: Chapter 2 Specifications
Specifications Topics Covered in this Chapter ▪ VariFlame vapor propane specifications ▪ VariFlame natural gas specifications VariFlame vapor propane specifications Maximum input 250,000 (BTUH) Minimum input 50,000 (BTUH) Ventilation air required to support combustion 1,050 (CFM) Inlet gas supply pressure maximum 13.5 in. -
Page 16: Variflame Natural Gas Specifications
Chapter 2: Specifications VariFlame natural gas specifications Maximum input 250,000 (BTUH) Minimum input 50,000 (BTUH) Ventilation air required to support combustion 1,050 (CFM) Inlet gas supply pressure maximum 13.5 in. W.C. Inlet gas supply pressure minimum 7.0 in. W.C. Burner manifold pressure maximum 10.0 in. -
Page 17: Chapter 3 System Overview
System Overview Topics Covered in this Chapter ▪ User Interface ▪ Typical Controller Connections ▪ Heater component functions ▪ Burner control module and sequence of operation ▪ Operation modes Pneg-2092 VariFlame Heater with Edge Connect... -
Page 18: User Interface
Chapter 3: System Overview User Interface Description Item Press to go up in the menu or to increase a parameter value. Press to go down in the menu or to decrease a parameter value. Enter function in a menu or to edit a parameter. 24Vdc supply state Lock mode activation state EDGE Automation network state... - Page 19 Chapter 3: System Overview Figure 3-1 User Interface Flow Chart Pneg-2092 VariFlame Heater with Edge Connect...
- Page 20 Chapter 3: System Overview Figure 3-2 User Interface Flow Chart Pneg-2092 VariFlame Heater with Edge Connect...
-
Page 21: Typical Controller Connections
Chapter 3: System Overview Typical Controller Connections VariFlame heaters with EDGE Connect can be installed to existing controllers or to an EDGE controller. Figure 3-3 Controller connections using existing control Figure 3-4 Controller connections with EDGE Connect Pneg-2092 VariFlame Heater with Edge Connect... -
Page 22: Heater Component Functions
Chapter 3: System Overview Heater component functions Figure 3-5 VariFlame Components 1 — Blower motor and wheel assembly 5 — Flame Probe 2 — High Limit Switch 6 — Control Board 3 — Air Proving Switch 7 — Throttle Valve 4 —... - Page 23 Chapter 3: System Overview state when the blower is on, the heater will go into lockout mode. Typical sources of air proving switch faults are dirty blower wheel, restricted inlet, restricted outlet, and a dirty air proving switch. Igniter (4) The igniter is a hot surface heating element used to initiate combustion.
-
Page 24: Burner Control Module And Sequence Of Operation
Chapter 3: System Overview Burner control module and sequence of operation Figure 3-6 VariFlame Sequence of Operation Pneg-2092 VariFlame Heater with Edge Connect... - Page 25 Chapter 3: System Overview Power up and Initialization When you first turn on the VariFlame, it performs a self-check routine before starting up. If the following problems are detected, the controller goes into lockout mode: • A memory issue • AC frequency issue on the main sector •...
-
Page 26: Operation Modes
Chapter 3: System Overview Operation modes Variable input (0-10V or 4-20mA) mode In one of these modes, the VariFlame controller receives a 0-10V or 4-20mA signal from an external pro- portional controller indicating the opening percentage of the output valve. The input is linearly remapped to a percentage which is then sent to the valve. - Page 27 Chapter 3: System Overview Learning — Upon reception of an 'ON' signal, the module starts a learning cycle to determine start and stop temperatures if they are unknown. The learning cycle may occur for two different reasons: • The module is starting Legacy mode for the first time and has no idea what the start and stop tem- peratures are.
- Page 28 Chapter 3: System Overview • The unit is powered off. Once rebooted, the module will continue operating with the previously con- figured operation mode. Should the operation mode's inputs still be inoperative, the module will fall back into failsafe. • You intentionally exit Failsafe mode from the user interface (by selecting a new operation mode). Should the new operation mode's inputs be inoperative, the module returns into Failsafe mode.
-
Page 29: Chapter 4 Installation
Installation Topics Covered in this Chapter ▪ Installing the air diverter ▪ Installing for recirculating operation (indoor) ▪ Pipe sizing guidelines ▪ Wiring Diagrams and Schematics Installing the air diverter Air diverters are shipped flat and can be bent to direct the heated air as it exits the heater. 1. -
Page 30: Installing For Recirculating Operation (Indoor)
Chapter 4: Installation Figure 4-2 Installing the air diverter 2 — Air Diverter 3 — Loosen screws Installing for recirculating operation (indoor) Before You Begin • Make sure the heater location has a minimum clearance from combustibles of 12 in. from the top, bottom and sides of the heater. - Page 31 Chapter 4: Installation 7. Check all gas connections for leaks using a leak detector solution and repair any gas leak before placing the heater into service. 8. Install a sediment trap and a manual shut off valve to the heater’s gas inlet. 9.
-
Page 32: Pipe Sizing Guidelines
Chapter 4: Installation Figure 4-4 Gas and Electrical Connections 1 — Sediment trap 4 — Vent to outside 7 — Regulator 9 — Heater 2 — Electrical cord 5 — Gas hose 8 — Shut-Off valve 10 — Air diverter 3 —... - Page 33 Chapter 4: Installation Figure 4-5 Example Piping System • Determine the HVR value for each pipe section of the system. No. Of Pipe Section HVR Calculation HVR Value Heaters BTUH BTUH 4 x 40,000 160,000 4 x 12 2 x 40,000 80,000 2 x 12 1 x 40,000...
- Page 34 Chapter 4: Installation are in thousands of BTUH's). The next larger value of 72 (21) is read from the table, corresponding to 72,000 BTUH (21 kW). • Follow the row leftward until you reach the columns labeled 'Internal Diameter' and 'Nominal pipe size'.
- Page 35 Chapter 4: Installation Table 4-3 Natural Gas (NG) (cont'd.) Maximum Capacity Of Pipe In Thousands Of BTU per Hour Nominal Internal Natural Gas (Methane) @ Pressure Drop Of 0.5 in w.c. (0.2 mbar) Iron Pipe Dia. Values listed are for 0.6 sp.gr. based on Heat Of Combustion of 1000 BTU/cu .ft Size, (IPS) Length Of Pipe, Feet (multiply ft by 0.3 to convert to meter)
-
Page 36: Wiring Diagrams And Schematics
Chapter 4: Installation Wiring Diagrams and Schematics Use the wiring diagrams and schematics to connect components to the VariFlame Edge controller. Make sure all power sources are disconnected and locked out before performing any maintenance to the equipment. DANGER Figure 4-6 Inside VariFlame Controller Pneg-2092 VariFlame Heater with Edge Connect... - Page 37 Chapter 4: Installation Figure 4-7 VariFlame EDGE wiring diagram Pneg-2092 VariFlame Heater with Edge Connect...
- Page 38 Chapter 4: Installation Figure 4-8 VariFlame EDGE schematic Pneg-2092 VariFlame Heater with Edge Connect...
- Page 39 Chapter 4: Installation Figure 4-9 VariFlame EDGE mode wiring Pneg-2092 VariFlame Heater with Edge Connect...
- Page 40 Chapter 4: Installation Figure 4-10 Dipswitches Pneg-2092 VariFlame Heater with Edge Connect...
-
Page 41: Chapter 5 Controller Settings
Controller Settings Topics Covered in this Chapter ▪ The Main Screen ▪ Turning OFF the heater ▪ Setting the parameters for the heater ▪ Setting the parameters for a Variable Input Mode ▪ Setting the parameters for Standalone Mode ▪ Setting the parameters for Legacy Mode ▪... -
Page 42: Turning Off The Heater
Chapter 5: Controller Settings Turning OFF the heater You can turn off the heater using the VariFlame control. To turn off the heater: 1. On the controller, push the Up or Down button until the Operation Modes Menu appears, then push the Enter button. -
Page 43: Setting The Parameters For A Variable Input Mode
Chapter 5: Controller Settings 1. On the controller, push either the Up or Down button until the Settings Menu appears, then push the Enter button. 2. Set the parameters to the desired temperatures using the UP, Down, and Enter buttons. Figure 5-3 Settings Menu Setting the parameters for a Variable Input Mode There are two Variable Input Modes, either a 0–10V or 4 –20mA. - Page 44 Chapter 5: Controller Settings Failsafe recovery — Defines how long the VariFlame should operate in failsafe mode before looking for a signal coming from the main controller. The period starts as soon as the failsafe mode is entered. At the end of the recovery period, VariFlame will stop and wait for a signal from the main controller.
- Page 45 Chapter 5: Controller Settings Figure 5-4 Variable Operations (0–10V or 4–20mA) Pneg-2092 VariFlame Heater with Edge Connect...
-
Page 46: Setting The Parameters For Standalone Mode
Chapter 5: Controller Settings Setting the parameters for Standalone Mode You do not need a controller to use the VariFlame’s Standalone Mode. This mode accommodates one or two LED temperature probes. The heater will maintain the temperature set in the heater burner control unit (BCU) at the time of installation. -
Page 47: Setting The Parameters For Legacy Mode
Chapter 5: Controller Settings Figure 5-5 Standalone Menu Setting the parameters for Legacy Mode The on/off signal from a legacy controller will trigger the heater. The VariFlame unit will synchronize the target temperature with the temperature set point used in the legacy control to maintain a consistent room temperature. - Page 48 Chapter 5: Controller Settings Failsafe recovery — Defines how long the VariFlame should operate in failsafe mode before looking for a signal coming from the main controller. The period starts as soon as the failsafe mode is entered. At the end of the recovery period, VariFlame will stop and wait for a signal from the main controller.
-
Page 49: Enabling A Second Probe
Chapter 5: Controller Settings Figure 5-6 Legacy Mode Enabling a second probe When using Standalone modes, each heater can connect to two temperature probes. You can access these settings through the Temperature Probe Menu. What You Should Know You have to cycle through all of the parameters and confirm any changes at the end of the cycle. The Parameters Submenu contains the following parameters: Second probe status —... - Page 50 Chapter 5: Controller Settings 3. Push the Up or Down button to choose enable or disable for a second probe, then push Enter to select. 4. Push the Up or Down button to enter the Probe Discard Offset. NOTE: The default offset is 5.0°. Pushing the up and down buttons modifies the offset in 0.1° incre- ments.
-
Page 51: Testing The Led Probes With Blink Mode
Chapter 5: Controller Settings Testing the LED probes with blink mode The blink mode will allow you to perform a visual test of the LED temperature probes. 1. On the controller, push either the Up or Down button until the Temperature Probe Menu appears, then push the Enter button. -
Page 52: Checking The System Status
Chapter 5: Controller Settings Checking the System Status If a problem occurs with the system, a warning triangle will appear on the main screen. To get a descrip- tion of the error source, you can access the system status. To check the System Status: 1. -
Page 53: Chapter 6 Startup And Operation
Startup and Operation Topics Covered in this Chapter ▪ Pre-startup inspections ▪ Emergency heater shutdown ▪ Normal heater shutdown ▪ Starting the heater ▪ Operating the burner ▪ Adjusting the heater output Pre-startup inspections • Look for any physical damage from shipping or installation that can cause the heater not to operate. •... -
Page 54: Starting The Heater
Chapter 6: Startup and Operation 4. Close the main gas supply valve. 5. Disconnect the main power supply. Starting the heater Before You Begin Make sure the heater has been installed properly by qualified gas and electrical service personnel. 1. Perform all pre-startup inspections. 2. - Page 55 Chapter 6: Startup and Operation Figure 6-1 Heater operation depending on output settings 1 — Heater kBtu output adjusted to high. 2 — Heater kBtu output adjusted to low. 3 — Heater kBtu output correctly adjusted. Turn off all power sources before performing any adjustments to equipment. Follow all safety procedures at all times.
- Page 56 NOTES Pneg-2092 VariFlame Heater with Edge Connect...
-
Page 57: Chapter 7 Service And Maintenance
Service and Maintenance Topics Covered in this Chapter ▪ Cleaning the heater ▪ Guidelines for checking gas pressure ▪ Checking the valve inlet pressure ▪ Checking the valve output pressure ▪ Replacing the motor and fan wheel ▪ Replacing the air proving switch ▪... -
Page 58: Checking The Valve Inlet Pressure
Chapter 7: Service and Maintenance • Close the fuel supply valve to the heater inlet. • Open the burner access panel and clean any dirt or debris from the gas control valve. What You Should Know Gas pressure entering the gas valve is Inlet Pressure. Gas pressure flowing out of the gas valve is Burner Manifold pressure. -
Page 59: Replacing The Motor And Fan Wheel
Chapter 7: Service and Maintenance NOTE: Pressure test kit must read up to 15 in. w.c. 4. Turn the heater on. 5. Open the gas valve and read the gas pressure. 6. When testing is complete, reinstall the threaded plug into the outlet pressure tap of the valve. Failure to replace this plug can cause serious injury and death. - Page 60 Chapter 7: Service and Maintenance Figure 7-1 Control mounting bracket 1 — Control mounting bracket 2 — Fan housing 3 — Screw Figure 7-2 Motor and fan wheel 2 — Fan housing 3 — Screw 4 — Motor and fan assembly Pneg-2092 VariFlame Heater with Edge Connect...
-
Page 61: Replacing The Air Proving Switch
Chapter 7: Service and Maintenance Replacing the air proving switch Before You Begin • Disconnect all power sources to the heater. • Turn off the gas supply. To remove the air proving switch: 1. Disconnect the two wires attached to the air proving switch. 2. -
Page 62: Replacing The Temperature High Limit Switch
Chapter 7: Service and Maintenance Figure 7-4 Removing the air proving switch 2 — Mounting plate 6 — Bolt 3 — Air proving switch 7 — Nut 4 — Air proving mounting bracket Replacing the Temperature High Limit Switch Before You Begin •... - Page 63 Chapter 7: Service and Maintenance Figure 7-5 Temperature high limit switch bracket 1 — Loosen screw 4 — Air proving mounting bracket 2 — Mounting plate 5 — High limit switch 3 — Air proving switch Figure 7-6 Temperature high limit switch 1 —...
-
Page 64: Replacing The Flame Probe
Chapter 7: Service and Maintenance Replacing the Flame Probe Before You Begin Both the igniter and flame probe can still be hot if the heater was in operation. Allow heater to cool completely before performing any maintenance. CAUTION • Disconnect all power sources to the heater. •... - Page 65 Chapter 7: Service and Maintenance Figure 7-8 Flame probe 1 — Probe mounting bracket 3 — Ignitor 2 — Screw 4 — Flame probe Pneg-2092 VariFlame Heater with Edge Connect...
-
Page 66: Replacing The Ignitor
Chapter 7: Service and Maintenance Replacing the Ignitor Before You Begin Both the igniter and flame probe can still be hot if the heater was in operation. Allow heater to cool completely before performing any maintenance. CAUTION • Disconnect all power sources to the heater. •... -
Page 67: Replacing The Control Board
Chapter 7: Service and Maintenance Figure 7-10 Ignitor 1 — Probe mounting bracket 3 — Ignitor 2 — Screw 4 — Flame sensor Replacing the control board Before You Begin • Disconnect all power sources to the heater. • Turn off the main gas supply. To remove the control board: 1. -
Page 68: Replacing The Gas Valve
Chapter 7: Service and Maintenance Figure 7-11 Control Board Cover 7 — Screw 8 — Control cover Figure 7-12 Control Board 7 — Screw 8 — Control board Replacing the gas valve Before You Begin Pneg-2092 VariFlame Heater with Edge Connect... - Page 69 Chapter 7: Service and Maintenance Turn off all gas supply before performing any maintenance on the gas supply lines. Failure to follow these instructions can result in bodily injury or death. WARNING • Disconnect all power sources to the heater. •...
- Page 70 Chapter 7: Service and Maintenance Figure 7-13 Remove supply valve 3 — Supply line 6 — Gas valve Figure 7-14 Gas valve removal 6 — Gas valve Pneg-2092 VariFlame Heater with Edge Connect...
-
Page 71: Chapter 8 Troubleshooting
Troubleshooting Topics Covered in this Chapter ▪ Troubleshooting ▪ LED meanings Troubleshooting Problem Solution The VariFlame controller Verify if the controller is powered up does not communicate on Verify if there are activities on the bus communication by looking at the activities of the EDGE network the LEDs: AUTO-RX, AUTO-TX, SAFE-RX, SAFE-TX. - Page 72 Chapter 8: Troubleshooting Error type Description 24VAC Failure Cause : BCM failed to detect AC network transition for more than 100ms at run time Solution : Power cycle the VariFlame AC Frequency Not Cause : BCM was not able to detect and measure AC frequency at startup Detected Solution : Power cycle the VariFlame Air Valve Shorted Pins...
- Page 73 Chapter 8: Troubleshooting wiring for open circuit. Verify sail switch continuity with a multimeter by closing it manually No Airflow Detected Cause : sail switch did not close in the 4 seconds following the power up of the blower Solution : Verify that the fan motor is able to start. Verify wiring to the fan’s motor. Verify that nothing prevents sail switch to go to close position.
-
Page 74: Led Meanings
Chapter 8: Troubleshooting Watchdog reboot Cause: an internal unexpected reset occurs Solution : Power cycle the VariFlame. Winding down failure Cause : sail switch did not went off in the 4 seconds following the power off of the Solution: Verify that the fan motor is able to stop. Verify wiring to the fan’s motor. Verify that nothing prevents sail switch to go to open position. -
Page 75: Chapter 9 Parts List
Parts List Topics Covered in this Chapter ▪ VariFlame EDGE Controller Parts ▪ Switch and Probe Parts ▪ Gas Parts ▪ Motor and Blower Wheel Parts VariFlame EDGE Controller Parts Figure 9-1 VariFlame EDGE Controller Parts Item Part Description VF3-1055 VariFlame Variable Rate Replacement Display VF3-1054 VariFlame Variable Rate Replacement Heater Control Board... -
Page 76: Switch And Probe Parts
Chapter 9: Parts List Switch and Probe Parts Figure 9-2 Switch and Probe Parts Item Part Description 3001-1740 Switch Micro with Sail Lever V3l 3005-0111 TSTAT TDISC 60T15 310D Airstream VF3-1025 VariFlame Variable Rate Heater Control VF1-3004 Hot Surface Igniter Assembly VF1-3002 Flame probe assembly Pneg-2092 VariFlame Heater with Edge Connect... -
Page 77: Gas Parts
Chapter 9: Parts List Gas Parts Figure 9-3 Gas Parts Item Part Description VF3-1022 (LP) Gas Valve, VariFlame Variable Rate, LP VF3-1023 (NG) Gas Valve, VariFlame Variable Rate, NG VF3-1013 Ball Valve, 1/4 Mnpt x 1/4 Fnpt, Compact VF2-3009 (LP) VariFlame Orifice, Propane VF2-3010 (NG) X VariFlame Orifice, Natural Gas... -
Page 78: Motor And Blower Wheel Parts
Chapter 9: Parts List Motor and Blower Wheel Parts Figure 9-4 Motor and Blower Wheel Parts Item Part Description 20-5099D Motor, 1/3HP, 1 Ph, 120V, 60 Hz / C225m 20-5011X Wheel, Blower / Large - C225m 50 Hz Pneg-2092 VariFlame Heater with Edge Connect... -
Page 79: Gsi Group, Llc Limited Warranty
Chapter 9: Parts List GSI Group, LLC Limited Warranty The GSI Group, LLC (“GSI”) warrants products which it manufactures to be free of defects in materials and workmanship under normal usage and conditions for a period of 12 months after sale to the original end-user or if a foreign sale, 14 months from arrival at port of discharge, whichever is earlier. - Page 80 1004 E. Illinois St. Assumption, IL 62510-0020 Phone: 1-217-226-4421 Fax: 1-217-226-4420 www.gsiag.com AP and Cumberland are a part of GSI, a worldwide brand of AGCO Corporation. Copyright © 2016 by The GSI Group, LLC Printed in the USA CN #325996...
Need help?
Do you have a question about the AP Cumberland VariFlame VF-16–EPS and is the answer not in the manual?
Questions and answers