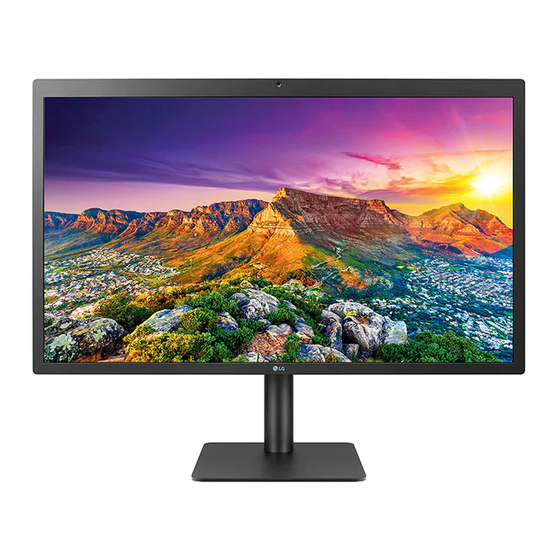
LG UltraFine 27MD5KL-B Manual
Hide thumbs
Also See for UltraFine 27MD5KL-B:
- Owner's manual (31 pages) ,
- Service manual (18 pages) ,
- Owner's manual (31 pages)
Advertisement
Quick Links
OWNER'S MANUAL
(For Mac)
Please read this manual carefully before operating your set and retain it for future reference.
27MD5KL
Questo manuale d'istruzione è fornito da trovaprezzi.it. Scopri tutte le offerte per
cerca il tuo prodotto tra le
migliori offerte di Monitor
LG 27MD5KL-B
Copyright © 2019 LG Electronics Inc. All Rights Reserved.
o
www.lg.com
Advertisement

Subscribe to Our Youtube Channel
Related Manuals for LG UltraFine 27MD5KL-B


Summary of Contents for LG UltraFine 27MD5KL-B
- Page 1 Monitor OWNER’S MANUAL (For Mac) Please read this manual carefully before operating your set and retain it for future reference. 27MD5KL www.lg.com Copyright © 2019 LG Electronics Inc. All Rights Reserved.
-
Page 2: Table Of Contents
CONTENTS LICENSE Each model has different licenses. Visit www.lg.com for more information on the license. LICENSE ------------------------------------------------ 2 IMPORTANT PRECAUTIONS --------------------------- 3 Thunderbolt and the Thunderbolt logo are trademarks of Intel OPEN SOURCE SOFTWARE NOTICE INFORMATION --- 6 Corporation or its subsidiaries in the U.S. and/or other countries. -
Page 3: Important Precautions
IMPORTANT PRECAUTIONS To Avoid Personal Injury : • Do not place the display on a sloping shelf unless properly secured. This unit has been engineered and manufactured to ensure your personal safety, however improper use may • Use only a stand recommended by the manufacturer. result in potential electrical shock or fire hazards. - Page 4 On Installation Make sure the panel faces forward and hold it with both hands to move. If you drop the product, the damaged product can cause electric shock or fire. Contact an authorized the service center for repair. Do not allow anything to rest upon or roll over the power cord, and do not place the display where the power Avoid high temperatures and humidity.
- Page 5 Be sure to use power cords and AC adapters provided or approved by LG Electronics, Inc. • The use of non-approved products may cause a fire or electric shock. When unplugging the power cord, always pull it by the plug. Do not bend the power cord with excessive force.
-
Page 6: Open Source Software Notice Information
Supported Software LG Electronics will also provide open source code to you on CD-ROM for a charge covering the cost of performing such distribution (such as the cost of media, shipping, and handling) upon email request to opensource@lge. - Page 7 Product Description Front Camera Microphone and Ambient light Camera indicator light sensor...
- Page 8 Back Power connector Kensington lock hole Stand detach button NOTE • The ambient light sensor is for auto brightness control of display and can be controlled by Mac OS.
- Page 9 Input Connector USB expansion port Thunderbolt 3( ) / USB-C Host (Mac) connection port...
- Page 10 ID Label / Sub ID Label You can view the monitor's ID Label and Sub ID Label. Sub ID Label...
- Page 11 Stand ID Label * Refer Detaching the Stand NOTE • ID Label: the monitor's standard ID label that states model name, production date, country of production, specifications, etc. Sub ID Label: a secondary ID label that states only the model name and basic specifications. CAUTION •...
- Page 12 Moving and Lifting the Monitor CAUTION • Avoid touching the monitor screen as much as possible. When moving or lifting the monitor, follow these instructions to prevent the monitor from being scratched or - This may result in damage to the screen or some of the pixels used to create images. damaged and to ensure safe transportation, regardless of its shape or size.
- Page 13 Installing on a Table Connect the power cord to the monitor and then plug the power cord into the wall outlet. Lift the monitor and place it on the table in an upright position. Place the monitor at least 100 mm away from the wall to ensure sufficient ventilation.
- Page 14 Adjusting the Stand Height Cautions When Connecting Power Cord Place the monitor mounted on the stand base in an upright position. Handle the monitor with both hands for safety. 100-240 V ~ • Make sure to use the power cord that is provided in the product package and connect it to a grounded power outlet.
- Page 15 NOTE WARNING • The left or right side of the monitor head can be slightly rotated up or down. Adjust the horizontal level of the monitor head. • When adjusting the screen height, do not place your hand on the stand body to avoid injury to your fingers.
- Page 16 Adjusting the Angle Using the Kensington Lock The connector for the Kensington security system is located at the back of the monitor. Place the monitor in an upright position, mounted on the stand base. For more information on installation and usage, refer to the Kensington lock owner’ s manual or visit the website Adjust the angle of the screen.
- Page 17 NOTE • The Kensington security system is optional. You can obtain optional accessories from most electronics stores.
- Page 18 Detaching the Stand Lift up the stand, slightly rotating it. Place the monitor’ s screen face down. To protect the screen from scratches, cover the surface with a soft cloth. Pull the stand away from the monitor in its rotated position. Push the Detach button on the back of the monitor to the left.
- Page 19 Check whether the hooks on the stand are separated from the slots of the main unit. Remove the stand once the hooks on the stand have been released from the slots of the main unit. Stand hooks CAUTION • Be careful not to drop the stand while detaching it. Main unit slots...
- Page 20 Attaching the VESA design cover Push the VESA design cover in the slanted position until it touches the other side. Place the monitor’ s screen face down. To protect the screen from scratches, cover the surface with a soft cloth. Push down on the VESA design cover.
- Page 21 Installing the Wall Mount Bracket Place the monitor’ s screen face down. To protect the screen from scratches, cover the surface with a soft cloth. Use four screws to attach the wall mount bracket. (Standard screws: M4 x L10)
- Page 22 NOTE NOTE • • Install the monitor at least 100 mm away from the wall on each side of the monitor to ensure sufficient Vertical orientation is not recommended. ventilation. • The wall mount bracket and the wall mount bracket screws are not included. CAUTION •...
-
Page 23: Making Connections
MAKING CONNECTIONS CAUTION • If you use generic cables not certified by LG, the screen may not display or there may be image noises. • Do not press the screen for a prolonged time. This may cause image distortion. •... - Page 24 USB-C connection Please connect a USB-C host with USB-C cable. NOTE • PD (Power Delivery) is supported via Thunderbolt 3( ) / USB-C Host (Mac) port. • Features may not work properly depending on the connected device’ s specifications and the environment. •...
- Page 25 Connecting to USB Device Power Delivery 5 V/1.5 A is supported via the USB expansion port. NOTE • Peripheral devices are sold separately.
-
Page 26: Troubleshooting
TROUBLESHOOTING Nothing is displayed on the screen. • Is your monitor connected to your Mac? Connect your monitor to your Mac. The monitor will turn on automatically if the PC is operating normally. • Is the monitor's power cord plugged in? Check if the power cord is correctly plugged into the power outlet. - Page 27 The display color is abnormal. • Does the display color appear unstable or Check if the signal cable is connected properly. Reconnect the cable or reinsert the PC's graphics card. monochrome? • Are there spots on the screen? When using the monitor, pixilated spots (red, green, blue, white, or black) may appear on the screen. This is normal for an LCD screen. It is not an error, nor is it related to the monitor's performance.
-
Page 28: Product Specification
PRODUCT SPECIFICATION The product specifications below may be changed without prior notice due to upgrade of product functions. LCD Screen Type TFT (Thin Film Transistor) LCD (Liquid Crystal Display) Screen Color Depth 8-bit, 10-bit color is supported. Pixel Pitch 0.11685 mm x 0.11685 mm Resolution Max Resolution Thunderbolt... - Page 29 Environmental Conditions Operating Conditions Temperature 0 °C to 40 °C Humidity Less than 80 % Storing Conditions Temperature -20 °C to 60 °C Humidity Less than 85 % Speaker Stereo Speakers Camera Built-in USB Camera Microphone Built-in USB Microphone Dimensions Monitor Size (Width x Height x Depth) With Stand (mm) 625.6 x 464.4 x 239.9...
- Page 30 Signal Timing Resolution Horizontal Frequency (kHz) Vertical Frequency (Hz) Polarity (H/V) Remarks 640 x 480 31.469 59.94 3840 x 2160 133.32 3200 x 1800 111.12 2560 x 1440 88.86 5120 x 2880 177.71 Main Recommended Timing...
- Page 31 The model and serial number of the product are located on the back and on one side of the product. Record them below in case you ever need service. Model Serial No.
Need help?
Do you have a question about the UltraFine 27MD5KL-B and is the answer not in the manual?
Questions and answers