Table of Contents
Advertisement
Quick Links
Advertisement
Table of Contents

Summary of Contents for BingoFit FT905HR
- Page 1 FITNESS TRACKER USER MANUAL...
-
Page 2: Fcc Caution
FCC Caution. This device complies with part 15 of the FCC Rules. Operation is subject to the following two conditions: (1) This device may not cause harmful interference, and (2) this device must accept any interference received, including interference that may cause undesired operation. - Page 3 particular installation. If this equipment does cause harmful interference to radio or television reception, which can be determined by turning the equipment off and on, the user is encouraged to try to correct the interference by one or more of the following measures: -Consult the dealer or an experienced radio/TV technician for help.
-
Page 4: Quick Use Guide
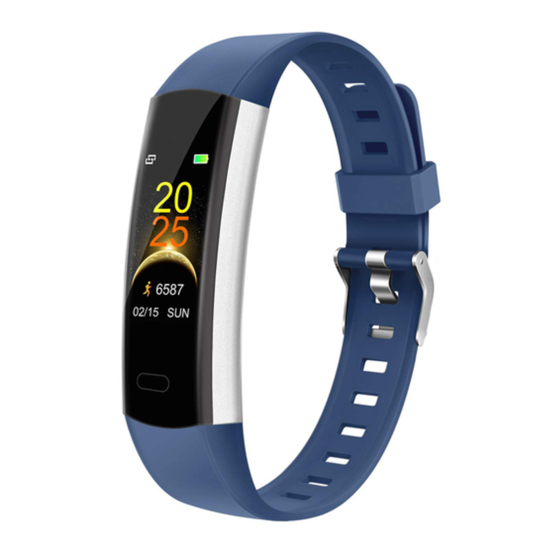
Quick Use Guide 1. Getting the Device Color Display Screen Heart Rate IC Touch Key TPU Straps Touch Key Single click the touch key: Switch interface or option. Press and hold the touch key: Enter the following function or turn on device. 2. - Page 5 USB charging port Please fully charge your new device (1-2 hour) before initial use. The screen will show a charging icon during charging. - 02 -...
- Page 6 Compatibility with Mobile IOS 9.0 & later Android 4.4 & later Quick Start Guide 1. Download the App Application name is ''CC Band''. Search "CC Band" on Google Play Store for Android and App Store for iOS, or scan QR code: CC Band - 03 -...
- Page 7 Compatibility with Mobile Before connecting, make sure your device is powered on and your smartphone's Bluetooth is on. Note: When you use it for the first time, please allow the app all permissions to avoid some features being restricted. 1. Connect the App with the device, go to the menu at the bottom of the screen, and click the icon "...
- Page 8 In IOS deveice you need to agree the pop up window message,click pair, at the picture. Note: please do not pair the tracker from bluetooth list directly. Once the device is connected to the mobile phone, the connection icon changes from disconnected to connected (see images).
- Page 9 Disconnected Connected After successful connection with App, set your personal data in "Dashboard"->"User Profile", then sync the information to the device, it will immediately starts to monitor your daily activity. Disconnecting the Device For Android, go to the page of "Device Connectivity Scanning"...
-
Page 10: Functions Introduction
Functions Introduction 1. The Main Interface 2. Function Operation Introduction 2.1 Home Page All information on this page can be synchronized correctly after the device connected with App successfully. [Click the touch key] Go to the next interface: " ". 2.2 Pedometer [Click the touch key] Go to the next interface: "... - Page 11 2.2.1 Activity Data The data of steps counted The data of calorie burned The data of distance travelled [Click the touch key] to go back to the interface: " ". 2.3 Auto-Heart Rate Monitoring Note: To ensure that the data is closer to the true value, pleasesit in a good posture, like typing posture and stay still.
- Page 12 [Press and hold] [Click] [Click] Sports Recording Mode Sports Data Display Mode [Press and hold the touch key for 2s again] Go back to the interface: " " from “Sports Data Display Mode” Remark: the operation steps are similar for other sports mode.
- Page 13 [Click the touch key] Go to the next interface: " ". [Press and hold the touch key for 2s] Go to the dial style. [Press and hold the touch key for 2s] Select the watch dial you like, then will go back automatically. 2.5.3 Band Version Here you can check the device version &...
-
Page 14: App Usage
Note: please use this function cautiously, as your data will be erased. [Click the touch key] Go to the next interface: " ". [Press and hold the touch key for 2s] Start to reset your device and erase device data. 2.5.5 Turn OFF [Click the touch key] Go back to the interface: "... - Page 15 2. Steps Count Record and display all activities of the day. You could check daily activities including steps, distance and calorie burned in the App. Click any data bar to check all your history records-Day/Week/Month/Year. 3. Heart Rate Monitoring(Heart Rate) - 12 -...
- Page 16 Here you can click the green area to start or stop your heartbeat test and click any data bar to check your history records of manual test results. Click the button of "Static Mode" or "Dynamic Mode" to choose the test mode of one-time monitoring or 24-hour monitoring.
- Page 17 Help&FAQs Find solutions for Frequently Asked Questions on the CC Band App=>> =>>Feedback. - 14 -...
-
Page 18: Warranty Policy
Warranty policy - 15 -... - Page 19 - 16 -...


Need help?
Do you have a question about the FT905HR and is the answer not in the manual?
Questions and answers