Advertisement
Quick Links
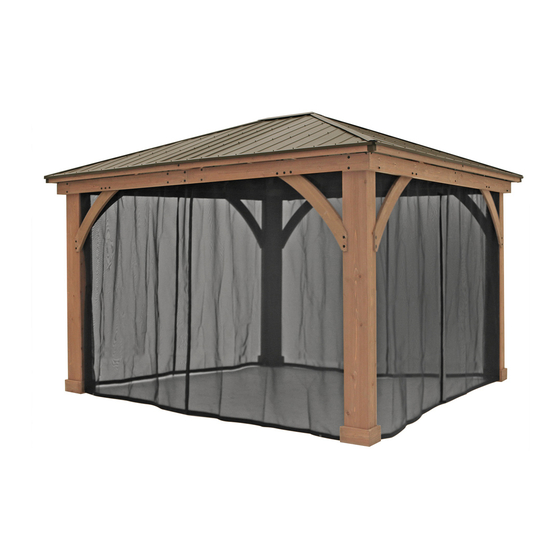
12' x 14' Mosquito Mesh Kit
Installation Instructions – YM12831Y
Kit Mosquitero de 12' x 14'
Instrucciones de instalación – YM12831Y
Ensemble de moustiquaire 12' x 14'
Instructions d'installation – YM12831Y
For use with the
YM12941 12 x 14
Gazebo (ITM. / ART.
1031553) and YM12978
12 x 14 Grand Gazebo
(ITM. / ART. 1902485)
Para usar con el Pavilion
YM12941 12 x 14 (ITM.
/ ART. 1031553) y Gran
Gazebo YM12978 12 x 14
(ITM. / ART. 1902485)
Pour utilisation avec le
Pavillon YM12941 12 x 14
(ITM. / ART. 1031553) et le
Grand Pavilion YM12978
12 x 14 (ITM. / ART.
1902485)
IMPORTANT, RETAIN FOR FUTURE REFERENCE: READ CAREFULLY
IMPORTANTE: CONSERVE PARA FUTURA REFERENCIA. LEA CUIDADOSAMENTE
IMPORTANT, À CONSERVER POUR DE FUTURS BESOINS DE RÉFÉRENCE : À LIRE SOIGNEUSEMENT
Yardistry – North America
Toll Free Customer Support: 1.888.509.4382
info@yardistrystructures.com
www.yardistrystructures.com
Y40000-831Y
05-26-2021
Yardistry – Norteamérica
Línea gratuita de servicio al cliente: 1.888.509.4382
info@yardistrystructures.com
www.yardistrystructures.com
1
Yardistry – Amérique du Nord
Service client sans frais: 1.888.509.4382
info@yardistrystructures.com
www.yardistrystructures.com
support@yardistrystructures.com
Advertisement

Related Manuals for Yardistry YM12831Y


Summary of Contents for Yardistry YM12831Y
- Page 1 12’ x 14’ Mosquito Mesh Kit Installation Instructions – YM12831Y Kit Mosquitero de 12’ x 14’ Instrucciones de instalación – YM12831Y Ensemble de moustiquaire 12’ x 14’ Instructions d’installation – YM12831Y For use with the YM12941 12 x 14 Gazebo (ITM. / ART.
- Page 2 Netting is NOT flame retardant and will burn. Grills, fire pits and chimineas are a fire hazard if placed too close to a Yardistry structure. Consult user’s manual of the grill, fire pit or chimnea for safe distances from combustible materials.
-
Page 3: Instructions For Proper Maintenance
• Tape Measure If you dispose of your Yardistry structure: Please disassemble and dispose of your unit so that it does not create any unreasonable hazards at the time it is discarded. Be sure to follow your local waste ordinances. - Page 4 Part Identification - Identificación de las piezas - Identification des pièces Y70818-237 (2) - Insect Panel for 12 x 14 Gazebo (2 pack) - Panel Mosquitero (paquete de 2) Y00400-005 - Panneau pour insecte (pqt de 2) Y09991-600 (1) - #2 x 2" Robertson Bit - Mecha Robertson No.2 x 2"...
- Page 5 Lisez la totalité du manuel instalación. Siga las d’assemblage. Suivez les instrucciones en orden. instructions dans l’ordre. 1-888-509-4382 support@yardistrystructures.com YM12831Y CARTON I.D. STAMP: / No. ID DE LA CAJA: / IDENTIFIANT DE BOÎTE: __ __ __ __ __ ___ support@yardistrystructures.com...
- Page 6 Step 2: Attach Curtain Track Short - Paso 2: Fijación de la guía de cortina corta - Étape 2: Fixation du rail pour rideaux court Instructions - Instrucciones - Instructions A: From the inside of the A: Desde el interior del ensamble, A: De l’intérieur de l’assemblage, assembly find the centre on one marque el centro de uno de los...
- Page 7 Step 2: Attach Curtain Track Short - Paso 2: Fijación de la guía de cortina corta Étape 2: Fixation du rail pour rideaux court mbly x2 Insect Screen Inst - Attach Short Tracks Images - Fotos - Images Center of beam / Short Beam Assembly / Ensamble de Centro de la viga / Viga Corta / Assemblage de poutre...
- Page 8 Step 3: Attach Curtain Track Long - Paso 3: Fijación de la guía de cortina larga - Étape 3: Fixation du rail pour rideaux long Instructions - Instrucciones - Instructions A: From the inside of the A: Desde el interior del ensamble, A: De l’intérieur de l’assemblage, assembly find the centre on one marque el centro de uno de los...
- Page 9 Step 3: Attach Curtain Track Long - Paso 3: Fijación de la guía de cortina larga - Étape 3: Fixation du rail pour rideaux long Images - Fotos - Images mbly x2 Insect Screen Inst - Attach Long Tracks F3.2 F3.1 Center of beam / Centro de Side View /...
- Page 10 Step 4: Attach Curtain Track Gussets - Paso 4: Fijación de los refuerzos de las guías de cortina - Étape 4 : Fixation des goussets de rail pour rideaux A: Where each set of Curtain A: Donde se une cada juego de A: Là...
- Page 11 Step 5: Attach End Screws - Paso 5: Fijación de los tornillos de los extremos - Étape 5 : Fixation de vis d’extrémité A: If there is a gap between A: Si queda un espacio entre la A: S’il y a un espace entre le rail the Curtain Track and the Post Guía de Cortina y el Ensamble del pour rideaux et l’assemblage de...
- Page 12 Step 6: Attach Tie Back Ribbons - Paso 6: Colocación de los lazos traseros - Étape 6: Fixation des rubans d’attache arrière A: En la esquina interior de cada A: Dans le coin intérieur de A: On the inside corner of each Ensamble del Poste, fije un Lazo chaque assemblage de montant, Post Assembly attach one Tie Back...
- Page 13 Step 7: Attach Insect Panel Part 1 - Paso 7: Fijación de panel mosquitero Parte 1 - Étape 7: Fixation du Panneau pour insecte Partie 1 A: Comenzando por el centro de A: Starting at the centre of one A: En débutant au centre de l’un un Ensamble de Viga, fije un Panel des assemblages de poutre, fixez un Beam Assembly attach one Insect...
- Page 14 Step 7: Attach Insect Panel Part 2 - Paso 7: Fijación de panel mosquitero Parte 2 - Étape 7: Fixation du panneau pour insecte Partie 2 C: Joignez les panneaux pour C: Una los Paneles Mosquiteros C: Join Insect Panels by zipping insecte en fermant la fermeture con el cierre de cremallera.
- Page 15 Step 8: Attach Insect Panels to Posts - Paso 8: Fijación de los paneles mosquiteros a los postes - Étape 8 : Fixation des panneaux pour insecte aux montants A: En la parte superior de cada A: Au haut de chaque A: At the top of each Post Ensamble del Poste, ubique los Assemblage de montant, situez...
- Page 16 Step 9: Secure Insect Panels - Paso 9: Sujeción permanente de los paneles mosquiteros - Étape 9 : Pose des panneaux pour insectes Note: Only complete this step if Note: Complétez cette étape Nota: Realice este paso solo si you plan on keeping your Insect uniquement si vous planifiez de planea dejar colocados los paneles Panels up at all times.
- Page 17 Garantía Limitada - Garantie limitée Yardistry warrants that this product is free from defect in materials and workmanship for a period of one (1) year from the original date of purchase. In addition, for any product with lumber, all lumber is warranted for five (5) years against rot and decay. This warranty applies to the original owner and registrant and is non-transferable.
- Page 18 support@yardistrystructures.com...
- Page 19 NOTES support@yardistrystructures.com...
- Page 20 À l’attention de: Service à la clientèle Anglais et français parlés / Inglés y francés hablado Yardistry would like to say “Thank you” for your time and feedback. Yardistry quiere “Agradecerle” por su tiempo y su opinión. Yardistry aimerait vous remercier d’avoir pris le temps de répondre au sondage.
Need help?
Do you have a question about the YM12831Y and is the answer not in the manual?
Questions and answers