Table of Contents
Advertisement
Quick Links
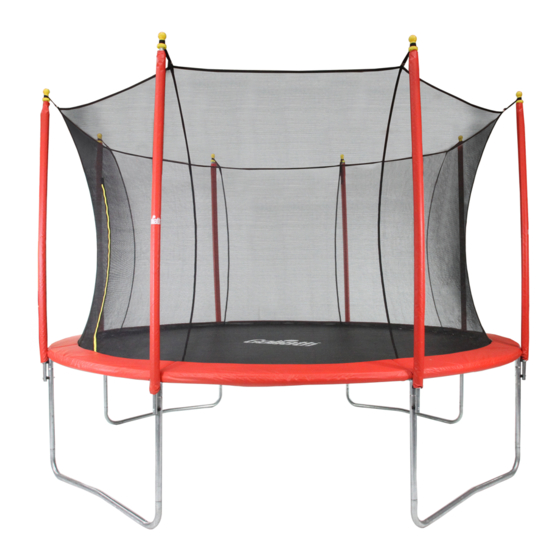
14FT GIGANTUS
TRAMPOLINE WITH ENCLOSURE
MODEL: TX-TF-14-HI
INSTRUCTION MANUAL
TXTF14HIB-V02-0219
WARNING!
SAFETY INFORMATION, INSTALLATION, CARE AND MAINTENANCE INSTRUCTIONS:
READ THESE MATERIALS PRIOR TO ASSEMBLING AND USING THE TRAMPOLINE.
To ensure your safety, please do not attempt to assemble this trampoline without reading this
instruction manual carefully. Failure to comply with this warning may result in injury and/or property
damage.
WARNING
• This trampoline is intended for users aged 6 years and above
• This trampoline contains small parts which may cause choking hazards.
• This trampoline is subject to a maximum user weight limit of 120kgs.
• Do not allow more than one person on the trampoline at a time.
• Do not allow young children to use unless under adult supervision.
• This trampoline is designed for domestic use only.
Customer Service Support: 1800 224 278 | www.goliath-outdoor.com
Advertisement
Table of Contents

Related Manuals for goliath GIGANTUS


Summary of Contents for goliath GIGANTUS
- Page 1 • Do not allow more than one person on the trampoline at a time. • Do not allow young children to use unless under adult supervision. • This trampoline is designed for domestic use only. Customer Service Support: 1800 224 278 | www.goliath-outdoor.com...
-
Page 2: Table Of Contents
Assembly Instructions (Frame) ..................... 17 Assembly Instructions (Jumping Mat & Net) ................18 Assembly Instructions (Frame Pad) ..................... 19 Assembly Instructions (Safety Net) ....................20 Disassembly ........................... 21 Limited Warranty ..........................22 Service Centre ..........................22 Customer Service Support: 1800 224 278 | www.goliath-outdoor.com... -
Page 3: Overview
T: 1800 224 278 Terms used: ‘Goliath’ refers to the registered brand ‘Goliath’ as well as all organisations under the control of Goliath BV. ‘the consumer’ refers to any individual and/or any legal entity purchasing from Goliath or using the website ‘the Website’... -
Page 4: Title & Risk
Damage due to incorrect assembly is not covered by Goliath warranty. Warranty All Goliath products are sold with a manufacturing warranty, which assure that the item is free of defects in workmanship and materials (“warranty”). The Warranty covers manufacturing defects only. It does not cover any faults described in. - Page 5 Goliath product. 4.3 Warranty Claims If a consumer believes that a Goliath product is faulty or defective, they must discontinue to use the product and submit a Warranty Claim. Customer Service Support: 1800 224 278 | www.goliath-outdoor.com...
-
Page 6: Australian Consumer Law
Missing Parts If a consumer believes that a Goliath product does not include all necessary parts, they must contact us immediately on 1800 224 278 or info@goliath-outdoor.com A consumer must not attempt to use a product if any part is incomplete, as it may be dangerous. Any damage that the user causes as a result of using incomplete or improper installed products will lead to immediate voiding of the warranty. -
Page 7: Product Portrayals
10 Privacy Policy Goliath will not pass your personal information on to any other party without your permission. Your personal information will be used only for the purpose for which it was given to us. From time to time, we may send you product information, including special offers, per mail or by email. -
Page 8: Safety Information
All Goliath trampolines are tested and compliant to Australian Safety Standard AS4989:2006 Customer Service Support: 1800 224 278 | www.goliath-outdoor.com... -
Page 9: Specific Use Limitation
Keep objects away which could interfere with the user. Maintain a clear area around, above, and under the trampoline and enclosure. • Learn fundamental bounces and body positions thoroughly before trying more advanced skills. Customer Service Support: 1800 224 278 | www.goliath-outdoor.com Page 7 of 23... -
Page 10: Safe Use Instructions
No buckles or jewellery should be worn, as these could damage the trampoline mat and cause injury to you. • Do not wear shoes while bouncing on the trampoline. Customer Service Support: 1800 224 278 | www.goliath-outdoor.com Page 8 of 23... -
Page 11: How To Use Your Trampoline
Focus your eyes towards the perimeter of the trampoline while bouncing in order to keep your balance. • Stop the bounce by bending at your knees and hips on contact with the bed. Customer Service Support: 1800 224 278 | www.goliath-outdoor.com Page 9 of 23... - Page 12 Practice these simple variations and concentrate on perfect form. Make sure that your toes are pointed and fingers are straight. These are simple variations to the basic bounce and are very important for gaining experience in coordinated movement. Customer Service Support: 1800 224 278 | www.goliath-outdoor.com Page 10 of 23...
- Page 13 Start from the hands and knees drop position. • As you rebound from the hands and knees, stretch so that you land on your stomach. From this position, rebound to your hands and knees. Customer Service Support: 1800 224 278 | www.goliath-outdoor.com Page 11 of 23...
- Page 14 From a standing position, prime the bed, then perform a front drop. Push sideways, as in Step 3, and complete a 180 degree turn, finishing in a front drop facing the opposite position (see Figure 7). Customer Service Support: 1800 224 278 | www.goliath-outdoor.com Page 12 of 23...
- Page 15 These instructions are issued in the interest of child safety, and we ask that you follow this advice. Customer Service Support: 1800 224 278 | www.goliath-outdoor.com Page 13 of 23...
-
Page 16: Installation Instructions
It is essential that you inspect the trampoline before each use and replace any worn, defective, or missing parts before further use. Use only parts that are recommended by the manufacturer. Customer Service Support: 1800 224 278 | www.goliath-outdoor.com Page 14 of 23... -
Page 17: Potential Hazards Of Trampoline Components
Sagging of the barrier Bent or broken barrier supports Sharp protrusions on the barrier support structure Broken or damaged enclosure entry system Customer Service Support: 1800 224 278 | www.goliath-outdoor.com Page 15 of 23... -
Page 18: Parts List
VERTICAL LEG TUBE JUMPING MAT SPRING SPRING HOOK TOOL UPPER POLE TUBE LOWER POLE TUBE POLE SLEEVE BALL CAP BALL CAP SCREW SCREWS SETS A SCREWS SETS B Customer Service Support: 1800 224 278 | www.goliath-outdoor.com Page 16 of 23... -
Page 19: Assembly Instructions (Frame)
3. Put all assembled Top Rail Frames together as 4. When it is done correctly, the trampoline frame shown as below. should look like the illustration below. Customer Service Support: 1800 224 278 | www.goliath-outdoor.com Page 17 of 23... -
Page 20: Assembly Instructions (Jumping Mat & Net)
V Hook on the jumping mat Follow the above instructions until all springs before proceeding with installation any further. are attached to the frame. Customer Service Support: 1800 224 278 | www.goliath-outdoor.com Page 18 of 23... -
Page 21: Assembly Instructions (Frame Pad)
1. Place the Frame Pad (15) onto the top of 2. Pull and secure the sewn on elastic band to the trampoline frame, align the frame pad. V-ring under the frame pad. Customer Service Support: 1800 224 278 | www.goliath-outdoor.com Page 19 of 23... -
Page 22: Assembly Instructions (Safety Net)
Spanner (17). DO NOT OVERTIGHTEN! assembled Pole Tubes done in previous step to Repeat steps 3 with the remaining 7 enclosure the Screw Sets B. poles. See below. Customer Service Support: 1800 224 278 | www.goliath-outdoor.com Page 20 of 23... -
Page 23: Disassembly
13 Disassembly To disassemble, simply follow ASSEMBLY STEP - FRAME, JUMP MAT, ENCLOSURE in reverse order, until you have disassembled the trampoline. Customer Service Support: 1800 224 278 | www.goliath-outdoor.com Page 21 of 23... -
Page 24: Limited Warranty
15 Service Centre CROWN & ANDREWS PTY LTD Unit D, 21 Loyalty Road, North Rocks NSW 2151 Australia T: 1800 224 278 E: info@goliath-outdoor.com 9:00am – 4:30pm Monday to Friday (excluding Public Holidays) Customer Service Support: 1800 224 278 | www.goliath-outdoor.com... - Page 25 DATE OF PURCHASE: ____/____/____ ATTACH RECEIPT HERE Customer Service Support: 1800 224 278 | www.goliath-outdoor.com Page 23 of 23...
Need help?
Do you have a question about the GIGANTUS and is the answer not in the manual?
Questions and answers