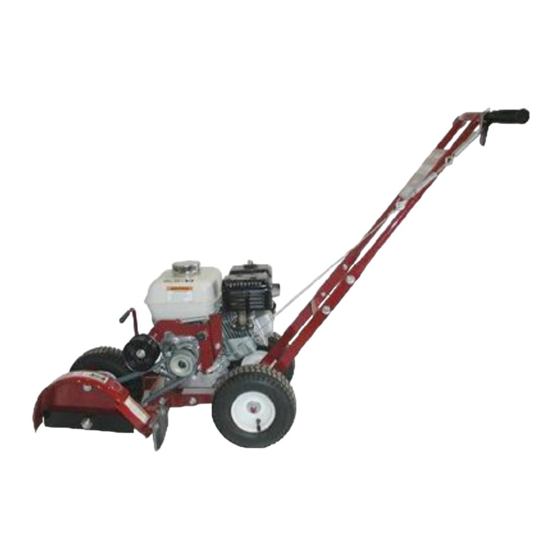
Brown Products Trench Master R450H Owner's/Operator's Manual
Hide thumbs
Also See for Trench Master R450H:
- Owner's and operator's manual (34 pages) ,
- Owner's/operator's manual (34 pages)

Related Manuals for Brown Products Trench Master R450H


Summary of Contents for Brown Products Trench Master R450H
- Page 1 12/2009 REDEFINER R450H R450HA WIREMASTER R460HA CONVERSION KITS 460-001 WIREMASTER 459-001 EDGER...
- Page 2 1943. Brown Products is proud of the reputation it has earned for quality products and customer service. If you have any questions or problems with your TRENCHMASTER , please contact your dealer or ®...
-
Page 3: Table Of Contents
TABLE OF CONTENTS Warranty………………………………………………………3 Supplemental Warranty………………………………..4 Owner Registration……………………………………….6 Safety…………………………………………………………….9 Operating Instructions…………………………………..11 Scheduled Maintenance………………………………..13 Troubleshooting…………………………………………….14 Parts Lists & Drawings: ReDefiner…………………………………………15 WireMaster Mole Kit & Edger Kit……..17 WireMaster Mole…………………………….19 Installation & Operation Instructions: WireMaster Mole Kit……………………….21 ReDefiner Edger Kit………………………….22... -
Page 4: Warranty
Engine problems must be checked and approved for warranty by an authorized engine manufacturer’s service center. Brown Products, Inc. is not an authorized service center for any engine manufacturer and accepts no responsibility for engine warranties, either express or implied. -
Page 5: Supplemental Warranty
One missing rotor tooth will be cause for changing the rotor. Use of any part not manufactured by Brown Products, Inc. will void all warrantees. The use of a re- manufactured rotor will also void the warranty. - Page 6 This page intentionally left blank.
- Page 7 TrenchMaster Owner’s Warranty Card ® Name ___________________________________ Model ________________________________ Address _________________________________ Serial Number _________________________ City/State _______________________________ Date Purchased ________________________ Phone __________________________________ TrenchMaster® Dealer ___________________ E-Mail __________________________________ IMPORTANT: TO PLACE THE BROWN WARRANTY INTO EFFECT, THIS WARRANTY CARD MUST BE COMPLETED AND MAILED WITHIN 30 DAYS AFTER RECEIVING THIS EQUIPMENT.
- Page 8 This page intentionally left blank.
-
Page 10: Safety
WARNING SAFETY PRECAUTIONS WARNING: Engine exhaust from this product contains chemicals known, in certain quantities, to cause cancer, birth defects, or other reproductive harm. DO NOT assemble TRENCHMASTER® before reading assembly instructions. DO NOT start TRENCHMASTER® before reading operating instructions. DO NOT modify TRENCHMASTER®... - Page 11 TRENCHMASTER® SOIL & DEBRIS EXHAUST CHART...
-
Page 12: Operating Instructions
OPERATING INSTRUCTIONS Brown TRENCHMASTER ® BEFORE STARTING ENGINE 1. Check machine. a. Read and be familiar with equipment operating instructions. b. Be sure you have the proper rotor for trench size and soil conditions. c. Check rotor retaining nut for tightness. d. - Page 13 Starting Engine Continued f. When engine starts, gradually open choke and let engine warm up at about ¼ speed. WARNING: Do not operate machine without rotor hood installed and secure. WARNING: Do not operate the machine within a 50’ radius of people, animals, automobiles or glassed areas which might be damaged by projectiles.
-
Page 14: Scheduled Maintenance
SCHEDULED MAINTENANCE Good maintenance practices are critical if you are to enjoy trouble free operation and long life from your Brown TRENCHMASTER ® . Most required maintenance procedures are shown in this section. However, other common sense maintenance practices such as cleanliness and storage must be followed. -
Page 15: Troubleshooting
TROUBLESHOOTING PROBLEM POSSIBLE CAUSE SOLUTION Burning Belts Improper tension on belts Adjust belt tension using the turnbuckle on the clutch cable. Spring should stretch approximately ¾” to 1” when clutch lever is fully engaged. Pulleys not aligned Align pulleys Pulleys worn excessively Replace pulleys Pulleys broken or burrs on Replace pulleys... - Page 16 TrenchMaster Model R450H & R450HA ReDefiner Parts List Ref # Part # Description # Req'd 450-001 Frame 450-002 Handlebar 450-003 Assembly, Rotor Arm with Bearings & Spacer 450-251 Bracket, Idler Arm 450-024 Stop, Belt, Engine Pulley 450-253 Plate, Hood Back 450-752 Brush 450-503...
-
Page 18: Redefiner
WireMaster Mole Kit 460-001 Parts List Ref # Part # Description # Req'd 460-503 Knob, Up/Down Adjustment 460-007 Rod, Ground 460-008 Bracket, Front, Up-Down 460-004 Bracket, Drape Retainer 460-010 Clamp, Wire Spool Bracket 460-013 Bracket, Wire Spool Mount 460-014 Tube, Wire Conduit, PEX 702-78 Strap 460-505... - Page 20 WireMaster Mole Model R460HA Parts List Ref # Part # Description # Req'd 450-001 Frame 450-002 Handlebar 450-003 Assembly, Rotor Arm with Bearings & Spacer 450-251 Bracket, Idler Arm 450-024 Stop, Belt, Engine Pulley 460-252 Hood, Back Plate 450-752 Brush 450-503 Channel, Brush 991-05...
- Page 22 WireMaster Mole Kit Installation Instructions 1. Remove the ReDefiner Rotor (item # 38) from the rotor shaft. 2. Remove the entire ReDefiner hood assembly (item #30) from the bearing housing bracket and bearing housing arm. Set aside the Lower Belt Stop (item #41) for reinstallation. 3.
- Page 23 ReDefiner Edger Kit Installation Instructions 1. Remove the ReDefiner rotor (item # 38) from the rotor shaft 2. Remove the entire hood assembly (item #30) from the bearing housing and bearing housing arm. Keep the Lower Belt Stop (item #41) for reinstallation. 3.