Advertisement
Advertisement

Summary of Contents for Outdoor Gourmet 156633
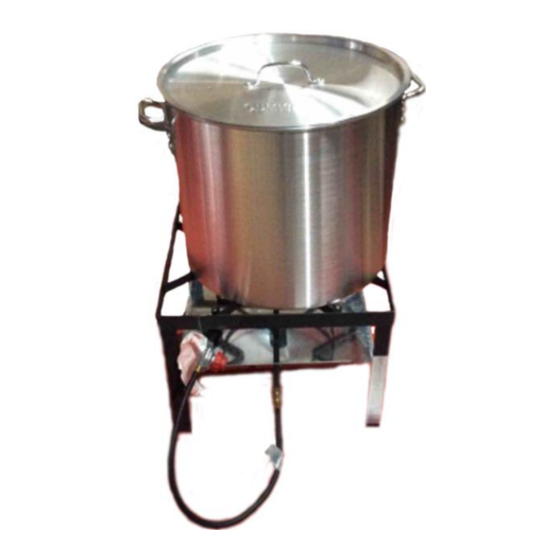
- Page 1 Assembly Instructions & User’s Manual 60 Qt Low Country Kit Style # 156633 Please keep this instruction manual for future reference Customer Service: (888) 922-2336 7:00 am to 12:00 am Central Standard Time (daily) Live Chat at: www.academy.com Email: customerservice@academy.com...
-
Page 2: Table Of Contents
Table of Contents Warning....................2 - 7 Parts List………………………………………………………………………….8 Hardware List & Tools List …………………………………………………….9 Assembly Instructions……………………………………………………...10 - 11 User Instructions……………………………………………………………12 - 17 Operating Instructions……………….....……………………………..18 Care and Maintenance………………………………………………………….19 Warranty Information………………………………………...…………... 20 Note: Beginning assembly of product, make sure all parts are present.Compare parts will package content list and hareware contents. - Page 3 WARNINGS THE APPLIANCE IS ONLY INTENDED FOR HEATING WATER (NOT OIL GREASE).THIS COOKER IS FOR OUTDOOR USE ONLY THIS APPLIANCE IS NOT INTENDED FOR COMMERCIAL USE SAFETY SYMBOLS: When using this appliance, basic safety precautions should always be observed. Read and understand the meaning of these symbols before assembling and using this appliance.
- Page 4 If you continue to smell gas, immediately contact the fire department (e.g. 911) and do not go near the appliance. Model No. 156633 Main Max. Input Rating: 100,000 BTU/H Equipped for use on: Propane Certified under ANSI Z21.89-2017/CSA 1.18-2017 Outdoor Cooking Specialty Gas Appliances WARNING: FOR OUTDOOR USE ONLY.
- Page 5 WARNINGS • The installation must conform with local codes or, in the absence of local codes, with either the National Fuel Gas Code, ANSI Z223.1/NFPA 54, Natural Gas and Propane Installation Code, CSA B149.1, or Propane Storage and Handling Code, B149.2 •...
- Page 6 WARNINGS • This appliance is not intended for and should never be used as a heater. • This appliance will be HOT during and after use. Use insulated oven mitts or gloves for protection from hot surfaces or splatter from cooking liquids. •...
-
Page 7: Warning
WARNINGS DANGER Do not insert any tool or foreign object into the valve outlet or safety relief valve. You may damage the valve and cause a leak. Leaking propane may result in explosion, fire, severe personal injury, or death. Never attempt to attach this appliance to the self-contained LP gas system of a camper, trailer, or motor home. - Page 8 User Instructions WARNINGS • Never overfill the cooking vessel with more water than specified by vessel manufacturer instruction. Do not move the appliance when in use. Allow the cooking vessel to cool to 115°F (46°C) before moving or storing. • Avoid bumping into or impacting the appliance to prevent spillage or splashing of hot cooking liquid.
- Page 10 Hardware List Description Hex Bolts ¼ “ X 1” Nuts with Washers Washers Tools List Adjustable wrench (not included) Page 9 of 21...
-
Page 11: Assembly Instructions
Assembly Instructions Step 1: Place the square stand (B) upside down on a flat surface as shown. Install the jet burner (D) assembly by inserting hex bolts (F) (4 pcs) through side holes and fully tighten nuts with washers (G&H) (4pcs). - Page 12 Assembly Instructions Step 4: Connect the type 1 connector on the regulator hose to the LP tank. Hand tighten clockwise. Fully Assembled 24’’ Page 11 of 21...
-
Page 13: User Instructions
User Instructions LP Tank Removal, Transport and Storage • Turn OFF control knobs at regulator and LP tank valve. Turn coupling nut counterclockwise by hand only – DO NOT USE TOOLS TO DISCONNECT. Place dust cap on cylinder valve outlet whenever the cylinder is not in use. Only install the type of dust cap on the cylinder valve outlet that is provided with the cylinder valve. - Page 14 User Instructions LP Tank Exchange Many retailers that sell appliances offer you the option of replacing your empty LP tanks through an exchange service, Use only those reputable exchange companies that inspect, precision fill, test, and certify their cylinders. Exchange your tank only for an OPD safety feature-equipped tanks as described in the “LP Tank”...
- Page 15 User Instructions Connecting Regulator to the LP Tank (1) Place LP tank on a secure, level, and stable surface. (2) Turn control knob to the OFF position. (3) Turn LP tank OFF by turning hand wheel clockwise to a full stop. (4) Remove the protective cap from the LP tank valve.
- Page 16 User Instructions Leak Testing Valves, Hoses and Regulator 1. Turn all control knob(s) to OFF. 2. Be sure regulator is tightly connected to LP tanks. 3. Completely open LP tank valve by turning hand wheel counterclockwise. If you hear a rushing sound, turn gas off immediately. This means there is a major leak at the connection.
- Page 17 User Instructions Lighting Instructions 1. Read complete instructions before lighting. 2. Turn regulator control valve to OFF position. 4’’ 3. Fully open LP bottle valve 4. DO NOT stand with head or arms over cooker. Remove the pot over cooker. Slowly turn on the regulator valve one turn clockwise.
- Page 18 User Instructions Turning LP Cooker Off • Turn all knobs to OFF position, turn LP tank OFF by turning hand-wheel clockwise to a full stop. Disconnecting Regulator to the LP Tank 1.Turn control knob of regulator to the OFF position. 2.Turn LP tank OFF by turning hand wheel clockwise to a full stop.
- Page 19 HOW TO USE YOUR NEW CRAWFISH KIT CRAWFISH/CRAB/SHRIMP BOIL * For our 60 quart pot, fill 1/2 full of water. Add approximately five, 16 ounce crab boil ingredient packs (complete, ready-to-use) available from a variety of manufacturers. * Bring water to a rolling boil. Add seafood. * Gently stir.
-
Page 20: Operating Instructions
Operating Instructions Check that your 20 lb LP gas cylinder is not over filled and has the proper QCC type 1 connection. The maximum weight of a properly filled cylinder is approximately 38 lbs. Check that your hose assembly is set to restrict gas flow. With the adjustable regulator provided, turn the regulator control counterclockwise until it stops. -
Page 21: Care And Maintenance
Care and Maintenance CAUTION Allow unit to fully cool before performing any cleaning. Proper care and appliance maintenance will keep your product operating smoothly. CLEAN THOROUGHLY AFTER EVERY USE. SUGGESTED CLEANING MATERIALS: • Warm water • Mild dishwashing liquid detergent •... -
Page 22: Warranty Information
We will not be responsible for labor charges and/or damage incurred in installation, repair or replacement nor for incidental or consequential damage. •Distributor: Academy, Ltd. •Address : 1800 NORTH MASON ROAD, KATY, TX 77449, USA •Appliance model : 156633 Outdoor Gourmet 60 Qt. Low Country Kit Page 21of 21...
Need help?
Do you have a question about the 156633 and is the answer not in the manual?
Questions and answers