Advertisement
Quick Links
Advertisement

Summary of Contents for Living & Co 12PL-DVLC
- Page 1 Dishwasher INSTRUCTION MANUAL Model Number: 12PL-DVLC E209 0800 422 274...
-
Page 2: Table Of Contents
Contents Important Safety Instructions Product Overview Installation Wash programs table Quick start guide Instructions FAQs and Troubleshooting Guide Other Useful Information 0800 422 274... -
Page 3: Important Safety Instructions
Important Safety Instructions READ CAREFULLY AND KEEP FOR FUTURE REFERENCE Read this manual thoroughly before first use, even if you are familiar with this type of product. The safety precautions enclosed herein reduce the risk of fire, electric shock and injury when correctly adhered to. Keep the manual in a safe place for future reference, along with any warranty information, your purchase receipt and the packaging carton. - Page 4 Important Safety Instructions (Cont.) • Inserting/removing the plug: Before you insert or remove the plug, make sure the appliance is switched off and the power is switched off at the electrical outlet. Remove by grasping the plug, do not pull on the cord. CAUTION! •...
- Page 5 Important Safety Instructions (Cont.) • Usage restriction: The appliance is not intended for use by persons (including children) with reduced physical, sensory or mental capabilities, or lack of experience and knowledge, unless they have been given supervision or instruction concerning use of the appliance by a person responsible for their safety. •...
-
Page 6: Product Overview
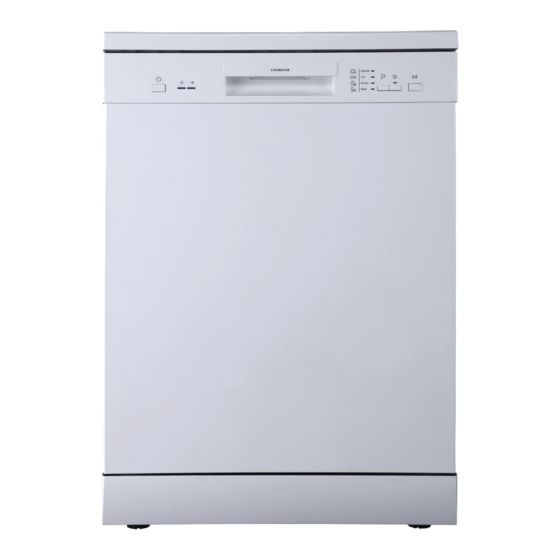
Product Overview SCOPE OF DELIVERY: DISHWASHER Dishwasher Rinse aid dispenser Cutlery basket Cup/cutlery rack Upper basket Other inclusions (not shown) Upper spray arm Drain hose and water supply hose Inner pipe Power cord and plug Lower basket Instruction manual Detergent dispenser Warranty card 0800 422 274... - Page 7 Product Overview (Cont.) CONTROL PANEL Operation buttons POWER Press this button to turn on your dishwasher. Press this button to select the appropriate washing program, PROGRAM the selected program indicator will light up. EXTRA Press this button to have dishes dried more thoroughly. (It can DRYING only be used with the Intensive, ECO and 90 mins programs.) Press this button to start the selected washing program or...
-
Page 8: Installation
Installation UNPACKING DANGER! Make sure your electrical power is disconnected before installing the dishwasher. Failure to do so can result in death or electric shock. IMPORTANT! All relevant pipes and electrical equipment should be installed by licensed plumbers, electricians or dishwasher installers. Make sure to use new water supply and drain hoses;... - Page 9 Installation (Cont.) LEVELLING THE APPLIANCE • Position the dishwasher on a level and sturdy floor. Fig. 1 • If the floor is uneven, adjust the adjustable feet until it reaches a horizontal position; just screw the feet in or out a little (Fig. 1). •...
- Page 10 Installation (Cont.) COLD WATER CONNECTION • Connect the cold water supply hose to a threaded 3/4” connector. During use, the dishwasher will heat up the water to the required temperature. Make sure the hose is not kinked or squashed and is fastened tightly in place (Fig. 4). Fig.
- Page 11 Installation (Cont.) ELECTRICAL CONNECTION Make sure your electrical voltage and circuit frequency correspond to those indicated on the rating plate and your electrical system is sized for the maximum voltage on the plate. This appliance requires a 10A fused, copper-wired electrical supply. A time delay fuse or circuit breaker is recommended, as well as provision of a separate circuit serving only this appliance.
-
Page 12: Wash Programs Table
Wash programs table Program Suitability Cycles Intensive Prewash (50ºC) For heavily soiled loads, such as Wash (60ºC) pots, pans, casserole dishes and Rinse dishes that have been sitting with Rinse dried food on them for a while. Rinse (65ºC) Drying For normally soiled loads, such Wash (45ºC) as plates, glasses, bowls and... - Page 13 Wash programs table (Cont.) Detergent (pre/main) Running Time (min.) Energy (kWh) Water (L) 5 / 25g 18.5 (or all-in-1) 0.75 (or all-in-1) 11.5 (or all-in-1) 11.5 0800 422 274...
-
Page 14: Quick Start Guide
Quick Start Guide For detailed operating instructions, please read the corresponding content in this manual. Install the dishwasher Please refer to the “Installation” section on pages 8–11 in this manual. Make sure the water tap is open. Prepare the dishes Load the baskets Scrape off leftover food and soften burnt Load the baskets following the dishwasher... -
Page 15: Instructions
Instructions LOADING THE DISHWASHER Before loading the dishwasher baskets: ATTENTION: It is not necessary to rinse the dishes under running water before you put them into the dishwasher. However, we recommend you scrape off any large amounts of leftover food and soften remnants of burnt food in pots and pans. Place objects in the dishwasher in the following way: •... - Page 16 Instructions (Cont.) Loading the upper basket Fig. 6: Upper basket, loaded to fit 12 place settings The upper basket is designed to hold more delicate and lighter tableware such as glasses, cups, small plates, bowls and shallow pans (as long as they are not too dirty).
- Page 17 Instructions (Cont.) Loading the lower basket Fig. 8: Lower basket, loaded to fit 12 place settings The lower basket is designed to hold dinner plates, larger items and the cutlery basket (Fig. 8). Pots, pans, serving dishes and bowls are often the most difficult to clean and fit best into the lower basket.
- Page 18 Instructions (Cont.) The cutlery basket Your new dishwasher is equipped with a removable cutlery basket with anti-nesting grid. You can use it with the anti-nesting grid up or down. Fig. 10 shows you how to load the basket with the anti-nesting grid to hold a cutlery set for 12 people.
- Page 19 Instructions (Cont.) DISHWASHER DETERGENT WARNING • Only use detergent specifically made for use in dishwashers. • Always add detergent just before starting the dishwasher, otherwise it could get damp and will not dissolve properly. It is also a hazard to leave detergent in the dispenser where children can reach it when the door is open.
- Page 20 Instructions (Cont.) RINSE AID Rinse aid is automatically released during the last rinse to prevent water from forming droplets on your dishes, which can leave spots and streaks. It also improves drying by allowing water to roll off the dishes. Your dishwasher is designed to use liquid rinse aid. Filling the rinse aid dispenser CAUTION! Only use specific, branded rinse aid for your dishwasher.
- Page 21 Instructions (Cont.) When to refill the rinse aid dispenser Fill the rinse aid dispenser when the warning light [ ] on the control panel comes on. Alternatively, you can estimate the amount of rinse aid left in the dispenser by the colour of the optical level indicator, which is located next to the cap (see Fig.
- Page 22 Instructions (Cont.) RUNNING THE DISHWASHER Starting a wash program • Open the door and draw out the lower basket. Load your dishes and push the basket back into place. Then load the upper basket the same way. • Add dishwasher detergent according to the instructions. •...
- Page 23 Instructions (Cont.) Forgot to add a dish? Additional dishes can be added any time before the detergent dispenser opens. • Press the START/PAUSE button to pause the washing (Fig. 18). • Wait for 5 seconds, open the door slightly, and when the spray arm has stopped working, you can open it completely.
-
Page 24: Faqs And Troubleshooting Guide
FAQs & Troubleshooting Guide TROUBLESHOOTING GUIDE The table below lists possible causes and solutions for some commonly experienced problems. If you follow all the instructions below but still cannot solve a problem, please contact our after sales support centre. Problem Possible cause Solution Replace the fuse or reset the circuit... - Page 25 FAQs & Troubleshooting Guide (Cont.) Problem Possible cause Solution Use only specific dishwasher detergent to avoid suds. If this occurs, open the dishwasher and let the suds evaporate. Add 3–4 litres of cold water to the tub, close the door securely, then run any Inappropriate detergent program.
- Page 26 FAQs & Troubleshooting Guide (Cont.) Problem Possible cause Solution Load the dishwasher as suggested in Improper loading this manual. Increase the amount of rinse aid. Remove the cap from the rinse aid Too little rinse aid dispenser and set the dosage dial to a higher number.
- Page 27 FAQs & Troubleshooting Guide (Cont.) ERROR CODES When there is a malfunction, some of the indicator lights on the control panel will start flickering in order to warn you that something is wrong. Code Meaning Possible cause and solution Faucet is not opened, or water The indicator for the intake is restricted, or water pressure is too low —...
-
Page 28: Other Useful Information
Other Useful Information (Cont.) CLEANING AND MAINTENANCE The filter system The filter system in the base of the wash cabinet efficiently removes food particles from the wash water, allowing it to be recycled during the wash. It prevents larger remnants of food or other objects from getting inside the pump. The filter system consists of three filters: a coarse filter, main filter and fine filter. - Page 29 Other Useful Information (Cont.) WARNING! • When cleaning the filters take care not to contort their shape, which could compromise the washing performance. • Do not overtighten the filters. Put the filters back in sequence securely, otherwise coarse debris could get into the system and cause a blockage. •...
- Page 30 Other Useful Information (Cont.) LOOKING AFTER YOUR DISHWASHER • After every wash, turn off the water supply to the appliance and leave the door slightly ajar so moisture and odours are not trapped inside. • Before cleaning or performing maintenance, always unplug the dishwasher from the socket.
- Page 31 Other Useful Information (Cont.) TECHNICAL SPECIFICATIONS, COMPLIANCE & DISPOSAL Model Number 12PL-DVLC Capacity 12 place settings Rated voltage/frequency 220-240V~ 50Hz Power consumption 1760–2100W Water pressure (flow pressure) 0.04–1.00 MPa = 0.4–10 bar Height 845mm Width 598mm Depth with door closed: 600mm with door open 90°: 1175mm...
- Page 32 Warranty We pride ourselves on producing a range of quality home appliances that are both packed with features and completely reliable. We are so confident in our products, we back them up with a comprehensive warranty. Now you too can relax knowing that you are covered. Customer Helpline NZ: 0800 422 274 This Product is covered by a 2 year warranty when accompanied by proof of purchase.
Need help?
Do you have a question about the 12PL-DVLC and is the answer not in the manual?
Questions and answers