Advertisement
Quick Links
Advertisement

Related Manuals for Bibo bar

Summary of Contents for Bibo bar
- Page 1 All manuals and user guides at all-guides.com BIBO bar user manual Maximize your BIBO experience...
- Page 2 As we want you to get the best from your BIBO bar, we ask that you read through this manual before getting things started.
- Page 3 Contents MEET YOUR BIBO bar p. 4 MAINTAINING YOUR BIBO bar p. 22 BIBO bar overview Replacing your BIBO bar maxi filter BIBO bar’s touch screen interface Replacing your BIBO bar zapper Cleaning your BIBO bar p. 6 TECHNICAL INFORMATION p.
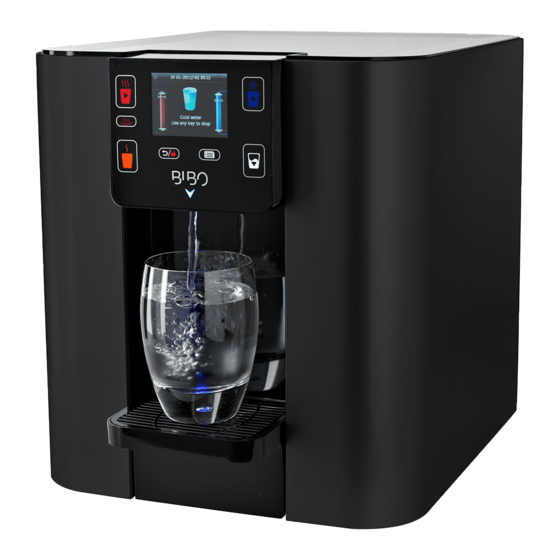
- Page 4 All manuals and user guides at all-guides.com Meet your BIBO bar CONTENTS BIBO OVERVIEW 1. Touch screen interface 2. 2.8”TFT LCD screen 3. Water outlets 4. Front panel 5. Removable Drip Tray 6. Lid 7. Refrigeration condenser 8. Hot tank switch 9.
- Page 5 Please note that your BIBO bar’s red Boiling Water Button (7), blue Chilled Water Button (10) and white Measured Cup Button (11) all have arrows inside. This is because they act as scroll buttons when navigating through the BIBO bar menu. Similarly, the Menu Button (15) and Lock Button (12) act as a confirmation and back buttons respectively when in menu mode.
- Page 6 Your BIBO bar comes with a self installation kit consisting of installed. If you are installing please take care when lifting it a 3m length of 6mm white water supply pipe (1), a BIBO ½” “T” your own BIBO bar, then please from its box.
- Page 7 BIBO installation, you will need to supply is flushed out thoroughly bar needs to be one that offers identify a mains cold water into a bucket until clear water Your BIBO bar needs to be There will need to be a suitable both convenience and style.
- Page 8 It’s useful to have a cloth close the work surface. elbow (provided with your BIBO by to dry up any spills. bar) into the water inlet. (Picture 5) c. Remove the plastic bag and c. Install the BIBO ½” “T” protective covering from the h.
- Page 9 There should be a heating switch immediately and heat up and the hot water red bar on the left of the screen start from step f again). You temperature bar icon will and a blue bar on the right of...
- Page 10 All manuals and user guides at all-guides.com Installing your BIBO bar CONTENTS STEP BY STEP GUIDE FOR SELF-INSTALLATION 3. SETTING UP YOUR BIBO bar CONTINUED When first used, the hot once 1,5 litres has been tank will take approximately drained.
- Page 11 Additionally the menu contains your MAXI filter and zapper settings. There is also an option to restore your BIBO bar to its original factory settings (but please don’t ever restore your BIBO bar without consulting our BIBO technical team first).
- Page 12 All manuals and user guides at all-guides.com Using your BIBO bar CONTENTS MENU OPTIONS AND PERSONAL SETTING WATER TEMPERATURE SETTING Your BIBO bar allows you to set 3. Touch to navigate between the TEMPERATURE TIP Elevation Temp City your preferred water temperatures temperature settings (Image i - iv).
- Page 13 Using your BIBO bar CONTENTS MENU OPTIONS AND PERSONAL SETTING WATER QUANTITY SETTING Your BIBO bar allows you to • Navigate to the boiling water that boiling water will be • Place your preferred cup on preset your cup size for boiling,...
- Page 14 You will notice your BIBO BIBO bar? It is for this place a cup under the water reason that the preset bar counting up the seconds measure is an approximate...
- Page 15 2. Touch again to select and correct year is set, use 7. Once your date and time have Your BIBO bar displays the time and date. Setting the correct enter into the Calendar settings. navigate to the month and day,...
- Page 16 Sleep Mode which allows your • Use to navigate to the BIBO bar to go to sleep and save Power settings. Sleep settings (this should be • Once you are happy with your energy after a certain amount of time of non-use.
- Page 17 MENU OPTIONS AND PERSONAL SETTING POWER AND ENERGY-SAVING SETTINGS If you’d like to wake your BIBO 5. To set your BIBO bar’s Power • To set an on/off time, touch • Once you are happy with your bar up from Standby Mode...
- Page 18 While your BIBO bar has an inherent safety feature for 6. To return to the menu touch boiling hot water dispensing, it is recommended that for...
- Page 19 Using your BIBO bar CONTENTS MENU OPTIONS AND PERSONAL SETTING RING SETTING RESTORE FACTORY SETTING Your BIBO bar gives you the The option to restore your 3. Touch again to select 5. Once your preferred restore BIBO bar to its factory settings, option for it to beep every and enter into the ring settings.
- Page 20 (take caution). . The screen will then settings are saved, according to 2. Unlock the boiling hot water display a boiling bar (Image ii). 2. Touch to start dispensing the instructions on page 4. Once your vessel has filled...
- Page 21 All manuals and user guides at all-guides.com Using your BIBO bar CONTENTS DISPENSING WATER DISPENSING A MEASURED CUP OF BOILING OR CHILLED WATER To use this feature, you will 3. Once your vessel has filled need to ensure the correct...
- Page 22 BIBO maxi filter every door before you know it. Simple 6 months and the replacement as that! If you’d like to find out of the BIBO zapper once a year. more about our filters@home package, please get in touch on 3. Touch...
- Page 23 1. Remove the lid on the top of grip tool supplied with your filter 5. Turn the new maxi filter your BIBO bar by simply lifting it pack (Image iv). clockwise to lock and install off. You will see the tops of two...
- Page 24 CONTENTS FILTER AND ZAPPER REPLACEMENT REPLACING YOUR BIBO ZAPPER Your BIBO bar will alert you front of your BIBO bar and can Alternatively use anything small when your BIBO zapper needs to be recognised by its slimmer to release the latch as indicated shape and flat top (Image ii).
- Page 25 BIBO zapper filter to clean the body of your BIBO along with the option to change bar as it will scratch. the current BIBO zapper. The BIBO bar drip tray can be removed and cleaned by hand or in your dishwasher.
- Page 26 All manuals and user guides at all-guides.com Technical Information CONTENTS PRODUCT SPECIFICATIONS There’s a lots that goes on inside your BIBO bar. If you’re looking for the technical ins and outs, please find the BIBO bar specifications below: SPECIFICATION PARAMETER...
- Page 27 Please remember: is visible with no sediments or dirt particles in the water. This Your BIBO bar can produce Your BIBO bar is for indoor use is to ensure your BIBO bar does high temperature boiling water. only. not block up. Be sure to do so...
- Page 28 3. Filter replacements have not taken place when required 3. Replace the expired filters If you’re still a little stuck and find that your BIBO bar is still not operating as it should, or if a problem persists, please contact us via email at hello@bibo.co.za...
- Page 29 BIBO bar with a new one for free while your warranty is valid. Appropriate maintenance costs will be charged for any...
- Page 30 All manuals and user guides at all-guides.com CONTENTS Please remember to let us know how you’re enjoying your BIBO bar by emailing us hello@bibo.co.za with your feedback or reviewing us on Facebook here. Wishing you many happy, healthy and hydrating hours with your BIBO bar.
Need help?
Do you have a question about the bar and is the answer not in the manual?
Questions and answers