Table of Contents
Advertisement
Quick Links
Advertisement
Table of Contents

Related Manuals for Lenovo LI2241


Summary of Contents for Lenovo LI2241
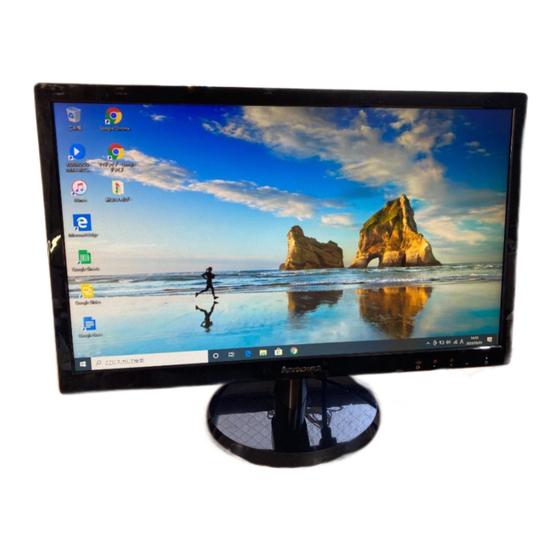
- Page 1 LI2241 Wide Flat Panel Monitor User’s Guide...
- Page 2 2013 © Copyright Lenovo LENOVO products, data, computer software, and services have been developed exclusively at private expense and are sold to governmental entities as commercial items as defined by 48 C.F.R. 2.101 with limited and restricted rights to use, reproduction and disclosure.
-
Page 3: Table Of Contents
Contents Safety information ............. iii Chapter1. -
Page 4: Safety Information
Lenovo suggests that standard power line provided by Lenovo should be used otherwise, Lenovo bears no liability for any problem resulting from the use of the power line of other manufacturers. For displays with glossy bezels the user should consider the placement of the display as the bezel may cause disturbing reflections from surrounding light and bright surfaces. -
Page 5: Chapter1. Getting Started
Chapter 1. Getting started This User’s Guide contains detailed information of your Flat Panel Monitor. For a quick overview, please see the Setup Poster that was shipped with your monitor. Shipping contents The product package should include the following items: •... -
Page 6: Product Overview
Product overview This section will provide information on adjusting monitor positions, setting user controls, and using the cable lock slot. Adjusting the tilt The illustration below shows the tilt range of the monitor. For more information, see “Positioning your monitor” on page 2-1. Monitor controls Your monitor has controls on the front which are used to adjust the display. -
Page 7: Cable Lock Slot
Cable lock slot Your monitor is equipped with a cable lock slot located on the rear of your monitor (in the lower position). Please see the instructions that come with the cable lock to learn how to using it. Setting up your monitor This section provides information on how to set up your monitor. - Page 8 Insert the power cord into the monitor , then plug the monitor power cord and the computer cord into grounded electrical outlets. Place the cable into the cable clip indicated in below figure. Note: A certified power supply cord has to be used with this equipment. The relevant national installation and/or equipment regulations shall be considered.
-
Page 9: Registering Your Option
Thank you for purchasing this Lenovo product. Please take a few moments to register your product and provide us with information that will help Lenovo to better serve you in the future. Your feedback is valuable to us in developing products and services that are important to you, as well as in developing better ways to communicate with you. -
Page 10: Chapter 2. Adjusting And Using Your Monitor
For more detailed information on any of these topics, visit the Healthy Computing Web site at: http://www.lenovo.com/healthycomputing/. Arranging your work area Use a work surface of appropriate height and available working area to allow you to work in comfort. -
Page 11: Quick Tips For Healthy Work Habits
• Use the monitor brightness, contrast, and image adjustment controls, if equipped, to optimize the image on your screen to meet your visual preferences. • Keep your monitor screen clean so you can focus on the screen’s contents. Any concentrated and sustained visual activity can be tiring for your eyes. Be sure to periodically look away from your monitor screen and focus on a far object to allow your eye muscles to relax. -
Page 12: Adjusting Your Monitor Image
Adjusting your monitor image This section describes the control features to adjust your monitor image. Using the direct access controls The direct access controls can be used when the On Screen Display (OSD) is not displayed. Table 2-1. Direct access controls Icon Control Description... -
Page 13: Using The On-Screen Display (Osd) Controls
Using the On-Screen Display (OSD) controls To adjust the settings, the user controls can be viewed through the OSD. Brightness/Contrast Brightness Contrast Exit Left Right To use the controls: Press to open the main OSD menu. to move among the icons. Select an icon and press to access that function. - Page 14 Table 2-2. OSD functions Controls and Controls and OSD Icon on Main Submenu Description Adjustments Adjustments Menu (Analog) (Digital) Adjusts overall screen Same as Analog brightness. Brightness Brightness/ Contrast Adjusts difference between light and dark areas. Contrast Moves image left or right. Digital input not applicable Horizontal Position...
- Page 15 Table 2-2. OSD functions Controls and Controls and OSD Icon on Main Submenu Description Adjustments Adjustments Menu (Analog) (Digital) Same as Analog Selects type of scaled image. • Original AR: Same Aspect Ratio with input Signal. Scaling • Full Screen :Expand image to full screen. Screen Prioritization Text Mode •...
- Page 16 Addressability Refresh rate 640x350 70Hz 640x480 60Hz, 72Hz,75Hz 720x400 70Hz 800x600 56Hz, 60Hz, 72Hz, 75Hz 832x624 75Hz 1024x768 60Hz, 70Hz, 75Hz 1152x864 75Hz 1280x1024 60Hz, 70Hz, 75Hz 1366x768 60Hz 1440x900 60Hz 1600x900 60Hz, 75Hz 1680x1050 60Hz 1920x1080 60Hz...
-
Page 17: Understanding Power Management
Understanding power management Power management is invoked when the computer recognizes that you have not used your mouse or keyboard for a user-definable period. There are several states as described in the table below. For optimal performance, switch off your monitor at the end of each working day, or whenever you expect to leave it unused for long periods during the day. -
Page 18: Caring For Your Monitor
Caring for your monitor Be sure to turn off the power before you perform any maintenance on the monitor. Do not: • Apply water or liquid directly to your monitor. • Use solvents or abrasives. • Use flammable cleaning materials to clean your monitor or any other electrical equipment. -
Page 19: Chapter 3.Reference Information
Chapter 3.Reference information This section contains monitor specifications, instructions to manually install the monitor driver, troubleshooting information. Monitor specifications Table 3-1. Monitor specifications for type-model LI2241wA 382.7 mm (15.07 in.) Height Dimensions 171.0 mm (6.73 in.) Depth 508.8 mm (20.03 in.) Width Stand Range: -5... -
Page 20: Troubleshooting
Troubleshooting If you have a problem setting up or using your monitor, you might be able to solve it yourself. Before calling your dealer or Lenovo, try the suggested actions that are appropriate to your problem. Table 3-2. Troubleshooting Problem... -
Page 21: Manual Image Setup
Table 3-2. Troubleshooting Problem Possible cause Suggested action Reference The power The video signal cable Be sure the video cable is “Connecting and indicator is white, is loose or connected with the turning on your but there is no disconnected from the system properly monitor”... -
Page 25: Installing The Monitor Driver In Windows 10
3. Turn on the monitor and then the system unit. Allow your computer to start the Windows 10 operating system. From the Lenovo website www.lenovo.com/supports/li2241w, find the corresponding monitor driver and download it to a PC to which this monitor is connected (such as a desktop). -
Page 26: Appendix A. Service And Support
Installation and configuration support through the Customer Support Center will be available until 90 days after the option has been withdrawn from marketing. After that time, the support is cancelled, or made available for a fee, at Lenovo’s discretion. Additional support is also available for a nominal fee. -
Page 27: Appendix B. Notices
Web sites. The materials at those Web sites are not part of the materials for this Lenovo product, and use of those Web sites is at your own risk. -
Page 28: Recycling Information
Collecting and recycling a disused Lenovo computer or monitor If you are a company employee and need to dispose of a Lenovo computer or monitor that is the property of the company, you must do so in accordance with the Law for Promotion of Effective Utilization of Resources.
Need help?
Do you have a question about the LI2241 and is the answer not in the manual?
Questions and answers