Table of Contents

Summary of Contents for Inotech IT3001
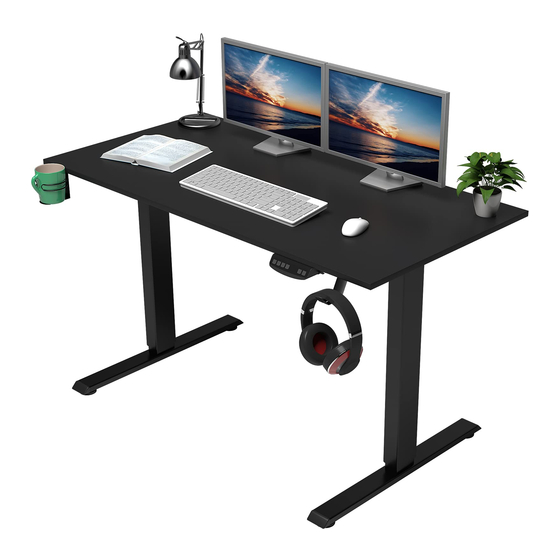
- Page 1 IT3001 Electric Height Adjustable Standing Desk Dual Motor Instruction Manual Color: Black Desktop + Black Frame min 27.6 inch IT3001 max 47.2 inch 100 kg/ 220 lbs If you have any question, please contact us via: help@inotech-ltd.com V1.0...
-
Page 2: Table Of Contents
CONTENTS Safety Instructions ---------------------------------------------------------------------------- Page 2 Package Contents ---------------------------------------------------------------------------- Page 3 Assembly Steps ------------------------------------------------------------------------------- Page 4~10 Step 1-2 ----------------------------------------------------------------------------------- Page 4 Step 3-5 ----------------------------------------------------------------------------------- Page 5 Step 6-8 ----------------------------------------------------------------------------------- Page 6 Step 9-10 --------------------------------------------------------------------------------- Page 7 Step 11-12 ------------------------------------------------------------------------------- Page 8 Step 13-14 ------------------------------------------------------------------------------- Page 9 Step 15 ----------------------------------------------------------------------------------- Page 10 Cautions ---------------------------------------------------------------------------------------- Page 10... -
Page 3: Safety Instructions
Refer to the user guide of controller (Page 11). If you do not understand these instructions or have any doubt about the safety instructions, assembly or use of this product, contact our customer service team via: help@inotech-ltd.com USE & LIABILITY Do not use this product for any purpose that is not explicitly specified in this manual. -
Page 4: Package Contents
PACKAGE CONTENTS (x4) (x1) (x2) (x2) Leveling Stud Crossbar End Base Lift Column (x1) (x1) (x1) (x2) Power Adapter Handset Control Box Side Bracket Power Wire (x2) (x1) Socket Tray Hook Headphone Hook (x1) Tabletop (x1) Socket Tray Accessory Kit (x4) (x6) (x8) -
Page 5: Assembly Steps
ASSEMBLY STEPS Installation Tips Lay a mat or old blanket out to assemble onto so the floor and the furniture doesn’t get scratched or damaged during building. STEP 1 Lay down the Crossbar End at a level floor, connect the two Lift Columns to the left and right side of the Crossbar End by using the Screws(A). -
Page 6: Step 3
STEP 3 First, remove the protective film on the Leveling Studs Then tighten them into the Bases by hand. Remove the Protective Film Checklist Leveling Studs STEP 4 Turn over the frame to stay upwards. Attach the Side Brackets on the Lift Columns by Screws( C ). - Page 7 STEP 6 Insert the plug of the Lift Columns into the socket of the Control Box STEP 7 Connect the Power Wire to the Power Adapter Connect the Power Adapter the Control Box Note: the other end of the Power Wire must be passed through one of the four punched holes on the Crossbar End Checklist...
- Page 8 STEP 9 Testing Before Final Assembly Setting Four Memory Height Desk Height Up and Down Before attaching the tabletop to the frame, make sure that - The lift columns are level and set at the lowest position. All the screws are tightened to avoid the desk making noise and wobbling.
-
Page 9: Step 11
STEP 11 Checklist Tabletop M6x16mm Screws x8 4mm Allen Key Easily put the Tabletop on the frame, make sure it will not fall down. Using the Screws(B) and 4mm Alley Key(J) to tighten the Tabletop to the frame. STEP 12 Checklist There are two pilot holes in both left and right side of the Tabletop M4x12mm Screws x2... -
Page 10: Step 13
STEP 13 Attach Socket tray Hooks in the Socket tray by Screws( E ). Checklist Then tighten the Screws( E ) with the 3mm Allen Key( I ). Socket tray Hook x2 Socket tray M4x6mm Screws x4 3mm Allen Key STEP 14 Checklist Attach the Socket tray... -
Page 11: Cautions
STEP 15 Plug in the power wire to get the desk power on. Just get started by pressing the handset to enjoy your life with our smart height adjustable desk. CAUTION! Keep area of vertical motion free of Do not exceed desk weight limit. obstacles. -
Page 12: Operation Guide
Operation Guide Setting Four Memory Height Desk Height Up and Down Activate the desk by following the next steps. -Connect the Power Wire to electricity to get the desk power on. -Press the button “DOWN” to the lowest position. -Reset the desk by pressing the button “DOWN” and hold up for 5-10 seconds until the buzzer reminds by sounding ‘bee’. -
Page 13: Error Code
Operation Guide 8. Error code -When the handset displays Error Code, please refer to below Error code sheet. -If the error is not yet resolved, unplug the Power Wire and wait for 30 seconds. Then plug back the Power Wire and reset the desk again (refer to “7. -
Page 14: Product Dimensions
Product Dimensions 70cm /27.6 in 120cm/47.2 in Technical Specifications Lowest Height 70cm(27.6in) Highest Height 120cm(47.2in) Weight Capacity 100Kg(220 lbs) Tabletop Size 120cm(47.2in)x60cm(23.6in)x2.5cm(0.98in) Input Voltage 100-240V Travel Speed 30mm per second Applicable Temperature 0~40℃ Noise <50 db Continuous operation for 2 mins at most Duty Cycle after pause for 18 mins... - Page 15 ・ This product is intended for indoor use only. Using this product outdoors could lead to product failure and personal injury. ・ Contact our customer service team whenever you have any confusion or uncertainty with the product. If you have any question, please contact us. help@inotech-ltd.com...

Need help?
Do you have a question about the IT3001 and is the answer not in the manual?
Questions and answers