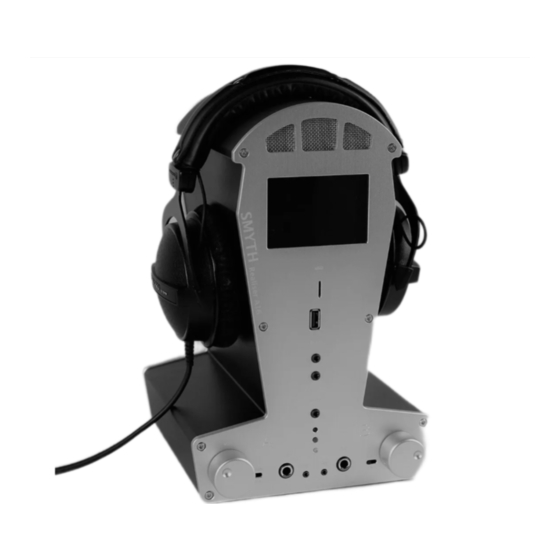
Smith Realiser A16 Firmware Installation
Hide thumbs
Also See for Realiser A16:
- Firmware installation (4 pages) ,
- Firmware installation (3 pages) ,
- Firmware installation (9 pages)
Advertisement
Quick Links
Updating your A16 with rev 1.80 Dec 12 2019 is only necessary if your A16's firmware is older. The
current revision of your firmware is found in SETTINGS>UPDATES/ABOUT as described below in step 5. If
an update is required please begin with STEP 1.
1) The defunct 'Auto Mute' feature has been changed to 'Preset Mute' and sets the mute window
immediately following a change of preset or audio source. It can be programmed from 1 to 3
seconds.
2) The HP-A and HP-B SPDIF and the Tactile outputs are now correctly muted during power up and
when changing presets or audio source. However, for the SPDIF outputs, the method
implemented at present simply grounds the bi-phase signal on mute. This will cause
downstream SPDIF receivers to unlock while mute is active, which may result in minor audible
artefacts during mute/unmute transitions. In the future we may improve on this by muting the
PCM before to encoding, rather than the SPDIF signal itself.
3) A channel swap on the stereo tactile output has been fixed.
4) The minimum HPEQ sweep amplitude has been reduced to avoid clipping when the headphone
gain switches are set to medium or high gain positions.
5) The minimum PRIR sweep amplitude has been reduced to better accommodate high gain sound
systems.
6) If the loading of user A or user B presets fails to complete (usually as a result of a power outage
during the loading process) the A16 will not attempt to automatically reload such presets until
they are manually loaded via the preset menu page. This is done to avoid a lock-out situation
whereby the unit would continually reload corrupted preset files. Reinstalling the firmware or
restoring factory settings will not circumnavigate this requirement. If either user A or user B
presets remain unloaded, some, or all, of the functionality of the A16 is disabled, so it is
important to recognised when this has happened. For example, if the user B preset remains
unloaded after power up, the solo/mute and level meters will not function for user A or user B.
To alert users to the fact that a preset remains unloaded, a 'reload' warning will now appear in
the home page for whichever preset needs attention.
Installing new firmware to your Realiser A16
Rev 1.80 Dec 12 2019
Issues addressed in this update
Advertisement

Related Manuals for Smith Realiser A16


Summary of Contents for Smith Realiser A16
- Page 1 Installing new firmware to your Realiser A16 Rev 1.80 Dec 12 2019 Updating your A16 with rev 1.80 Dec 12 2019 is only necessary if your A16’s firmware is older. The current revision of your firmware is found in SETTINGS>UPDATES/ABOUT as described below in step 5. If an update is required please begin with STEP 1.
- Page 2 A16 Firmware update procedure STEP 1. The new firmware for the Realiser A16 is uploaded through the micro-SD card slot on the front panel. First, obtain a micro-SD card (commonly 16 GB) and ensure it is formatted as FAT32. Second, create a ‘realiser’...
- Page 3 STEP 4. Using the remote control, press the ENTER key twice to begin the firmware update. The A16 will enter a long period (20-25 minutes) of authenticating the software, loading and rebooting. When the unit first reboots it will begin updating the firmware for the individual hardware modules. After the individual firmware modules have been reprogrammed the unit will reboot using the normal power-up sequence to the Speaker Map display for User A.
- Page 4 firmware update. It is a requirement for rev 1.80 due to changes in the file formatting for the internal listening rooms and presets. First press BACK and then navigate to ‘Settings’ and press ENTER. Then navigate to ‘System’ and press ENTER again. Move the cursor down to Full factory restore and enable it using the ADJ+ key.
- Page 5 New features in this update 1) Asynchronous PRIR measurement mode The asynchronous PRIR measurement method (ASYNC) is now fully operational in this firmware release. Furthermore, both synchronous (ALL) and asynchronous (ASYNC) PRIR methods can measure azimuth and elevation looks. Although PRIR files can now include elevation look data, we have not yet completed the SVS virtualiser program that can make use of this data.
- Page 6 Before you begin the ASYNC measurement, one of the PRIR Sound Rooms, under Settings, should be configured to match the real sound room to be measured. In the 5.1ch example above, the speaker order is given as L,R,C,SW,Ls and Rs. Hence the speakers listed in the PRIR sound room should match this order.
- Page 7 Next configure the look angle mode. There are only two choices relevant for ASYNC measurements. Either Look angles are Free or Fixed. When the look angles are fixed then the look angles inserted into the async PRIR file are those supplied by the measurement suite file – in this example those angles are 0, -30, +30, +20, -20 degrees.
- Page 8 Begin the process by selecting Measure Async PRIR and pressing enter. The first screen is used to set the loudness of the sound system. Insert the in-ear microphones, sit in the sweet-spot, play the MAN noise track (T1) and adjust the volume until the levels average around the white line.
- Page 9 loudspeaker and the A16 finds the optimal microphone gain that maximizes the signal to noise ratio. This calibration should be undertaken in silence and with the subject looking towards the centre speaker. On completion of the level calibrate track, play the Phase Locking track (T3). Again, this is automatically detected by the A16.
- Page 10 On completion of the setup track, the A16 display should now show the speaker setup that will be measured. Once you are ready you can start the async PRIR measurement by playing the first look track Centre 0 (T5). The subject should position their head according to the voice instructions. For each look track a sweep is output to each loudspeaker in sequence.
- Page 11 On completion of the final track (T13) all look angles will have been measured and a white box is drawn around each measured speaker. Press enter to save the PRIR to a file. 2) Changes to the Synchronous (ALL) PRIR measurement mode a) Activating HT assist now forces the look-mode to ‘fixed’.
- Page 12 azimuth and elevation pilot tones separated in this way is to allow the subject to switch between axes and iteratively find the head angle that minimises the volume of the tone for both axes. The method in previous firmware revisions activated the elevation pilot tone automatically once the azimuth angle was close to the desired angle –...
- Page 13 Assist or Pause-between-looks is active. Since each look in the ASYNC method is a separate track on the blu-ray disc or USB drive, examination of the PRIR impulses can be made on a track by track basis. An example of the PRIR viewer screen is shown below. A more complete explanation is shown on our YouTube channel.
- Page 14 final 0.4 of the PRIR is just residual noise, albeit 100dB below peak. Fortunately, low level reverberation of this order is difficult to perceive under normal listening conditions and therefore a good measurement made under ideal conditions will essentially be indistinguishable from the real room.
- Page 15 5) Factory restore Factory restore menu has been split into two options a) full factory restore b) restore only the settings. For either restore operations the User and Headphone text descriptor fields are no longer overwritten. 6) Raw optical-only head tracking mode A raw optical head tracking mode of operation has been included in head tracker firmware rev: 1.20 Nov 08 2019.
- Page 16 7) Editing the descriptor fields in existing PRIR and HPEQ files The filename, layout and subject fields for internal PRIR files can now be edited using the standard text entry method up to a maximum of 32 characters for each. The filename, headphone and subject fields for internal HPEQ files can also be edited in the same way.
- Page 17 Audible clicks when changing/jumping tracks on Atmos BluRay discs Audible clicks can often be heard when changing/transitioning tracks on Atmos BluRay discs. Initial investigations suggest it is related to the HDMI board switching modes outside its own audio mute window. A16 powers up with White screen or Black screen For a few A16s the LCD display does not always initialize properly during powerup.
- Page 18 Updating the Head Tracker firmware The HT firmware updater programs the head tracker firmware stored in the A16 into the head tracker via the HT cable. This internal firmware file is delivered as part of the A16 firmware update and as such is invisible to the user.
- Page 19 If the HT firmware update fails to follow the order shown above, for example it stalls at ‘Connecting to HT’, or alternates between ‘Loading application’ and ‘Connecting to HT’ then the communication with the HT has failed. First, fully exit the Update HT firmware menu and unplug the head tracker. Then restart beginning step one.
- Page 20 turn green (blinking) indicating that the calibration is complete. The entire process may take up to 25 minutes. Step 5) Once the head tracker is blinking green pick it up and, with the LED now on steady green, unplug the 2.5mm jack. Now reconnect the 2.5mm jack. Immediately following power-up the LED will either flash green 10 times, or it will flash alternating red-green 5 times.
Need help?
Do you have a question about the Realiser A16 and is the answer not in the manual?
Questions and answers