Advertisement
Quick Links
"BLT 160" ユーザーマニュアル/ USER MANUAL
改訂版. n° 5 - 19/07/2011
DISCHARGER
BLT160
VERSION WITH CARD AP211
AP211 カード付属バージョン
USER MANUAL
ユーザーマニュアル
READ THE FOLLOWING INSTRUCTIONS CAREFULLY
before connecting the discharger to mains and battery
放電器を主電源およびバッテリーに接続する前に
以下の説明をよくお読みください。
P.B.M. S.r.l.
via Barella, Z.I. - VIGNOLA ( MO ) ITALIA
Tel. + 39 059 770 53 11 - Fax + 39 059 770 53 00
http://www.gruppopbm.it e-mail: pbm@gruppopbm.it ファイルMU001033GJ_BLT160_GB_JAP rev5_190711.doc
Advertisement

Related Manuals for P.B.M. BLT160

Summary of Contents for P.B.M. BLT160
- Page 1 "BLT 160” ユーザーマニュアル/ USER MANUAL 改訂版. n° 5 - 19/07/2011 DISCHARGER BLT160 VERSION WITH CARD AP211 AP211 カード付属バージョン USER MANUAL ユーザーマニュアル READ THE FOLLOWING INSTRUCTIONS CAREFULLY before connecting the discharger to mains and battery 放電器を主電源およびバッテリーに接続する前に 以下の説明をよくお読みください。 P.B.M. S.r.l. via Barella, Z.I. - VIGNOLA ( MO ) ITALIA Tel.
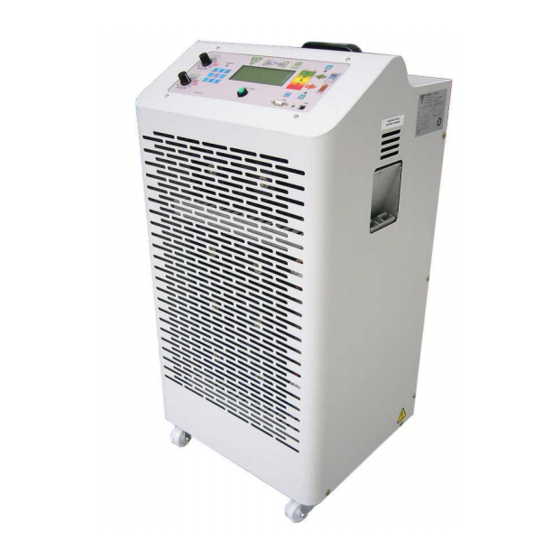
- Page 2 Discharger BLT160 INSTALLATION / USE / OPERATION The BLT160 device is a BATTERY DISCHARGER designed for connection to a freestanding battery charger, which can manage completely automatic charge and discharge cycles successively on the same battery. The main components of the discharger are: •...
- Page 3 • Skilled and authorized personnel only shall be allowed to open the BLT160 discharger • Before setting the BLT160 discharger at work the insulation of power cord and charging cable has to be checked.
- Page 4 "BLT 160” ユーザーマニュアル/ / USER MANUAL 改訂版. n° 5 - 19/07/2011 CONTROL PANEL The BLT160 discharger is equipped with a multifunctional control panel for operative monitoring and main functions settings. Before start up, check out all of the main controls and indicators: DL13 Green LED –...
- Page 5 CHARGER CONNECTOR BATTERY CONNECTOR The BLT160 discharger is usually pre-set for a mains voltage range of 100 to 240V AC, 50/60 Hz Make sure also to earth the discharger properly. CONNECTION SEQUENCE 1. Connect the power cord to mains 2. Connect the battery to the socket, on the left side, through the connector supplied. Pay attention to the polarity.
- Page 6 "BLT 160” ユーザーマニュアル/ / USER MANUAL 改訂版. n° 5 - 19/07/2011 SWITCH-ON SEQUENCE After moving the main switch to POSITION 1, the LED’s on the front panel start to blink sequentially every 0.3 seconds. At the end of the initial test, the control panel displays the START configuration. The current battery capacity is made equal to the programmed rated capacity.
- Page 7 "BLT 160” ユーザーマニュアル/ / USER MANUAL 改訂版. n° 5 - 19/07/2011 PROGRAMMING OF MODES OF OPERATION From the START mode display (e.g. following to battery connection) the user can set the operation parameters through the front panel interface, which consists of: alphanumeric 4x20 display with double-height chars membrane keyboard with 12 function keys 16 mm diameter START-STOP button...
- Page 8 "BLT 160” ユーザーマニュアル/ / USER MANUAL 改訂版. n° 5 - 19/07/2011 MaxCT Maximum charge time (if this time is exceeded, a charge fault is reported) MinCT Minimum charge time Charge increase PTaC Time pause after charge PTaD Time pause after discharge Time of diagrams sampling gg/mm/aa hh:mm PROG3 When pressing...
- Page 9 "BLT 160” ユーザーマニュアル/ / USER MANUAL 改訂版. n° 5 - 19/07/2011 Programming mode When 1-EASY type is selected, the displaying of the programming windows PROG2, PROG3 and PROG4 are no longer available to the user. Window PROG1 also, in MODO_TEST5 and MODO_TEST10 mode, changes in that only 3 parameters remain active: gg/mm/aa hh:mm PROG1 Vnom=xxxV Ahnom=bbbb...
- Page 10 "BLT 160” ユーザーマニュアル/ / USER MANUAL 改訂版. n° 5 - 19/07/2011 d) During the charging process, the Mag% parameter allows to take into account the not-unitary performance of the battery recharge (programming page PROG2, see page 6). The Ahs actually delivered to the battery are calculated as follows: AhCar = Ah / (1+Mag%) For example: with Ah=600 and Mag%=5, the AhChar value is 571.
- Page 11 "BLT 160” ユーザーマニュアル/ / USER MANUAL 改訂版. n° 5 - 19/07/2011 NC+T5 AND NC+T10 MODES In these modes, the CYCLES mode operates for all programmed cycles except the last. For this one only, TEST5 (NC+T5) and TEST10 (NC+T10) mode activate respectively. To guarantee a complete battery recharge, also the second last charge is performed with set values.
- Page 12 "BLT 160” ユーザーマニュアル/ / USER MANUAL 改訂版. n° 5 - 19/07/2011 E) HISTORY DATA AND DIAGRAM OLD data: The system detects charge and discharge main data. The system storage can save up to 150 cycle data. The following cycles are overwritten on the eldest ones (the cycle no. 151 deletes no. 1) This data can be monitored as follows: by displaying it on the device monitor by means of the keyboard by using the BLTView software for Windows®...
- Page 13 "BLT 160” ユーザーマニュアル/ / USER MANUAL 改訂版. n° 5 - 19/07/2011 The keys on the control panel activate the monitor functions, as follows: : exits from the data history display window and returns to the status display window ← : reduces a cycle number and subsequently a test number →...
- Page 14 "BLT 160” ユーザーマニュアル/ / USER MANUAL 改訂版. n° 5 - 19/07/2011 Every situation is highlighted as follows: DL11 red LED lighting up to indicate charge faults DL11 and DL20 red LED lighting up to indicate discharge faults DL11 and DL20 red led lighting up to indicate system faults prompt message on the display containing a fault code and description If different faults are active at the same time, they are displayed in subsequent windows.
- Page 15 "BLT 160” ユーザーマニュアル/ / USER MANUAL 改訂版. n° 5 - 19/07/2011 FAILURES LIST Where: AR: Self-resetting – It refers to a fault, which can be reset by pressing C. The fault can be caused by a temporary system condition that can be either self-restoring or solved with little intervention, which does not require the discharger activity to be interrupted.
- Page 16 "BLT 160” ユーザーマニュアル/ / USER MANUAL 改訂版. n° 5 - 19/07/2011 Code Description Type Cause Remedy Auxiliary temperature sensor Aux T. SENSOR OC System Contact service damaged (open circuit) Auxiliary temperature sensor Aux T. SENSOR SC System Contact service damaged (short circuit) Analogue sensor damaged ANALOGUE SENS.
- Page 17 "BLT 160” ユーザーマニュアル/ / USER MANUAL 改訂版. n° 5 - 19/07/2011 G) TECHNICAL FEATURES • Linear operation • Battery voltage range: 4V to 96 V (2V @ 80A) • Charge current: up to 160A • Discharge current: 1 to 160A •...
- Page 18 "BLT 160” ユーザーマニュアル/ / USER MANUAL 改訂版. n° 5 - 19/07/2011 GLOSSARY CODE DESCRIPTION actN Number of active components working AhC1F Amperehours charged during the initial charging stage ALARM Failure message An. I Analogue input for current reading An. V Analogue input for voltage reading Aux.
- Page 19 "BLT 160” ユーザーマニュアル/ / USER MANUAL 改訂版. n° 5 - 19/07/2011 CODE DESCRIPTION ON-OFF state of contactor of K2 ON-OFF state of contactor of K3 ON-OFF state of contactor of K4 ON-OFF state of contactor of K5 ON-OFF state of battery contactor Increase maxCT Maximum charge time...
- Page 20 "BLT 160” ユーザーマニュアル/ / USER MANUAL 改訂版. n° 5 - 19/07/2011 放電器 BLT160 設置 / 操作 / 機能 BLT160 は、外付けバッテリー充電器に接続して使用できるバッテリー放電器です。同一バッテリーに、完全 に自動化された充放電サイクルを連続して実行することができます。 主要コンポーネント: ファン付パッシブ散逸ユニット • 定電流用ファン付アクティブ散逸ユニット • メイン制御カード AP211 • アクティブコンポーネントドライバーカード AP208 • • パッシブロードとバッテリー充電器用 DC コンタクタ 警告! バッテリー充電器に接続して使用する場合、バッテリーを接続すると自動的に充電がスタ ートする AUTOSTART 機能を備えた充電器が必要です。...
- Page 21 "BLT 160” ユーザーマニュアル/ / USER MANUAL 改訂版. n° 5 - 19/07/2011 A) セットアップおよび安全のガイドライン 放電器を主電源およびバッテリーに接続する前に 以下の説明をよくお読みください。 • 専門の技術者以外、放電器 BLT160 を開けることは禁止されています。 • BLT160 を作動する前に電源コードおよび充電ケーブルをチェックしてください。 • バッテリーまたはバッテリー充電器を接続したり取り外したりする前に、主電源を切ってください。 • 警告!! 通常、バッテリー充電中は爆発性のガスが発生します。以下の注意を厳守してくだ さい。 放電器のそばでタバコを吸ったり、火や火花が発生するものを近づけないで ください。 必ず放出ガスが充満しないよう風通しの良い場所でバッテリー、BLT160 の テストを実行、利用してください。 警告!! BLT160 の設置場所は注意して選んでください。電気的パーツを含むため、電気アー クが発生する危険があります。放電器を雨や水がかかるところに置かないでください。埃 や熱源を避け、平らで固い床面に置いてください。BLT160 を、木やその他可燃性の素材で できた棚や台の上に置かないでください。放電器が正常に機能するために、周囲に熱がこ...
- Page 22 "BLT 160” ユーザーマニュアル/ / USER MANUAL 改訂版. n° 5 - 19/07/2011 コントロールパネル BLT160 は、ステータスの監視と主要な機能設定のためのマルチファンクション・コントロールパネルを備え ています。 セットアップ前に、主要操作と表示器を見てみましょう。 DL13 緑色 LED – 95% バッテリ ー DL15 緑色 LED – 80% バッテリ ー DL16 黄色 LED – 60% バッテリ 放電電流セレクタ マルチファンクショ ー ースイッチ...
- Page 23 "BLT 160” ユーザーマニュアル/ / USER MANUAL 改訂版. n° 5 - 19/07/2011 C) 設置とスタートアップ 設置中、または設置場所の変更後、AC 電流の電圧をチェックしてください。 定格より高すぎたり低すぎたりすると、充電電流の減少や増大の問題が生じる場合があります。 バッテリー充電器 コネクタ バッテリー コネクタ BLT160 放電器は主電源の電圧レンジは 100~240V AC、50/60 Hz に初期設定されています。 放電器に適切にアースされているか確認してください。 接続手順 1. 電源コードを主電源に接続してください。 2. バッテリーを、放電器の左にあるソケットに付属のコネクタで接続してください。極を間違えないよ うに細心の注意を払ってください。 径 50mmq 以上、長さ 4~5mのケーブルを使用してください。短縮/延長ケーブルなどは使わないでく ださい(ケーブルが長すぎると、データの読み取りにエラーが生じる場合があります)。 3. 必要に応じて、バッテリー充電器を放電器の右側のソケットに付属ケーブルで接続してください。極...
- Page 24 "BLT 160” ユーザーマニュアル/ / USER MANUAL 改訂版. n° 5 - 19/07/2011 スイッチオン手順 メインスイッチを押してポジション1に合わせると、前面パネルにある LED が 0.3 秒間隔で点滅し始めます 初期テスト終了後、コントロールパネルに START 設定が表示されます。 接続されたバッテリーの容量は、プログラムされた定格容量と同じになります。 バッテリーの有無は、1.4V 以上の電圧から認識され、バッテリーバーの5つの LED のうち最低1つが光りま す。 NOTE: 以下のセクションには技術用語が含まれています。 本マニュアルの最後にある用語集を参照してください。 スタート手順 START の手順を進める前に、PRG キーを押して、操作パラメータの設定プログラムをチェックしてください。 SW4 スイッチを AUTO に合わせて、定格電圧(RatV)を選択してください。 SW3 スイッチを 10~160A に調節し、放電電流(DiscI) を選択してください。 バッテリーの定格...
- Page 25 "BLT 160” ユーザーマニュアル/ / USER MANUAL 改訂版. n° 5 - 19/07/2011 D) 操作モードのプログラム START モードの表示から (例:バッテリー接続に続いて)ユーザーは次からなるフロントパネルのインターフ ェイスで操作パラメータを設定することができます: 英数字 4x20 文字表示のディスプレイ 12 のファンクションキーのキーボード 直径 16 mm のスタート-ストップボタン 放電電流の選択用クイック設定スイッチ(Is) バッテリー定格電圧の選択用クイック設定スイッチ(RatV) ブザー キーボードのキーは次の機能を備えています: : サブウィンドウから出て、メインディスプレイに戻る : 選択値を増やす à : 時間表示 ¹ : 左に進む ←...
- Page 26 "BLT 160” ユーザーマニュアル/ / USER MANUAL 改訂版. n° 5 - 19/07/2011 ← と → のキーで、プログラム設定フィールドを左右に動くことができます。à と õ のキーで、選択したフ ィールドの値を変更することができます。OK キーで、設定値を確認します。 Esc キーで、PROG1 ウィンド ウから出ます。 ¹ を押すと、一行目にある日付と時間のフィールドが MaxCT=aahbbm PROG2 選択可能になります。 MinCT=cchddm Mag=ee% を押すと、システムは PROG 2 ウィンドウに PTaC =ffhggm 入ります: PTaD=iihllm StDrrm ここでは次の設定ができます: MaxCT 最大充電時間(この時間を超えると、充電エラーとなります)
- Page 27 "BLT 160” ユーザーマニュアル/ / USER MANUAL 改訂版. n° 5 - 19/07/2011 バッテリータイプ設定 1-ニッカドを選択した場合、定格電圧は 2.0V から 1.2V になります in V/el 表示は 0.6 の倍数になります。 パラメータ 単位 0-鉛 1-ニッカド Vnom 12.0 Volt VStop 1.70 1.02 V/el. Vgas 2.40 1.44 V/el. プログラム設定 1-EASY を選択した場合、設定ページ PROG2、PROG3、PROG4 は利用できません。MODO_TEST5 と MODO_TEST10 モードでの設定ページ...
- Page 28 "BLT 160” ユーザーマニュアル/ / USER MANUAL 改訂版. n° 5 - 19/07/2011 操作モードの設定 PROG 1 ウィンドウでは、modoc のパラメータは次のように設定できます: 表 G.1 バッテリーテストモードの記述とパラメータ設定 ハイライトされたフィールドは変更できません MODOC 説明 DiscI MinCT MaxCT PTaC PTaD (h:m) (V/el) (h:m) (h:m) (h:m) (h:m) TEST フリーテスト RatAh/5 5:00 1.70 3:00 24:00 1:00 0:30 フリーサイクル...
- Page 29 "BLT 160” ユーザーマニュアル/ / USER MANUAL 改訂版. n° 5 - 19/07/2011 TEST、TEST5 、TEST10 モード これらのモードは全て状態の良好なバッテリーの効率を測るのに適しています。 TEST5 と TEST10 モードは、自動的に全パラメータをそれぞれ 5 時間または 10 時間の放電テストに設定しま す。 放電ステージ: 放電容量 (DIS.Ah)は、サイクル毎にチェックされます。 EFFICIENCY パラメータは、次のように計算します: EFFICIENCY = DIS.Ah*100/RatAh 充電ステージ: 充電容量(CH.Ah)は、サイクル毎にチェックされます。 最低充電時間(=MinCT)に達すると、CH.Ah=RatAh の場合、システムは次の一 時停止ステージに移ります。その後、放電ステージに進みます。 最大時間 MaxCT 内に CH.Ah>=RatAh の状態に達しない場合、エラー表示が出ます。 テストは中止されません。しかしバッテリーが必要な放電...
- Page 30 "BLT 160” ユーザーマニュアル/ / USER MANUAL 改訂版. n° 5 - 19/07/2011 NC+T5、NC+T10 モード このモードでは、CYCLES モードでプログラムされたサイクルから最後のサイクルを除いた全サイクルを実行 します。最後のサイクルのみ、TEST5 (NC+T5)と TEST10 (NC+T10)モードがそれぞれ実行されます。 バッテリーを完全に再充電するために、最後から2番目の充電も既定値で実行されます。 このモードは再生サイクル後のバッテリーの状態をチェックするのに最適です。 これらのモードには、最低2サイクルが必要です。値を 0 に設定して一回のみ放電をすることはできません。 ICOST モード 充電サイクルなしオペレーション(N.ICOST=0)。 定電流放電時のみ作動可能です。 スイッチは放電電流リファレンスを直接選択することもできます。 PRG に設定し、 と ボタンを使い、1から 160A に放電電流リファレンスを変更出来ます。 定電流放電を行う機能です。またリファレンスを変更、作動時に一定に保つことが出来ます。 VCOST モード 充電サイクルなしオペレーション(N.VCOST=0)。...
- Page 31 "BLT 160” ユーザーマニュアル/ / USER MANUAL 改訂版. n° 5 - 19/07/2011 セレクター・スイッチで操作モードをクイック設定 Is と ratAh スイッチで、放電電流とバッテリー定格電圧のパラメータをクイック設定することができます。 また、ratAh スイッチを AUTO に設定すると、システムが定格電圧を自動的に検出します。 AUTO モード中の定格電圧は、スイッチに表示された値に対応する値に設定されます。 BatV ratV BatV ratV 0 ÷ 6.5 38.1 ÷ 42.0 6.6 ÷ 13.0 42.1 ÷ 52.0 13.1 ÷ 26.0 52.1 ÷...
- Page 32 "BLT 160” ユーザーマニュアル/ / USER MANUAL 改訂版. n° 5 - 19/07/2011 履歴データ表示 1) システムを次の操作モードのどれかにセットしてください: START, CHARG, P_CH., DISCH, P_DIS, 2) ←または→を押してください。システムは履歴データ表示モードに入ります。 OLD サイクルのウィンドウが表示されます: TESTNttttt CNcc OLD DIS.Ahaaaa AhC1Fbbbb EFF.=eee% CH.Ahcccc Vmin=x.xx VMax=y.yy 読み方 ttttt = 実行されたテストの回数(1~99999) = テスト中に実行されたサイクルの数(0~99) 放電データ: = サイクル中の放電容量(単位 Ah) aaaa = 算定された効率(0~100%, ***= 計算不実行) = 放電中のバッテリーの最低電圧(単位...
- Page 33 "BLT 160” ユーザーマニュアル/ / USER MANUAL 改訂版. n° 5 - 19/07/2011 読み方 ttttt = 実行されたテスト回数(1~99999) = テスト中に実行されたサイクルの数(0~99) hh:mm = サイクル開始日時(日/月/年、時/分) gg/mm/aa 放電データ: ffhggm = 放電時間(時と分で表示) Ffhggm = プログラムされた放電時間(時と分で表示) 充電データ: sshttm = 初回の充電時間(時と分で表示) Ffhggm = 全体の充電時間(時と分で表示) コントロールパネルのキーを使って、モニターの機能を操作できます:: 履歴データ表示ウィンドウから出て、ステータス表示ウィンドウに戻る。 サイクル回数を増やし、続いてテスト回数を増やす。 (クイック設定モードでも同様) à サイクル回数を減らし、続いてテスト回数を減らす。...
- Page 34 "BLT 160” ユーザーマニュアル/ / USER MANUAL 改訂版. n° 5 - 19/07/2011 同時に複数のエラーが起きると、続くウィンドウに表示されます。 SYSTEM FAULT-Pnn cc-fault descrip.1 cc-fault descrip.1 cc-fault descrip.1 読み方: nn = 進行中のエラーウィンドウ数 (1~15) 1 番のウィンドウは最新のエラーを表示します。 = 進行中のエラーコード = 進行中のエラー説明 description コントロールパネルのキーには次の機能があります。: リセットせずにエラー表示から出る。 エラーリストのトップに行く(=最新のエラーを表示する)。 à エラーリストのボトムに行く(=より古いエラーを表示する)。 õ 終了したエラーの表示をリセットする。 エラーは通常、保存されます。リセットするには、C.を押してください。 一部の特殊エラーは、システムが自動的にリセットする場合があります...
- Page 35 "BLT 160” ユーザーマニュアル/ / USER MANUAL 改訂版. n° 5 - 19/07/2011 エラーリスト 読み方: AR: セルフリセット–C ボタンを押すとリセットできるエラー。システムの一時的な状態により引 き起こされるエラーで、放電作業を中断しなくても、一時停止することにより解決できる。 ブロック – 突然動作を停止するエラー コー 記述 タイプ 原因 解決方法 ド パラメータ/ 履歴データメモリの システムをリセットする システム × × 障害 DEFECTIVE EEPROM サービスセンターに連絡 (デフォルト・パラメータ) システムをリセットする システム × ×...
- Page 36 "BLT 160” ユーザーマニュアル/ / USER MANUAL 改訂版. n° 5 - 19/07/2011 コー 記述 タイプ 原因 解決方法 ド バッテリー温度センサー故障 システム ○ × サービスセンターに連絡 BATT.T. SENSOR CC (ショート) 散逸器温度センサー故障(開回 システム ○ × サービスセンターに連絡 DISS.T. SENSOR OC 路) 散逸器温度センサー故障(ショー システム ○ × サービスセンターに連絡 DISS.T.
- Page 37 "BLT 160” ユーザーマニュアル/ / USER MANUAL 改訂版. n° 5 - 19/07/2011 コー 記述 タイプ 原因 解決方法 ド 充電また 充電または放電中にバッテリー バッテリーを取り外す前に × × TEST STOP due toB は放電 が外れた STOP を押す G) 仕様 線形操作 • バッテリー電圧レンジ: 4V ~ 96 V (2V @ 80A) •...
- Page 38 "BLT 160” ユーザーマニュアル/ / USER MANUAL 改訂版. n° 5 - 19/07/2011 用語集 コード 説明 動作中の要素数 actN 初回充電時に充電されたアンペア字 AhC1F エラーメッセージ ALARM 電流読み取りのアナログインプット An. I 電圧読み取りのアナログインプット An. V 補助温度 Aux. T バッテリーのアンペア時 バッテリーの電圧 BatV 割合調整 CYCLES + TEST5 動作モード C+T5 CYCLES + TEST10 動作モード C +T10 ケーブルの抵抗値...
- Page 39 "BLT 160” ユーザーマニュアル/ / USER MANUAL 改訂版. n° 5 - 19/07/2011 K1 のコンタクタの ON-OFF 状態 K2 のコンタクタの ON-OFF 状態 K3 のコンタクタの ON-OFF 状態 K4 のコンタクタの ON-OFF 状態 K5 のコンタクタの ON-OFF 状態 バッテリーコンタクタの ON-OFF 状態 増加 最大充電時間 maxCT 最小充電時間 minCT 最大バッテリー電圧 maxV 最小バッテリー電圧...
Need help?
Do you have a question about the BLT160 and is the answer not in the manual?
Questions and answers