
Summary of Contents for SEIS Shimano Steps EC-E6000
- Page 1 UM-7GP0A-001 SHIMANO Total Electric Power System SHIMANO STEPS special battery and parts user's manual...
-
Page 3: Table Of Contents
CONTENTS IMPORTANT NOTICE ..................2 GENERAL SAFETY INFORMATION ..............2 TO ENSURE SAFETY ..................2 NOTICE .......................4 Introduction ....................5 Items for regular inspection before riding the bicycle ........5 Handling method ..................5 Charging time ........................5 Battery storage method ......................5 Battery life .........................5 Used batteries ........................5 Names of parts .....................7 Main specifications ..................8 Charging method ..................9... -
Page 4: Important Notice
• Do not connect the terminals with metallic objects. Doing so IMPORTANT NOTICE may cause them to short circuit or overheat, and result in burns or injury. • Contact the place of purchase or a bicycle dealer for • Do not carry or store the battery together with metallic objects information on installation and adjustment of the products such as necklaces or hairpins. - Page 5 • If the battery does not become fully charged after two hours • Do not use the battery charger with commercially-available of charging, immediately unplug the battery from the electrical electrical transformers designed for overseas use (travel outlet and contact the place of purchase. Doing otherwise converters).
-
Page 6: Notice
• Use the product under the supervision of someone responsible • Do not hold the battery charger by the cables when carrying for safety and upon receiving usage instructions. Do not allow physically, sensory, or mentally impaired persons, • Do not apply excessive tension to the cable and charging plug. inexperienced persons, or persons with no required •... -
Page 7: Introduction
• When there is dirt on the terminals of the battery mount and Handling method battery charger, remove the battery, remove the power plug from the electrical outlet, and then clean them with a waste cloth or cotton bud dampened with ethanol, etc. If you „... - Page 8 FCC compliance information This device complies with Part 15 of the FCC Rules. Operation is subject to the following two conditions: (1) This device may not cause harmful interference, and (2) This device must accept any interference received, including interference that may cause undesired operation.
-
Page 9: Names Of Parts
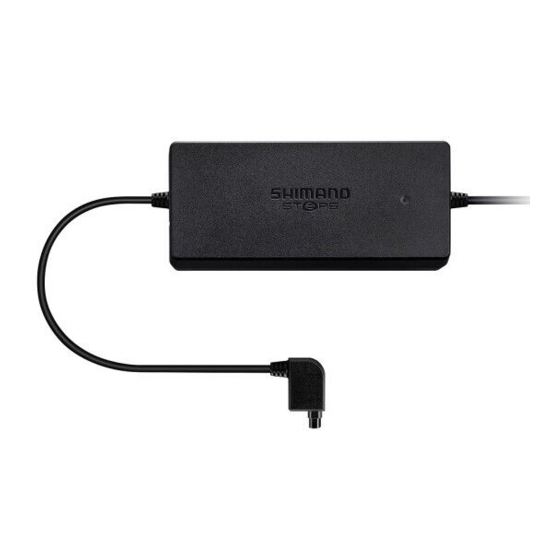
Names of parts EC-E6000 Charging plug LED lamp Battery charger EC-E6002 Power cord connector Charging plug LED lamp SM-BCC1 (sold separately) Battery charger SM-BCC1 Insert into the connector * Insert it fully EC-E8004 EW-CP100 *1 Satellite charging port Charging plug LED lamp Battery charger EW-SW100 *1... -
Page 10: Main Specifications
Main specifications Battery Battery main body Lithium-ion BT-E6000/BT-E6010/BTE8014: 11.6 Ah Nominal capacity BT-E6001*/BT-E8010*/BT-E8020*/BT-E8035*: 14 Ah Operating During discharge: -10˚C - 50˚C temperature range During charging: 0˚C - 40˚C Nominal voltage 36 V * The drive unit may not operate correctly when its firmware version is 3.2.6 or earlier. Update the firmware version using E-TUBE PROJECT. -
Page 11: Charging Method
Charging method „ When charging the battery alone When charging, orient the battery and the battery charger as indicated in the figure. * The orientation of the socket differs according to the battery specifications. BT-E6000/BT-E6001/BT-E6010/BT-E8035 Attach the adapter to the battery charger’s charging plug. Connect the battery charger’s power plug to the electrical outlet. - Page 12 BT-E8010/BT-E8014/BT-E8020 BT-E8010/BT-E8014 Connect the battery charger’s power plug to the electrical outlet. Battery Charging port Insert the charging plug into the battery's charging port. * Charge the battery on a flat surface indoors. Charging plug BT-E8020 Battery Charging plug Charging port...
-
Page 13: When Charging The Battery While It Is Mounted On The Bicycle
„ When charging the battery while it is mounted on the bicycle Connect the battery charger’s power plug to the electrical outlet. Insert the charging plug into the charging port of the battery mount/satellite charging port. * Charge the battery on a flat surface indoors. * Place the battery charger main body on a steady surface such as the table before charging. - Page 14 Firmly close the charging port cap after charging. Charging port Charging port Charging port BM-E6000 BM-E6010 EW-CP100...
-
Page 15: Charger Led Lamp
„ Charger LED lamp Regarding the charger LED lamp After charging has started, the LED lamp on the battery charger EC-E6000 lights up. Charger LED lamp Lit up Charging Flashing Charge error Battery disconnected EC-E6002 Charger LED lamp EC-E8004 Charger LED lamp For information on the charging time, refer to the following. -
Page 16: Battery Led Lamp
„ Battery LED lamp Regarding the battery LED lamp The current charge status can be checked via the LED lamp on the battery. Battery LED lamp Battery LED lamp Charging Battery LED lamp x 5 Lighting pattern*1 Charging status 0 - 20% 21 - 40% 41 - 60% 61 - 80%... - Page 17 Battery level indicator You can press the power switch to check the current battery level. Battery LED lamp x 5 Lighting pattern*1 Battery level 100 - 81% 80 - 61% 60 - 41% 40 - 21% 20 - 1% (if the battery is not attached to the bicycle) 0% (if the battery is attached to the bicycle) : Does not light up : Lights up...
-
Page 18: Installing The Battery
Proper use of the battery Charging can be carried out at any time, regardless of the remaining battery, but please fully charge the battery in the following cases: Be sure to use the dedicated battery charger. • The battery cannot be used at the time of purchase. Before riding, be sure to fully charge the battery. If the battery has become completely empty, charge it as soon as possible. - Page 19 BT-E8010/BT-E8014 Insert the battery from its base. • Align the indentation in the bottom of the battery with the convex section on the mount and insert the battery. Slide the battery. • Insert the battery until you hear a click. Remove the key.
-
Page 20: Removing The Battery
BT-E8035 This section describes an example of a frame design where the battery is removed/installed from the bottom. Insert the battery from its base. Insert the battery. • Insert the battery until you hear a click. CAUTION • After pushing the battery in, pull the battery to confirm that it is locked securely. Removing the battery CAUTION •... - Page 21 Carefully remove the battery. The battery can only be removed when the key is in the unlock position. BT-E8010/BT-E8014 BT-E6010 Insert the key. Power switch Turn the power OFF, and then insert the key into the key cylinder of the battery mount. BT-E8010/BT-E8014 Power switch Key cylinder...
- Page 22 Remove the battery. • Slide the battery to the left to remove it, while taking care not to drop it. • Only put the key in the unlock position when removing the battery. BT-E8020 • This section describes an example of a frame design where the battery is removed/installed from the bottom. •...
- Page 23 Release the battery lock. (1) Insert the key into the key cylinder of the battery mount. (2) Turn the key clockwise. (3) Push the key in. The battery is unlocked. Key cylinder Remove the battery. (1) Carefully remove the battery. (2) Remove the key, and close the keyhole cap.
- Page 24 BT-E8035 • This section describes an example of a frame design where the battery is removed/installed from the bottom. • When using a battery cover from another manufacturer, remove the battery cover before removing the battery. Turn the power OFF. If there is a keyhole cap, open it.
- Page 25 Remove the battery. Carefully remove the battery while supporting it with your Double latch plate hand and pushing the double latch plate.
-
Page 26: Power On/Off
„ Power ON/OFF • The power cannot be turned ON while charging. • When the bicycle has been stopped for 10 minutes, the auto power OFF function automatically switches the power OFF. NOTICE • Do not step on the pedal when turning the power ON/OFF. Doing so may cause a system error. •... - Page 27 Power ON from battery when the battery is installed With the BT-E8010/BT-E8020/BT-E8035, press and hold the power switch for 6 seconds to force the power OFF. Press the battery power switch. The LED lamp turns on and the battery level is indicated. BT-E6000/BT-E6001 BT-E8010/BT-E8014 Power switch...
-
Page 28: Troubleshooting
TROUBLESHOOTING „ TROUBLESHOOTING Symptoms Causes/possibilities Remedies Has the battery level been left at 0% for an Charge the battery. If the LED does not light up The battery LED does not light extended period of time? Or, have you not after charging the battery, contact the place of charged the battery after purchase? purchase. - Page 29 Symptoms Causes/possibilities Remedies Check whether any foreign material is attached Is the charging plug of the battery charger to the connection area, and remove and securely inserted into the battery? reconnect the charging plug. If the problem is not resolved, contact the place of purchase. The battery charger LED does The LED turns off when the battery is fully not light up.
-
Page 30: Battery Led Lamp Error Indication
Symptoms Causes/possibilities Remedies Is the (main) battery level too low? Charge the (main) battery. If you press the satellite power button, the LED lights up for a Check that the (main) battery is securely short period of time, but it Is the (main) battery properly connected? connected. - Page 31 Lighting pattern*1 Indication conditions Recovery Error code*2 Make sure that the cable is not loose or Communication error with the improperly connected. E024 bicycle system If the situation does not improve, contact the place of purchase. Remove the battery charger from the (Repeatedly flashes red 4 times) This is displayed if an error battery and press the power switch.
- Page 32 One Holland, Irvine, California 92618, U.S.A. Phone: +1-949-951-5003 High Tech Campus 92, 5656 AG Eindhoven, The Netherlands Phone: +31-402-612222 3-77 Oimatsu-cho, Sakai-ku, Sakai City, Osaka 590-8577, Japan Please note: specifications are subject to change for improvement without notice. (English) © Sep. 2019 by SHIMANO INC. ITP...
Need help?
Do you have a question about the Shimano Steps EC-E6000 and is the answer not in the manual?
Questions and answers