
Summary of Contents for Camec RV Media EVOLUTION
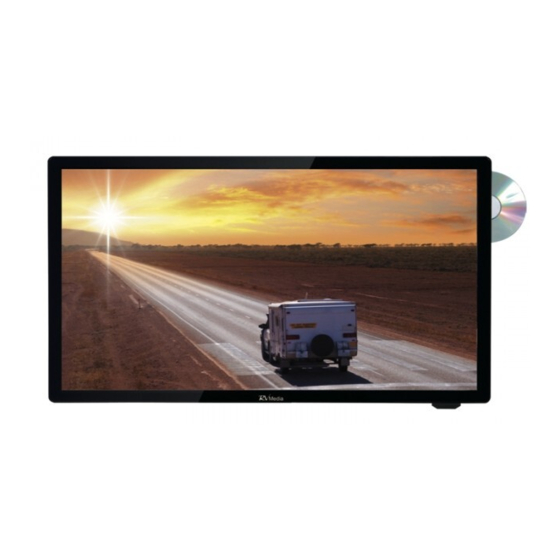
- Page 1 EVOLUTION 12/24V FULL HD LED SMART TV with ® BLUETOOTH ® 051263 24" SMART TV WITH BLUETOOTH AND DVD player www.caravansplus.com.au...
- Page 2 www.caravansplus.com.au...
-
Page 3: Table Of Contents
Contents Important Safety Instructions What’s in the Box ---------------------------------------------------------------------------------- Controls on the TV/Installation ------------------------------------------------------------- TV Inputs and Outputs --------------------------------------------------------------------------- Remote Control ---------------------------------------------------------------------------------- Getting Started ---------------------------------------------------------------------------------- First Time Installtion --------------------------------------------------------------------------------- Select Input Source ---------------------------------------------------------------------------------- EPG(Electronic Program Guide) ----------------------------------------------------------------- TV MENU Picture ------------------------------------------------------------------------------------------------ 16 Sound ------------------------------------------------------------------------------------------------ 17... -
Page 4: Important Safety Instructions
IMPORTANT SAFETY INSTRUCTIONS 61cm (24") FULL HD LED SMART TV 051263 April 2021 • Before installing this TV set, make sure your outlet voltage corresponds to the voltage stated on the appliance rating label of the power adaptor being used.. •... - Page 5 IMPORTANT SAFETY INSTRUCTIONS Cont’d Usage conditions and restrictions • Follow the instructions in this manual when installing and adjusting the TV set. Only adjust those controls that are covered in this instruction manual; improper adjustment of other controls may result in damage. If this happens, unplug the TV and have it serviced by appropriately qualified personnel.
- Page 6 IMPORTANT SAFETY INSTRUCTIONS Cont’d • When deciding where to put the TV set, make sure the location is: • Well ventilated. Leave at least a 20cm space all around the TV set for good ventilation. • Protected from overheating and away from direct sunlight. •...
-
Page 7: What's In The Box
WHAT’S IN THE BOX TV with inbuilt DVD Player Backlit Remote Control Smart Remote 240V Plugpack Kit EVOLUTION 12/24V FULL HD LED SMART TV with BLUETOOTH ® ® 051263 24" SMART TV WITH BLUETOOTH AND DVD player www.caravansplus.com.au... -
Page 8: Controls On The Tv/Installation
TV CONTROLS CONTROLS ON THE TV After you insert a disc in the disc tray, press the button to play, and press twice to pause. 2. Press the button when the power is on to eject the disc. Press the button again to re-load the disc. -
Page 9: Tv Inputs And Outputs
TV INPUT & OUTPUTS HDMI1 DVB-S2 DVB-T2 NOTE : Please, make sure the inputs and outputs have solid connections before connecting power. 1. DC IN: POWER (DC12/24V or plugpack) input 2. RJ45 Network Cable In (24" only): For internet connection via a modem or router. 3. -
Page 10: Remote Control
REMOTE CONTROL FUNCTIONS -/-- MOUSE RADIO www.caravansplus.com.au... - Page 11 REMOTE CONTROL FUNCTIONS -/-- Switch the program digit Smart TV - return to home screen. SUBTITLE MOUSE turning on/off the mouse in your browser and applica ons Press to display EPG (Electronic Program informa or TV. Smart TV - Open Web Browser. Change between TV and Radio Modes.
- Page 12 REMOTE CONTROL FUNCTIONS REMOTE CONTROL BATTERIES AND RANGE Installing Batteries Open the battery compartment cover on the back side. Battery Cover To use the remote control, point it towards the special remote sensor slightly below the television. The remote has a range of up to seven Insert two 1.5V AAA size Alkaline* meters from the TV at an angle of batteries in the correct polarity.
- Page 13 REMOTE CONTROL FUNCTIONS www.caravansplus.com.au...
-
Page 14: Getting Started
The TV can also operate on 240V. This is done via an optional 240V adaptor. If you require a 240V adaptor, please order a RV Media TV Accessory Pack (which includes the Adaptor and Table-top stand) from your local Camec dealer or online : 19" TV p/n: 044571 22"... - Page 15 GETTING STARTED - BASIC OPERATIONS Remote To select a TV Channel, first select Sat or DTV as an input source first, then choose your desired channel in one of the following ways. Remote ON SCREEN LOW BATTERY VOLTAGE WARNING If the RV’s system voltage drops below 11V* when powering the TV via the 12V accessory lead, an on screen warning will be displayed warning you of the low voltage state.
-
Page 16: First Time Installtion
First Time Installation The Startup Wizard menu contains language settings and network settings. Language settings: you can set the TV operating language. Network settings: you can set according to the connection, wireless network settings WIFI connection, wired connection is to set the local area network. www.caravansplus.com.au... -
Page 17: Select Input Source
Select Input Source Press the “Source” button to display the input source menu, press the left or right button to select the corresponding input source, and press the OK button to enter the relevant source. SCHEDULE RECORDING & REMINDERS Press the EPG button on the Remote control to access the Electronic Program Guide (DTV only) Use the ▼/▲... -
Page 18: Tv Menu
TV MENU Press the “menu” button to display the menu, press the up and down keys to select the appropriate settings, press the right button to enter the relevant settings. Picture Picture Mode: Use the menu button to call up the menu, then right click to select the "Image Mode" option, press the left and right button to switch the image mode to Standard / Movie / Vivid / User. -
Page 19: Sound
Sound Sound mode: Use the up and down keys to select the sound menu, then press the right button to select the “Sound Mode” option, press the left and right button to switch the sound mode to Standard/Sports/Music/Movie/User. Equalizer: Through the up and down keys selected "equalizer" option, and then press the OK key system will appear different bandwidth frequency level. -
Page 20: Channel
Channel DVBT Auto Search Select option of Auto Tuning under the up and down keys . hen press OK button and the auto tuning will begin. Auto Tuning can also be activated by pressing the“QT” button on the remote control while in DTV mode. DTV Manual Search To simulate manual search, select the Channel you need to store, and also select the color and sound system. -
Page 21: Function
Function OSD Time: Press the "menu display time" option, through the left and right direction keys can be changed to 5 seconds, 10 seconds, 15 seconds,30 seconds, always optional. CEC: Press the up and down keys to select the option, and then press the OK key to open the CEC function. When CEC is turned on, you can choose to turn on or off Auto Standby, Auto Power on, ARC, Auto Standby. -
Page 22: Time Setting
Time setting Date/Current time: This is not adjustable, when there is a signal when the automatic calibration. Sleep time: The system provides OFF/10/20/30/60/90/120/180/240min sleep time to choose from. Auto Standby: The TV will shift to Standby mode in 3H/4H/5H/OFF as you can choose. Lock System Lock Choose with the up and down keys,then open the lock function with left and right keys. -
Page 23: Hotel Mode
Hotel mode In this mode, you can manage the opening and closing of the relevant channels, set the language, screen ratio operatio. Key lock: Press the “key lock” option to turn the menu on or off through the left and right keys. Scan lock: Press the“... -
Page 24: Media Operation
Media Operation Picture Through the up and down keys to select the "picture" icon, press the confirmation button to confirm, and then press right to the folder, press the confirmation button to open the appropriate folder. After selecting the picture, press the confirmation key to open the picture, can carry on some operation through the left and right keys. -
Page 25: Android Operation
Android Operation Home The main page is designed with Zeasn UI, divided into: latest news, Featured APP, applications, music, sports. *Different regions will receive different push content Press the Home button on the remote to enter the smart TV interface. Please search available app that you need from Play Store, then click to download it. - Page 26 Set your device name Give your device a name to help identify it when casting or connecting to it from other devices. Network&Internet Enter the "Network" menu item "Wi-Fi", you can open or close the Wi-Fi connection function, there are 4 types of connection: select focus and enter the password in the list of connections, use without-password protected connection, manually add hot name to connect, and point-to-point direct connection.
- Page 27 Device Preferences In the Device Preferences, you can see other settings under Android. About: You can view and set the relevant information for Software Update: You can set the software local the OTA update, you can also view the model, Android upgrade, automatically prompt to update the version, version,version number information.
- Page 28 Date&time:The date and time can be updated Language: System language can be selected here. automatically based on the network or time zone, or you can turn off automatic updates and update to manual settings. You can view the currently located time zone and set the time system.
-
Page 29: Bluetooth
Reset: Here you can reset the unit. After reset, the data of Android system will be cleared. Bluetooth Enter the bluetooth setting menu for bluetooth search and pairing operation. www.caravansplus.com.au... -
Page 30: Dvd Operation
(Reference only for models with DVD function) www.caravansplus.com.au... - Page 31 www.caravansplus.com.au...
- Page 32 www.caravansplus.com.au...
- Page 33 www.caravansplus.com.au...
-
Page 34: Cleaning & Maintenance
CLEANING & MAINTENANCE www.caravansplus.com.au... -
Page 35: Troubleshooting
TROUBLESHOOTING www.caravansplus.com.au... - Page 36 TROUBLESHOOTING Cont’d www.caravansplus.com.au...
-
Page 37: Specifications
SPECIFICATIONS Picture & Sound Model 051263 24" (61cm) Screen Size 1920 x 1080 Panel Resolution (pixels) Bluetooth 250 cd/m Brightness 3000:1 Contrast Ratio 8.5ms Response Time 176 (H) x 176 (V) Viewing Angle Display Type 16:9 Aspect Ratio 2 x 3W Speakers 480i, 480P, 576i, 576P, 720P, 1080i, 1080P HD Modes... - Page 38 As RV Media continually strives to improve its products, Specifications may be subject to change without notice. Warranty This product is backed up with a 2-Year Nationwide Warranty. Warranty Help line New Zealand: 09 257 2419 Australia: 1300 422 632 Evolution AU V1.0 April 2021 www.caravansplus.com.au...
- Page 39 www.caravansplus.com.au...
- Page 40 www.caravansplus.com.au...
Need help?
Do you have a question about the RV Media EVOLUTION and is the answer not in the manual?
Questions and answers