Table of Contents
Advertisement
Quick Links
Advertisement
Table of Contents

Summary of Contents for MegaSquirt DBWX2
- Page 1 Users manual DBWX2 Controller Not For Release (BETA) ...
-
Page 2: Table Of Contents
AVR fault codes 7. PID Settings a. Operating modes b. Throttlebody specific settings 8. Configuring fault output 9. Step by step initial configuration guide a. Setting up DBW throttle to MegaSquirt 3 Trademark Legal Notice . All product names, trademarks and registered trademarks are property ... -
Page 3: Introduction
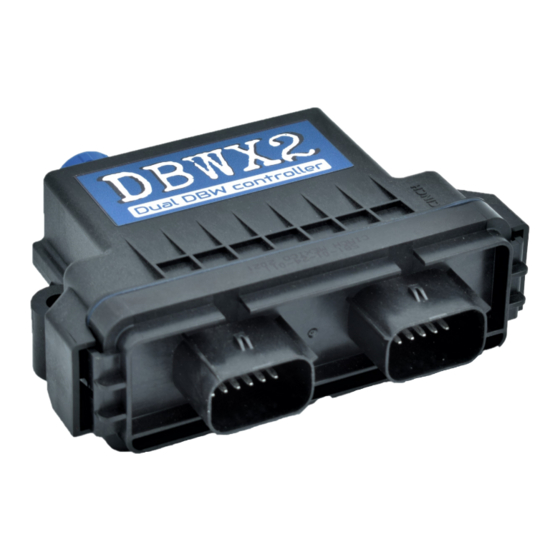
Introduction DBWX2 controller Features include 2 independent channels for drive by wire throttles. Both channels have independent PID controller that is user configurable. Safety is handled by using dual cpus. The redundant cpu architecture makes the controller one of ... -
Page 4: I/O And Pinout
I/O and pinout The controller has six 0-5V analog inputs for pedal and drive by wire throttle body position sensors. These inputs are protected from short to ground and +12V. The controller has four 5V reference voltage outputs to be used as pedal and dbw position sensor reference voltage. -
Page 5: Wiring
Wiring Steps to take for a good install with custom wiring Make sure that you have the proper crimping tools 2. Use proper gauge wire Connector and pin part numbers: Molex MX150 Black connector: 33472-1201 Molex MX150 Gray connector: 33472-1202 ... - Page 6 Crimping wires to connector pins Step 1: Strip the correct amount of insulation from the wire. The stripped copper must be slightly longer than the tab that will be crimped over it. Step 2: Crimp the tab that holds the wires copper strands in place. ...
- Page 7 Step 3: Crimp the tab that holds on to the insulation of the wire. Now the wire has been properly crimped to the connector pin and can be inserted to the connector. Note: It is necessary to use a proper crimping tool. This ensures correct power transfer between wire and connector.
- Page 8 Inserting the crimped pin into the connector body Step1: Make sure that the “white” plastic part from inside the connector is pulled out. This can be verified by making sure that the plastic piece is protruding from the connector. If the plastic is not showing, you can use a small screwdriver to pry it out from the connector. ...
- Page 9 Step 2: Insert the crimped pin from behind the connector body. There is a small dimple on the pin that marks the correct orientation of the pin. Top row has the dimple on top and bottom row at bottom.
-
Page 10: Wiring Diagrams
Wiring diagrams Power and CAN-bus wiring Use a 10A fuse. The controller will use the fuse as part of the polarity protection. GND connections should be connected to the battery negative terminal without interrupts. This results in the best operation. From electronics revision C onvard controller has a user programmable CAN-bus termination ... -
Page 11: Accelerator Pedal
Wiring the accelerator pedal 10 ... - Page 12 DBW connections 11 ...
-
Page 13: Updating The Controller
Updating the controller To update the controller it must be powered from a 12V source. Shut down Tunerstudio if its running. After unzipping the firmware update you should see firmwareupdater.exe (or similar name). Double click on it to start the update. ... -
Page 14: Understanding Fault Codes
Understanding fault codes ARM Fault codes Fault code system was added to aid in fault finding. It is important to understand what causes a particular error condition in the controller. BOD error: This is a CPU error that is caused by a low voltage condition to reset the cpu. -
Page 15: Avr Fault Codes
AVR Fault codes The AVR cpu has the same fault diagnosis as the main ARM cpu. The reason behind the addon of a secondary CPU is redundancy. If the main cpu failed such that it would command the throttle(s) open, the secondary cpu will still be able to save the situation ... -
Page 16: Pid Settings
PID Settings Operating modes: -Off : Channel is offline -Standalone curve 1 & 2: Controller is in standalone mode and will use throttle curve 1 or 2 to map the opening of the DBW throttlebody to the accelerator pedal position. ... - Page 17 sensor difference will a fault be triggered. Default value is 4% H-Bridge current sense enable: This setting enables the current sense circuitry in the H-Bride. This circuitry is around 15% accuracy from full scale (30A). This means that it cannot be used for precision measurement, but it can measure relative changes in current.
-
Page 18: Configuring Fault Output
Configuring fault output Circuit: Fault output is an open collector low side output. Current is limited to 10A but it is not recommended to load the output beyond 5Amps because of thermal concerns. User can configure the outputs PWM frequency and dutycycle in normal and fault ... -
Page 19: Step By Step Initial Configuration Guide
At this point the controller should be wired correctly. Now open TunerStudio and start a new project. After you have successfully connected to the DBWX2 controller the first thing to do is calibrate the DBW throttlebody. Open the “DBW1” or “DBW2” menu and click on the “DBW auto min/max” ... - Page 20 Calibrate the accelerator pedal Open the “Setup” menu and click on the “Pedal calibration” Now leave the throttle untouched and click on the “Cal low position”. Now the 0% position has been calibrated. Fully depress the accelerator pedal with some force. Press “Cal high position”.
- Page 21 Now is the time to choose the operating mode. You can test the throttle in standalone modes, but usually the throttlebody is controlled via the ECU. Select MS-Can if you intend to use DBW throttle on your MegaSquirt 3 project. ...
-
Page 22: Setting Up Dbw Throttle To Megasquirt 3
Baudrate by default is 500kbps. This also needs to match with megasquirt and all other devices sharing the CAN-bus. Enable the MS-DBW messaging. If this is the last or only device on the CAN-bus with megasquirt, you can enable the internal bus termination resistor here. ... - Page 23 Setting up the MegaSquirt 3 ECU Connect to the MegaSquirt 3 ECU with TunerStudio. Open the “CAN-bus / Testmodes” menu and click on the “Throttle Control (DBW)” Type in the values as pictured. Base can identifier = 256 . ...
- Page 24 Setting and confirming proper settings for safe operation This is the most important part of any DBW installation. The safety related settings are found under “Safety Settings” menu. These settings affect the sensor fault detection. You should leave these at 4% for optimal operation ...
Need help?
Do you have a question about the DBWX2 and is the answer not in the manual?
Questions and answers