Table of Contents
Advertisement
Quick Links
Advertisement
Chapters
Table of Contents

Related Manuals for KAULIN MFG. CO. Siruba C007K


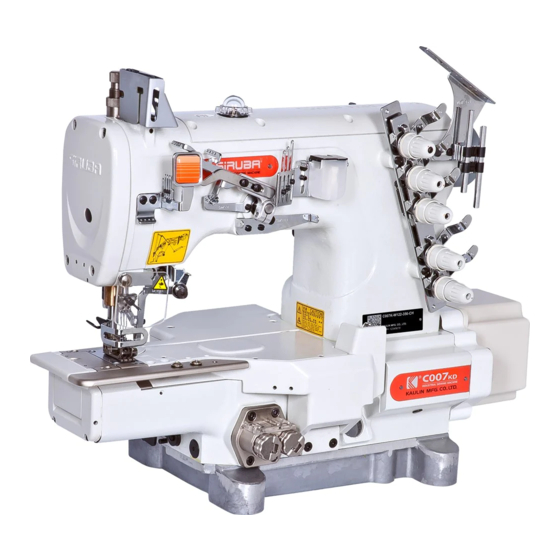
Summary of Contents for KAULIN MFG. CO. Siruba C007K
- Page 1 電控參數說明書 ELECTRONIC CONTROL PARAMETER MANUAL C007K / VC008...
-
Page 2: Table Of Contents
目 錄 產品安裝 ....................1 1.1 產品規格 ...................... 1 1.2 介面插頭的連接 ................1 1.3 連線與接地 ..................3 1.4 安裝與調整 ..................3 操作面板使用說明................4 2.1 操作面板的顯示說明................4 2.2 操作面板各按鍵功能說明 ..............6 系統參數設置說明................8 3.1 技術員參數表 .................... 8 3.2 系統員參數表 ................... 14 3.3 監控參數表操... -
Page 3: 產品安裝
安全事項 · 在使用本產品之前,請先閱讀《產品說明書》及所搭配的縫紉機 機 械說明書。 · 本產品必須由接受過專業培訓的人員來安裝或操作。 · 請儘量遠離電弧焊接設備, 以免產生的電磁波干擾本控制器而發生 誤動作。 · 請不要在室溫 45°以上或者 0°以下的場所使用。 · 請不要在濕度 30%以下或者 95%以上或者有露水和酸霧的場所使 用。 · 安裝控制箱及其他部件時,請先關閉電源並拔掉電源插頭。 · 為防止干擾或漏電事故, 請做好接地工程,電源線的接地線必須牢 固的方式與大地有效連接。 · 所有維修用的零部件,須由本公司提供或認可,方可使用。 · 在進行任何保養維修動作前, 必須關閉電源並拔掉電源插頭。 控制 箱裡有高壓危險,必須關閉電源五分鐘後方可打開控制箱。 · 本手冊中標有 符號之處為安全注意點,必須注意並嚴格遵守, 以免造成不必要的損害。 產品安裝 1.1 產品規格 產品型號:ASD58-55;ASU58-55;ASD58-75;ASU58-75;... - Page 4 圖 1-1 AS 系列 控制器圖 ① 電機電源插座;② 腳踏板插座;③ 電機編碼器插座;④ 操作面 板插座;⑤翻 台開關插座;⑥自動電磁鐵插座;⑦抬壓腳電磁鐵插座; ⑧機頭燈插座(黑色) ;⑨外置 同步器插座 :使用正常的力量插不進去時,請檢查插頭與插座是否匹 配,插入方向或針的方向是 否正確! 照明燈介面和抬壓腳電 磁鐵介面都是 1*2 的介面, 機頭照明燈介面使用黑色介面, 請注意區分。 ⑨外置同步 ①電機電源插座 器插座 ②腳踏板插座 ③電機編碼器插座 ④操作面板插座 ⑤翻台開關插座 ⑥自動電磁鐵插座 ⑦抬壓腳電磁 ⑧機頭燈插座 鐵插座 圖 1-2 AS 系列控制 箱插座背板...
-
Page 5: 連線與接地
1.3 連線與接地 必須要做好系統的接地工程,請合格的電氣工程人員予以施工。產 品通電及投入使 用前,必須確保電源插座 AC 輸入端已安全可靠地接 地。系統的接地線為黃綠線,該 地線請務必可靠連接至電網安全保 護接地上,以保證安全使用,並可防止出現異常 情況。 :所有電源線、信號線、接地線等接線時不要被其它物體 壓到或過度扭曲,以確保使 用安全! 1.4 安裝與調整 (A)一體式直驅電機,請參閱各機頭廠家安裝說明書; 圖 1-3 控制器安裝 示意圖 (B)外掛式皮帶電機,請注意調整電機與皮帶安裝位置: (1)電機的皮帶輪與縫紉機皮帶輪必須絕對平行; (2)電纜線穿過台板下後必須加以固定,防止被皮帶摩擦; (3)皮帶鬆緊度調整,可將電機腳座上的固定螺栓略微調松後, 調整電機與機頭皮帶輪鍵的 適當間距,再鎖緊固定。 圖 1-4 電機安裝 示意圖 (C)外掛控制箱的安裝,在台板右側面留出足夠空間,將控制箱鎖緊於台 板右下方。 (D)腳踏板(速控器)的安裝,請保持吊杆成直線,將腳踏板支架鎖 緊于台板下方。 並根據需要,適當調整吊杆螺絲,改變腳踏板角度, 使踏板前踩與後踩行程適合於 操作習慣。... -
Page 6: 操作面板使用說明
操作面板使用說明 2.1 操作面板的顯示說明 根據不同配置與需求,AS 系列控制器提供多種操作面板供客戶使用。 根據系統工作 狀態,操作面板的液晶模組將顯示當前的縫紉模式、各種 參數、前/後固縫設置,以及抬 壓腳、停針位、剪線、慢速起縫等液晶字 元。各面板所含功能按鍵及液晶顯示功能符號根據型號區別而略有增減, 但工作模式與使用方式均大致相同。 (1)H-43 操作面板 外觀 圖 2-1 操作面板 H-43 外觀介 面 圖 2-2 H-43 操作面板液晶顯示幕圖 示 表 2-1 H-43 操作面板液晶功能圖示顯示說明 索引 圖示 描述 索引 圖示 描述 自動剪線功能 中間停針上停針 軟啟動功能 自由縫 前加固縫 W 縫... - Page 7 (2)H-70 操作面板外觀 圖 2-3 操作面板 H-70 外觀介面 圖 2-4 H-70 操作面板液晶顯示幕圖 示 表 2-2 H-70 操作面板液晶功能圖示顯示說明 圖示 描述 索引 圖示 描述 索引 自動剪線功能 W 縫 軟啟動功能 多段縫 前加固縫 多段縫觸發功能 後加固縫 自動測試 縫紉段數標記 夾線功能 計數/參數值顯示 四段縫 剪線後抬壓腳 計針標記 中間停針抬壓腳 計件標記 中間停針下停針 計數顯示...
-
Page 8: 操作面板各按鍵功能說明
2.2 操作面板各按鍵功能說明 序號 外觀 名稱 功能描述 確認及 按鍵輸入參數確認鍵,並回退到上一級功能表直至操作員縫紉工作狀態。此外,還可與其它按鍵 返回鍵 同 時按下實現組合功能,可進入高級參數與功能設置。 亦稱為起始倒針功能選擇鍵,每按動一次,系統前固縫工作模式將按照 11B 號參數設置在無前固 前加固 、 縫與前單固縫 前雙固縫 、前四固縫 之間迴圈選擇,對應液晶屏圖示點亮。同時 縫鍵 顯示 即為前固縫介面,選擇對應的 鍵和 鍵可增減設置 A、B 段的針數,默認針數範圍 1~F 對應 1~15 針。 亦稱為結束倒針功能選擇鍵,每按動一次,系統後固縫工作模式將按照 11B 號參數設置在無後固 縫與後單固縫 、後雙固縫 、後四固縫 之間迴圈選擇, ,對應液晶屏圖示點亮。同時顯 後加固 縫鍵... - Page 9 序號 外觀 名稱 功能描述 夾線鍵 按下該鍵,液晶屏圖示 點亮,表明夾線功能有效,再按一下圖示熄滅,表明關閉夾線功能。 用於縫紉中途停車時系統的上/下停針位置選擇,按下該鍵, 點亮,表明為上停針,再按下該 停針位 鍵, 點亮,表明為下停針。但縫紉完成剪線之後,系統將停車在上針位。 鍵 注:H-43 面板無此按鍵,通過複合鍵 實現此功能。 在自由縫中途停車或多段縫段間停車時,按下該鍵可實現補針功能。點動按鍵為補半針,按下時 補針鍵 間稍長為補一針,保持按下則連續補針。 自動剪 按下該鍵,液晶屏圖示 點亮,表明自動剪線功能有效,再按一下該圖示熄滅,表明關閉剪線 功 能。 線鍵 抬壓腳 每按動一次,系統抬壓腳模式將在不自動抬壓腳、剪線後自動抬壓腳 、縫紉中停車自動抬 鍵 壓腳 、剪線後和停車時都自動抬壓腳四種模式之間迴圈選擇,對應液晶屏圖示同時點亮。 多段縫 在多段縫模式下,按下該鍵,液晶屏圖示 點亮,表明選擇觸發模式有效,此時點動腳踏板一 觸發鍵 次即可完成當前段的設定針數縫製;再按一下該圖示熄滅,表明多段縫下觸發功能關閉。 機頭燈 H-43 與 H-70 面板支援外接機頭燈調光功能,依次按下該鍵,可獲得關閉和從暗到明四級調光效 鍵...
-
Page 10: 系統參數設置說明
系統參數設置說明 3.1 技術員參數表 鍵和 同時按下可修改技術員參數表; 1、 鍵 0000, 2、 液晶顯示 ,要求鍵入技術員密碼,初始密碼為 按對應的 鍵和 鍵可更 改密碼數值; 3、 按下 鍵,如密碼正確,即進入技術員參數設置模式,顯示 , 4、 按下對應的 鍵和 或 鍵和 鍵可選擇參數編號並更改相應的參數值; 5、 最後按下 鍵,即退出參數設置模式,回到縫紉工作模式。 參數編號 參數範圍 典型值 參數描述 備註 100~800 起縫速度 1 0 0 200~5000 3500 自由縫最高速(全域最高限速)... - Page 11 200~2200 1800 前固縫速度 1 1 0 200~2200 1800 後固縫速度 1 1 1 200~2200 1800 連續回縫速度(W 縫) 1 1 2 1~70 前固(及 W)縫針跡補償 1(吸合補償,數值增大表示加快吸合) 1 1 3 1~70 前固(及 W)縫針跡補償 2(釋放補償,數值增大表示釋放加快) 1 1 4 1~70 後固縫針跡補償 1(吸合補償,數值增大表示加快吸合) 1 1 5 1~70 後固縫針跡補償...
- Page 12 後加固工作模式。 0:輕促踏板,即自動執行結束回縫。 1: 無效 0/1/2/3 1 2 3 2:針停上定位後,受 119 號參數[CT]時間控制動作 3:針停下定位後,受 119 號參數[CT]時間控制動作 W 加固工作模式。 0:輕促踏板,即自動執行起始回縫。 1:受踏板控制,可任意停止。 0/1/2/3 1 2 4 2:針停上定位後,受 119 號參數[CT]時間控制動作 3:針停下定位後,受 119 號參數[CT]時間控制動作 加固縫 0~99 後固縫最後一個 C 段增加的針數 1 2 5 模式 0~99 前固縫之前插入的針數(第一 A 段增加的針數) 1 2 6 0~99 後固縫之後插入的針數(最後一個...
- Page 13 0~1024 踏板抬壓腳位置 1 3 5 0~1024 踏板回中位置 1 3 6 0~1024 踏板前踩運行位置 具體設置方法見圖 4-1 所示。 1 3 7 0~1024 踏板低速運行位置(上限) 1 3 8 0~1024 踏板模擬量最大值 1 3 9 0~800 踏板抬壓腳確認時間 1 3 A 0/1 踏板回中立刻剪線選擇:0 關;1 開 1 3 B 0/1 抬壓腳位置抬壓腳功能選擇:0 不抬;1 抬...
- Page 14 0/1/2 按鈕補針模式:0:按下時間控制;1:補半針;2:補一針 1 4 8 壓腳下放速度減緩:緩放延遲係數,越大下放越慢 1 4 9 0~10 踏板加速速度曲線濾波係數 1 4 A 0~99 F 鍵功能選擇。F 鍵功能選擇。0:無;1:厚料對針眼功能 1 4 B 1~100 計針數功能比例值設定 1 5 0 1~9999 計針數上限設定值 1 5 1 計針數模式選擇: 0:不計數 1:依針數遞增計數,計數滿後自動重新計數 2:依針數遞減計數,計數滿後自動重新計數 3:依針數遞增計數,計數滿後,馬達自動停止,須由重定按鈕設定 0~4 或面板上的 P 鍵來啟動重新計數。 1 5 2 4:依針數遞減計數,計數滿後,馬達自動停止,須由重定按鈕設定...
- Page 15 執行時間復位 1 6 0 參數傳輸 0:無動作 0/1/2 1 6 1 1:下傳參數 2:上傳參數 操作類 1, 2 恢復出廠參數 1 6 2 (不保 1, 2 保存當前參數為用戶自訂機修參數(可恢復) 1 6 3 存) 密碼 1 6 4 恢復控制器出廠參數,並覆蓋機頭廠家出廠參數或用戶自訂機修參 1 6 5 數。原有參數不可恢復。 注:16X 參數操作保存時,必須長時間按住 大約 3-5 秒即可保存。...
-
Page 16: 系統員參數表
3.2 系統員參數表 鍵和 同時按下可修改系統員參數表; 1、 鍵 0000, 2、 液晶顯示 ,要求鍵入系統密碼,初始密碼為 按對應的 鍵和 鍵可更改 密碼數值; 3、 按下 鍵,如密碼正確,即進入系統員參數設置模式,顯示 ; 4、 按下對應的 鍵和 或 鍵和 鍵可選擇參數編號並更改相應的參數值; 5、 最後按下 鍵,即退出參數設置模式,回到正常縫紉模式。 參數編號 參數範圍 典型值 參數描述 備註 剪線電機運行模式選擇: 0:平車式 1:繃縫式 A(普通繃縫剪線:停到上針位後剪線) 0/1/2 2 0 0 2:包縫式:手動剪線... - Page 17 5-359 剪線開始角度 TS(相對於下針位角度) 2 0 3 10-359 剪線結束角度 TE(相對於下針位角度,需大於 TS) 2 0 4 1-999 剪線開始延時 T1(ms) 2 0 5 1-999 剪線結束延時 T2(ms) 2 0 6 1~999 保留 2 0 7 1~9999 保留 2 0 8 1~999 保留 2 0 9 10-60 剪線加力係數(電機加力) 2 0 A...
- Page 18 1~999 撥線/掃線延遲時間 ms 2 1 6 1~9999 撥線/掃線持續時間 ms 2 1 7 1~999 撥線/掃線復原時間 ms 2 1 8 夾線功能選擇 0/1 2 1 9 0:關閉;1:打開 10-359 夾線開始角度 2 1 A 11-359 夾線結束角度 2 1 B 0~9999 吹風開始延時 ms 2 1 C 1~9999 吹風持續時間...
- Page 19 AS-61 系列中分壓腳工作模式:0:不與壓腳、倒縫、交替量關聯;1: 2 2 C 與壓腳、倒縫、交替量關聯。 0~359 定角度補針的目標角度(對針眼角度) 2 2 D AS-61 系列雙針機自動轉角節能模式開關 0:關閉;1:開啟 2 2 E 壓腳提升的控制模式 0/1 2 3 0 0:按鈕點動切換;;1:按鈕始終按下才有效; 自動測試模式選擇:(前面兩位元數模式設置) 0/1 2 3 1 0:定針數;1:定時間(×100ms) 安全開關報警確認時間 ms(不區分直驅翻台開關和繃縫剪刀保護開 0~1000 2 3 2 關,統一處理方式) 0~1000 安全開關恢復確認時間 ms 2 3 3 電機轉向:...
- Page 20 自動倒縫時的密縫模式 0/1 2 3 F 0:自動倒縫時保持當前密縫狀態;1:自動倒縫時強制關閉密縫; 電機/機頭傳動比:X0.001 0~9999 1000 2 4 0 (如果自動計算過傳動比,控制器內的該參數可能與 HMI 上的不同) 保留 2 4 1 0~359 上停針位調整角度(相對於上針位感測器的位置偏移) 2 4 2 0~359 下針位機械角度 2 4 3 0~800 放壓腳延遲時間(ms) 2 4 4 0~359 厚料加力開始角度 機頭相 2 4 5 關參數...
- Page 21 0:禁止;1:手動倒縫;2:安全開關;3:緊急停針;4:布邊檢測;5:剪線開關輸入;6:壓腳開關輸入; 7:補針;8:前後加固逆轉;9:壓腳交互量抬起;10:密縫;11:計數器復位;13:壓腳交替量輸入 1;14: 2 5 0 - 壓腳交替量輸入 2;15:提針鎖定;16:拼縫壓腳控制輸入;17:雙針機左轉輸入;18:雙針機右轉輸入; 2 5 B 19:副張力控制輸入 1 號電磁鐵輸出功能定義 2 6 0 2 號電磁鐵輸出功能定義 2 6 1 3 號電磁鐵輸出功能定義 2 6 2 輸出功 4 號電磁鐵輸出功能定義 2 6 3 詳見下行 能定義 5 號電磁鐵輸出功能定義 2 6 4 6 號電磁鐵輸出功能定義...
- Page 22 1~100 4 號電磁鐵斬波每週期關閉時間 ms(保留) 2 7 E 0~600 4 號電磁鐵保護時間 100ms 2 7 F 1~500 5 號電磁鐵全出力時間 ms 2 8 0 1~100 5 號電磁鐵斬波每週期開通時間 ms(保留) 2 8 1 1~100 5 號電磁鐵斬波每週期關閉時間 ms(保留) 2 8 2 0~600 5 號電磁鐵保護時間 100ms 2 8 3 1~500 6 號電磁鐵全出力時間...
- Page 23 15 號輸入功能定義 2 9 C 15 號輸入有效電平 0/1 2 9 D 16 號輸入功能定義 2 9 E 16 號輸入有效電平 0/1 2 9 F 0:禁止;1:手動倒縫;2:安全開關;3:緊急停針;4:布邊檢測;5:踏板剪線輸入;6:踏板壓腳輸入; 2 9 0 - 7:補針;8:前後加固逆轉;9:壓腳交互量抬起;10:密縫;11:計數器復位;13:壓腳交替量輸入 1;14: 2 9 F 壓腳交替量輸入 2;15:提針鎖定;16:拼縫壓腳控制輸入;17:雙針機左轉輸入;18:雙針機右轉輸入 9 號機頭輸出功能 2 A 0 10 號機頭輸出功能 2 A 1 11 號機頭輸出功能...
-
Page 24: 監控參數表操
3.3 監控參數表 鍵和 鍵同時按下可進入監控模式,液晶顯示 ; 1、 2、 按對應的 鍵和 鍵或 鍵和 鍵可選擇參數編號,即可即時監視對應參 數 變化; 3、 最後按下 鍵,即退回到正常縫紉模式。 參數編號 參數描述 參數編號 參數描述 針數計數 踏板電壓採樣值 0 1 0 0 2 5 計件數 機頭傳動比實際值 0 1 1 0 2 6 機頭真實速度 電機累計執行時間(Hour) 0 1 2 0 2 7 霍爾狀態... -
Page 25: 故障代碼表
3.5 故障代碼表 若系統出現報錯或報警,請首先檢查如下項: 1、先確認機器的連接線是否連接完好;2、確認電控和機頭是否匹配;3、確認恢復 出廠是否準確。 故障代碼 代碼含義 解決措施 硬體過流 關閉系統電源,30 秒後重新接通電源,控制器若仍不能正常工作,請更換控 E r r - 0 1 制器並通知廠方。 軟體過流 E r r - 0 2 斷開控制器電源, 檢查輸入電源電壓是否偏低 (低於 176V) 。 若電源電壓偏低, 請在電壓恢復正常後重新開機控制器。 若電壓恢復正常後, 啟動控制器仍不能 系統欠壓 E r r - 0 3 正常工作,請更換控制器並通知廠方。... -
Page 26: 特殊功能操作說明
特殊功能操作說明 4.1 上停針位調整 控制系統在恢復出廠後,可根據需要重新設置上針位 元! 第一步:先按住 鍵,再按 鍵,即進入監控模 式,默認為 024 號監控參數,液晶屏顯示當前角度,如 為 0°表明此位置為系統當前預設的上停針位置。 第二步:轉動手輪,讓挑線杆到上停針位置或希望調整到的合 適位置,此時液晶屏顯示調整後的上停針位,如 124° 第三步:先按住 鍵,再按 鍵,使機械偏轉角度歸零, 上停針位設置完成。最後按 鍵退出。 4.2 一鍵恢復機頭廠家參數值 如果希望恢復機頭廠家的出廠參數,可按照如下步驟: 第一步:先按住 鍵,再按 鍵,即進入監控模 式,默認為 024 號監控參數。 第二步:長按 鍵 3 秒鐘以上,開始一鍵恢復機頭廠 家參數,液晶屏顯示橫杠,表明正在恢復參數,此時控 制器切勿斷電或拔出操作面板插頭。 待數碼管顯示全 8,表明機頭廠家參數恢復完成。... -
Page 27: 腳踏板靈敏度調整
4.3 腳踏板靈敏度調整 腳踏板動作由初始位置①(136 號參數)開始,緩慢向前踩至②(137 號參數)開始 低速縫紉,繼續前踩至③(138 號參數)開始加速,再深踩至④(139 號參數)達到最高 速度。②③段之間維持起縫速度,③④段之間為無級調速過程; 1、當腳踏板由初始位置①(136 號參數)開始,緩慢後踩至⑤(135 號參數)時 抬 壓腳自動抬起; 2、當腳踏板由初始位置①(136 號參數)開始,緩慢後踩至⑥(134 號參數)時 自 動完成剪線動作。 3、各參數數值設置需保證 (134 號參數)<(135 號參數)<(136 號參數)<(137 號參數)<(138 號參數)< (139 號參數) 4、可通過監控模式下 025 號參數即時監測不同位置下的踏板採樣數值作為各參數的 參考值。調整對應參數,抬壓腳和前踩或後踩的動作位置也隨之改變。如前踩很大距離機 器還沒有運轉,可適當減小 137 參數(不能小於回中位置參數 136) ,即可提高前踩的靈 敏度; 若機器過於靈敏, 輕觸踏板機器就開始運行,可適當加大 137 參數; 若不容易補針, 稍微前踩,速度就迅速提高造成前沖多針,可適當增大... -
Page 28: 前後固縫模式設置
壓腳電磁鐵設置參數。 電磁鐵速度調整 若電磁鐵吸合緩慢,力度不夠。可增加電磁鐵全出力時間,例 如增大參數 270,即增 加剪線電磁鐵全出力時間,從而提高剪線吸合速度、增大剪線力度。若電磁鐵聲音過大, 可適當減小電磁鐵全出力時間。 電磁鐵容易發熱 可減小占空比,適當將斬波開通時間參數(如 271 號)降低或者將關閉時間參數(如 272 號)增加(注:如果開通時間占比調整過小,可能會導致電磁鐵吸合狀態下力度不夠 甚至提前釋放) 。 電磁鐵吸合無力,吸合狀態的力度如何調整(怎樣增大吸合時候狀態的力度 可增大占空比,適當將斬波開通時間參數(如 275 號)增加,或將關閉時間參數(如 276 號)減小(注:如果開通時間占比調整過大,易使電磁鐵發熱) 4.5 前後固縫模式設置 針對固縫模式,通過前固縫按鍵 和後固縫按鍵 ,系統預設支援①單固縫、② 雙固縫、③四固縫與④無固縫四種模式間切換。 前單固縫、後單固縫模式 前雙固縫、後雙固縫模式 ① ② 前四固縫、後四固縫模式 無前、後固縫 ③ ④ 可通過調整 11B 號參數,修改固縫切換模式。若設置為 1, 則只在單固縫與關閉固縫間切換; 若設置為 2, 則在單固縫、 雙固縫和關閉固縫間切換;若設置為... -
Page 29: 前後固縫與四段縫超長針數設置
4.6 前後固縫與四段縫超長針數設置 在設置前後固縫的 A/B/C/D 段與四段縫的 E/F/G/H 段時,可選 擇對應的 鍵和 鍵增減設置各段數值,系統通常預設設置 範圍為 1~F 對應 1~15 針。 但若需要設置更多的針數,可通過修改 11C 號參數和 11D 號參 數來指定欲設置針數的十位,再加上 A/B/C/D 和 E/F/G/H 段設 置的個位數字,共同組成總針數。例如,在設置前後固縫針數 時,默認 11C 號參數為 0000 若 A 段、C 段設置為 E,B 段、D 段設置為 4,則 A 段、C 段實 際... -
Page 30: 操作面板計件數功能
4.7 H-43 操作面板計件數功能 第一步,先按住 鍵,再按 鍵,液晶屏會提示輸入技術 員參數密碼,再按下 鍵進入技術員模式; 第二步,調整到 154 號參數,輸入將所需的計件數,例如設定的報 警件數為 100 件; 第三步,再調到 155 號參數,選擇所需計件數模式,通常可設置 為 3,即計件數滿後按復位鍵取消報警重新計數,然後按 鍵 保存退出。 第四步,打開計件數監控功能,先按住 鍵,再按 鍵進 入監控模式。 第五步,將參數號調到 011,即計件數監視功能,這樣每剪完一 次線,計件數就增加 1。 第六步,當所計件數達到所設上限值(154 號參數)時,例如 100 件時, 操作面板顯示 ALA-3,提示計件數報警,表明計件數已達到 154 號參數所設報警件數, 第七步,此時可按 鍵取消報警,並重新開始計數,計件報警 件數仍然由 154 號參數確定。... -
Page 31: 操作面板計針數功能
4.8 H-43 操作面板計針數功能 第一步,先按住 鍵,再按 鍵,液晶屏會提示輸入技術 員參數密碼,再按下 鍵進入技術員模式; 第二步,調整到 151 號參數,輸入將所需的計針數,例如設定的報 警針數為 3000 針; 第三步,再調到 152 號參數,選擇所需計針數模式,通常可設置 為 3,即計針數滿後按復位鍵取消報警重新計數,然後按 鍵 保存退出。 第四步,打開計針數監控功能,先按住 鍵,再按 鍵進入 監控模式。 第五步,將參數號調到 010,即計針數監視功能,這樣每轉一圈 完成一針,計針數就增加 1。 第六步,當所計針數達到所設上限值(151 號參數)時,例如達 到 3000 針時, 操作面板顯示 ALA-2,提示計針數報警,表明計針數已達到 151 號參數所設報警針數, 第七步,此時可按 鍵取消報警,並重新開始計數,計針報警 件數仍然由... -
Page 32: 操作面板計針數/計件數功能
4.9 H-70 操作面板計針數/計件數功能 H-70 操作面板包含專門的計針數/計件數顯示模組。 H-70 操作面板系統參數的設置方式與 H-43 面板一致。 第一步,先按住 鍵,再按 鍵,液晶屏會提示輸入技術 員參數密碼,再按下 鍵進入技術員模式; 第二步, 選擇所需計針數模式,通常可設置為 3,即計針數滿後 按復位鍵取消報警重新計數; 第三步,再選擇所需計件數模式,調到 155 號參數,亦可設置為 3,即計針數滿後按復位鍵取消報警重新計數;然後按 鍵保 存退出。 若開啟了計針數功能或計件數功能,操作面板將對應顯示計針數 標識或計件數標識。當計針數功能與計件數功能均開啟時,預設 顯示計針數值, 此時按計數切換鍵 可在顯示計針數與計件數功能間切換。 系統通常預設開啟計數設定值快捷修改的功能。可調整 158 號參 數,修改為 1 則關閉此功能,默認為 0 開啟此功能。 此時,顯示計針數時,按計數按鍵區域內 鍵,可對計 針數設定值加減;... - Page 33 顯示計件數時,按計數按鍵區域內 鍵,可對計件數當 前值加減; 按計數復位鍵 可對當前顯示的計數值清零。...
- Page 34 介面定義配置圖 平縫系列介面配置表 電機電源 Motor Power 同步裝置 Synchronizer 腳踏板 Pedal 電機編碼器 Encoder 操作面板 Operation Panel 翻抬開關 Safety SW 機頭電磁鐵 Machine Head Sclenoid 燈 抬壓腳電磁鐵 Lamp Foot Lifter...
- Page 35 繃縫系列介面配置表 電機電源 Motor Power 同步裝置 Synchronizer 腳踏板 Pedal 電機編碼器 Encoder 操作面板 Operation Panel 翻抬開關 Safety SW 機頭電磁鐵 Machine Head Sclenoid 燈 抬壓腳電磁鐵 Lamp Foot Lifter 386P0146A 2014-1-9...
- Page 36 Contents 1. Installation Introduction ..............1 1.1Product specifications ..............1 1.2 Interface connection..............1 Operation Panel Instruction ............. 4 2.1 Operation panel display instruction ..........4 System parameter setting ............. 10 Technician mode ..............10 Administrator mode ............... 18 Monitoring Mode..............28 Safety switch warning mode..........
-
Page 37: Installation Introduction
Safety Instruction · Please read this manual carefully, also with related manual for the machinery before use the controller. · For installing and operating the controller properly and safely, qualified personnel are required. · Please try to stay away from arc welding equipment, in order to avoid electromagnetic interference and malfunction of the controller. - Page 38 Fig.1-1 AS series Control Box ①:the motor power supply socket; ②: the pedal socket; ③:the motor encoder socket; ④the operation panel switch socket socket;⑤ the turn table;⑥:the automatic electromagnet socket; ⑦:the presser foot lifting electromagnet socket; ⑧:the head lamp socket (black); ⑨:the external synchronizer socket. :...
- Page 39 „ 1.3 Power Connection and Grounding basic parameters Please electrical engineer must do construction to the system grounding engineering. Electricity and put into use, must ensure that the power supply socket AC input has been safe and reliable grounding. System ground is yellow-green line, the line must be connected to the power grid safe reliable grounding protection, to ensure the safe use, and can prevent the abnormal situation.
-
Page 40: Operation Panel Instruction
(C) The external control box is installed; please note the table right side leaving enough space. The control box is locked in the lower right (D) The pedal (speed controller) is installed; please keep the boom into a straight line, the foot board support locking in the table below. - Page 41 Table 2-1 LCD Icon Display Description Icon Index Icon Description Description Index Automatic trimming Intermediate stops up stop position Soft-start function Free sewing start back tacking W seam End back tacking Multi-seam Sewing segments Trigger function index Numeric character Automatic test display (pin number / parameter) Foot...
- Page 42 Table 2-2 LCD Icon Display Description Icon Index Icon Description Description Index Automatic trimming W sewing Soft-start function Multi-segment sewing start back tacking Multi-seam trigger function End back tacking Automatic test Sewing segments Clamp function index Numeric character Four –segment sewing display (pin number / parameter) Foot...
- Page 43 Appearance Description Name It is called end back tacking function selection keys, every effective press the key once, system will be in accordance with the 11B parameter set none and single end back tacking , double end back End back tacking key tacking , four end back tacking , LCD icon is lit at the...
- Page 44 Appearance Description Name Press this key, LCD icon is lit, show soft start function effectively, then press the icon is off, indicates close soft start Soft start key function. Press this key, LCD icon is lit, show clamp function Clamp string key effectively, then press the icon is off, indicates close clamp function.
- Page 45 Appearance Description Name In the multi segment sewing mode, press the key, LCD icon is , suggesting that trigger mode effectively, the pedal can be One-Shot-Sewing key accomplished once the current period of setting needle sewing; then click the icon out, show that multi segment joint triggered off. H-43 and H-70 panel support machine headlight dimming function, in Lamp order to press the key, can get close and from dark to bright four...
-
Page 46: System Parameter Setting
3 System parameter setting 3.1 Technician mode 1、Press key and key can modify the technician parameter table. 2、 The LCD will display .Type the password for the technician, the initial password is 0 0 0 0,press the corresponding key and the key can change the password value;... - Page 47 System accelerate sensitivity ( D i r e c t d r i v e transmission can be set up to a large value ; belt transmission don't set large 1~20 1 0 9 value or too much noise and vibration. This parameter do not affect the electrical)...
- Page 48 Corresponding to A/B/C/D pins of ten bit, start and end back tacking 0000-9999 1 1 C interface under the A/B/C/D digits together constitute the two digit pin number, each section of pin number 1~99 needle. Corresponding to E/F/G/H pins of ten bit, start and end back tacking 0000-9999 1 1 D interface under the E/F/G/H digits together constitute the...
- Page 49 Before start back tacking insertion of needle number (the first A 0~99 1 2 6 segment increase needle number ) After end back tacking insertion of needle number (the first D 0~99 1 2 7 segment increase needle number ) 0~3 1 2 8 Intermediate constant back sewing number...
- Page 50 0~1024 1 3 4 Trimming pedal-position 0~1024 1 3 5 Foot lifting pedal-position 0~1024 1 3 6 Pedal back to Mid position Figure 4-1shows the 0~1024 1 3 7 Pedal start running position specific setting method. 0~1024 1 3 8 Pedal low speed running position 0~1024 1 3 9...
- Page 51 Function mode selection when manually push back tacking 0/1 1 4 2 0: Juki mode. During sewing or stop sewing both have this action. 1:Brother mode. Only acts during sewing. Special operation mode: 0: Operator selection 1: Simply sewing mode 0/1/2/3 1 4 3 2: Motor initial angle measurement (not necessary to remove the belt)
- Page 52 Stitch counting mode selection: 0: no counting 1: Counting up according to stitch number, after reaching set value then restart. 2: Counting down according to stitch number, after reaching set value then restart. 3: according to the number of needle increment count, count full, 0~4 1 5 2 motor automatically stop, shall be determined by the P key to...
- Page 53 4: the piece number count down, count full, motor automatically stop, shall be determined by the P key to reset button set or panel to start counting again. Corresponding to 1/2/3/4, an electromagnet chopper duty time 0~9999 1 5 6 selection (0 in MS, 1 in 0.1ms) Corresponding to 5/6/7/8, an electromagnet chopper duty time 0~9999...
-
Page 54: Administrator Mode
3.2 Administrator mode 1、Press key and key can modify the administrator parameter table. 2、The LCD will display .Type the password for the administrator, the initial password is 0 0 0 0,press the corresponding key and the key can change the password value; 3、... - Page 55 3: After lower needle stop position is reached, time delay to the parameter 205 set value [T1] then start trimming, time delay to the parameter 206 set value [T2]. 4: After upper needle stop position is reached, time delay to the parameter 205 set value[T1] then start trimming, time delay to the parameter 206 set value [T2], most applications are for interlock machines.
- Page 56 Thread slack electromagnet sequential selection: 0:211 parameter set point of [LS] after loose line, untilthe needle position to delay 214 parameter set time [L2]. 1:211 parameter set point of [LS] after loose line, until the 212 parameter set angle [LE]. 2:211 parameter set point of [LS] Thread after loose line, 214parameters set by the [L2] until the time delay.
- Page 57 1~9999 2 1 7 Thread wiping/Thread sweeping time delay ms 1~999 2 1 8 Thread wiping/Thread sweeping recover time ms Thread nipping function selection 0/1 2 1 9 0: off 1: on 10-359 2 1 A Thread nipping initial angle 11-359 2 1 B Thread nipping finish angle...
- Page 58 Needle cooling output power set up (0: 1: running action, higher than 0/1/2 2 2 8 the 22A parameter setspeed when the action, 2: cut the line after the end of 229,the movement parameter setting time) 1 - 2550 2500 2 2 9 Needle cooling time delay 200 - 6000...
- Page 59 Foot lifting signal speed control function: 0: off 0/1 /2 2 3 5 1: analog signal 2: digital signal 0~1023 2 3 6 Signal min. 0~1023 2 3 7 Signal max. 200~800 2 3 8 Signal speed control min. 200~2500 2 3 9 Signal speed control max.
- Page 60 0~800 2 4 4 Foot lifting release time delay (ms) 0~359 2 4 5 Torque increase initial angle of over thick material 0~359 2 4 6 Torque increase finish angle of over thick material 0~2000 2 4 7 Oil refill time alarm (hour. 0: function deactivated) 0~4000 2 4 8 Oil alarm, stop operation time (hour.
- Page 61 2 6 0 No. 1 electromagnet output definition 2 6 1 No. 2 electromagnet output definition 2 6 2 No. 3 electromagnet output definition As follows 2 6 3 No. 4 electromagnet output definition Output 2 6 4 No. 5 electromagnet output definition Definition 2 6 5 No.
- Page 62 1~100 2 7 D No.4 electromagnet chopping on time ms(Reserved) 1~100 2 7 E No.4 electromagnet chopping off time ms(Reserved) 0~600 2 7 F No.4 electromagnet protection time 100ms 1~500 2 8 0 No.5 electromagnet fully output time ms 1~100 2 8 1 No.5 electromagnet chopping on time ms(Reserved) 1~100...
- Page 63 2 9 9 No.13 active input level 0/1 2 9 A No.14input definition 2 9 B No.14 active input level 0/1 2 9 C No.15input definition 2 9 D No.15 active input level 0/1 2 9 E No.16 input definition 2 9 F No.16 active input level 0/1 0:Disable 1:Manual back tacking 2:Safety switch 3:Emergency stop 4:Material side detection 5:Pedal trimming input...
-
Page 64: Monitoring Mode
3.3 Monitoring Mode key and key press can enter the monitor mode, LCD shown is 2, press the corresponding key and key or key and key to select parameter number, can be real-time monitoring ofchanges in the corresponding parameters; 3, finally press the key, is to return to the normal sewing pattern Description Description... -
Page 65: Safety Switch Warning Mode
3.4 Safety switch warning mode Code Alarm code solution meaning Refueling Press the P key can temporarily cancel alarm. Please refueling remind Count needle number has reached the limit, you can press the P key to Count needle cancel the alarm and re count number alarm Piece number Said piece number has reached the limit, you can press the P key to cancel... -
Page 66: False Alarm Mode
3.5 False alarm mode If the system error or warning, please first check the following items: 1, to confirm the connection machine is connected properly; 2, confirm the control and head matches; 3, confirm restore factory is accurate. error meaning solution code hardware overflow... -
Page 67: Special Function Operating Instructions
DSP Read/Write E r r - 1 4 EEPROM failure Motor over-speed E r r - 1 5 protection Turn off the system power, restart the system after 30 seconds, if it still does not E r r - 1 6 Motor reversion work, please replace the controller and inform the manufacturer. -
Page 68: A Key Recovery Machine Manufacturers Parameter Value
4.2 A key recovery machine manufacturers parameter value If you want to restore the factory parameters, according to the following steps: The first step: first press key, then press key, enter into monitor mode; The default is 024, monitoring The second step: long press key for more than 3 seconds, start a key recovery machine factory parameters, LCD screen display bar, that is the restore parameters, the... - Page 69 3、the parameter settings are required to ensure that (parameter 134) < (parameter 135) < (parameter 136) < (parameter 137) < (parameter 138) < (parameter 139) 4、an be used as the parameter's value through the pedal real-time monitoring of 025 parameters at different positions of the monitoring mode sampling numerical. Adjusting the corresponding parameters, presser foot and step on or after step action position change.
-
Page 70: Electromagnet Performance Adjustment
4.4 Electromagnet performance adjustment According to the typical configuration, parameters of 260 to 1, showed that the No. 1 electromagnets are set to cut the line electromagnet, the No. 1 electromagnet set parameter 270~273 is cutting line electromagnet set parameters. Parameters of 261 to 3, showed that the No. -
Page 71: Start/ End Back Tacking Sewing Mode Set
4.5 Start/ end back tacking sewing mode set According to the fixed seam pattern, through the start back tacking sewing key and end back tacking sewing key, the system default support ①the single back tacking sewing , ②double back tacking sewing ③four back tacking sewing④ none back tacking sewing between the four modes to switch single start/end back tacking sewing mode set double start/end... -
Page 72: Start/ End Back Tacking Sewing And Four-Segment Sewing Is Set Long
4.6 Start/ end back tacking sewing and Four-segment sewing is set long needle When it is set start/end back tacking sewing of A/B/C/D and E/F/G/H , four segment sewing Select corresponding key and the key can set the segment value addition and subtraction,the system default range is 1~F corresponds to the 1~15 pin. -
Page 73: Operating Panel Piece Number Function
Set before and after the four joint E/F/G/H segments fixed seam is similar, but the ten tuning parameters for 11D parameters. Note: the shortcut keys out of 11C parameters for press key; shortcut key 11D parameters for press key. 4.7 H-43 operating panel piece number function The first step, press key, then press key, the LCD... -
Page 74: Operating Panel Count Needle Number Function
The fifth step, adjusted the parameter number to 010, including the number of needle monitoring function, so that each turn finished stitch, stitch count is increased by 1. The sixth step, when the needle reached the upper limit (parameter 154), for example, when the needle reached to 100. Operation panel display ALA-3, suggesting that the needle number alarm, show that the needle number has reached 154, the number of needle set alarm. - Page 75 The third step, select the required count needle number mode, transferred to the 152 parameters, can be set to 3, including the number of needle after press the reset key to cancel the alarm to count; then press key save and exit. The fourth step, open the count needle number monitoring function, press key, then press...
-
Page 76: Operating Panel Count Needle Number / Piece Number Function
4.9 H-70 operating panel count needle number / piece number function H-70 operating panel contains special count needle number / piece number display module. H-70 operating panel system parameter is set the way and the H-43 panel is the same The first step, press key, then press key, the LCD... - Page 77 At this time , press counting key can switch count needle number and piece function in the show . The system default settings count fast modifying function. Adjustable parameter 158, modified to 1 to disable this feature, the default is 0 open this function. At this time, display the count needle number, according to the counting key area, press keys, the count needle...
- Page 78 5 The interface define of the configuration Flat sewing series interface definition table 電機電源 Motor Power 同步裝置 Synchronizer 腳踏板 Pedal 電機編碼器 Encoder 操作面板 Operation Panel 翻抬開關 Safety SW 機頭電磁鐵 Machine Head Sclenoid 抬壓腳電磁鐵 Foot Lifter 燈 Lamp...
- Page 79 Interlock series interface definition table 電機電源 Motor Power 同步裝置 Synchronizer 腳踏板 Pedal 電機編碼器 Encoder 操作面板 Operation Panel 翻抬開關 Safety SW 機頭電磁鐵 Machine Head Sclenoid 抬壓腳電磁鐵 Foot Lifter 燈 Lamp 386P0146A 2014-1-20...
- Page 80 由於對產品的改良及更新 , 本產品使用說明書中與零件圖之產品及外觀的修改恕不事先通知 ! The specification and/or the equipment described in the instruction book and parts list are subject to change because of modification with out previous notice C007K / VC008.SEP .2020...
Need help?
Do you have a question about the Siruba C007K and is the answer not in the manual?
Questions and answers