Table of Contents
Advertisement
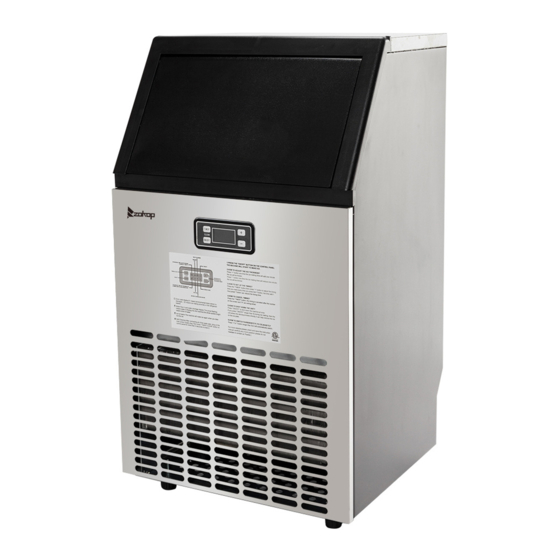
COMMERCIAL ICE MAKER
Instruction Manual
Thanks for your purchase. Any questions please don't hesitate to contact us,
We will handle all your problem ASAP. Your feedback is vital to us! And we will
always try to do better. For more details, please contact us by email via
support@rovsun.com. (Write your seller's Order # on the subject of the email,
so that we can find your order and better assist your issue) Or call us at
(1)855-882-2333 .
Model:HZB-45
Advertisement
Table of Contents

Related Manuals for Zokop HZB-45


Summary of Contents for Zokop HZB-45
- Page 1 For more details, please contact us by email via support@rovsun.com. (Write your seller's Order # on the subject of the email, so that we can find your order and better assist your issue) Or call us at (1)855-882-2333 . Model:HZB-45...
-
Page 2: Important Safety
1-IMPORTANT SAFETY 1.This unit must be properly installed in accordance with the installation instructions before it is used. 2.This appliance must be earthed, and use the 115V/60Hz earthed power supply.Never remove the ground prong.Never use an adapter. 3. Do not run cord over carpeting or other heat insulators. Do not cover the cord. Keep cord away from traffic areas, and do not submerge in water. -
Page 3: Specifications
3. Allow 4 hours for the refrigerant fluid to settle before plugging the ice maker in, as the unit maybe fall upside down during shipping or transportation. 2-SPECIFICATIONS MODEL HZB-45 POWER SUPPLY VOLTAGE 1Phase, 115V/60Hz ICE MAKING RATING (Amps) 3.5Amp ICE HARVEST RATING (Amps) 5.5 Amp... -
Page 4: General Information
3-GENERAL INFORMATION 1) Main Unit Construction 1. Top cover 2. Door for ice taking 3. Ice-making & its water tank assembly: Including ice-making evaporator, water tank, water pump and some detecting parts. 4. Front panel 5. Operation panel 6. Air outlet: Must keep the air circulate smoothly, hot air will blow out when unit running. -
Page 5: Operation Panel
2) Operation panel A. “ TIMER CLEAN” button 1) Quickly press this button once, to enter the Timer setting program. 2) Press this “ TIMER CLEAN” button for more TIMER than 5 seconds, to enter the Self-cleaning CLEAN program. ON/OFF B. -
Page 6: Ice-Making And Its Water Tank Parts
3) Ice-making and its water tank parts A. Water dividing pipe: With nine little holes, water will flow out from these little holes. And if no water flows out, can be disassembled and cleaned. B. Evaporator (ice-making module) C. Ice full detecting board: Use to detect the inner cabinet is full of ice or not, and to check the the ice-harvest process is over or not. -
Page 7: Operating Procedures & Maintenance
4-OPERATING PROCEDURES & MAINTENANCE 1) Unpacking 1.Remove the exterior and interior packaging. Check if all the accessories are inside or not. If any parts are missing, please contact our customer service. 2.Remove the tapes for fixing the door and inner cabinet, ice scoop, etc. Roughly clean the inner cabinet &... - Page 8 50mm at top and sides for proper air circulation. The installation should allow the ice maker to be pulled forward for servicing if necessary. 6. When installing the ice maker under a counter, follow the recommended spacing dimensions shown above. Place electrical and water supplies and drain fixtures in the recommended locations as shown.
-
Page 9: Water Connection
4) Water Connection NOTE:Be sure to use the new hose-sets supplied with the appliance to connect to water mains and that old hose-sets should not be reused. 1.Connect the water supplying hose to the unit 1) First remove the clipper on the water inlet port for water supply (indicated in the following illustration “B”) located at unit back, then pushing inwards the anti-dusty plug, use your other hand’s finger to press the out circle to fix the anti-dusty plug, then take down the anti-dusty plug. -
Page 10: Operation The Ice-Making Process
5-OPERATION THE UNIT 1) Operation The Ice-Making Process Operation button and display area diagram OPERATION DISPLAY OPERATION AREA AREA AREA TIMER CLEAN ON/OFF 1. Starting up 1) Plug in the power plug, the symbol will flash in the display window. 2) Press the ON/OFF button on the control panel, the external pipe can add water to the water tank through the electromagnetic water valve, after reaching the standard water level, the machine will start to make ice, then the... - Page 11 unit stop working. After water shortage, the unit needs to be restarted, otherwise it will start up automatically after 15 min. Note: Each ice making cycle is around 12-18 min, and the ice making time varies according to the ambient temp and the water temp. Especially for the first ice making cycle, it will be longer because of the high water temp in the water tank, but the ice making cycle will not over 30 min.
- Page 12 In ice making condition display 5H, it means the machine will shut down automatically after 5 hours. D. The "H" in the display screen indicates that the machine currently has timing function, and the number in front will be smaller and smaller, until it becomes zero, the timing ends, the machine enters the mode you need.
-
Page 13: Cleaning And Maintenance
6-CLEANING & MAINTENANCE 1) Warming 1. Before carrying out any cleaning or maintenance operations, unplug the ice maker from the main power supply electricity (EXCEPTION: Ice maker self-cleaning program). 2. Do not use any alcohol or fume for cleaning/disinfection the ice maker. It may cause cracks on the plastic parts. -
Page 14: Ice Making Parts Cleaning
NOTE: Do not use strong cleaning agents or abrasives on the interior,these cleaners may transmit taste to the ice cubes,or damage and discolor the interior. 4) Ice Making Parts Cleaning During the using, periodically to clean these main system of your ice-maker. 1. - Page 15 5) Ice Making Assembly System Cleaning Minerals that are removed from water during the freezing cycle will eventually form a hard scaly deposit in the water system. Cleaning the system regularly helps remove the mineral scale buildup. How often you need to clean the system depends upon how hard your water is.
-
Page 16: Normal Trouble Shooting
the self-Cleaning program. Same as above explanation, the water pump runs for 8 minutes and stops for 3 minutes, one cycle, again one cycle. The total duration time is 30 minutes for one self-cleaning program. During this process, the “CLEAN”light will always be on during this period, and the digit window will indicate the left time. -
Page 17: Preparing The Icemaker For Long Storage
Check the main water supply pressure or check the water supply hose is blocked or No water supply not, adding the water pressure or cleaning the hose necessary. Floating ball of the water level “ADD WATER” Clean the water tank and the water level detecting switch is blocked, indicator is on. -
Page 18: Product Warranty
be necessary to drain out all of the water in the system. 1. Allow all of the ice cubes have been ejected from the evaporator of ice maker. 2. Turn off the unit, and unplug the power cord. 3. Shut off the water supply at the main water supply. 4.
Need help?
Do you have a question about the HZB-45 and is the answer not in the manual?
Questions and answers
The tray below my ice maker keeps filling up and I'm getting an F displayed
The tray below the Zokop HZB-45 ice maker may be filling up due to water overflow or melting ice, and the display showing an "F" indicates the environmental temperature is being displayed in Fahrenheit. The "F" is not an error code but simply shows the temperature unit.
This answer is automatically generated
unit freezes but water is not flowing into the tray
The ice machine will not power up. I changed the plug, and the same thing other things in the plug worked. Is there a fuse that could need to be changed
We just set up our HZB-45A ice machine. It will not continue to make ice. The display is showing ice is full which it is not. Do you have any recommendations?