Table of Contents
Advertisement
Available languages
Available languages
Quick Links
Advertisement
Table of Contents

Related Manuals for Saitek Pro Flight Cessna Rudder Pedal


Summary of Contents for Saitek Pro Flight Cessna Rudder Pedal
- Page 1 ® Pro Flight Cessna rudder Pedals officially licensed Cessna Product ®...
- Page 2 PRO FLIGHT CESSNA YOKE SYSTEM FLIGHT YOKE AND 3 LEVER QUADRANT MODUAL PRO FLIGHT CESSNA RUDDER PEDALS FLIGHT PEDALS WITH TOE BRAKES PRO FLIGHT CESSNA TRIM WHEEL OFFICIALLY LICENSED CESSNA PRODUCT OFFICALLY LICENSED CESSNA PRODUCTS FROM SAITEK PRO FLIGHT AVILABLE AT: WWW.SAITEK.COM 68-17211-37759...
-
Page 3: Table Of Contents
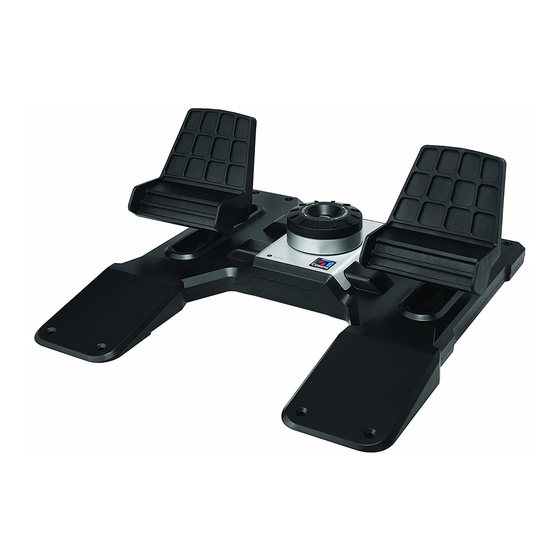
ENGLISH INtroductIoN drIvErS aNd SoftwarE INStaLLatIoN for uSErS of wINdowS® XP, 32- aNd 64-bIt drIvErS aNd SoftwarE INStaLLatIoN for uSErS of wINdowS® vISta aNd 7, 32- aNd 64-bIt How to tESt aNd adjuSt Your coNtroLLEr ProGraMMING Your Pro fLIGHt coNtroLLEr wItH SMart tEcHNoLoGY ProGraMMING SoftwarE fraNÇaIS INtroductIoN INStaLLatIoN dES PILotES Et du LoGIcIEL Pour LES utILISatEurS dE wINdowS®... - Page 4 RUDDER AXIS With self-centering mechanism Avec mécanisme d’autocentrage Mit selbstzentrierendem Mechanismus Con meccanismo autocentrante AUTHENTIC CESSNA PEDALS Con mecanismo autoajustable With independent toe brakes Avec axes de freins de palonnier indépendants Mit unabhängigen Zehenbremsen Con freni indipendenti Con frenos de dedos independientes ADJUSTABLE TENSION Adjust the resistance to suit any plane Ajustez la résistance pour s’adapter à...
-
Page 5: Introduction
PC flight simulation software. Saitek and Cessna have teamed up to provide you with the most authentic flight controls for your home cockpit. This product has been built using genuine design data from the world’s most popular plane manufacturer. -
Page 6: Drivers And Software Installation For Users Of Windows® Vista And 7, 32- And 64-Bit
USB ports, and then click Next. 5. At the Driver Setup screen, click Next to test your controller. 6. When the Saitek Controller screen appears, try out all of your controller’s controls to determine if it is working properly. When you have finished, click OK. -
Page 7: How To Test And Adjust Your Controller
USB ports and then click Next. 5. At the Driver Setup screen, click Next to test your controller. 6. When the Saitek Controller screen appears, try out all of your controller’s controls to determine if it is working properly. When you have finished, click OK. - Page 8 Click on the Deadzones tab of the Properties window. You can adjust the deadzones (i.e., the distance of pedal travel which doesn’t result in a corresponding in-game rudder movement) of the Pro Flight Cessna Rudder Pedals by clicking on the deadzone axes and dragging the deadzone indicators to the desired level.
- Page 9 are used for the toe brakes. Due to the way in which Flight Sim detects the pedals, they need to be correctly configured before you can start getting the most out of them. Start by opening FSX and clicking to Settings > Controls > Control Axes (in FS2004 go to Settings >...
-
Page 10: Programming Your Pro Flight Controller With Smart Technology Programming Software
• Program special moves with sophisticated timing features • Special game setups available as “Profiles” from the Saitek website and on the Smart Technology CD • Download the latest version of Smart Technology Programming Software from the Saitek website ruNNING tHE SMart tEcHNoLoGY ProGraMMING SoftwarE A. - Page 11 Once the ST software has opened, you will be presented with a “tip” screen (if it’s the first time you have run the software). This screen gives useful information pertaining to the profile software. If you do not wish to see this screen when you start the ST software, uncheck the small check box in the corner of the tip screen.
- Page 12 dowNLoad drIvErS aNd SoftwarE Clicking on this link will open your default browser and direct it to the download drivers and software page. dowNLoad GaME ProfILES Clicking on this link will open your default browser and direct it to the download profiles page.
-
Page 14: Introduction
PC. Saitek et Cessna ont fait équipe pour vous proposer les commandes de vol les plus réalistes pour votre cockpit à domicile. Ce produit a été... -
Page 15: Installation Des Pilotes Et Du Logiciel Pour Les Utilisateurs De Windows® Vista Et 7, 32 Et 64 Bits
USB dans l’un des ports USB de l’ordinateur, puis cliquez sur Next. 5. Dans l’écran de démarrage du pilote, cliquez sur Next pour tester le contrôleur. 6. Lorsque l’écran du contrôleur Saitek apparaît, essayez toutes les commandes de votre contrôleur afin de déterminer s’il fonctionne correctement. Lorsque vous avez terminé, cliquez sur OK. -
Page 16: Comment Tester Et Régler Votre Contrôleur
USB dans l’un des ports USB de l’ordinateur, puis cliquez sur Next. 5. Dans l’écran de démarrage du pilote, cliquez sur Next pour tester le contrôleur. 6. Lorsque l’écran du contrôleur Saitek apparaît, essayez toutes les commandes de votre contrôleur afin de déterminer s’il fonctionne correctement. Lorsque vous avez terminé, cliquez sur OK. - Page 17 Les utilisateurs de Windows 7 devront naviguer vers : Jeux > Outils > Périphériques d’entrée via le bouton Démarrer. Ouvrez la fenêtre Périphériques de jeu et le volant de trim Saitek Pro Flight Cessna devrait apparaître. Cliquez sur Propriétés pour faire apparaître l’écran Tester. Cliquez sur l’onglet Tester.
- Page 18 coNfIGuratIoN daNS fLIGHt SIM X Et fLIGHt SIM 2004 Les pédales de gouverne de direction possèdent trois axes, un pour la gouverne de direction et deux pour les axes de pédales utilisées pour les freins de palonnier. En fonction de la manière dont Flight Sim détecte les pédales, celles-ci doivent être tout d’abord configurées correctement pour que vous puissiez commencer à...
-
Page 19: Programmation De Votre Contrôleur Pro Flight Avec Le Logiciel Smart Technology Programming Software
• Pour terminer, double-cliquez sur l’axe de gouverne de direction, afin que la fenêtre Changer l’affectation détecte l’axe de gouverne de direction. Ces trois axes sont les seuls qui doivent être affectés aux pédales ; s’il y en a plus dans la liste, supprimez-les en utilisant la commande Supprimer l’affectation de la manette. - Page 20 • Configurations de jeu spéciales disponibles en tant que « Profiles » sur le site Web de Saitek et sur le CD Smart Technology • Téléchargez la dernière version du logiciel Smart Technology Programming Software sur le site Web de Saitek EXécutIoN du LoGIcIEL SMart tEcHNoLoGY ProGraMMING SoftwarE...
- Page 21 ProduIt La page produit est l’écran principal qui apparaît lors de la première ouverture du logiciel Smart Technology (comme illustré ci-dessous). Tout matériel Pro Flight connecté à votre ordinateur sera automatiquement détecté et affiché sur cet écran. Étant données qu’elles se trouvent toujours en début de la liste des matériels connectés, les pédales de gouverne de direction Pro Flight apparaîtront toujours dans la page produit du logiciel, bien qu’aucun matériel Pro Flight ne soit connecté...
- Page 22 téLécHarGEr LES ProfILS dE jEu Un clic sur ce lien ouvre votre navigateur par défaut et le dirige vers la page de téléchargement des profils. Dans cette page, choisissez votre contrôleur et une liste de profils préétablis qui correspondent aux jeux les plus récents va apparaître. LIrE LE MaNuEL dE ProGraMMatIoN St L’intégralité...
-
Page 23: Einführung
Spielvergnügen so realistisch wie möglich machen sollen. Sie ermöglichen in PC-Flugsimulationsspielen die Steuerung der Ruder- und Bremsfunktionen mit dem Fuß. Die Zusammenarbeit von Saitek und Cessna bietet Ihnen die authentischsten Steuergeräte für Ihr Cockpit am PC. Dieses Produkt wurde auf der Grundlage echter Designdaten des populärsten Flugzeugherstellers der Welt entwickelt. - Page 24 Sie den Bildschirmanweisungen. Wenn Sie sich später registrieren möchten, dann markieren Sie dieses Feld nicht. 9. Um die Installation zu beenden, klicken Sie auf Fertig stellen. Ihr Saitek Controller ist nun spielbereit! trEIbEr- uNd SoftwarE INStaLLatIoN für bENutzEr voN wINdowS® vISta uNd 7 32-bIt uNd 64-bIt 1.
-
Page 25: Testen Und Einstellen Ihres Controllers
Sie auf OK, wenn Sie fertig sind. 7. Klicken Sie auf dem folgenden Software-Setupbildschirm auf Next. Ein Popupfenster wird mit der Meldung angezeigt, ob Sie der Software von Saitek vertrauen möchten. Klicken Sie auf Yes und dann auf Next.. 8. Nach Abschluss der Installation erhalten Sie die Option Run Profile Editor, die Ihnen die Programmierumgebung anzeigt. - Page 26 Anwender von Windows 7 klicken auf Start und dann auf Spiele > Extras > Eingabegeräte. Nach dem Öffnen des Fensters Gamecontroller sollte das Saitek Pro Flight Cessna Rudder Pedals angezeigt werden. Klicken Sie auf Eigenschaften, um den Bildschirm Test zu öffnen. Klicken Sie auf die Registerkarte Test. Wenn Sie das Trim Wheel drehen, sollten Sie eine Reaktion auf dem Bildschirm sehen.
- Page 27 SEtuP IN fLIGHt SIM X uNd fLIGHt SIM 2004 Die Ruderpedale haben drei Achsen, eine für das Ruder und zwei für die Fußpedale, die für die Zehenbremsen genutzt werden. Aufgrund der Art und Weise, wie Flight Sim die Pedale erkennt, müssen sie korrekt konfiguriert werden, bevor Sie von ihnen profitieren können.
-
Page 28: Ausführen Der Smart Technology Programming Software
erkannt wird. Dies sind die einzigen drei Achsen, die auf die Pedale eingestellt werden sollten. Wenn weitere Achsen in der Liste vorhanden sind, löschen Sie sie mithilfe des Befehls „Joystick-Zuweisung löschen“. Nachdem die Achsen eingerichtet wurden, gehen Sie zum Kalibrierfenster (In FS2004 gehen Sie zu Empfindlichkeiten). - Page 29 Wenn die ST-Software geöffnet ist, wird ein Hinweisbildschirm angezeigt (bei der ersten Ausführung der Software). Über diesen Bildschirm erhalten Sie nützliche Informationen zur Profilsoftware. Wenn dieser Bildschirm nicht angezeigt werden soll, wenn Sie die ST-Software starten, deaktivieren Sie das kleine Kontrollkästchen in der Ecke des Hinweisbildschirms.
- Page 30 SHow tIPS Klicken sie darauf, um den Hinweisbildschirm anzuzeigen. Dies ist derselbe Bildschirm, der angezeigt wird, wenn Sie die ST-Software zum ersten Mal öffnen. Sie können über diesen Bildschirm alle Tipps durchgehen. dowNLoad drIvErS aNd SoftwarE Wenn Sie auf diesen Link klicken, wird die Seite zum Herunterladen von Treibern und Software in Ihrem Standardbrowser geöffnet.
-
Page 31: Introduzione
3 assi, progettati per il massimo realismo. Consentono il controllo a pedali delle funzioni di guida e di frenata nei software per PC con simulazioni di volo. Saitek e Cessna si sono unite per offrire autentici controlli di volo sul cruscotto Questo prodotto è... -
Page 32: Installazione Dei Driver E Del Software Per Utenti Di Windows® Vista E 7, A 32 E A 64 Bit
USB in una delle porte USB del computer, quindi fare clic su Next. 5. Alla schermata Installazione driver, fare clic su Next per provare il controller. Non appena viene visualizzata la schermata Controller Saitek, 6. Nella schermata di Installazione software seguente, fare clic su Next e seguire le istruzioni a schermo. -
Page 33: Come Verificare E Regolare Il Controller
• Gli utenti Windows 7 devono navigare mediante il pulsante Start in: Giochi > Strumenti > Dispositivi di input. Aprire la finestra Controller di gioco e verrà visualizzato il volante Saitek Pro Flight Cessna Rudder Pedals. Fare clic su Proprietà per richiamare la schermata Test. Fare... - Page 34 clic sulla scheda Test. Lo spostamento del volante di assetto dovrebbe riflettersi in una risposta su questa schermata; se è così, è il segnale che funziona a dovere. Fare clic sulla scheda Deadzone della finestra Proprietà. È possibile regolare le deadzone (cioè...
- Page 35 IMPoStazIoNE IN fLIGHt SIM X E fLIGHt SIM 2004 La pedaliera Rudder Pedals dispone di tre assi, una per la barra di comando e due assi dei pedali usati per i freni indipendenti. Grazie alla modalità di rilevamento dei pedali di Flight Sim, questi ultimi devono essere configurati correttamente prima di iniziare ad utilizzarli al meglio delle possibilità.
-
Page 36: Programmazione Del Controller Pro Flight Con Il Software Smart Technology
• Programmazione di movimenti speciali con sofisticate funzionalità di temporizzazione • Impostazioni di gioco speciali disponibili come “Profiles” dal sito Web Saitek e sul CD Smart Technology • Download dell’ultima versione di Smart Technology Programming Software dal sito Web Saitek ESEcuzIoNE dI SMart tEcHNoLoGY ProGraMMING SoftwarE A. - Page 37 un’altra con un’icona denominata Profile Editor. Fare clic su di essa e si aprirà il software Smart Technology. B. Cercare sul desktop l’icona Smart Technology. Una volta rilevata, fare double-click per caricare il software Smart Technology. C. Fare clic con il pulsante destro su controller icon accanto all’orologio, quindi fare clic su Profile Editor dall’elenco.
- Page 38 SuPPorto Dalla scheda supporto, è possibile accedere alle seguenti funzionalità, facendo clic su di esse. MoStra SuGGErIMENtI Una volta selezionata, viene visualizzata la relativa schermata, che è la stessa ad apparire la prima volta che si esegue il software ST. Da qui è possibile navigare attraverso tutti i suggerimenti, se lo si desidera.
-
Page 39: Introducción
Spielvergnügen so realistisch wie möglich machen sollen. Sie ermöglichen in PC-Flugsimulationsspielen die Steuerung der Ruder- und Bremsfunktionen mit dem Fuß. Die Zusammenarbeit von Saitek und Cessna bietet Ihnen die authentischsten Steuergeräte für Ihr Cockpit am PC. Dieses Produkt wurde auf der Grundlage echter Designdaten des populärsten Flugzeugherstellers der Welt entwickelt. -
Page 40: Instalación De Drivers Y Software Para Usuarios De Windows® Vista Y 7, 32- Y 64-Bit
USB de su ordenador, y luego haga clic en Next. 5. En la pantalla Driver Setup, haga clic en Next para probar su mando. 6. Cuando aparezca la pantalla Saitek Controller, pruebe todos los controles de su mando para determinar que funcionan correctamente. Cuando haya terminado, haga clic en OK. -
Page 41: Cómo Probar Y Ajustar Tu Mando
USB de su ordenador, y luego haga clic en Next. 5. En la pantalla Driver Setup, haga clic en Next para probar su mando. 6. Cuando aparezca la pantalla Saitek Controller, pruebe todos los controles de su mando para determinar que funcionan correctamente. Cuando haya terminado, haga clic en OK. - Page 42 Abre la ventana Dispositivos de juego, donde debería aparecer Saitek Pro Flight Cessna Rudder Pedals. Haz clic en Propiedades para que aparezca la pantalla de prueba. Haz clic en la pestaña Prueba. Si mueves el timón, debería haber una respuesta en esta ventana; si hay respuesta, significa que el timón funciona correctamente Haz clic en la pestaña Deadzones (zonas muertas) de la ventana Propiedades.
- Page 43 INStaLacIóN EN fLIGHt SIM X Y EN fLIGHt SIM 2004 Los pedales Rudder Pedals tienen tres ejes, uno para el timón y dos ejes de pedal de pie que se utilizan para el freno de dedo. Debido al modo en que Flight Sim detecta los pedales, estos deben configurarse correctamente antes de poder empezar a sacarles el máximo partido.
-
Page 44: Programar Su Mando Pro Flight Con El Software De Programación Smart Technology
Programa movimientos especiales con sofisticadas características de tiempo • Ajustes especiales para juegos disponibles como “Profiles” desde el sitio web de Saitek y en el CD de Smart Technology • Descargue la última versión del software de programación Smart Technology desde... - Page 45 EjEcutar EL SoftwarE dE ProGraMacIóN SMart tEcHNoLoGY A. Haga clic en Inicio, después en Todos los programas y luego busque Smart Technology en la lista de programas. Haga clic sobre él y debajo del título verá otro título con un icono que dice Profile Editor. Haga clic sobre él y se abrirá el software de Smart Technology.
- Page 46 Programming, aparecerá a la izquierda una imagen en alta resolución del mando que va a programar, y bajando por la derecha de la pantalla verá una lista de casillas de comando llamadas “Cells”. Para obtener una guía detallada sobre la programación, vaya a la pestaña Support y haga clic en READ PROGRAMMING MANUAL.
- Page 47 dEcLaracIóN dE coNforMIdad Para La u.E.: Según lo exigido, ciertos productos de éstos han sido probados y están de conformidad con los requerimientos de las directivas de la Unión Europea 2002/95/EC, 2002/96/EC, y 2004/108/EC. El signatario autorizado del fabricante es Mad Catz, Inc., 7480 Mission Valley Road, Suite 101, San Diego, CA 92108.
- Page 48 © 2011 Mad Catz Interactive Asia Limited (MCIA). Pro Flight logo, the Saitek logo, Mad Catz and the Mad Catz logo are trademarks or registered trademarks of Mad Catz, Inc., and/or its affiliated companies. Cessna emblems, logos, and body designs are trademarks of Textron Innovations Inc. and are used under license by Mad Catz Inc.
Need help?
Do you have a question about the Pro Flight Cessna Rudder Pedal and is the answer not in the manual?
Questions and answers