Table of Contents
Advertisement
Available languages
Available languages
MANUEL D'UTILISATION/ INSTRUCTION MANUAL
CENTRE DE BREUVAGES/CELLIER ENCASTRABLE CADRE MONOPIECE /
BUILT-IN BEVERAGE CENTER /WINE CELLAR SEAMLESS FRAME
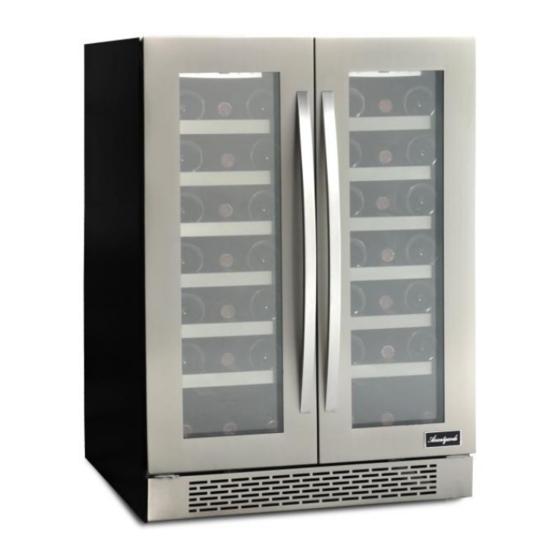
Modèle/Model: VPC42DS
Pour une utilisation optimale de cet appareil ainsi que pour votre sécurité, veuillez lire
attentivement les instructions contenues dans ce manuel avant de faire fonctionner cet
appareil.
To ensure proper use of this appliance and your safety, please read the following
instructions completely before operating this appliance.
090316
1
Advertisement
Chapters
Table of Contents

Subscribe to Our Youtube Channel
Related Manuals for Avantgarde VINOPAZZO VPC42DS


Summary of Contents for Avantgarde VINOPAZZO VPC42DS
- Page 1 MANUEL D’UTILISATION/ INSTRUCTION MANUAL CENTRE DE BREUVAGES/CELLIER ENCASTRABLE CADRE MONOPIECE / BUILT-IN BEVERAGE CENTER /WINE CELLAR SEAMLESS FRAME Modèle/Model: VPC42DS Pour une utilisation optimale de cet appareil ainsi que pour votre sécurité, veuillez lire attentivement les instructions contenues dans ce manuel avant de faire fonctionner cet appareil.
-
Page 2: Table Of Contents
TABLE DES MATIÈRES 1. PRÉCAUTIONS IMPORTANTES..…………………………..….....3-4 2. INSTRUCTIONS INSTALLATION …………………………………..…5-6-7 3. UTILISATION……………………………………………………………..… 7 a. Commandes et réglages de température………………..…8-9 b. Fonctions………………………………………………………...9-10 c. Entreposage………………………………………………………..11 4. ENTRETIEN ……………………..………………………….………..……..12 5. GARANTIE……………………………………………………………….13-14 6. GUIDE DE DÉPANNAGE…………………………..……..……….….……15... -
Page 3: Précautions Importantes
1. PRÉCAUTIONS IMPORTANTES ATTENTION Avant son utilisation l’appareil doit être positionné et installé adéquatement en suivant les directives contenues dans ce manuel, sous la section « installation ». Lorsque vous utilisez un appareil électrique, il convient de toujours d’observer les précautions de base afin de réduire le risque de choc électrique, de feu ou de blessure corporelle. - Page 4 Cet appareil n’est pas conçu pour être utilisé par une personne (y compris un enfant) ayant des capacités physiques, sensorielles ou mentales réduites, ou qui n’ont pas suffisamment d’expérience et de connaissance, sauf si cette personne a reçu des instructions sur l’utilisation de l’appareil de la part d’une personne responsable de sa santé, et si elle était supervisée la première fois qu’elle a utilisé...
-
Page 5: Instructions Installation
2. INSTRUCTIONS D’INSTALLATION ATTENTION Si l’appareil est transporté en position horizontale, l’huile du compresseur risque de couler sur le circuit de refroidissement. C’est pourquoi il est nécessaire de laisser l’appareil en position verticale pendant 12 heures avant de le mettre en marche. Cette période permet à l’huile de retourner dans le compresseur. - Page 6 plastique, pièces en polystyrène, etc.) constitue une source potentielle de danger et doit être tenu hors de la portée des enfants. Inspectez minutieusement l’appareil. Si vous cernez un défaut, cessez l’installation et communiquez avec le détaillant. Utilisez cet appareil uniquement pour les fins auxquelles il a été conçu. ...
-
Page 7: Utilisation
INSTALLATION ENCASTRÉE Si vous souhaitez encastrer cet appareil, utilisez les dimensions écrites dans le diagramme et le tableau ci-dessous à titre de guide d’installation : Dimensions d’installation encastrée (mm/po) Légende 660 mm (26 po) 610 mm (24 po) 883 mm (34¾ po) 152 mm (6 po) 51 mm (2 po) 3. -
Page 8: Commandes Et Réglages De Température
COMMANDES TABLEAU DE COMMANDES : Bouton « » : Pour mettre en marche et arrêter l’appareil ( ON et OFF, respectivement), tenez ce bouton enfoncé pendant environ 3 secondes. Bouton « » Bouton d’économie d’énergie : Gardez ce bouton enfoncé pendant 3 secondes pour activer ou désactiver la fonction d’économie d’énergie. -
Page 9: Fonctions
RÉGLAGE DE LA TEMPÉRATURE La température zonale peut avoir une différence de +/- 5°F (+/- 3º C) selon le chargement et les conditions ambiantes. Par exemple, exposer votre appareil à un froid extrême ou à de fortes chaleurs peut faire fluctuer les températures intérieures. Pour régler : ... - Page 10 Il est normal que l’appareil affiche « HI » ou « LO » à l’occasion. Si cet affichage est fréquent ou persiste, réinitialisez l’appareil en le débranchant et le rebranchant. Si le problème est toujours présent après une réinitialisation, communiquez avec le service à la clientèle. Avant de rebrancher le câble d’alimentation à...
-
Page 11: Entreposage
ENTREPOSAGE ET RANGEMENT L‘unité comprend 12 tablettes de bois et 3 de verre. Pour les canettes : l’unité comprend 3 tablettes de verre qui permettent de ranger 60 canettes de 335ml (3 tablettes de 18 + 6 au bas de la section) Pour le vin : La capacité... -
Page 12: Entretien
4. ENTRETIEN DE L’APPAREIL NETTOYAGE DE L’APPAREIL Coupez le courant, débranchez l’appareil et videz le contenu incluant les tablettes. Lavez les surfaces intérieures avec de l’eau chaude et une solution au bicarbonate de soude (2 cuillères à soupe pour ¼ d’eau). ... -
Page 13: Garantie
Les celliers AVANTGARDE sont fabriqués avec l’optique d’offrir une valeur exceptionnelle, et en visant votre entière satisfaction pour chacun de nos produits. Ainsi, tous les celliers AVANTGARDE sont couverts par une garantie limitée de deux (2) ans, valable sur les pièces et la main-d’œuvre. - Page 14 électrique, l’utilisation d’une rallonge, une tension faible ou des baisses de tension dans l’alimentation électrique de l’appareil. USAGE COMMERCIAL Lors d’un usage commercial AVANTGARDE offre une garantie limitée d’un (1) sur les pièces seulement. Pour obtenir de plus amples renseignements au sujet de nos garanties, veuillez communiquer...
-
Page 15: Guide De Dépannage
6. GUIDE DE DEPANNAGE Vous pouvez résoudre un grand nombre de problèmes courants facilement. Essayez les suggestions ci-dessous avant d’avoir recours à un technicien. PROBLÈME CAUSE POSSIBLE L’appareil ne fonctionne pas. L’appareil n’est pas branché. L’appareil est éteint. Le disjoncteur ou le fusible du circuit est sauté. L’appareil n’est pas suffisamment Vérifiez le réglage de température. - Page 16 TABLE OF CONTENTS IMPORTANT SAFETY INSTRUCTIONS..…………………………....17-18 INSTALLATION INSTRUCTIONS ………………..………………………..…19-20 OPERATING YOUR APPLIANCE Conditions……………………………………………………………….…21 Control and temperature Settings …………………….………….21-22 Functions……….……………………………………………………….….22 Storage…………………………………………………………………..24 CARE AND MAINTENANCE ……………………..………………….……………25 WARRANTY…………………………………………………………………..…26-27 TROUBLESHOOTING ……………………………..……..……………………….28...
-
Page 17: Important Safety Instructions
1. IMPORTANT SAFETY INSTRUCTIONS WARNING Before the appliance is used, it must be properly positioned and installed as described in this manual. So read the manual carefully. To reduce the risk of fire, electric shock or injury when using the appliance, follow basic precautions. SAFETY PRECAUTIONS ... - Page 18 Electrical components might cause leaking gas to ignite. You may identify such sprays by the printed contents or a flame symbol. Do not store explosives or sprays using combustible propellants such as butane, propane, pentane, etc., in the appliance. ...
-
Page 19: Installation Instructions
2. INSTALLATION INSTRUCTIONS ATTENTION If the appliance is transported in a horizontal position, the oil from the compressor may leak into the cooling circuit. For this reason, allow the appliance to rest in a vertical position for 12 hours before turning it on, so that the oil flows back into the compressor. Remove the external packaging, remove the protective plastic film from the surface of the appliance (if used) and clean the external parts of the appliance with a cleaner designed for this purpose. - Page 20 ELECTRICAL REQUIREMENTS A 115 Volt (AC only) 60 Hz grounded electrical supply equipped with a 15- or 20- amp fuse or circuit breaker is required. It is recommended that a separate circuit serving only your appliance be provided. Use outlets that cannot be turned off by a switch or pull chain. Connect this appliance to a 3-prong power supply outlet that has a ground terminal.
-
Page 21: Operating Your Appliance
3. OPERATING YOUR APPLIANCE OPERATING CONDITIONS Proper operation of the appliance is guaranteed only if the following conditions are met: The temperature in the room where the appliance is located conforms to the climate class stated on the appliance’s rating label. ... -
Page 22: Functions
WINE STORAGE If you are storing wine for long periods of time, it should be stored at a temperature of between 10°C and 14°C (50°F and 57°F). The following drinking temperatures are recommended for the various types of wine: Red wines: 57°F to +64°F (+14°C to +18°C) Rosé... - Page 23 NOTES If too many bottles are put in at once or the door has not been closed tightly, the unit will display the "HI" signal on the display panel. This is normal. Please wait 5 minutes after closing the door and “HI” will disappear. It is normal that the cabinet shows “HI”...
-
Page 24: Storage
STORAGE As a Wine cellar : to achieve the maximum storage capacity of 42 bottles you can position the wine bottles alternately on the upper six shelves (each side) and three (3) bottles on the bottom shelf. As a Wine cellar/Beverage center: on the upper three shelves (of 1 side) you can store eighteen (18) cans, and six (6) cans on the bottom shelf for a total storage capacity of 60 beverage cans while on the other side you can position 3 wine bottles on the upper six shelves and three (3) on the bottom shelf for a total of 21. -
Page 25: Care And Maintenance
4. CARE AND MAINTENANCE CLEANING YOUR WINE CELLAR Turn off the power, unplug the appliance, and remove all items including shelves and rack. Wash the inside surfaces with warm water and baking soda solution. The solution should be about 2 tablespoons of baking soda with a quart of water. ... -
Page 26: Warranty
GENERAL PARTS AND LABOR WARRANTY AVANTGARDE warrants for (2) two years , to the purchaser of every new unit, the cabinet and all parts thereof, to be free from defects in material or workmanship, under normal and proper use and maintenance service as specified by AVANTGARDE and upon proper installation and start-up in accordance with the instruction manual supplied with each AVANTGARDE unit. - Page 27 ALTERATION, NEGLECT, ABUSE, MISUSE, ACCIDENT, DAMAGE DURING TRANSIT OR INSTALLATION, FIRE, FLOOD, ACTS OF GOD: AVANTGARDE is not responsible for the repair or replacement of any parts that AVANTGARDE determines have been subjected to alteration, neglect, abuse, misuse, accident, damage during transit, improper installation, fire, flood, or act of God.
-
Page 28: Troubleshooting
6. Troubleshooting guide You can solve many common appliance problems easily, saving you the cost of a possible service call. Try the suggestions below to see if you can solve the problem before calling the servicer. Problem Possible cause Not plugged in. Appliance does not operate.
Need help?
Do you have a question about the VINOPAZZO VPC42DS and is the answer not in the manual?
Questions and answers