
Related Manuals for Wittern VendNet 3576M

Summary of Contents for Wittern VendNet 3576M
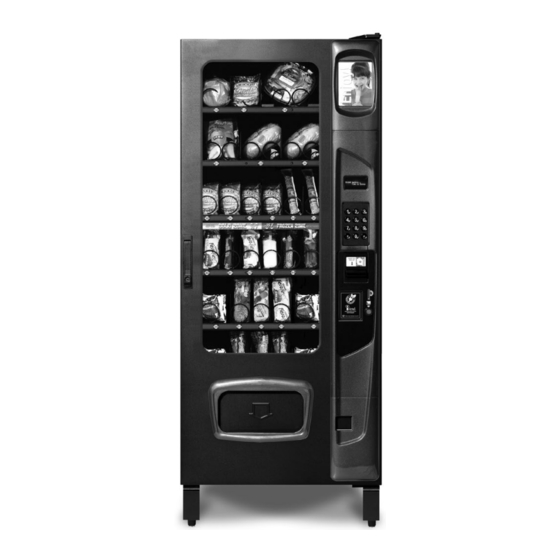
- Page 1 STAND ALONE COLD/FROZEN FOOD VENDOR (GVC2 Controller) MODELS: 3576M/3576MA – MULT-ZONE (Cold and Frozen Food) 3576F/3576FA – SINGLE-ZONE (Frozen Food) 3576C/3576CA – SINGLE-ZONE (Cold Food) SERVICE MANUAL July 2013 4222618•A...
-
Page 2: Table Of Contents
Table of Contents INTRODUCTION ......1 0 DIAGNOSTICS ......22 SPECIFICATIONS ......2 TEMPERATURE CONTROL ..26 UNPACKING ........3 HEALTH SAFETY FIELD TEST ..28 LOADING PRODUCTS ....5 REFRIGERATION......29 TRAY ADJUSTMENTS....6 REMOVING THE REFRIGERATION SYSTEM........34 SPIRAL ADJUSTMENT .... -
Page 5: Introduction
INTRODUCTION This manual contains instructions, service and installation guidelines for the Stand Alone Multi-zone/Cold/Frozen Food Vendor. Please read this manual thoroughly and follow the instructions. The initial set-up of a vendor is a very important step of insuring that the equipment operates in a trouble-free manner. This vendor can be factory configured to have two temperature compartments (top and bottom) in a single vending machine separated by moveable air deflectors and... -
Page 6: Specifications
SPECIFICATIONS DIMENSIONS & WEIGHT TYPE MULTI-ZONE (3 WIDE) MODEL 3576 3576A WIDTH 29.5 in. (74.9 cm) DEPTH 38 in. (96.5 cm) HEIGHT 72 in. (182.9 cm) ESTIMATED WEIGHT 693 lbs (614 kg) Note: Weights will vary depending on optional equipment installed. ELECTRICAL MODEL EMBRACO... -
Page 7: Unpacking
UNPACKING This vending machine was thoroughly inspected before leaving the factory and the delivering carrier has accepted this vendor as their responsibility. Note any damage or irregularities at the time of delivery and report them to the carrier. Request a written inspection report from the claims inspector to file any claim for damage. - Page 8 INSTALLATION • This vendor should only be installed where it can be overseen by trained personnel. • The maximum safe tilt angle of this vendor is 10°. Do not attempt to move the vendor by hand; it should only be moved using equipment •...
-
Page 9: Loading Products
MAIN POWER SWITCH Plug the power cord to a dedicated power outlet. Open the vendor door. Turn on the main power switch located on the center right hand side of the vendor. See Figure Figure 3. Power Panel LOADING PRODUCTS Load product from front to back making sure all items fit freely between the auger spaces. -
Page 10: Tray Adjustments
PRODUCT PART NUMBER WIDTH THICK TYPE (INCH) (INCH) 0.50 4200272.103309 0.66 4200272.102309 0.94 4200272.101309 CANDY 2.75 1.19 4200272.100309 1.50 4200272.104309 2.03 4200272.105309 3.09 4200272.106309 CAN/BOTTLE 2.75 3.09 4200272.106309 DISPENSER (12 OZ CAN) 4.84 2.59 DIA 4214090 1.19 4200272.109309 1.50 4200272.108309 SNACK 5.50 1.81... - Page 11 3 WIDE SNACK/CANDY/FOOD TRAY Pull the tray out until it stops. Locate the harness retainer on the right sidewall. See Figure 5a. Pull the tray harness out of the harness retainer. Unplug the tray plug from its receptacle on the right side wall.
-
Page 12: Spiral Adjustment
SPIRAL ADJUSTMENT SNACK/CANDY/FOOD TRAY Each auger can be rotated in 20° (degree) increments for a different product vend drop-off point. Most items can be vended successfully when the auger end is positioned at 6 o'clock. The general rule is - the narrower the product, then the higher the timing. -
Page 13: Automatic Delivery Lift
AUTOMATIC DELIVERY LIFT This information is for machines with the GVC2 Control Board (part number 4214682.004) and software version V3.3.10177 and higher. INTRODUCTION The Automatic Delivery Lift system is designed to lift vended products to the 2012 American Disabilities Act (ADA) height requirement level from the locations floor. This same system can also provide an enhanced customer experience for those locations where an almost hands free vended product presentation is desirable. - Page 14 Motor count includes tray motors, changer escrow motor, delivery lift and auto door motors briefly (example – shows 40 and then goes back to 36d) to show the additional motors and then returns to show only tray count. Service Mode 4 – Configuration •...
-
Page 15: Controller Functions
CONTROLLER FUNCTIONS IVEND® CYCLE All vendor selections have been assigned at the factory to be monitored for iVend™ optical sensing. For 5 milliseconds at the start of a vend, the iVend® optical sensor will be checked to make sure it is not blocked, damaged or disconnected. If blocked, damaged or disconnected - the normal home-switch-vend cycle will be used and the optical sensors will be ignored. -
Page 16: Service Mode
SERVICE MODE Use Service Mode to program and service the machine. Use the keypad as an input device. Watch the display for information while in Service Mode. SERVICE MODE BUTTON To enter Service Mode, press the Service Mode Button located on the top or upper right corner of the controller cover. -
Page 17: Basic Programming Setup
BASIC PROGRAMMING SETUP KEYPAD Use the buttons on the keypad as directed in the step-by-step instructions in this manual in programming the vendor. DISPLAY Figure 7: Keypad Check the display after pressing the Service Mode Button and/or Keypad Buttons to make sure that the program is responding correctly. - Page 18 3 OPTIONS 3.1 FORCE VEND See GVC2 Programming Manual (P/N 4215507) for more information. 3.2 BILL ESCROW See GVC2 Programming Manual (P/N 4215507) for more information. 3.3 MULTI VEND See GVC2 Programming Manual (P/N 4215507) for more information. 3.4 FREE VEND See GVC2 Programming Manual (P/N 4215507) for more information.
- Page 19 3.9 KEYPAD BACKLIGHT STEP DISPLAY This menu Motors ( - - ) Press Service Mode Button controls Options the brightness Press level of the KB Backlight Press to view setting. keypad backlight. Press repeatedly to change setting. KB Backlight 3 (Default is 3) Note:0=Off, 1=Low, 2=Med, 3 =High, 4=Max KB Backlight 3...
- Page 20 4.8.2 TIME TIME SETTING Time Setting - This STEP DISPLAY menu controls and Press Service Mode displays the current time Motors ( - - ) of day. The display will Button show a 24 hour format. Configuration Press Examples: 8:05 a.m. = TIME O8.O5 Date/ Time Press 01:15 p.m.
- Page 21 4.9.3 HS “All” STEP DISPLAY Motors (--) Press Service Mode Button Configuration Press for Configuration menu Health Safety Press for Health Safety menu Press to edit the Lower Zone or Lower Zone or Upper Zone Press to edit the Upper Zone All Items (Current) Press for All Items...
-
Page 22: Refrigeration Configuration Settings
See GVC2 Programming Manual (P/N 4215507) for more information. 4.0.6 SET DEFAULTS See GVC2 Programming Manual (P/N 4215507) for more information. 4.0.7 REFRIGERATION CONFIGURATION SETTINGS STEP DISPLAY Motors ( - - ) Press Service Mode Button Configuration Press Password Press Enter Password (default 2314) **** FROZEN (Not used) - Page 23 STEP DISPLAY Motors (--) Press Service Mode Button Configuration Press for Configuration menu Password Press for Password menu Enter Password (default 2314) Advanced Config Homing (Current Setting) Press for Homing menu *- exit 9- edit Homing (Choice Flashing) Press to toggle between ON/OFF *- exit # - save Homing (New Setting) Press...
-
Page 24: Pricing
PRICING Price Setting - This menu allows three (3) methods for assigning prices: • ITEM — by individual selections • ROW— by shelf or tray • ALL ITEMS — by entire machine. COUPONS — by Item, Row, or ALL • TOKENS —... -
Page 25: Advanced Options
5.4 COUPON OR TOKEN Allows the operator to designate the values of coupons or tokens that are accepted by pre-programmed validators. See GVC2 Programming Manual (P/N 4215507) for more information 5.7 COMBO See GVC2 Programming Manual (P/N 4215507) for more information 6 ACCOUNTING Use this menu to gain access to menus that display or reset data for various types of cash and vend totals. -
Page 26: Diagnostics
0 DIAGNOSTICS 0.1 DIAGNOSTIC STEP DISPLAY This menu is used to 1. Press Service Mode Button Motors ( - - ) perform a self-diagnostics check and display results. Diagnostic... Press Checksum Temp Sensor Optical Coin Acceptor Press to start test Bill Validator Card Reader1 Card Reader2... - Page 27 Refrig Log (New Status) Press to save *- exit 1- edit (Sales Mode) Press 4 times to exit. 0.7.2 DAQ LOG STEP DISPLAY Motors ( - - ) Press Service Mode Button Diagnostics Press Password: Press Enter Password (default-2314) DAQ Log (after a few seconds, Press display changes to Log) (Sales Mode)
- Page 28 0.0.2 AUTOMATED DOOR Opens and closes the Delivery Lift box product door and indicates if the control board detects the motor cam switch to be in the correct position. STEP DISPLAY Press the ‘Service Mode’ button on the (Motor count) control board.
- Page 29 NOTE: The display will show “Lift Unknown” while the Delivery Lift is moving to the up or down position. If the control board can’t determine a Lift motors cam position the “Lift Unknown” message will also appear and stay present. IMPORTANT: Do not attempt to run the Delivery Lift Test diagnostic if the Delivery Lift Plate may be jammed.
-
Page 30: Temperature Control
TEMPERATURE CONTROL To prevent damage to the refrigeration unit when it is turned off or the power is interrupted, the unit will not restart for at least five refrigeration minutes regardless of the temperature. SENSORS Temperature sensor(s) are positioned to best represent the product temperature. The sensor(s) are monitored by the controller program. - Page 31 RELAYS The program controls four relays which then control the refrigeration and heating systems: • RELAY1 - controls the compressor and the condenser fan (refrigeration system). • RELAY2 - controls the upper zone blower / heater & evaporator fan via the door switch. •...
-
Page 32: Health Safety Field Test
HEALTH SAFETY FIELD TEST 0.7.4 HEALTH SAFETY TEST The HEALTH SAFETY feature prevents the sale of perishable food if the air temperature inside the Satellite Food Vendor compartment rises above the Health Safety temperature limit for more than 15 minutes. The factory default for health safety limit is automatically set when the refrigeration configuration is set. -
Page 33: Refrigeration
STEP DISPLAY Motors ( - - ) Press Service Mode Button Diagnostics Press for Diagnostics menu Password: Press for Password menu Enter Password (default-2314) HS Test (Current Setting) Press for Health Safety test *- exit 4- edit HS Test (Choice Flashing) Press to toggle ON/OFF *- exit # - save... - Page 34 Figure 9d. Danfoss 5/8 Hp Compressor Schematic Figure 9b. Danfoss Compressor 30 | M U L T I - Z O N E / F R O Z E N F O O D V E N D O R •...
- Page 35 The sealed hermetic system should not be worked on outside the Factory Service Center . There are three things that can go wrong with a sealed system and should be repaired only at the Factory Service Center. These are: 1. Low Charge - usually caused by leaks; look for oil around seals and welds. Unit will not cool properly.
- Page 36 NOISY OR VIBRATING UNIT 1. Components rubbing or touching each 2. Worn or aged compressor grommets. other. 3. Compressor. ♦ Check fan blades and motor. ♦ Bad valves. ♦ Loose shrouds and harness. ♦ Slugging. ♦ Copper tubing. ♦ Bad windings (Refer to Table 1 and schematic on page 29.).
- Page 37 TROUBLESHOOTING CIRCUITS WITH MULTI-METER Caution : Power must be disconnected and fan circuit open. 1. To check the power source, use the 2. Check temperature sensor harness voltage section of the Multi-Meter. to control board for continuity using Acceptable range is 103-127VAC for ohmmeter of Multi-Meter.
-
Page 38: Removing The Refrigeration System
REMOVING THE REFRIGERATION SYSTEM CAUTION: Always disconnect power source BEFORE servicing. 1. Turn off Main Power Switch and unplug vendor power cord from wall outlet. 2. Remove the bottom tray but not rails. 3. Locate the cabinet control harness and temperature sensor harness on the top right refrigeration unit. -
Page 39: Converting From Single Zone To Multi-Zone Mode
CONVERTING FROM SINGLE ZONE TO MULTI-ZONE MODE : Optional Multi-Zone Conversion Kit) EQUIRED Turn power switch off. Remove top four trays from machine by unplugging tray harness and pulling trays out of tray rails. Install turning vane with air holes in bottom opening Move existing turning vane located at top of machine to center opening and... -
Page 40: Replace Air Filter
and move second turning vane to top Remove air curtain from bottom side of tray four (Fig. 11) Replace trays to proper locations and connect harnesses 10. Turn power switch on and reconfigure control board to either single zone cold food or single zone frozen mode (See Configuration Instructions). - Page 41 EVERY 6-MONTHS CLEAN DOOR AND DELIVERY DOOR SEALS Clean the door seals. Inspect them for any deformities or cracking. CLEAN EVAPORATOR COIL Open the door. Clean the evaporator coil of refrigeration unit using a soft bristle brush and/or vacuum cleaner. Figure 12b.
-
Page 42: Parts Ordering Procedure
PARTS ORDERING PROCEDURE When ordering parts, include the following: 1. The model and serial numbers of the vending machine for which the parts are needed. 2. Shipping address. 3. Address where the invoice should be sent. 4. The number of parts required. Always refer to the pertinent parts and/or part manual for the correct part number and description of a specific part. - Page 43 NOTES...
- Page 44 The contents of this publication are presented for informational purposes only, and while every effort has been made to ensure their accuracy, they are not to be construed as warranties or guarantees, express or implied, regarding the products or services described herein or their use or applicability.
Need help?
Do you have a question about the VendNet 3576M and is the answer not in the manual?
Questions and answers