Table of Contents
Advertisement
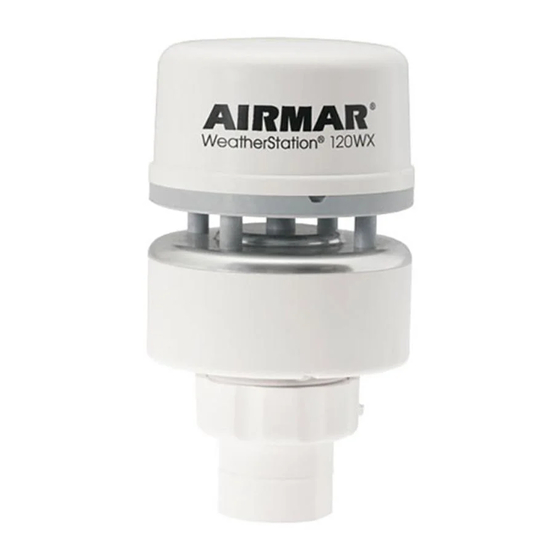
Owner's Guide & Installation Instructions
WeatherStation
Patents apply to some models.
U.S. Patent No. 8,326,561; 8,714,007; 9,244,192
UK Patent No. 2 460 158
Record the serial number found on the underside of the WeatherStation® Instrument.
Serial No._____________________Date of Purchase_________________________
Ultrasonic, Smart
Instrument
®
Sensor
™
Land Models:
110WX
120WXH
150WX
200WX
200WXRS
200WXS
220WXH
Marine Models:
120WX
120WXH
220WX
220WXH
Off-shore Model:
200WX-IPX7
17-461-01 rev.14
01/15/18
Advertisement
Table of Contents

Subscribe to Our Youtube Channel
Related Manuals for Airmar WeatherStation 200WXRS


Summary of Contents for Airmar WeatherStation 200WXRS
- Page 1 Owner’s Guide & Installation Instructions Ultrasonic, Smart Sensor ™ WeatherStation Instrument ® Land Models: 110WX 120WXH 150WX 200WX 200WXRS 200WXS 220WXH Marine Models: 120WX 120WXH 220WX 220WXH Off-shore Model: Patents apply to some models. U.S. Patent No. 8,326,561; 8,714,007; 9,244,192 200WX-IPX7 UK Patent No.
- Page 2 Information in this manual is subject to change without notice. Airmar reserves the right to change or improve its products and to make changes in the content without obligation to notify any person or organization of such changes.
-
Page 3: Table Of Contents
Table of Contents Introduction & Features..............4 Functions & Outputs................5 Safety Instructions................6 Understanding Apparent & Theoretical Wind........7 Adding External Sensors..............7 Choosing Cables & Hardware............8 Where to Purchase Parts..............9 Tools & Materials................10 Choosing the Mounting Location..........11 Installing..................12 Cable Routing & Connecting Guidelines........15 Connecting to a Data Converter, Combiner, or Splitter....16 Connecting to an NMEA 0183 Display.........16 Connecting to an NMEA 2000... -
Page 4: Introduction & Features
Please read the Owner’s Guide completely before proceeding. Introduction Thank you for purchasing Airmar’s ultrasonic, WeatherStation Instrument. This exciting product has multiple sensors in a single unit—without any moving parts. The compact housing is waterproof with a single removable cable. Functions and features vary by model. -
Page 5: Functions & Outputs
Table 1: Functions & Outputs Apparent wind speed & angle Theoretical wind speed & direction Heater (Keeps wind channel free of ice) Air temperature Wind chill temperature Barometric pressure Relative humidity Opt. Opt. Opt. Opt. Opt. Opt. Opt. Dew point temperature Opt. -
Page 6: Safety Instructions
WARNING Navigation Aid Only—The WeatherStation Instrument is an aid to navigation only and should never be solely relied upon. It is not a replacement for traditional navigation aids and techniques. Only official government charts contain all the information needed for safe navigation. Follow the safety precautions below to reduce the risk of poor product performance, property damage, personal injury, and/or death. -
Page 7: Understanding Apparent & Theoretical Wind
Understanding Apparent & Theoretical Wind Virtually all mechanical and ultrasonic anemometers report apparent wind speed and direction. The Airmar WX Series is unique because it calculates both theoretical wind speed and direction relative to ground, and the apparent wind speed and direction. These wind readings are the same if the unit is mounted in a fixed location. -
Page 8: Choosing Cables & Hardware
Choosing Cables & Hardware The WeatherStation Instrument can be connected to a device and/or network in several ways. You must have the correct cable(s) and any needed converting/connecting hardware before beginning the installation. WeatherStation Cables (NO heater) Length Part No. •... -
Page 9: Where To Purchase Parts
Figure 1. Antenna mounts (not supplied) Copyright © 2007 Airmar Technology Corp. Parts Humidity Sensor: 110WX, 150WX, 200WX 33-627-01 Humidity Sensor: 200WXRS, 200WXS 33-760-01 Where to Purchase Parts Obtain parts from your instrument manufacturer or marine dealer. -
Page 10: Tools & Materials
Tools & Materials Safety glasses Dust mask Ear protection Pencil Level Electric drill Drill bits Phillips screwdrivers Teflon pipe-thread tape (optional) Deck gland (some installations) Grommets (some installations) Cutting pliers (some installations) Wire strippers (some installations) Heat-shrink tubing (some installations) Heat gun (some installations) Multimeter (some installations) Cable ties (some installations) -
Page 11: Choosing The Mounting Location
Choosing the Mounting Location For accurate readings and a reliable GPS signal, selecting the best location for the WeatherStation Instrument is very important. Easy access and appearance should be secondary considerations. Since each installation is unique, the best separation distances will vary depending on the surroundings and the particular equipment and how it is configured. -
Page 12: Installing
(where air travels through the unit) reflector plate (heated) lower housing alignment notch Figure 3. WeatherStation Instrument with heater (120/220WXH shown) Copyright © 2008 - 2018 Airmar Technology Corp. - Page 13 6. Screw an extension tube onto the antenna mount if desired. lower housing alignment notch nut assembly extension tube (most installations) cable exit (some installations) antenna mount (some installations) Figure 4. Installation (150WX shown) Copyright © 2007 - 2018 Airmar Technology Corp.
- Page 14 Be careful not to rotate the WeatherStation Instrument, changing the alignment or loosen the nut assembly from the antenna mount/extension tube. WeatherStation connector alignment captive nut assembly antenna mount or extension tube Figure 5. Attaching the cable to the WeatherStation Instrument Copyright © 2007 - 2011 Airmar Technology Corp.
-
Page 15: Cable Routing & Connecting Guidelines
Cable Routing & Connecting Depending on the equipment you will be using, route the WeatherStation cable to a Converter, Combiner, Splitter, an NMEA 0183 display, or an NMEA 2000 network. After reading the cautions below, go to the appropriate instructions. CAUTION: Do not remove the waterproof connector(s) to ease cable routing. -
Page 16: Connecting To A Data Converter, Combiner, Or Splitter
[10m (30')] Figure 6. Wiring the junction box (not to scale) Copyright © 2016 Airmar Technology Corp. Wire the junction box using the wiring diagram below (Figure 7) To prepare the cables, follow “Preparing the Wires”. Figure 7. Heater models with a cable run greater than 20m (60') - Page 17 Connector on Display End If the WeatherStation cable has a connector on the display end, and it can be plugged into the port on the NMEA 0183 display; do so now. Coil any excess cable and secure it with cable ties to prevent damage. Fasten the cable in place. No Connector on Display End: Wiring CAUTION: The WeatherStation Instrument has either an RS422 or RS232 interface.
- Page 18 A/+ IN RX IN B/- IN NO CONNECTION B/- OUT NO CONNECTION SHIELD SHIELD Figure 8. NMEA 0183 WeatherStation Cable—no heater Copyright © 2007 - 2014 Airmar Technology Corp. locator WeatherStation connector optional optional RS422 RS232 A /+ OUT A /+ OUT...
-
Page 19: Connecting To An Nmea 2000 ® Network
Figure 10. NMEA 2000 WeatherStation Cable [6m (20') shown] Copyright © 2008 - 2011 Airmar Technology Corp. NOTE: WeatherStation cables greater than 6m (20') have a termination resistor built into the WeatherStation connector (Figure 11). termination resistor in connector locator 120Ω... -
Page 20: Calibrating The Compass
Calibrating the Compass WARNING: The internal compass may need to be calibrated after the WeatherStation Instrument is installed for maximum accuracy. Perform the pretest below to determine if calibration is necessary. CAUTION: Boat—The Pretest and AutoCalibration Procedure must be done in calm seas in a 0.8 km (0.5 mile) open area away from other boats and ferrous objects such as structures and aids to navigation. -
Page 21: Operation
Operation Heater: 120WXH, 220WXH NOTE: When the Heater is ON, the Air Temperature and the Wind Chill Temperature functions are OFF. When the Heater is OFF, the Air Temperature and the Wind Chill Temperature functions resume automatically. The heater can operate in three different modes. •... -
Page 22: Maintenance
200WXRS, 200WXS—Gently clean under the louvers with a duster. rain sensor waterproof film wind channel reflector plate lower housing louver (5) serial number temperature sensor screw (3) Figure 12. Maintenance (200WXRS shown) Copyright © 2008 - 2017 Airmar Technology Corp. -
Page 23: Software
Software Revisions Airmar may release updated versions of both the WeatherStation firmware and the WeatherCaster software. Periodically check Airmar’s website at www.airmar.com ™ to down-load the latest revision. Installing WeatherCaster Software ™ Follow the instructions in the WeatherCaster Software Guide. -
Page 24: Troubleshooting
Move the WeatherStation Instrument farther back and higher (Figure 13). Figure 13. Boat/vehicle mounting location (boat shown) Copyright © 2007 Airmar Technology Corp . Heater Not Working • Is there 24VDC supply voltage to the heater? NOTE: The heater does not cycle ON until the air temperature reaches 1°C. -
Page 25: Technical Information
120WX....2 220WX....4 Specifications Product specifications are measured under laboratory conditions. The installation and surrounding environment can impact the product’s performance. Airmar recommends that best installation practices as defined by the World Meteorological Organization (WMO) are followed in your installation. -
Page 26: Abbreviations, Acronyms, Glossary, Trademarks
The software within the WeatherStation hardware WeatherCaster software The PC application program ™ Trademarks Airmar is a registered trademark of Airmar Technology Corporation. ® NMEA 2000 is a registered trademark of the National Marine Electronics Assoc. ® Smart is a trademark of Airmar Technology Corporation. - Page 27 Notes...
- Page 28 35 Meadowbrook Drive, Milford, New Hampshire 03055-4613, USA www.airmar.com...
Need help?
Do you have a question about the WeatherStation 200WXRS and is the answer not in the manual?
Questions and answers