Table of Contents
Advertisement
Quick Links
Advertisement
Table of Contents

Related Manuals for sunjoe SPX4001-PRO-RM


Summary of Contents for sunjoe SPX4001-PRO-RM
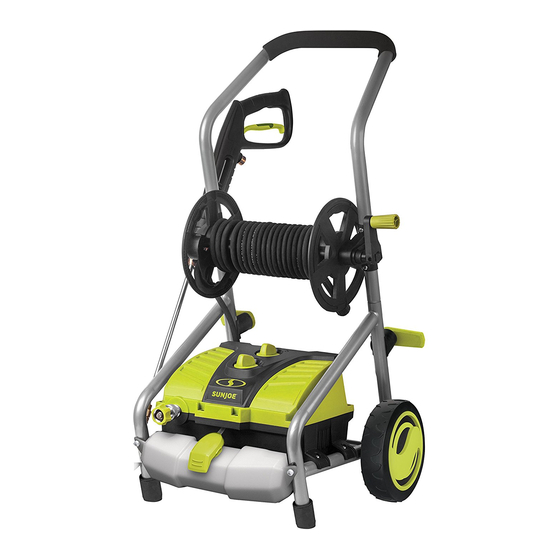
- Page 1 14.5-AMP | 2030 PSI MAX* | 1.76 GPM |HOSE REEL | TURBO NOZZLE OPERATOR’S MANUAL Model SPX4001-PRO-RM A Division of Snow Joe , LLC ® Form No. SJ-SPX4001-PRO-RM-880E-M-V1 © 2021 by Snow Joe , LLC SAVE THESE INSTRUCTIONS ® All rights reserved. Original instructions.
-
Page 2: General Safety
OPERATOR’S MANUAL Model SPX4001-PRO-RM A Division of Snow Joe , LLC ® Form No. SJ-SPX4001-PRO-RM-880E-M-V1 IMPORTANT! • Stay alert – Watch what you are doing. Use common sense. Do not operate the pressure washer when you are Safety Instructions tired, or under the influence of alcohol or drugs. -
Page 3: Electrical Safety
• Risk of explosion – Do not spray flammable liquids. require assistance, contact your local supply authority for further information.) • Risk of injection or injury to persons – Never direct discharge stream at people, pets, or electrical devices. WARNING! Electrical Shock Hazard –... -
Page 4: Risk Of Electrocution
If the appliance plug does not fit fully into the outlet, Table 1. Method of Securing Extension Cord reverse the plug. If the plug still does not fit, make sure that you are using the correct polarized wall outlet. If the Cord set Appliance cord plug still does not fit, contact a qualified electrician to... -
Page 5: Product Description
Product Description Purpose • This high-pressure electric power washer is intended for residential use to clean vehicles, machines, buildings, facades, etc. Areas of Application • Never use the machine in potentially explosive areas under any circumstances! • The operating temperature must be between 32ºF (0ºC) and 104ºF (40ºC). -
Page 6: Safety Symbols
Safety Symbols The following table depicts and describes safety symbols that may appear on this product. Read, understand, and follow all instructions on the machine before attempting to assemble and operate. Symbols Descriptions Symbols Descriptions READ THE OPERATOR'S MANUAL(S) – Read, understand, WARNING! Electrical shock hazard –... -
Page 7: Technical Data
Know Your Electric Pressure Washer Read the owner’s manual and safety instructions carefully before operating the electric pressure washer. Compare the illustration below to the electric pressure washer in order to familiarize yourself with the location of the various controls and adjustments. Save this manual for future reference. -
Page 8: Carton Contents
Unpacking Fig. 1 Carton Contents • Upper handle frame + hose reel assembly • Lower handle + pressure washer assembly • Trigger gun • Spray wand • Five (5) Quick-Connect nozzles (0º, 15º, 25º, 40º and Soap) • Turbo nozzle •... - Page 9 WARNING! Keep hose away from sharp objects. Fig. 3 Bursting hoses may cause injury. Examine hoses regularly and Hose reel replace if damaged. Do not attempt to mend a damaged hose. opening 7. Connect the garden hose adapter (female coupler) to the water inlet of the pressure washer, then thread your garden hose (male end) into the garden hose adapter (Figs.
- Page 10 8. Attach garden hose to water supply (Fig. 8). 10. Check that the electrical supply voltage and frequency (Volt/Hz) correspond to those specified on the pressure washer rating plate. If the power supply is correct, you Fig. 8 may now plug the pressure washer into the power outlet (Fig.
-
Page 11: Working With Detergents
3. Turn the ON/OFF switch (pressure select dial) to the LOW (I) Fig. 13 or HIGH (II) position to start the pressure washer (Fig. 12). STOP Fig. 12 Slot Safety lock 3. Snap the desired nozzle onto the Quick-Connect collar until it clicks into place (Fig. - Page 12 1. Remove the cap from the detergent tank and fill the tank 7. When finished using the pressure washer, you must first with detergent (Fig. 15). drain and rinse the detergent tanks. Run the pressure washer in low pressure until all of the soap is drained from the detergent tanks.
-
Page 13: Shutting Down
Storage V) Use the Soap nozzle (black) for low-pressure detergent application to clean equipment, remove mildew and oxidation stains from houses, clean bricks or degrease Hose reel grimy surfaces. 1. Unlock the hose reel by pulling out on the handle out NOTE: When using detergent, make sure to install the (Fig. -
Page 14: Winterizing + Long-Term Storage
Winterizing + Long-Term Storage Fig. 22 If you must store your pressure washer in a location where the temperature falls below 32ºF (0ºC), you can minimize the chance of damage to your machine by utilizing the following procedure: Inlet filter •... -
Page 15: Service & Support
Service + Support If your Sun Joe SPX4001-PRO-RM electric pressure washer ® requires service or maintenance, please call the Snow Joe ® Sun Joe customer service center at 1-866-SNOWJOE ® (1-866-766-9563). Model + Serial Numbers When contacting the company, reordering parts, or arranging... -
Page 16: Troubleshooting
Troubleshooting • Disconnect the unit from the electrical power supply before carrying out maintenance on the machine or when checking that its parts are in proper working order. • To avoid unnecessary hassles, consult the following table before contacting customer service with any mechanical issues. Problems Possible Cause Possible Solution... -
Page 17: Optional Accessories
SHOP ONLINE now at sunjoe.com NOTE: Accessories are subject to change without any obligation on the part of Snow Joe... - Page 18 SNOW JOE + SUN JOE REFURBISHED GOODS WARRANTY ® ® Snow Joe + Sun Joe may from time to time change the design of ® ® GENERAL CONDITIONS: its products. Nothing contained in this warranty shall be construed Snow Joe + Sun Joe operating under Snow Joe , LLC warrants...
- Page 19 NOTES...
- Page 20 sunjoe.com...
Need help?
Do you have a question about the SPX4001-PRO-RM and is the answer not in the manual?
Questions and answers