Table of Contents
Advertisement
Quick Links
JUE-60GX
Inmarsat
Global Xpress GX
Mobile Earth Station
Instruction Manual
7ZPSC0584
Inmarsat GX Service systems
Introduction of the JUE-60GX
Components
Setup
Web Interface
Maintenance
After-sales service
Specification
Web Interface Menu Tree
Software Upgrading Procedure
Initializing the settings to the factory
default state
List of Initial Values (BDE-Version 0100)
Troubleshooting & FAQ
LED of BDE
Abbreviations and Glossary
JRC Network
Hazardous substances of Electrical and
electronic Products
1
2
3
4
5
6
7
8
APP A
APP B
APP C
APP D
APP E
APP F
APP G
APP H
APP I
Advertisement
Table of Contents

Related Manuals for Japan Radio Co. JUE-60GX


Summary of Contents for Japan Radio Co. JUE-60GX
- Page 1 Inmarsat GX Service systems Introduction of the JUE-60GX Components Setup Web Interface Maintenance JUE-60GX After-sales service Inmarsat Specification Global Xpress GX Web Interface Menu Tree APP A Software Upgrading Procedure APP B Initializing the settings to the factory Mobile Earth Station...
-
Page 3: Preface
Network Service Device (NSD) provided by Value Added Reseller (VAR). The JUE-60GX is packaged and shipped under strict quality control with inspection criteria to deliver the equipment with highest quality, performance, and reliability needed to meet our customer’s requirements and satisfaction. - Page 4 Safety Cautions Cautions for High Voltage High voltages, ranging from several hundreds to tens of thousands of volts, are used in electronic apparatus, such as radio and radar instruments. These voltages are totally harmless in most operations. However, touching a component inside the unit is very dangerous.
- Page 5 Emergency Measures Method of First-Aid Treatment Precautions for First-Aid Treatments Apply artificial respiration to the person who collapsed, minimizing moving as much as possible avoiding risks. Once started, artificial respiration should be continued rhythmically. (1) Refrain from touching the patient carelessly as a resultof the accident; the first-aider could suffer from electrical shocks by himself or herself.
- Page 6 First Aid Method Flow of Cardiopulmonary Resuscitation (CPR) A person is collapsing. A person is collapsing. - Secure the safety of the surrounding area. - Secure the safety of the surrounding area. - Prevent secondary disasters. - Prevent secondary disasters. Listen to the appeal of the Responding Check for response.
- Page 7 Specific Procedures for Cardiopulmonary Resuscitation (CPR) 1. Check the scene for safety to prevent secondary disasters a) Do not touch the injured or ill person in panic when an accident has occurred. (Doing so may cause electric shock to the first-aiders.) b) Do not panic and be sure to turn off the power.
- Page 8 6. Cardiopulmonary resuscitation (CPR) (combination of chest compressions and rescue breaths) a) Chest compressions 1) Position of chest compressions • Position the heel of one hand in the center of the chest, approximately between the nipples, and place your other hand on top of the one that is in position. 2) Perform chest compressions Perform uninterrupted chest compressions of Compress...
- Page 9 7. When to stop cardiopulmonary resuscitation (CPR) a) When the injured or ill person has been handed over to the emergency services b) When the injured or ill person has started moaning or breathing normally, lay him/her on his/her side in a recovery position and wait for the arrival of emergency services.
- Page 10 11. Electric shock (defibrillation) a) If the AED determines that electric shock is needed, the voice prompt saying, "Shock is needed" is issued and charging starts automatically. b) When charging is completed, the voice prompt saying, "Press the shock button" is issued and the shock button flashes. Press the shock button.
-
Page 11: Before Using
Some functions of JUE-60GX may not work correctly owing to the hardware and software version of equipment connected to JUE-60GX. Please confirm that whether your equipment is connectable or not to the dealer or agent. -
Page 12: Pictorial Indication
Disconnect the power plug Concerning Warning Label Warning labels are put on the JUE-60GX. Do not take off, destroy, or modify these labels. * Windows Internet Explorer is the registered trademark of Microsoft Corporation. Firefox is the registered trademark of Mozilla Foundation. -
Page 13: Concerning Warning Label
● Concerning warning label ● Warning labels are put on the JUE-60GX ADE and BDE. Do not take off, destroy, or modify these labels. Warning Label of JUE-60GX ADE (The illustration of upper part shows the safety Procedure for removing Radome from ADE.) 1: This mark means the attestation number which means safe, high-quality product and suits EU directive (Free circulation was permitted in the EU signatory). -
Page 14: During Operation
25 W/m 16 m 100 W/m In case of approach within a radius of 26 meters by necessity, turn off the JUE-60GX and stop transmitting. If an external matter, such as metal fragments, water, liquid, etc., infringe into your JUE-60GX, turn off the power and contact the dealer or agent you purchased. - Page 15 Use the specified power supply voltage only (90 VAC to + 264 VAC), otherwise trouble, fire, or electric shock or malfunction may occur. Do not troubleshoot or repair the internal equipment of the JUE-60GX by yourself. Any electrical work by any person other than our trained maintenance staff may cause fire or abnormal operation of this equipment or electrical shock for you.
- Page 16 CAUTION Before using, read this instruction manual. Incorrect operation may cause improper working operation or malfunction. When a fault has been detected, refer to the “Appendix E”. If it is not improved, turn OFF and ON the power switch of main unit to reboot. Still it persists, stop operation and contact the dealer you purchased from.
-
Page 17: Table Of Contents
1.1.2 Inmarsat Global Xpress system ................1-2 Inmarsat Global Xpress Services ..................1-4 Important reminder for using JUE-60GX ................1-5 Section 2 Introduction of the JUE-60GX ............2-1 Outline ..........................2-1 Features........................... 2-2 Interconnection diagram and components List ..............2-3 2.3.1... - Page 18 Setting the PC network ..................... 5-2 5.1.2 Connection between PC and BDE ................5-6 JUE-60GX login and logout ....................5-7 5.2.1 Accessing JUE-60GX with the Web browser ............. 5-7 5.2.2 Login ........................5-8 5.2.3 Logout ........................5-9 Overview of the Web interface ..................5-10 5.3.1...
- Page 19 Disposal of the JUE-60GX ....................7-1 Section 8 Specification ..................8-1 Appendix A Web Interface Menu Tree .............. A-1 Menu for JUE-60GX GUEST users ................... A-1 JUE-60GX ADMIN users ....................A-2 Appendix B Software Upgrading Procedure ........... B-1 Downloading the latest software ..................B-2 Upgrading software ......................
- Page 20 Appendix F LED of BDE ..................F-1 BDE LED display sequence and display at the occurrence of abnormality......F-2 F.1.1 LED display sequence ....................F-2 F.1.2 LED display sequence at software upgrading ............F-4 Appendix G Abbreviations and Glossary ............G-1 Appendix H JRC Network ..................
-
Page 21: Section 1 Inmarsat Gx Systems
One Inmarsat 5 generation satellite (geosynchronous satellite) is deployed in each ocean region. And each ocean region has an overlapped area with the neighboring regions. When JUE-60GX is in an overlapped area, the optimum satellite is selected automatically for communication. -
Page 22: Inmarsat Global Xpress System
179E I5-F2 I5-F3 I5-F1 I5-F4 Extendable Global Xpress Global Xpress network available Coverage via steerable beams over at least 99% of this area 1.1.2 Inmarsat Global Xpress system The Inmarsat Global Xpress system consists of NOC and SAS Functions of each facility are as follows: Network Operation Center (NOC) The NOC located at the INMARSAT headquarters in London U.K., coordinates communication lines of the network 24 hours a day, 365 days a year. - Page 23 SAS (Satellite Access Station) The SASs located in Fucino (Italy), Burum (Holland) and Hawaii (America) which are the gateway systems operating inter-working with public network (including telephone and Internet). POP (Points Of Presence) POP is the gateway to public communication lines. 付録...
-
Page 24: Inmarsat Global Xpress Services
1.2 Inmarsat Global Xpress Services The Inmarsat Global Xpress system provides the following services. All the services can be used concurrently. Internet access • Packing switching • Best effort Note maximum communication speed determined communication charge contract. Voice • VoIP •... -
Page 25: Important Reminder For Using Jue-60Gx
1.3 Important reminder for using JUE-60GX Note • The Global Xpress services are operated by Inmarsat and some other network service providers. The Global Xpress services may be changed or terminated without prior notice due to the circumstance of the service providers. - Page 26 Section 1 Inmarsat GX systems...
-
Page 27: Section 2 Introduction Of The Jue-60Gx
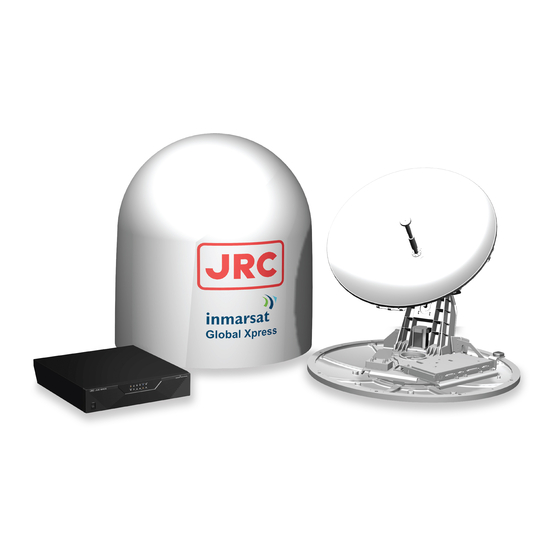
Internet, e-mail, and IP phone, etc. The GX network service is available connecting Network Service Device (NSD) supplied by Value Added Reseller (VAR). The JUE-60GX Mobile Earth Station (MES) is composed of Above Deck Equipment (ADE) and Below Deck Equipment (BDE). -
Page 28: Features
The service available to you is depending on the contract. Compact design The JUE-60GX can be installed on vessels of all sizes due to the compact and lightweight design of the ADE. The adoption of an active and Gyro-less antenna structure makes this unit a perfect fit for small vessels. -
Page 29: Interconnection Diagram And Components List
To GYRO 7ZCSC0428 GPS/ DSUB Cable 15p 7ZCSC0431 GX JB GYRO To GPS Spare Wire 7ZCSC0132 Power Supply Cable To AC100V-240V AC IN INMARSAT GX JUE-60GX 7ZCSC0266 Earth Cable Provisional Interconnection Diagram Earth 付録 Section 2 Introduction of the JUE-60GX... -
Page 30: Components List
If the cables are supplied by customer, refer the installation guide "3.1 Connecting cables". The following table lists the recommended cable type and maximum RX coaxial cable length. Type Maximum cable length CNT-600-FR 100m LMR-600-FR 100m CNT-400-FR LMR-400-FR RG-214/U RG-223 Section 2 Introduction of the JUE-60GX... -
Page 31: Dimensional Drawing (Jue-60Gx Standard Components)
2.4 Dimensional drawing (JUE-60GX standard components) 2.4.1 ADE (Above Deck Equipment) JUE-60GX [NTG-428] mark INMARSAT mark FWD mark 4-M16 Bolts S.S. P.S. Unit: mm Connector Mas: approx.46kg 付録 Section 2 Introduction of the JUE-60GX... - Page 32 2.4.2 BDE (Below Deck Equipment) JUE-60GX [NTF-329] Unit: mm Mass: approx .6.5 kg Section 2 Introduction of the JUE-60GX...
-
Page 33: Dimensional Drawing (Option)
Minimum Connector Cable Type Length Mass bending Remarks Dia. Dia. radius CFQ-3922A35 35 m±0.5 m 30 mm 15 mm 8.8 kg 100 mm N connector Concerning cable length option, please refer to 2.3.2. 付録 Section 2 Introduction of the JUE-60GX... - Page 34 Section 2 Introduction of the JUE-60GX...
-
Page 35: Section 3 Components
Section 3 Components This section describes the configuration of JUE-60GX and connected equipment. 3.1 Above Deck Equipment (ADE) The radome covers the antenna equipment, which is composed of: • Above deck unit with built in Antenna Interface Module (AIM) • Antenna pedestal •... -
Page 36: Below Deck Equipment (Bde)
3.2 Below Deck Equipment (BDE) 3.2.1 Appearance 3.2.1.1 Front view 3.2.1.2 Rear view Section 3 Components... -
Page 37: Front View
3.2.2 Front view Name Function outline Power switch Turns power on and off. Indicates the equipment status. The meanings and sequence of the LEDs are described in [Appendix 3.2.3 Rear view Name Function outline Supplement GPS/GYRO Connects GPS and GYRO Maximum cable length: 1 km connector (complies with NMEA) - Page 38 Name Function outline Supplement ADE- BDE (TX) Used for the connection of a Connector shape: SMA connector transmission coaxial cable of ADE. connector (ADE: N connector) Coaxial conversion cable is attached to connect with coaxial cable. ADE- BDE (RX) Used for the connection of a Connector shape: TNC connector reception coaxial cable of ADE.
-
Page 39: Ade - Bde Connection Cable
3.3 ADE - BDE connection cable This cable is used for connecting ADE and BDE. Memo This coaxial cable can be connected in either direction. Notes Two coaxial cables are used, one for transmitting and one for receiving. The following optional cables are made available. •... -
Page 40: Communication Devices
3.4 Communication devices 3.4.1 Device connection example Refer to specification supplied by VAR. Section 3 Components... -
Page 41: Section 4 Setup
If NSD is connected to the MGMT LAN, temporarily disconnect the connection. JUE-60GX BDE Rear view Setup PC Set the IP address of the PC. Under the factory default settings, JUE-60GX is set as follows. BDE IP address 192.168.1.2 ADE IP address 192.168.1.3... -
Page 42: Browsing The Web Interface
4.2 Browsing the Web Interface Display the Web interface with the Web browser of PC and access JUE-60GX. Notes • JUE-60GX officially supports Mozilla Firefox 23. Firefox upper-level versions and compatible browsers are also supported. • Cookie must be enabled with the Web browser. -
Page 43: Bde Power On/Off
4.2.1 BDE power on/off 4.2.1.1 Power on Check the following items before turning on the power. • There are no obstructions between the antenna and the satellite. • The power breaker is set to on. • The coaxial cable from ADE is properly connected to the BDE. Set the BDE power switch to on. - Page 44 How to read the LED panel RX2 STATUS READY STS1 STS2 STS3 STS4 BDE power switch on Green On Red On Yellow On Green Blink Red Blink Undecided Starting boot loader Starting OS Completed OS start, starting core module (CM) Completed CM start To searching satellite Notes...
- Page 45 The automatic satellite search (acquisition) function operates. • JUE-60GX calculates the satellite position from the current position information that was measured by GPS, automatically directs the antenna to the satellite direction, and acquires the satellite. • After acquisition, the antenna direction angle is automatically controlled so that the received signal strength becomes the maximum.
-
Page 46: Power Off
4.2.1.2 Power off Turn off the power switch. READY LED starts blinking in red and power disconnection processing is executed during this time. At completion of power disconnection processing, all the LED indicators go off and the power is turned off. -
Page 47: Setting External Input Of Bow Correction Value, Gyro, And Gps
4.3 Setting external input of BOW correction value, GYRO, and GPS This section describes the external input setting procedures of BOW correction value, GYRO, and GPS. The BOW correction can offset the angle error from the bow. The more this value is correct, the faster antenna can find the satellite. - Page 48 GYRO Input Select the external GYRO input from the drop-down list. Disable: Not used. NMEA(4.8 kbps): Use serial (4.8 kbps) input. NMEA(38.4 kbps): Use serial (38.4 kbps) input. LAN: Use LAN input. Note Supported NMEA sentences: (Water speed and Heading) ・VHW (Heading True) ・HDT...
-
Page 49: Section 5 Web Interface
Section 5 Web Interface This section describes the procedure to connect PC and JUE-60GX, login to JUE-60GX from the Web browser, change setting and check status. The following items are mainly described. Item Outline 5.1 Connection between PC and Describes the network setting of PC and cable JUE-60GX connection between PC and JUE-60GX ports. -
Page 50: Connection Between Pc And Jue-60Gx
JUE-60GX 5.1.1 Setting the PC network Set the network in PC to connect PC with JUE-60GX. In this section, it is assumed that Microsoft Windows 7 is used and JUE-60GX is started with the initial settings. Note The setting screen may vary depending on the operating environment. - Page 51 Click on [Local Area Connection]. The “Local area connection status” dialog box is displayed. Click on the [Properties] button. The “Properties of local area connection” dialog box is displayed. 付録 Section 5 Web Interface...
- Page 52 The [Properties of Internet protocol (TCP/IP)] dialog box is displayed. Select [Use next IP address] to set the IP address manually. Set the IP address of PC. Under the factory default settings, JUE-60GX is set as follows. BDE IP address 192.168.1.2...
- Page 53 Click on the [OK] button. Note In this description, the factory default settings are used. The [Properties of local area connection] dialog box is displayed. Click on the [Close] button. 付録 Section 5 Web Interface...
-
Page 54: Connection Between Pc And Bde
5.1.2 Connection between PC and BDE Connect MGMT LAN and PC with an Ethernet cable. Note If NSD is connected to the MGMT LAN, temporarily disconnect the connection. Setup PC Memo JUE-60GX automatically recognizes the Ethernet cable type (cross or straight). Section 5 Web Interface... -
Page 55: Jue-60Gx Login And Logout
5.2 JUE-60GX login and logout 5.2.1 Accessing JUE-60GX with the Web browser Display the Web interface with the Web browser of PC and access JUE-60GX. Notes • JUE-60GX formally supports Mozilla Firefox 23. Firefox upper-level versions and compatible browsers are also supported. -
Page 56: Login
ADMIN users are allowed to set terminal settings in addition to the authorization available to GUEST users. This section describes the procedure for logging into JUE-60GX from the Web interface screen as an ADMIN user. Click on the [Log in] button at the top right corner of the screen. -
Page 57: Logout
Enter an ADMIN user name and a password and click on the [Log in] button. Under the factory default setting, “ADMIN” is set as the ADMIN user name and “000001” as the password. The ADMIN user screen is displayed. ADMIN user dedicated menu The login status is displayed on the right side of the top area. -
Page 58: Overview Of The Web Interface
5.3 Overview of the Web interface 5.3.1 Screen structure of the Web interface This section describes the screen structure of the Web interface. Memo For the subsequent explanation, the ADMIN user screen is used. Top area Refer to “5.3.1.1”. Naviation area Operation area Refer to “5.3.1.2”. -
Page 59: Top Area
5.3.1.1 Top area Item Description Reception level indicator The reception levels are displayed on the 6-level bar. Green normal state, white means the transmission inhibition state. For blocking, refer to “5.5.2”. The signal type is displayed on the left side of the bar. -
Page 60: Operation Area
Menu that can be executed by ADMIN users only When a menu is selected, the equipment information and setting items related to the menu are displayed in the operation area. The version number of the software and antenna information (including blocking information) are displayed below the menu. -
Page 61: Saving Logs (Common Operation)
5.3.2 Saving logs (common operation) Logs can be saved in a file under the Web interface. Logs include alarmpack log, event log, antenna control section log, and system log, and all the logs are saved in a same file. Logs can be saved from the following menus. Menu Related section [Logs] - [Alarmpack]... -
Page 62: Menus Available To All The Users
5.4 Menus available to all the users 5.4.1 Checking the JUE-60GX status ([Dashboard] - [Status] menu) Display procedure Select [Dashboard] - [Status] in the navigation area. Function outline This function checks the statuses of JUE-60GX, satellite, antenna, GPS, and alarm. Screen example (10) (11) (13) (12) - Page 63 Unit Status Displays the status of JUE-60GX. Item Description Antenna Cont. Status of the antenna control section 0x00 Power ON: Checking the hardware 0x01 Boot Idle: Checking the program 0x1* Initializing: Initializing 0x2* Idle: Waiting for GPS signals 0x3* Searching: Searching satellite...
- Page 64 Item Description Ext-GPS Displays the status of the external GPS Disable: Disabled by terminal setting Disconnected: Not connected Invalid: Not received Valid (GGA) : Received GGA (Global Positioning System Fixed Data). Valid (GGA, ZDA) : Received GGA and ZDA (Time & Date). Valid (GGA, RMC) : Received GGA and RMC (Recommended Minimum Specific GNSS Data).
- Page 65 Displays GPS information. Item Description (15) Time Displays the GPS time. At non acquisition, the elapsed time since the startup of the equipment is displayed. (16) Latitude Displays the latitude of GPS with “degrees/minutes/seconds + NS”. At non acquisition, ---° ---‘—“ –“ is displayed. (17) Longitude Displays the longitude of GPS with “degrees/minutes/seconds + NS”.
-
Page 66: Checking And Saving An Alarmpack ([Logs] - [Alarmpack])
Alarm information can be saved in a file (refer to “5.3.2”.) Notes The specification for recording logs in the alarmpack of JUE-60GX is different from other models in the following points. 1. Records logs without alarm in the alarmpack since the equipment status is recorded immediately after the startup of the equipment. - Page 67 Item Description Displays the JRC manufacturing number (7 digits) and the MAC address of each of ADE and BDE. Terminal Displays the hardware specific information of LNB, AIM, and BIM. Identification Maintenance No. AIM/BIM: Displays the following information for each of AIM and BIM. Boot: Boot maintenance number Main RFS: Main RFS number Main App: Main application number...
- Page 68 Alarmpack Log section This section displays the history at equipment startup and alarm occurrence/clearance. The top of the list indicates the current equipment status (Current) and the history of up to the past 50 items is displayed. Alarms are classified by unit (AIM, BIM, CM, and BUC). The unit name from which an alarm is issued is displayed in red.
- Page 69 SAT-Long SAT-AZ SAT-EL Longitude of the Azimuth of the Angle of elevation of satellite satellite the satellite Hunt-Freq Hunt-BW Hunt frequency Hunt bandwidth Search-Sts Search-Mode Search-Opt MissPoint Antenna control Satellite search Search options Miss point information status mode ANT-BR ANT-EL ANT-X Antenna bearing Angle of elevation of...
- Page 70 GPS-Lat GPS-Lon GPS-Time Latitude of own ship Longitude of own UTC time ship GPS-InUse GPS in use SPV-Sts CM-RSSI1 CM-RSSI2 SPV status RSS1 of receiver 2 RSS2 of receiver 2 GYRO-Hd GYRO-Mode Ship’s heading FWD from Bow GYRO input setting Ext-GPS-Sts Ext-GPS-Sat Ext-GPS-Mode...
- Page 71 Power Power supply to BUC 0 :Keyline : PA On :OpenBMIP : enabled or unspecified Lo-PLL 1 :Keyline : PA On Tx-Ditect HPA-Temp PLL unlocking Transmission power BUC temperature :OpenBMIP : disabled information 2 :Keyline : PA Standby :OpenBMIP : enabled 3 :Keyline : PA Standby :OpenBMIP : disabled...
-
Page 72: Expanding/Shrinking The Alarmpack Log Section
5.4.2.1 Expanding/shrinking the Alarmpack Log section Display of the Alarmpack Log section can be expanded or shrunk. When this section is clicked on, the display of the applicable unit is shrunk and the information is set to non-display. When [Shrink All] button is clicked on, information of all the units is shrunk and is set to... -
Page 73: Checking And Saving Event Logs ([Logs] - [Event Log])
5.4.3 Checking and saving event logs ([Logs] - [Event Log]) Display procedure Select [Logs] - [Event Log] in the navigation area. Function outline This function enables the checking of up to 1,000 events that occurred in AIM and BIM. Event logs can be saved in a file also (refer to “5.3.2”). Screen example Refer to “5.3.2”... - Page 74 Details of events and parameters Display Outline Details name Parameter 1 Parameter 2 Start Start of Software version at starting "Rollback = Main" equipment "Rollback = Sub" Power Off Turning off Reason for power off power of Success: equipment 0 = "Power switch"; Failure: 1 = "Sequence time out (T16)";...
-
Page 75: Monitor])
5.4.4 Checking and saving statistics logs of the antenna control section ([Logs] - [AC Monitor]) Display procedure Select [Logs] - [AC Monitor] in the navigation area. Function outline Up to 100 items of event log of the antenna section can be checked. Event logs can be saved in a file (refer to “5.3.2”). - Page 76 See below for the meanings of the log. Item Description Record number ROLL MAX Maximum roll angle(deg.) ROLL AVE Average roll angle(deg.) PITCHING MAX Maximum pitch angle(deg.) PITCHING AVE Average pitch angle(deg.) IMPACT X MAX Maximum vibration acceleration in the X-axis direction IMPACT X AVE Average vibration acceleration in the X-axis direction IMPACT Y MAX...
-
Page 77: Checking And Saving System Logs ([Logs] - [Syslog])
Select [Logs] - [Syslog] in the navigation area. Function outline System logs of JUE-60GX can be checked. The system log to be displayed can be selected by the filter function. System logs can be saved in a file. Screen example Refer to “5.4.5.2”... -
Page 78: Displaying And Filtering System Logs
5.4.5.1 Displaying and filtering system logs Logs are not displayed immediately after logging into the Web interface. Logs can be displayed in the following procedure. Click on the [Update] button. System logs are displayed in [Log]. Section 5 Web Interface 5-30... - Page 79 Filtering a system log to be displayed Set a selection flitering from [File], [Level], and [Word]. Filtering Description condition File A log is filtered based on the file. Search is performed based on the file. All (RAM): Searches all the syslog files in RAM. Recent: Searches only the latest syslog file in RAM.
-
Page 80: Saving System Logs
Clearing display of system log Click on the [Reset] button. The filter setting is cleared. 5.4.5.2 Saving system logs System logs can be saved by setting the logs to be saved. Select a file to be saved and click on the [Set] button. Item Description Download Displayed Log... - Page 81 To save all the logs, click on the [File] button of [All]. To save logs excluding the system logs in ROM, click on the [File] button of [Minimum]. A file processing dialog is displayed. Specify file save and click on the [OK] button. The file is saved.
-
Page 82: Menus Available To Admin Users
Delivery Date Set the JUE-60GX operation starting date. The operation starting date not only indicates the communication starting date after installation of JUE-60GX but also is useful for judging the guarantee period. Set a correct date. FWD from Bow Set the FWD angle based on the bow angle within the range of -180.0 to +180.0. - Page 83 Item Description GYRO Input Select the external GYRO input from the combo box. Disable: Not used. NMEA(4.8 kbps): Use serial (4.8 kbps) input. NMEA(38.4 kbps): Use serial (38.4 kbps) input. LAN: Use LAN input. Note Supported NMEA sentences: (Water speed and Heading) ・VHW (Heading True) ・HDT...
-
Page 84: Setting Transmission Forbidden Area And Blocking Area ([Settings] - [Tx Limit & Blockage])
5.5.2 Setting transmission forbidden area and blocking area ([Settings] - [Tx Limit & Blockage]) Display procedure Select [Settings] - [TX Limit & Blockage] in the navigation area. Function outline This function enables the setting of a transmission prohibition area and a blocking area. For a transmission prohibition area, set in which people may enter under the radio wave transmission active state within the area of 26 m from the antenna. - Page 85 The area setting procedure is as follows. When the area is set as a transmission prohibition area, select [TX Limitation] from the [Function] combo box of desired No.. When the area is set as a blocking area, select [Blockage Indication] from the [Function] combo box of desired No..
- Page 86 A blocking area is displayed in blue. A transmission prohibition area is displayed in red. A Blockage Area Diagram is displayed in the navigation area other than [Settings] - [TX Limit & Blockage] screen. Section 5 Web Interface 5-38...
-
Page 87: Changing An Admin User Password ([Settings] - [Acount])
5.5.3 Changing an ADMIN user password ([Settings] - [Acount]) Display procedure Select [Settings] - [ Acount] in the navigation area. Function outline Set an ADMIN user password. Screen example The ADMIN user password change method is as follows. Click on the [Password] input field of [ADMIN]. The input field becomes blank space. -
Page 88: Upgrading The Jue-60Gx Software ([Tools] - [Software Upgrade])
5.5.4 Upgrading the JUE-60GX software ([Tools] - [Software Upgrade]) Display procedure Select [Tools] - [Software Upgrade] in the navigation area. Function outline Upgrade software. For the details, refer to “Appendix B”. Screen example Section 5 Web Interface 5-40... -
Page 89: Exporting/Importing Settings ([Tools] - [Export / Import])
5.5.5 Exporting/importing settings ([Tools] - [Export / Import]) Display procedure Select [Tools] - [Export / Import] in the navigation area. Function outline By exporting setting data of the equipment to PC, the setting data can be backed up. Setting data that has been saved can also be imported to the equipment. -
Page 90: Importing Setting Data
5.5.5.2 Importing setting data Note When setting data is imported, the original setting data cannot be restored. Click on the [Browse…] button. A file selection dialog is displayed. Select setting data to be imported. Click on the [Import] button. Section 5 Web Interface 5-42... - Page 91 Click on the [Yes] button. Import starts. When import is completed normally, the following message is displayed. Automatic reboot of the system is done. Automatic reboot is performed , to enable the imported configuration file. 付録 Section 5 Web Interface 5-43...
-
Page 92: Using The Diagnostic Function ([Tools] - [Diagnostic])
For the setting procedure, refer to “5.5.6.1”. In [Ping], the connection between JUE-60GX and a device can be checked by transmitting a ping packet to the specific host from the IP address of the selected unit. For the procedure, refer to “5.5.6.2”. -
Page 93: Setting Syslog Transfer
Screen example 5.5.6.1 Setting Syslog transfer To receive transferred syslog, the syslog server must be operating under the specified server IP address. The level of the syslog to be transferred is to be defined by the user. Syslog messages at the user-defined level and higher levels are transferred. -
Page 94: Checking The Connection Status By Ping
Select a level of the log to be transferred in [Log Level]. Log level Description EMERGENCY State that may cause system failure ALERT Error to be handled urgently CRITICAL Fatal error ERROR General error WARNING Warning NOTICE Notice INFORMATION Information DEBUG Debugging information Click on the [Set] button. -
Page 95: Setting Gps Auto Cold Start
Enter the IP address of the transmission source in [Source]. Item Description Internal IP address of BIM For checking the connection between internal units Fixed value: 192.168.1.2 External IP address of BIM For checking the connection with JRC LAN connection (IP address of JRC LAN BIM) equipment Setting at the factory delivery: 192.168.60.152... -
Page 96: Rebooting The System([Tools]-[Reboot
[Reboot]) Display procedure Select [Tools] - [Reboot] in the navigation area. Function outline Reboot JUE-60GX system. Screen example 5.5.7.1 Rebooting procedure Click on the [Reboot] button. Click on the [Yes] button. Rebooting JUE-60GX is started. Section 5 Web Interface 5-48... -
Page 97: Deleting Alarmpacks
5.5.8 Deleting alarmpacks/resetting to the factory default state ([Others] - [Factory Default]) Display procedure Select [Others] - [Factory Default] in the navigation area. Function outline Delete all the alarmpacks or reset the equipment to the factory default state. Note After deletion/reset execution, the setting data cannot be restored. Screen example 5.5.8.1 Deleting alarmpacks Select [Terminal Logs] from the combo box. -
Page 98: Setting Jrc Lan ([Others] - [Jrc Lan])
Select [Others] - [JRC LAN] in the navigation area. Function outline Set the JUE-60GX network. The EXT LAN Type item at the time of GX LAN selection , you can use the second unit of the NSD. The EXT LAN Type item at the time of JRC LAN selection, by setting the IP addresses of BIM and AIM in the IP address in JRC LAN, the remote maintenance and status monitor functions that can be provided by VDR and INM-C of JRC become available. - Page 99 The setting procedure is as follows. Set the following items. Item Description EXT LAN Type JRC LAN connection or , choose whether to perform a second unit of NSD connection . Note To reflect the setting change, the equipment must be restarted. Local VLAN ID Set the VLAN ID at the time of JRC LAN connection .
- Page 100 Item Description Item Description 255.128.0.0/9 Prefix 9 bit 255.255.255.192/26 Prefix 26 bit 255.192.0.0/10 Prefix 10 bit 255.255.255.224/27 Prefix 27 bit 255.224.0.0/11 Prefix 11 bit 255.255.255.240/28 Prefix 28 bit 255.240.0.0/12 Prefix 12 bit 255.255.255.248/29 Prefix 29 bit 255.248.0.0/13 Prefix 13 bit 255.255.255.252/30 Prefix 30 bit 255.252.0.0/14...
- Page 101 Section 6 Maintenance The life of the JUE-60GX depends on how well the equipment is maintained. Check the following items from time to time to ensure the best performance of your JUE-60GX. Keep the input voltage within the specified range (90 VAC to 264 VAC).
-
Page 102: Section 6 Maintenance
Section 6 Maintenance... -
Page 103: Section 7 After-Sales Service
For this professional maintenance, please contact the purchasing dealer. This is a charged service. Disposal of the JUE-60GX Follow the rule of the pertinent local government when you abandon the JUE-60GX (ADE). For details, contact the dealer, our service office (Refer to the list of offices at the end of the volume) or 付録... - Page 104 Section 7 After-sales service...
-
Page 105: Section 8 Specification
Section 8 Specification 1. Inmarsat GX equipment type Category 1 Class 60 2. Frequency Transmit 29.0 to 30.0 GHz Receive 19.2 to 20.2 GHz 3. Maximum E.I.R.P +49.0 dBW 4. G/T (reception capability) 15 dBK 5. Modulation BPSK, QPSK, 8PSK 6. - Page 106 Section 8 Specification...
-
Page 107: Appendix A Web Interface Menu Tree
Appendix A Web Interface Menu Tree A.1 Menu for JUE-60GX GUEST users ***** GUEST menu ***** Dashboard menu • Checking the JUE-60GX status Logs menu • Checking and output of alarmpack APP A • Checking and output of event log •... -
Page 108: Jue-60Gx Admin Users
A.2 JUE-60GX ADMIN users ***** ADMIN menu ***** Settings menu • Setting basic data of JUE-60GX • Setting transmission prohibition areas and blocking area • Changing an ADMIN user password Tools menu • Upgrading JUE-60GX software • Exporting or importing setting data •... -
Page 109: Appendix B Software Upgrading Procedure
付録 D Upgrading the software from the Web interface Directly connect PC to the JRC LAN port of JUE-60GX with an Ethernet cable, start the Web interface of JUE-60GX, and execute the upgrading. For the upgrading procedure, refer to “Appendix B.2”. -
Page 110: Downloading The Latest Software
If the version of the software that can be downloaded from the homepage is more current than your JUE-60GX software version, the software version can be checked by selecting [Logs] - [Alarmpack] of the Web interface. (Refer to “Appendix B.3”.) -
Page 111: Upgrading Software
B.2 Upgrading software Notes • Do not turn off the power of the PC nor JUE-60GX during software transfer or upgrading. • It may take 3 minutes or more for transfer or upgrading of application software. Select [Tools] - [Software Upgrade] in the navigation area. - Page 112 Click on the [Upgrade Start] button. Software upgrading starts. Wait until software upgrading is completed and the result is displayed. Notes • Do not operate the Web interface until the result is displayed on the screen. • Upgrading may take 3 minutes or more. •...
-
Page 113: Failing Software Upgrading
B.2.1 Failing software upgrading When software upgrading fails, the error code and reason (cause of the error) are displayed on the screen. Check the error contents and perform upgrading again. If software upgrading fails continuously, stop the operation and examine the cause. When the equipment no longer operates normally, switch the equipment setting to the sub mode by referencing “Appendix B.2.2”. -
Page 114: Main Error Causes
Main error causes Reason Description Transfer to BIM failed Failure in transfer of the upgrade file to BIM Under Upgrading Duplicate upgrade execution BIM : error on script (firmtool.sh) Error occurred in BIM Error section: Script BIM : error on task (upgrade) Error occurred in BIM Error section: Upgrading thread BIM : error on task (spv) -
Page 115: Software Rollback Function
付録 D The software that is used is switched. Restart the equipment. Subsequently, JUE-60GX operates with the software under the factory default version. Switching the equipment setting to the normal mode (main mode) 付録 A Select [Main] in [Rollback] and restart the equipment. -
Page 116: Checking The Software Version
B.3 Checking the software version Restart the equipment,check whether the software has been upgraded correctly by using the following procedure. Display the alarmpack by selecting [Logs] - [Alarmpack] in the Web menu system. Check the display of [Main App] of AIM and BIM. Software version If the same number as “xxxx”... -
Page 117: Appendix C Initializing The Settings To The Factory Default State
Select [Terminal Logs] and click on the [Return to Default] button. 付録 D 付録 E Click on the [Yes] button. JUE-60GX starts in the factory default setting when the machine is Automatic restarted. 付録 A Appendix C Initializing the settings to the factory default state... - Page 118 Appendix C Initializing the settings to the factory default state...
- Page 119 Appendix D List of Initial Values (Version 0100) Item Initial value Set from the Web menu system Section Setting name title/number JUE-60GX operation starting 01/JAN/2013 5.5.1 Delivery Date day/month/year BOW correction value FWD from Bow External gyro input NMEA(4.8k) GYRO Input...
-
Page 120: Appendix D List Of Initial Values (Version 0100
Appendix D List of Initial Values (Version 0100) -
Page 121: Appendix E Troubleshooting & Faq
Appendix E Troubleshooting & If a problem occurs, perform operation according to the FAQ items If the problem cannot be solved, reboot the device. If an error is still detected, collect device logs, and then stop using the device, and contact your distributor with the collected logs (refer to Section 7). - Page 122 Problem Probable cause Confirmation item ANT LED blinked in red. The antenna points to Confirm the antenna pointing direction the direction of through the Web interface. transmission-prohibited If the antenna points to the area. transmission-prohibited area, wait until the ship moves and the antenna pointing direction is outside the transmission-prohibited area.
-
Page 123: Satellite Acquisition, Tracking, Communication
E.2 Satellite acquisition, tracking, communication Question description Probable cause Confirmation item The satellite is not acquired. The GPS signal is not Wait until GPS changes from invalid to received. valid on the Web interface “Status” screen ANT LED does not light in (refer to “5.4.1”). - Page 124 Question description Probable cause Confirmation item Reception signal intensity is Blocking is occurring. Confirm whether there is a shield between weak. the antenna and the satellite. If there is a shield, wait until the ship moves and the shield disappears between the antenna and the satellite.
-
Page 125: Web Interface
付録 M When the button is clicked on The Web browser JUE-60GX supports Mozilla Firefox 23 or 付録 N the JRC Web interface menu version is not later version officially. screen, an error message supported. -
Page 126: Corrective Action When Alarm Occurs
E.4 Corrective action when alarm occurs If an alarm relevant to the items listed in the following table occurs, perform operation according to the confirmation items. If the alarm cannot still be corrected, contact your distributor. Unit Alarm name Outline Probable cause Confirmation item STS1 LED... - Page 127 Unit Alarm name Outline Probable cause Confirmation item STS2 LED Blocking occurred. The built-in GPS cannot [GPS] Internal GPS determine position AIM LED signal reception information. Confirm error whether blocking state is entered. If this alarm is frequently displayed even after blocking is cleared, the unit may be faulty.
- Page 128 If the following alarms occur, turn off the power to the BDE, and then turn it on to reboot the main unit. Unit Alarm name Outline ST1 LED [CURR] Current error (GPIO detection error) [CUR_THR] Current value error [FAN_TMP] BIM FAN temperature error [FAN_REV] BIM FAN rotation error [UGD_ERR]...
-
Page 129: Problem Related To Communication Service
E.5 Problem related to communication service Refer to the document on troubleshooting attached to NSD. 付録 B 付録 D APP E 付録 M 付録 N 付録 A Appendix E Troubleshooting & FAQ... - Page 130 (G-th): 2[G] accumulated time threshold (ACC-th): 1440[min]=24[hour] The acceleration sensor inside JUE-60GX detects impact. If excessive impact is detected... If an Impact alarm occurs Please check the installation requirements of ADE then contact JRC and Inmarsat.
- Page 131 E.6.1 LED blinking indication Two LED lighting modes, normal mode and caution mode, are available. When an excessive impact is detected, it switches to caution mode and indicates in real time by blinking faster at once the all LED of STS1-4.
- Page 132 E.6.2 Alarm recording If the accumulative impact time exceeds the threshold, an IMPACT alarm will be occured and recorded in the Alarmpack. The accumulative impact time (unit: minutes) is displayed in Impact-Acc in the ALM-AIM area of [Logs]-[Alarmpack]. The transition value of the Impact-acc are recorded in alarmpack.csv, eventlog.csv, life_time_log.txt included in alarmpack.
- Page 133 E.6.3 Disable LED indication Select [Settings] – [Terminal] in the navigation area. Change the [Impact Indication] pull-down menu in Terminal Setting from [On] to [Off]. After setting, save/apply the setting by clicking on the [Set] button. 付録 B 付録 D APP E E.6.4 Clear Impact alarm Select [Settings] –...
-
Page 134: Other Problem
E.7 Other problem Turn off the power to the BDE, and then turn it on to reboot the BDE. Appendix E Troubleshooting & FAQ E-14... -
Page 135: Appendix Fled Of Bde
Appendix F LED of BDE NET LED STATUS LED Indicates the communication service availability. Indicates the status of Off: The communication service is not available (CM power Off) Blink in green: The communication service is not available (processing acquisition) Off: CM power off On in green: The communication service is available (acquisition completed) On in green: Normal HUB syncing) -
Page 136: Bde Led Display Sequence And Display At The Occurrence Of Abnormality
F.1 BDE LED display sequence and display at the occurrence of abnormality F.1.1 LED display sequence How to read the LED panel RX2 STATUS READY STS1 STS2 STS3 STS4 Power on Green On Red On Yellow On Red Blink Green Blink Undecided Starting boot loader Safe mode... - Page 137 Terminated CM Any one of LED on in yellow From completion of CM start status notice Searching satellite Satellite searching/tracking failed Tracking satellite Within blocking/transmission prohibition area setting 付録 B Acquiring satellite 付録 D 付録 E BDE error detected APP F APP G Completed satellite acquisition, tracking ADE error detected...
-
Page 138: Led Display Sequence At Software Upgrading
F.1.2 LED display sequence at software upgrading AIM & BIM software upgrading How to read the LED panel RX2 STATUS READY STS1 STS2 STS3 STS4 Green On Red On Yellow On Red Blink Green Blink Undecided Completed AIM & BIM software upgrading Appendix F LED of BDE... - Page 139 F.1.3 LED display sequence at vibration and impact How to read the LED panel RX2 STATUS READY STS1 STS2 STS3 STS4 Green On Red On Yellow On Green Blink Red Blink Undecided If sensor over the impact gravity acceleration threshold(2G) 付録...
- Page 140 Appendix F LED of BDE...
-
Page 141: Appendix G Abbreviations And Glossary
Appendix G Abbreviations and Glossary ADE (Above Deck Equipment) AIM (Antenna Interface Module) * Antenna interface module used in GX system. One of the substrate compose ADE. ANT (Antenna) AOR (Atlantic Ocean Region) AZ (AZimuth) BDE (Below Deck Equipment) 付録 B BIM (Broadband Interface Module) * Network interface module used in GX system. - Page 142 GX (Global Xpress) * The 5th generation satellite communications system operated by Inmarsat. HD (HeaDing) HPA (High Power Amplifier) INFO (Information) INMARSAT (International Maritime Satellite Organization) IOR (Indian Ocean Region) LAN (Local Area Network) LED (Light Emitting Diode) LNB (Low Noise Block converter) MAC address (Media Access Control Address) MES (Mobile Earth Station) NMEA (National Marine Electronics Association)
- Page 143 RAM (Random Access Memory) * Electronic parts for temporarily saving data. RAM is used by connecting to CPU (Central Processing Unit) and data can be read from and written to RAM. Data is cleared when the power is turned off. ROM (Read Only Memory) RMS (Remote Maintenance System) * JRC's original onboard equipment performance and functionality monitoring system using VDR as a server.
- Page 144 Appendix G Abbreviations and Glossary...
-
Page 145: Appendix Hjrc Network
Appendix H JRC Network If your JUE-60GX has problems in operation, please contact the dealer you purchased it from. For assistance in finding a Service Center, please access one of the following web sites. JRC web site JRC Japan http://www.jrc.co.jp JRC Amsterdam http://jrc.am/... - Page 146 Appendix H JRC Network...
-
Page 147: Appendix I Hazardous Substances Of Electrical And Electronic Products
Appendix I Hazardous substances of Electrical and electronic Products 付録 B 付録 D 付録 E 付録 E 付録 M 付録 N APP I APP J 付録 R 付録 S 付録 A I-1Appendix I Hazardous substances of Electrical and electronic Products... - Page 148 Appendix I Hazardous substances of Electrical and electronic Products...
- Page 150 Not use the asbestos For further information,contact: URL Head office : http://www.jrc.co.jp/eng/ Marine Service Department 1-7-32 Tatsumi, Koto-ku, Tokyo 135-0053, Japan : tmsc@jrc.co.jp e - mail One - call : +81-50-3786-9201 ISO 9001, ISO 14001 Certified CODE No.7ZPSC0584 MAY. 2021 Edition 4...
Need help?
Do you have a question about the JUE-60GX and is the answer not in the manual?
Questions and answers