Table of Contents
Advertisement
Quick Links
Advertisement
Table of Contents

Related Manuals for HAT collective S-COLLECTION SX

Summary of Contents for HAT collective S-COLLECTION SX
- Page 1 S-COLLECTION, 2-LEG, SX/SE Installation Instructions Innovative Ergonomic Solutions HAT Collective 800 524 2744 408 437 8770 customerservice@team-ies.com cs@hatcollective.com team-ies.com hatcollective.com PAGE 1 OF 22 © 2021 Innovative Ergonomic Solutions P516158 REV B...
- Page 2 IMPORTANT SAFETY INSTRUCTIONS CONSIGNES DE SECURITE IMPORTANTES SAVE THESE INSTRUCTIONS VEUILLEZ GARDER CES CONSIGNES When using an electrical furnishing, basic precautions should always be followed, Lorsque vous utilisez des meubles electriques, des precautions de base doivent toujours including the following: etre respectees, y compris les suivantes.
-
Page 3: Parts List
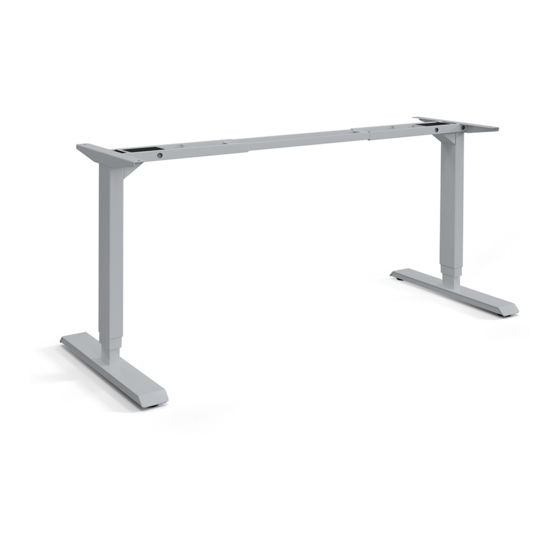
PARTS LIST Actuator Flex Crossbar - Right M6 Flange Head Nut Switch Bracket 45° Cable Clip 10x Varies, see page 19 Varies, see page 7 R011 172 RM-405-3 R010230 Control Box Flex Crossbar - Center ø 5 x 20mm Wood Screw 24x Switch 4mm Wrench CBD6SP00020A-109... - Page 4 INSTALL LEFT & RIGHT SIDEBARS Attach Left & Right Sidebars (Part C & D) to Actuators (Part A) using 8 bolts (Part J) and supplied Allen wrench (Part V). (8x) (2x) NOTE: For Top Bracket types, see page 20. PAGE 4 OF 22...
- Page 5 INSTALL LEFT & RIGHT FLEX CROSSBARS Attach Left & Right Flex Crossbars (Part E & F) to Actuators using 4 bolts (Part J) and supplied Allen wrench (Part V). (4x) PAGE 5 OF 22...
- Page 6 INSTALL CENTER FLEX CROSSBAR Install the Center Flex Crossbar (Part G) onto the Left and Right Crossbars using 4 bolts (Part J), 4 nuts (Part K), and supplied Allen wrench (Part V). (4x) (4x) NOTE: For Flex Crossbar sizes and sku, see page 7. PAGE 6 OF 22...
- Page 7 FLEX CROSSBAR OVERVIEW A-Flex Crossbar: Surfaces 36" - 48" (914.4mm-1219.2mm) 66730610 For 48" surfaces For 36" surfaces B-Flex Crossbar: Surfaces 48" - 72" [1219.2mm-1828.8mm] 66750610 For 72" surfaces For 48" surfaces PAGE 7 OF 22...
- Page 8 INSTALL FEET AND GLIDERS Place Feet (Part H) on top of Actuators so that the Actuator fits into the top side of the Feet. Secure Feet to Actuators using (8x) 8 bolts (Part J) and supplied Allen wrench (Part V). (4x) Screw in Gliders (Part I) to be hand tight.
-
Page 9: Install Worksurface
INSTALL WORKSURFACE Attach the base assembly to the underside of the worksurface using 24 wood screws (Part L). (24x) PAGE 9 OF 22... - Page 10 INSTALL CONTROL BOX Attach the Control Box (Part B) to the underside of the worksurface using 2 wood screws (Part M). (2x) PAGE 10 OF 22...
-
Page 11: Install Switch
INSTALL SWITCH Attach the switch to either the 45° Switch Bracket (Part O) or the 90° Switch Bracket (Part P). With the Switch attached to the bracket, place the Switch on the underside of the worksurface and attach using 2 wood screws (Part N). - Page 12 INSTALL PERSONAL HEALTH TRACKER SWITCH (SOLD SEPARATELY) Place the Health Tracker Switch on the underside of the worksurface, and place the Switch Cover onto the Switch so that the two extruded cylinders line up with the mounting points. NOTE: The cord should be managed through the slot in the back of the cover to avoid crimping when finalizing attachment.
- Page 13 PLUG IN POWER & SWITCH COMPONENTS Begin by plugging the Switch (Part Q) into the Control Box (Part B). Plug Motor Cables (Part R & S) into the Actuators and plug other end into Control Box (Part B). Ensure enough Power Cable (Part T) is available to reach your work space’s plug or outlet. Use “U-shape”...
- Page 14 FLIP THE DESK UPRIGHT We recommend using two people to safely flip the completed desk onto its feet. Plug in the desk and ensure Switch is working correctly. For detailed Switch instructions, please see pages 15-16. PAGE 14 OF 22...
- Page 15 PERFORM INITIAL RESET DIGITAL SWITCH OPERATION ADJUSTING INITIAL HEIGHT Connect power cord to 120v power outlet. It may be necessary to adjust the displayed height due to different thicknesses of desktops etc. The DPF1C will as INITIALIZE standard either show 68 cm or 24.5 inch as the default The desk cannot drive up if it has not been initialized.
- Page 16 PERSONAL HEALTH TRACKER OPERATION STORE MEMORY ADJUSTING INITIAL HEIGHT • Press the star button shortly, and wait for the 4 memory It may be necessary to adjust the displayed height due to positions to show. different thicknesses of desktops etc. The DPG1C will as standard either show 68 cm or 24.5 inch as the default •...
-
Page 17: Trouble Shooting And Diagnosis
TROUBLE SHOOTING AND DIAGNOSIS 408 437 8770 FORCE REQUIRED TO ACTIVATE ANTI-COLLISION STANDARD ERROR CODES The included electric height adjustable table that is not working properly can be evaluated to determine why the Upwards: 44 lbs (20 kg) table isn’t functioning. Downwards: 88 lbs (40 kg + load on desk and desk itself) ERROR DESCRIPTION... -
Page 18: Specifications
SPECIFICATIONS BASE: WORKSURFACE / DESKTOP SIZE RANGE: • Complete 2-leg, electric adjustable frame Dimensions: • Feet Options: • Width: 36.0" - 96.0" (914.4mm - 2438.4mm) - M - Medium Cantilevered • Depth: 24.0" - 30.0" (558.8mm - 914.4mm) 21.56" (548mm) Advance L-Model •... - Page 19 ACTUATOR STANDARD OVERVIEW 1.96" 1.96" (50mm) (50mm) 3.14" 3.14" (80mm) (80mm) ACTUATOR TYPE BLACK WHITE SILVER 63020610-1 63020604-1 63020630-1 66020710-1 66020704-1 66020730-1 PAGE 19 OF 22...
- Page 20 TOP BRACKET OVERVIEW Cantilevered under-frame Bi-level under-frame Centered under-frame 15.76" (400mm) 11.81" (300mm) 26.77" (680mm) R063 524/534 R063 503/513 R063 507/517 PAGE 20 OF 22...
- Page 21 STANDARD FEET OVERVIEW L - Large Cantilevered M - Medium Cantilevered T - Large Centered 27.56" (700mm) Advance L-Model 21.56" (548mm) Advance L-Model 27.56" (700mm) Advance T-Model R063 294 R063 297 R063 290 V28T - Large Centered V22 - Medium Cantilevered 27.56"...
-
Page 22: Switch Overview
SWITCH OVERVIEW UD - Up/Down Control Switch DS - Digital Readout Switch with Memory PH - Personal Health Tracker DPF1K00010006 DPF1C00-0120016 PH2-DPG1C PAGE 22 OF 22...
Need help?
Do you have a question about the S-COLLECTION SX and is the answer not in the manual?
Questions and answers