
Related Manuals for Panasonic AG-HMC71E


Summary of Contents for Panasonic AG-HMC71E
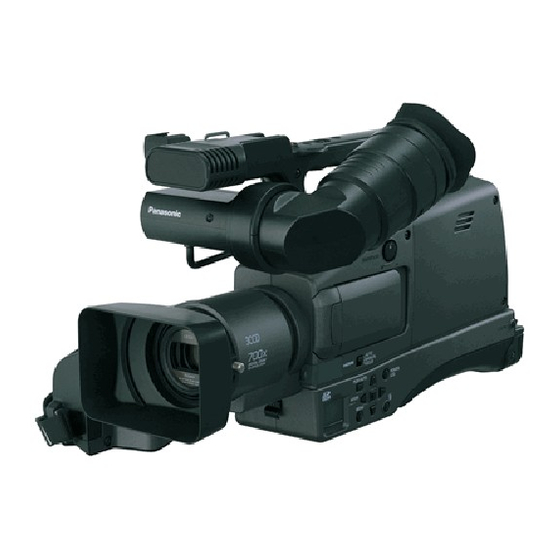
- Page 1 Operating Instructions Memory Card Camera-Recorder AG-HMC71E Model No. Before operating this product, please read the insructions carefully and save this manual for future use. ENGLISH F0308S0 -F VQT1R33(E)
-
Page 2: Read This First
If you lose the fuse cover the plug must not Fuse be used until a replacement cover is obtained. A replacement fuse cover can be purchased from your local Panasonic Dealer. indicates safety information. - Page 3 ª DO NOT REMOVE PANEL COVERS BY UNSCREWING THEM. To reduce the risk of electric shock, do not remove the covers. No user serviceable parts inside. Refer servicing to qualified service personnel. WARNING: ≥TO REDUCE THE RISK OF FIRE OR SHOCK HAZARD, DO NOT EXPOSE THIS EQUIPMENT TO RAIN OR MOISTURE.
- Page 4 CAUTION: Danger of explosion or fire if battery is mistreated. For Battery Pack ≥Replace only with same or specified type. ≥Do not disassemble or dispose of in fire. ≥Do not store in temperatures over 60 °C. ≥Do not leave the battery in an automobile exposed to direct sunlight for a long period of time with doors and windows closed.
- Page 5 To remove the battery Main Power Battery (Refer to page 30 for the detail.) Press the battery removal button. Battery removal button Remote Control Battery (Refer to page 25 for the detail.) 1While pressing the stopper A, pull out the battery holder.
- Page 6 ª Indemnity concerning recording IMPORTANT content ª Carefully observe copyright laws The manufacturer shall in no event be liable for Whatever you have recorded and created can the loss of recordings due to malfunction or be used for your personal entertainment only. defect of this unit, its accessories or recordable Under copyright laws, other materials cannot media.
- Page 7 ≥Other names of systems and products mentioned in these instructions are usually the registered trademarks or trademarks of the manufacturers who developed the system or product concerned. ≥This product is licensed under the AVC patent portfolio license for the personal and non- commercial use of a consumer to (i) encode video in compliance with the AVC Standard (“AVC Video”) and/or (ii) decode AVC Video...
-
Page 8: Table Of Contents
Contents Recording Read this first! ........2 Recording motion pictures ....44 Before using Recording modes/recordable time Features of Memory Card Camera available for the motion picture ..46 Recorder ..........14 Recording still pictures (JPEG) ..47 Accessories .......... 17 Picture Quality/Approximate Number Parts identification and handling .. - Page 9 Contents Editing Others Editing scenes........73 Menus and Indications ...... 102 Deleting scenes........73 Menu list..........102 Protecting scenes........74 Menus related to [ADVANCED] Editing still pictures......75 and [SETUP] ........104 Indications..........105 Deleting still pictures ........75 Messages..........107 Protecting still pictures ......76 Functions that cannot be used DPOF setting..........77 simultaneously........
- Page 10 Cautions for use When you use the unit in a sandy or dusty place such as a beach, do not let sand or fine dust get into the body and terminals of the unit. About this unit Also, keep the unit away from sea water. ≥Sand or dust may damage the unit.
- Page 11 Mounting the camera-recorder on a tripod In cold places such as a ski resort, the period ≥The tripod mounting hole is 5.5 mm deep. Do during which you can record pictures is not force the tripod screw beyond this shortened. depth.You can damage the camera-recorder if ≥When you travel, do not forget to bring an AC you use any screw other than 1/4-20UNC.
- Page 12 About the SD card Extremely high precision technology is employed to produce the LCD Monitor screen ≥The memory capacity indicated on the label of featuring a total of approximately 251,000 an SD card is the total of the capacity for pixels.
- Page 13 About condensation When condensation forms on the unit, the lens will cloud up and the unit may not work properly. Make every effort to ensure that condensation does not form. If it does form, take the actions described below. Causes of condensation Condensation takes place when the ambient temperature or humidity is changed as follows.
-
Page 14: Before Using
Before using Before using Features of Memory Card Camera Recorder Very clear high definition pictures This unit is an AVCHD format video camera for recording highly detailed high definition images on an SD card. You can watch images in high-resolution HD video if you connect this unit and a high definition TV and then play back the images. - Page 15 Before using Watching high definition images If you connect this unit and a high definition TV with a HDMI cable (optional) and then play back the pictures, you can enjoy watching them in high definition. A High definition TV B HDMI cable (optional) ≥If you connect this unit to a TV that does not support high definition, the images will be standard quality.
- Page 16 Before using Saving the data on the SD card When the SD card is full or to prevent the data from being deleted, use the supplied software (HD Writer Ver2.5) to copy the data on the SD card to the hard disk of the computer. A USB cable (optional) ª...
-
Page 17: Accessories
Before using Accessories Check the accessories before using this unit. ≥Product numbers correct as of January 2008 Remote control Battery pack Button-type battery VW-VBG260 CR2025 AC adaptor AC cable VW-AD20 AUnited Kingdom BAreas other than United Kingdom DC cable CD-ROM k 2 ≥Operating instructions ≥HD Writer 2.5E for HDC Shoulder belt... -
Page 18: Parts Identification And Handling
Before using Parts identification and handling 1) Recording lamp (front) (l 104) 2) Lens hood (l 23) 3) Lens (LEICA DICOMAR) 4) White balance sensor/remote control sensor (l 26, 64) 5) HANDLE ZOOM Switch [HANDLE ZOOM] (l 52) 6) Lock ring (l 24) 7) Grip zoom button [W/T] (l 52) 8) External microphone input connector (l 58) 9) Photoshot button (l 47) - Page 19 Before using 11) Lens hood screw (l 23) 28) Cursor button (l 35) 12) LCD monitor (l 24) 13) MONITOR LEVEL Knob [MONITOR LEVEL] (l 68) 14) Speaker (l 68) 15) Reset button [RESET] (l 115) 16) AUDIO LEVEL Knob[AUDIO LEVEL] (l 60) 17) AUDIO SELECT Switch [AUDIO SELECT] (l 60)
- Page 20 Before using 31 32 29) Viewfinder (l 42) 30) Eye cup (l 17) 31) Component Connectors (Y, P /BNC) (l 82) 32) Video Output Connector (BNC) (l 84) 33) DC input terminal [DC IN 7.3V] (l 32) 34) Battery Removal Button (l 30) 35) Headphone Connector [PHONE] (Mini jack) (l 68) 36) Battery Installation Slot (l 30) 37) USB terminal [ ] (l 86, 96)
- Page 21 Before using 44) Internal microphones (l 58) 45) Accessory shoe ≥You can fit a microphone (optional), etc. 46) Handle Recording Start/Stop Button (l 44) 47) Handle Zoom Button [W/T] (l 52) 48) Visibility Adjustment Lever (l 43) 49) Status indicator (l 33) 50) Recording Start/Stop Button (l 44) 51) Mode dial (l 33)
- Page 22 Before using Using grip belt Shoulder belt installation hole Adjust the length of the grip belt so that it fits your This is for installing the shoulder belt and hand, and hold it properly. carrying the camera on your neck or shoulder. Open the belt cover and loosen Thread the belt through the the belt.
- Page 23 Before using Tripod receptacle Lens Hood Piece ª Installing the lens hood The tripod receptacle is a hole used to mount a tripod for the unit. (For details on mounting the Tighten (loosen) the lens hood screw A to install tripod, refer to the operating instructions for the (remove) the lens hood.
-
Page 24: Using The Lcd Monitor
Before using Using the LCD monitor Using the finder You can record the image while viewing it on the Adjust the angle. LCD monitor. Loosen the lock ring. Place your finger on LCD monitor open latch and pull the LCD Adjust the horizontal position. -
Page 25: Using The Remote Control
Dispose of used batteries buttons on the unit. according to the manufacturer’s instructions. Replace battery with Panasonic PART NO. CR2025 only. Use of another battery may present a risk of fire or explosion. Caution: Battery may explode if mistreated. - Page 26 Before using ª Remote control usable range The distance between the remote control and the unit’s remote control sensor A: Within approx. Angle: Approximately 10° upward, approximately 15° downward, approximately 15° leftward, or approximately 75° rightward 10° 15° 15° 75°...
-
Page 27: Cards That You Can Use With This Unit
We recommend using SD Memory cards and SDHC Memory cards conforming to Class 2 or higher of the SD Speed Class Rating or the following SD cards made by Panasonic for motion picture recording. ≥Product numbers correct as of January 2008... - Page 28 SD / SDHC memory Rating Class 2) cards usable in this unit. This indicates a Class 2 rating in the high speed https://eww.pavc.panasonic.co.jp/pro-av/ standards (SD Speed Class) stipulated by the ≥For the purposes of these operating SD Card Association for high speed writing...
-
Page 29: Setup
Remove the DC cable from the AC adaptor. battery or AC adaptor. Contact your ≥The Panasonic battery that can be used dealer. with this unit are VW-VBG260 and VW-VBG6 (product numbers correct as of January ≥Battery charging time (l 31) -
Page 30: Inserting/Removing The Battery
Setup Inserting/removing the battery Removing the battery Press the battery removal button. Inserting the battery Mount the battery from the top, and insert it until the audible click. ≥The lock can be released and the battery removed. ≥Be sure to set the mode dial to OFF and check that the status indicator is off before removing the battery. -
Page 31: Charging Time And Recordable Time
≥In order to safely use the unit, we recommend that you use genuine Panasonic batteries which have been subject to our quality control process. -
Page 32: Connecting To The Ac Outlet
≥Even if the battery is inserted in this unit, it The remaining battery capacity is displayed in will not charge. minutes when using the Panasonic battery that you can use for this unit. It may take time to Connect the AC cable to the AC display the remaining battery capacity. -
Page 33: Selecting A Mode (Turning The Unit On/Off)
Setup Selecting a mode How to turn off the power (Turning the unit on/off) Set the mode dial to OFF. Rotate the mode dial to switch to recording, playback, PC connection or power OFF. ≥Rotate the mode dial slowly. How to turn on the power While pressing the lock release button, set the mode dial to The status indicator goes off and the power turns... -
Page 34: Inserting/Removing An Sd Card
Setup Inserting/removing an SD ª Concerning the SD card card ≥Do not touch the terminals on the back of the SD card. Be sure to set the mode dial to OFF before ≥Electrical noise, static electricity or the failure of inserting/removing an SD card. -
Page 35: How To Use The Cursor Button
Setup How to use the cursor button Operations during recording This unit has a cursor button A for selecting Rotate the mode dial to select ¬ functions, performing operations etc. so it is easy to operate this unit with one hand. Press the center of the cursor button, and icons will be displayed on the screen. - Page 36 Setup Operations during playback Rotate the mode dial to select ¬ Select the scene for playback using the cursor button and press the center of the button to make the selection. ≥The selected scene is played back on the full screen. ≥The operation icon is automatically displayed on the screen.
- Page 37 Setup About the operation icons displayed in each mode Recording mode 3/3 3/3 2/3 2/3 1/3 1/3 1/3 Cursor Icon Function Page button Backlight compensation — Fade Set the AUTO/MANUAL/FOCUS switch to MANUAL. White balance In manual mode Iris or gain value [MANUAL] Shutter speed Set the AUTO/MANUAL/FOCUS switch to FOCUS.
- Page 38 Setup Playback mode ( In still picture playback) Cursor Icon Function Page button Slide show start/pause Stop playback and show thumbnails ∫ Playback previous picture (during pause) Playback next picture (during pause) ª About auto mode Set the AUTO/MANUAL/FOCUS switch to AUTO, and colour balance (white balance) and focusing will be adjusted automatically.
-
Page 39: Using The Menu Screen
Setup Using the menu screen Select the Sub Menu by pressing the up or down button of the Refer to “Menu list” (l 102) for information about cursor button. the menus. While stopped, press the MENU button. C Current settings on menus ≥The menu displayed differs depending on Press the right button of the the position of the mode dial. - Page 40 Setup To get back to the previous screen Operating with remote control Press the left button of the cursor button. The menu screen transition is the same as when the buttons on the main unit are used. Press the MENU button. To exit the menu screen MENU Press the MENU button.
-
Page 41: Setting Date And Time
Setup Setting date and time ≥The clock function starts at [00] seconds when the cursor button is pressed. When the unit is turned on for the first time, a ≥After pressing the MENU button to finish message asking you to set the date and time will the setting, check the date and time appear. -
Page 42: Adjusting Lcd Monitor/Finder
Setup 24 hours and the battery will save the date and [LCD SET] items: time for approx. 6 months. (The battery is still [BRIGHTNESS]: Brightness of the LCD monitor being recharged even if the mode dial is set to [COLOUR]: Colour level of the LCD monitor OFF.) [EVF SET] items:... - Page 43 Setup To adjust the viewing conditions Viewfinder maintenance of images in the finder If the inside of the viewfinder is stained with dust, then remove the eye cup holder and remove the Pull the finder to pull out the dust with an air blower, etc. visibility adjustment lever A inside, ª...
-
Page 44: Recording
Recording Recording To end the recording Press the recording start/stop button again to Recording motion pictures pause recording. Record motion pictures on an SD card. ≥Use an SD card that can be used for motion picture recording. (l 27) ≥This unit records high definition images that are compatible with the 16:9 aspect ratio of a wide-screen TV. - Page 45 At this time, the following message appears. When motion pictures are to be recorded, use a Panasonic SD card or another SD card which can be used to record motion pictures. (l 27) A Recording mode...
-
Page 46: Recording Modes/Recordable Time Available For The Motion Picture
[VIDEO] [REC MODE] desired item and press the center of the cursor button. Approximate recording times of motion pictures per SD card made by Panasonic SD card memory Motion pictures can be recorded with the highest picture quality. 256 MB... -
Page 47: Recording Still Pictures (Jpeg)
Recording Recording still pictures (JPEG) Record the still picture on an SD card. ≥This number of recording pixels for still pictures is compatible with the 16:9 aspect ratio of a A Focus indication wide-screen TV. They are recorded at ± (The white lamp flashes.): 1920k1080. - Page 48 Recording ª About the screen indications To record still pictures clearly ≥When zooming in on the subject with a only when the PHOTO SHOT magnification of 4k or higher, it is difficult to button is pressed halfway reduce the slight shaking from holding this unit by hand.
- Page 49 Recording ª About the focus indication Switching the shutter effect on/off ≥The focus indication does not appear in manual focus mode. You can add a shutter sound when recording still ≥Focus on a subject manually when it is not pictures. easily focused automatically.
- Page 50 Recording About simultaneous recording (recording still pictures while recording motion pictures) You can record still pictures even while recording motion pictures. While recording motion pictures, press the PHOTO SHOT button fully (press to the bottom) to take the picture. ≥This function is not activated if the PHOTO SHOT button is pressed halfway.
-
Page 51: Picture Quality/Approximate Number Of Recordable Pictures On An Sd Card
Recording Picture Quality/Approximate Approximate Number of Number of Recordable Recordable Pictures on an SD Pictures on an SD Card Card ª Picture quality and number of Picture quality recordable pictures Selecting the picture quality. Press the MENU button, then select Picture size (1920t1080) M... -
Page 52: Various Recording Functions
Recording Various recording functions Operate the handle zoom button. Zoom in/out function You can zoom in or out using the grip or handle zoom button. You can zoom in up to 12k optically. Rotate the mode dial to select ¬ Operate with the grip zoom button. -
Page 53: Recording Yourself
Recording Recording yourself Digital zoom function If the zoom magnification exceeds 12k, then the When the LCD monitor is turned to the lens side, digital zoom function will be activated. The the right and left of the images displayed on the maximum magnification provided by the digital LCD monitor are reversed as in a mirror. -
Page 54: Backlight Compensation Function
Recording Backlight compensation Fade in/fade out function function Fade in: The image and audio gradually This is for preventing a backlit subject appear. from being darkened. Fade out: The image and audio gradually disappear. Use this function when the light is emanating from behind the subject and the subject appears Rotate the mode dial to select ¬... -
Page 55: Image Stabilizer Function
Recording Press the recording start/stop Image stabilizer function button. This is for reducing image shakes Pause recording. (Fade out) (jitter) during recording. Reduces the image shaking (jitter) due to hand movement when recording. Rotate the mode dial to select ¬ Press the MENU button, then select [BASIC] [O.I.S.]... -
Page 56: Guide Line Function
Recording Guide line function Zebra display This is for viewing the slope and the This is for displaying the parts that balance of the image while recording are too bright. or playing back. Parts where white saturation (colour saturation) is likely to occur (extremely brightly lit or shiny It is possible to confirm whether the displayed parts) are displayed with diagonal lines (zebra images are flat or not while recording or during... -
Page 57: Colour Bar
Recording Colour bar This is for displaying a colour bar to check the colour tone. This unit displays a 7 colour bar which is useful for adjusting the picture quality of the TV or the external monitor. Rotate the mode dial to select ¬... -
Page 58: Input Audio Selection
Recording Input Audio Selection The camera will record two-channel audio. Select from the built-in microphone, an external microphone, or any microphones or audio devices connected to the XLR CH1/CH2 terminal to record audio on the respective channels. (Refer to the following table.) Setting/State Recording channel AUDIO IN... -
Page 59: Use The External Microphone Or Audio Devices Connected To The Xlr Terminal
Recording the sensitivity increases, which may Use the external microphone introduce noise into the recording. or audio devices connected to Set the input level select switch the XLR terminal. to +48V to use a phantom Connect the external microphone microphone (a microphone that or an audio device to the XLR requires the +48V power supply). -
Page 60: Audio Recording Level
Recording Adjust the recording level with Audio Recording Level the AUDIO LEVEL knob. ≥Adjust the audio recording level with the The recording level of audio signals can be AUDIO LEVEL knob according to the audio adjusted when recording. level meter on the bottom of the LCD monitor or viewfinder. -
Page 61: Manual Recording Functions
Recording Manual recording functions ] Surf & snow To record images in bright places such as ski slopes and beaches Scene mode To cancel the scene mode function This is for recording in various Press the MENU button, then select [BASIC] # situations. -
Page 62: Manual Focus Adjustment
Recording ≥The center of the screen is not enlarged Manual focus adjustment when [MF ASSIST] is [OFF]. To restore to the automatic adjustment If auto focusing is difficult due to the conditions, Press the AUTO/MANUAL/FOCUS switch down then manual focusing is available. again to the FOCUS position. -
Page 63: White Balance
Recording Manual adjustment mode White balance ≥Mercury-vapor lamps, sodium lamps, This is for recording in natural some fluorescent lights colours. ≥Lights used for wedding receptions at hotels, stage spotlights in theatres The automatic white balance function may not ≥Sunrise, sunset etc. reproduce natural colours depending on the scenes or lighting conditions. -
Page 64: Manual Shutter Speed/Aperture Adjustment
Recording ª About the white balance sensor Manual shutter speed/aperture adjustment Shutter Speed: Adjust it when recording fast-moving subjects. Aperture: Adjust it when the screen is too bright or too dark. Rotate the mode dial to select ¬ Set the AUTO/MANUAL/FOCUS switch to MANUAL. - Page 65 Recording B Iris/Gain value: CLOSE # (F16 to F2.0) # OPEN # (0dB to 18dB) ≥Value closer to [CLOSE] darken the image. ≥Value closer to [18dB] brighten the image. ≥When the iris value is adjusted to brighter than [OPEN], it changes to the gain value. To restore to automatic adjustment Set the AUTO/MANUAL/FOCUS switch to AUTO.
-
Page 66: Playback
Playback Playback Select the scene to be played back. Motion picture playback Play back motion pictures. Rotate the mode dial to select B Previous page C Next page D Scene number The selected scene will be encircled by a yellow frame. ≥If 9 or more scenes have been recorded, the next (or previous) page can be displayed by pushing the left and right... - Page 67 Playback * Press the 6 or 5 button on the remote Skip playback (to the start of a control. scene) ª About motion picture (Operation is possible with the remote compatibility control only.) ≥This unit is based on the AVCHD format. ≥The video signal that can be played back on Press the button on the...
- Page 68 Playback Frame-by-frame playback To adjust the volume The motion picture is advanced one frame at a The volume of the speaker and the headphone time. when playback is adjusted. Move the cursor button up during Move the MONITOR LEVEL knob to playback to pause the playback.
-
Page 69: Playing Back Motion Pictures By Date
Playback To return to playing back all the scenes Playing back motion pictures Press the MENU button, then select by date [PLAY SETUP] # [PLAY MODE] # [VIEW ALL] and press the center of the cursor button. Recorded scenes are grouped by date on this ≥When [PLAY MODE] is set to [VIEW ALL], all unit. -
Page 70: Repeat Playback
Playback Repeat playback Resuming the previous playback Playback of the first scene starts after playback of the last scene finishes. If playback of a scene was stopped halfway, the playback can be resumed from where it was Press the MENU button, then select stopped. -
Page 71: Still Picture (Jpeg) Playback
Playback Still picture (JPEG) playback ≥If 9 or more files have been recorded, the next (or previous) page can be displayed Play back the still pictures recorded on the card. by moving the cursor button left and right or moving the cursor button down, selecting Rotate the mode dial to select by moving the cursor button left and right and then pressing the... - Page 72 Playback ª About still picture compatibility ≥This unit is compliant with the unified standard DCF (Design rule for Camera File system) established by JEITA (Japan Electronics and Information Technology Industries Association). ≥The file format supported by this unit is JPEG. (Not all JPEG formatted files will be played back.) ≥If a non-standard file is played back, the folder/...
-
Page 73: Editing Scenes
Editing Editing Deleting multiple scenes from the thumbnail display Editing scenes Rotate the mode dial to select ¬ and then select the (motion Deleting scenes picture playback) tab. This is for deleting scenes recorded on SD cards. Press the button while the thumbnail view screen is The deleted scenes cannot be restored. -
Page 74: Protecting Scenes
Editing The selected scene is encircled by a red Protecting scenes frame. ≥When the cursor button is pressed again, This is for preventing scenes from the selected scene will be canceled. being deleted by mistake. ≥Up to 50 scenes can be set in succession. Scenes can be protected so that they are not (Only when [SELECT] is selected in step 2) deleted by mistake. -
Page 75: Editing Still Pictures
Editing Editing still pictures Deleting multiple files from the thumbnail display Deleting still pictures Rotate the mode dial to select ¬ This is for deleting still picture files and then select the (still picture recorded on SD cards. playback) tab. The deleted files cannot be restored. -
Page 76: Protecting Still Pictures
Editing (Only when [SELECT] is selected in step 2) Protecting still pictures Press the button. This is for preventing still picture files When the confirmation message from being deleted by mistake. appears, select [YES], then press Files recorded on an SD card can be protected the center of the cursor button. -
Page 77: Dpof Setting
Editing To complete the settings DPOF setting Press the MENU button. This is for writing the printing data on an SD card. To cancel all DPOF settings Press the MENU button, then select You can write the data of the still pictures to be [PLAY SETUP] # [DPOF SET] # printed and the number of prints (DPOF data) [CANCEL ALL] and press the center of the... -
Page 78: Card Management
Card management Card management Formatting Formatting an SD card This is for initializing cards. Please be aware that if an SD card is formatted, then all the data recorded on the card will be erased. Store important data on a computer etc. -
Page 79: With Other Products
With other products With other products ª To display the on-screen information on the TV With a TV The information displayed on the screen (operation icon and time code etc.) can be Playback on TV displayed on the TV. The motion pictures and still pictures recorded Press the EXT DISPLAY button on the remote on this unit can be played back on a TV screen. - Page 80 With other products 1 Connecting with a HDMI cable (optional) What is HDMI? HDMI is the next-generation interface for digital devices. When this unit is connected to a HDMI compatible device, the image and audio can be output with a digital signal. If you connect this unit and a HDMI compatible high definition TV and then play back the recorded high definition images (l 14), you can enjoy them in high resolution with high quality sound.
- Page 81 With other products ª About the settings when 1080i connecting with HDMI This is an interlace scan method which scans When this unit is connected to another device 1080 scan lines to display a high definition with a HDMI cable, the output setting on this unit image.
- Page 82 With other products 2Connecting with a component video cable (optional) and an audio cable (optional) Connect the unit and TV with a component video cable (optional) and an audio cable (optional). COMPONENT VIDEO IN AUDIO IN A Component video cable (optional) B Audio cable (optional) ≥Connect to terminals of the same colour.
- Page 83 With other products ª If the image or audio from this unit is not output on the TV ≥Check that the plugs are inserted as far as they ≥Check the connected terminal. ≥Check the TV’s input setting (input switch). (For more information, please read the operating instructions for the TV.) ≥If the images are not displayed correctly on a wide-screen TV, adjust the aspect setting on...
- Page 84 With other products 3 Connecting with a video cable (optional) and an audio cable (optional) Connect the unit and TV with a video cable (optional) and an audio cable (optional). VIDEO VIDEO IN AUDIO IN A Video cable (optional) B Audio cable (optional) Set the mode dial to to turn on the power.
-
Page 85: Dubbing Images Onto A Connected Dvd Recorder Or Video Device
With other products Dubbing images onto a connected DVD recorder or video device This is for dubbing images recorded on this unit onto a DVD recorder, video device etc. ≥Images are dubbed in standard quality. ≥Use the AC adaptor to free you from worrying about the battery running down. Connect this unit and a video device. -
Page 86: With A Printer (Pictbridge)
With other products With a printer (PictBridge) Move the cursor button up or down to select the desired To print pictures by directly connecting this unit number of prints, then press the to the printer, use a printer compatible with center of the cursor button. - Page 87 With other products Select the layout setting on When you stop printing halfway Move the cursor button down. [PAGE LAYOUT]. A confirmation message appears. If [YES] is selected, the number of prints set is canceled and the screen returns to step 2. If [NO] is selected, all the settings are kept and the screen returns to step 3.
-
Page 88: With A Computer
With a computer With a computer Before using with a computer What you can do with a computer Data type Can do Software used [Copy to PC] [Write data to media]* [Copy between media]* Motion picture [Play back on a PC] HD Writer Ver2.5 [Easy editing] [Convert into the MPEG-2 format]... -
Page 89: Contents On Provided Cd-Rom ("Hd Writer 2.5E For Hdc")
With a computer Contents on provided CD-ROM (“HD Writer 2.5E for HDC”) The following software applications are contained on the provided CD-ROM (“HD Writer 2.5E for HDC”). ª HD Writer Ver2.5 You can acquire data of motion pictures and still pictures on an SD card to the hard disk of the computer, easily edit (split, merge, delete) the motion pictures, then write the data to an SD card or disc. -
Page 90: End User License Agreement
With a computer reverse engineering, decompiling, or End User License Agreement disassembly of the Software. Before opening the CD-ROM (“HD Writer 2.5E for Article 6 Limitation of Liability HDC”) package, please read the following. The Software is provided “AS-IS” without warranty of any kind, either expressed or implied, You (“Licensee”) are granted a license for the including, but not limited to, warranties of... -
Page 91: Operating Environment
With a computer Operating environment ≥Even if the system requirements mentioned in these operating instructions are fulfilled, some PCs cannot be used. ≥A CD-ROM drive is necessary to install the supplied software applications. (A compatible DVD writer drive and media are necessary for writing to a DVD.) ≥Operation is not guaranteed in the following cases. - Page 92 With a computer ª Operating environment for HD Writer Ver2.5 (continued) Necessary software Windows Vista: DirectX 10 Windows XP/2000: DirectX 9.0c ≥If you install the software on a PC that is not compatible with DirectX 9.0c, the PC may not work properly. If you are unsure whether or not your PC is compatible, contact the maker of your PC.
- Page 93 With a computer ª Operating environment for the card reader function (mass storage) IBM PC/AT compatible PC Microsoft Windows 2000 Professional Service Pack 4 Microsoft Windows XP Home Edition Microsoft Windows XP Professional Microsoft Windows Vista Home Basic Microsoft Windows Vista Home Premium Microsoft Windows Vista Ultimate Microsoft Windows Vista Business Microsoft Windows Vista Enterprise...
-
Page 94: Installation
With a computer Installation Read the [End User License When installing the software, log on to your PC Agreement], then place a check as the Administrator (or with a user name with beside [I accept the terms of the equivalent authorization) or with the user name license agreement] if you agree for a standard user account. -
Page 95: Reading The Operating Instructions Of The Software Applications
Adobe Acrobat Reader 5.0, Adobe Reader 7.0 ([Change or Remove] or [Add/ or later must be installed. Remove]) or [Uninstall]. Select [start] [All Programs (Programs)] [Panasonic] [HD Writer 2.5E] [Operating Instructions]. ≥Proceed with the uninstallation by following Operating Instructions the on-screen instructions. -
Page 96: Connection And Recognition
With a computer Connection and recognition Connect this unit and a computer. Connection and recognition procedures After the software applications are installed, this unit must be connected to the computer and be correctly recognized by the computer. ≥Connect after installing the software applications. -
Page 97: About The Computer Display
With a computer ª Copying still pictures recorded About the computer display on the SD card to a computer When the unit is connected to a computer, it is Card reader function (mass storage) recognized as an external drive. When an SD card with recorded data on it is [Removable Disk] is displayed in [My Computer]. -
Page 98: To Disconnect Usb Cable Safely
With a computer Click the [Hardware] tab, then To disconnect USB cable safely click [Device Manager]. Double click the icon in task tray displayed on the computer. ≥Hardware disconnect dialogue appears. ≥Depending on your computer’s settings, this icon may not be displayed. Select [USB Mass Storage Device] and click [Stop]. -
Page 99: Using Hd Writer Ver2.5
(On the computer) Select [start] the power. [All Programs (Programs)] [Panasonic] [HD Writer 2.5E] [HD Writer]. HD Writer 2.5E ≥The HD Writer Ver2.5 introductory screen is displayed. If [OK] is clicked, the software will start. - Page 100 With a computer Click the [Start copying] button. Click on the top right and select the folder with the image data you want to copy to the SD card. 080529_1 ≥A confirmation message appears. Click [Yes] and copying starts. ª Writing back to an SD card ≥Insert an SD card in this unit and format the Select [Start writing] to copy the card.
-
Page 101: If Using Macintosh
With a computer If using Macintosh ≥Even if the system requirements mentioned in these operating instructions are fulfilled, some personal computers cannot be used. ≥Apple, Mac OS is either registered trademarks or trademarks of Apple Computer, Inc. in the United States and/or other countries. -
Page 102: Others
Others Others ª [ADVANCED] [REC LAMP] (l 104) Menus and Indications [ZEBRA] (l 56) [COLOUR BARS] (l 57) [MF ASSIST] (l 62) Menu list ª [SETUP] Recording menus [FORMAT CARD] (l 78) [DISPLAY] (l 104) [DATE/TIME] (l 41) [DATE FORMAT] (l 41) [POWER SAVE] (l 104) [BEEP SOUND] (l 104) [LCD SET] (l 42) - Page 103 Others Playback menus Playback menus (When video playback tab is (When the still picture playback selected) tab is selected) ª [PLAY SETUP] ª [PLAY SETUP] [PLAY MODE] (l 69) [SCENE PROTECT] (l 76) [REPEAT PLAY] (l 70) [DPOF SET] (l 77) [RESUME PLAY] (l 70) ª...
-
Page 104: Menus Related To [Advanced] And [Setup]
Others ≥In the following cases, the unit may not turn off Menus related to [ADVANCED] even when you set this to [5 MINUTES]. and [SETUP] – When using the AC adaptor – When connecting the unit to a computer or ≥Underlined items are the initial shipping printer via the USB cable condition. -
Page 105: Indications
Others Fade (White), Fade (Black) Indications Microphone level ª Recording indications Zebra display Motion picture recording Motion picture recording mode 30min 0h00m00s Sports mode R30min 10 10 10 10 Portrait mode Low light mode 1/100 OPEN Spotlight mode 15.12. - Page 106 Others ª Playback indications Number of recording pixels for M Motion picture playback still pictures 1920k1080 The picture size is not displayed for still pictures recorded with other products that have different picture sizes from the sizes shown above. Still picture playback ª...
-
Page 107: Messages
You are attempting to connect an AC adaptor not compatible with this unit. Use the supplied AC adaptor. (l 32) If using a Panasonic battery compatible with this unit (l 31), remove the battery and then insert it again. If the message appears even after repeating this several times, this unit needs repair. - Page 108 Others CANNOT PROTECT. Scenes on SD cards for which the top menu has been created with HD Writer Ver2.5 cannot be protected. PUSH THE RESET An irregularity in the unit has been detected. Press the RESET SWITCH. button to restart the unit. (l 115) CANNOT SET.
- Page 109 Others About recovery When the SD card is accessed, you try to playback a scene or faulty control information is read, one of the messages below may be displayed. (Depending on the error, this may take time.) CONTROL DATA ERROR HAS BEEN DETECTED.
-
Page 110: Functions That Cannot Be Used Simultaneously
Others Functions that cannot be used simultaneously Some functions in this unit are disabled or cannot be selected due to the unit’s specifications. The table below shows examples of functions restricted by various conditions. Functions Conditions which disable the functions Backlight compensation ≥When the iris/gain is set Shutter effect... -
Page 111: Troubleshooting
Others Troubleshooting ª Unit operations Problem Check points This unit cannot be ≥Is the battery fully charged? # Charge it with the AC adaptor. (l 29) turned on. ≥The battery protection circuit may have operated. Attach the battery to the AC adaptor for 5 to 10 seconds. If the unit still cannot be used, the battery is faulty. - Page 112 Others Problem Check points This unit cannot be ≥Press the RESET button. (l 115) If normal conditions are not operated though restored yet, remove the battery or AC adaptor, wait about 1 minute powered up. and then reconnect the battery or AC adaptor. Then about 1 minute later, turn on the power again.
- Page 113 Others Problem Check points Auto focus function does ≥Is manual focus mode selected? # Set the AUTO/MANUAL/FOCUS switch to AUTO, or press the not work. PUSH AUTO button. ≥Are you trying to record a scene which is hard to bring into focus in auto focus mode? # There are some recording subjects and surroundings for which the auto focus does not operate correctly.
- Page 114 Others Problem Check points Scenes cannot be ≥Is the scene on the SD card protected? # Protected scenes cannot be deleted. Release the protect setting. deleted. (l 74) ≥Scene which cannot be displayed as thumbnails (the thumbnails are displayed as ) cannot be deleted.
- Page 115 Others Problem Check points “PUSH THE RESET ≥The unit detects an abnormal condition. Press the RESET button. SWITCH.” is displayed. The unit restarts. ≥If you do not press the RESET button, the power to this unit is turned off automatically about 1 minute later. ≥Even after you press the RESET button, the indication may still appear repeatedly.
- Page 116 Others ª For switching scenes When multiple scenes are played back successively, playback may pause for a period of several frames or for several seconds when switching scenes. ≥Whether successive scenes play back smoothly or not depends on the player. On some players, scenes may pause for a moment even if the following conditions are not applicable.
- Page 117 Others ≥When a scene is deleted Example 1: To delete a scene in the middle SCENE1 SCENE2 SCENE3 SCENE4 Delete SCENE1 SCENE2 SCENE4 Images pause for several seconds where a scene is deleted. Switched scenes without deleting a scene will play back smoothly.
-
Page 118: Explanation Of Terms
Others Explanation of terms Outside of the effective range of automatic white balance adjustment, the image will become Automatic white balance reddish or bluish. Even within the effective range of automatic white balance adjustment, the White balance adjustment recognizes the colour automatic white balance adjustment may not of light and adjusts so the white colour will function properly if there is more than one light... - Page 119 Others Recording a subject behind dirty or dusty window The subject behind the window will not be focused because the focus is on the dirty window. Similarly, when recording something on the opposite side of a road with heavy traffic, a vehicle that happens to pass by may be brought into focus.
-
Page 120: Specifications
Others Specifications Memory Card Camera-Recorder Power source: DC 7.3 V (When using AC adaptor) DC 7.2 V (When using battery) Power consumption: Recording: 8.5 W indicates safety information. Signal system 1080/50i Recording format AVCHD format compliant Image sensor 1/4-inch 3CCD image sensor Total: 560 Kk3 Effective pixels: Motion picture: 520 Kk3... - Page 121 Others Component terminal 1.0 Vp-p, 75 h output level : 0.7 Vp-p, 75 h : 0.7 Vp-p, 75 h HDMI terminal output HDMI [1125i (1080i)/625p (576p)] level Audio output level (Line) 316 mV, 600 h External microphone Mic sensitivity j70 dBV input (3.5 mm stereo mini jack) XLR input...
- Page 122 Others Still pictures Recording media SD Memory Card: 8 MB, 16 MB, 32 MB, 64 MB, 128 MB, 256 MB, 512 MB, 1 GB, 2 GB (FAT12 and FAT16 system corresponding) SDHC Memory Card: 4 GB, 8 GB, 16 GB (FAT32 system corresponding) Compression JPEG (Design rule for Camera File system, based on Exif 2.2 standard), DPOF corresponding...
-
Page 123: Index
Others Index ª Others Image stabilizer ..........55 Initial setting ..........104 ª Iris ..............65 AC adaptor .........11, 29, 32 Aperture ............64 ª Auto focus ............118 LCD monitor ........12, 24, 42 Automatic white balance ......63, 118 ª AVCHD ............14 Manual focus .......... - Page 124 Others ª Scene mode ...........61 SD Memory Card ...........27 SD Speed Class ..........28 SDHC Memory Card ........27 Self-recording ..........53 Shutter effect ..........49 Shutter speed ..........64 Simultaneous recording .........50 Skip playback ..........67 Slide show .............71 Slow-motion playback ........67 Still picture (JPEG) playback ......71 Still picture (JPEG) recording ......47 Still picture compatibility ........72 ª...
- Page 125 MEMO...
- Page 126 Matsushita Electric Industrial Co., Ltd. Web Site: http://panasonic.net Professional & Broadcast IT Systems Business Unit Europe Panasonic AVC Systems Europe a Division of Panasonic Marketing Europe GmbH Hagenauer Str. 43, 65203 Wiesbaden-Biebrich Deutschland Tel: 49-611-235-481 © 2008 Matsushita Electric Industrial Co., Ltd. All rights reserved.
Need help?
Do you have a question about the AG-HMC71E and is the answer not in the manual?
Questions and answers