Advertisement
ASSEMBLY INSTRUCTIONS
When assembling your cat tree, place on a flat, stable surface.
Assemble ver�cally, star�ng on the base.
Loose components will result in damage to the cat tree. Ensure
all screws are secure and �ghten them again a�er two days.
Check that screws are secure once a month to ensure
product's stability.
JOYO CAT TREE SPECIFICATIONS
Overall Dimensions: 18.9" L x 18.9" W x 58" H (48 x 48 x 147 cm)
Overall Product Weight: 31.96 lbs. (14.5 kg)
Assembly Required: All Hardware and Instruc�ons Provided
Materials:
Frame Structure: Material: MDF Board
Exterior Cover: Plush Fabric, Natural Sisal Rope
NEED HELP?
* Any ques�on about our product?
Please contact us by the email,
we will deal with your ques�on
within 24 hours!
support@oudort.com Or scan the QR code for help!
PARTS LIST
48x48cm*1
48x48cm*1
48x20cm*1
3-1
40x40cm*1
φ30x5cm*1
35x30x25cm*1
7x42cm*1
*An extra spare is provided for each kind of screw
( M8*20, M8*40, M8*80)
58inch
18.9inch
18.9inch
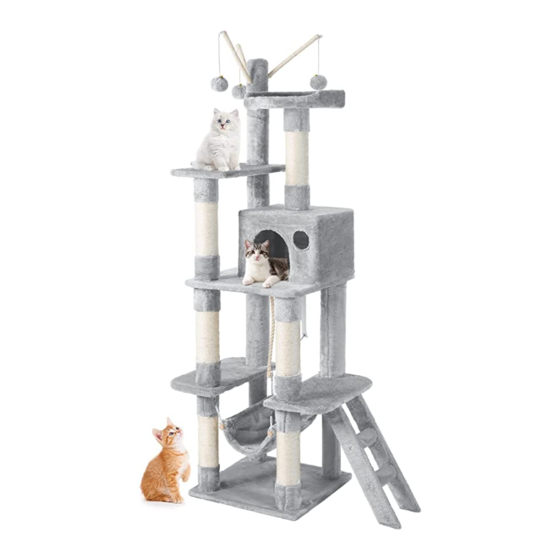
COMPLETED CAT TREE
48x20cm*1
3-2
40cm*2
----- 1 -----
INSTALLATION STEPS
STEP1
Top Perch
Diameter: 11.81"
Condo Dimension:
13.78" L x 11.81" W x 9.84" H
STEP3
B
ANTI-TOPPING FITTINGS
ANTI-TOPPLING
FITTINGS
HOW TO USE THE ANTI-TOPPLING FITTINGS?
• Step1: Mark the intended loca�on of the plas�c anchor with a
pencil.
• Step2: Please drill a hole in the wall for each anchor. (When using
a drill, select a bit with a diameter that is slightly smaller than the
diameter of the wall anchor for a �ght fit.)
• Step3: Tap it gently with a hammer un�l the anchor is flush with
the wall surface.
• Step4: Place a screw in the center of the wall anchor.
• Step5: Tighten the screw in the plas�c wall anchor with a screw-
driver.
STEP2
STEP4
f
f
f
f
D
6
A
a
A
f
A
A
b
f
2
f
f
f
f
CAT HOUSE
• Read and follow all warnings and instruc�ons in this
manual
• This item is not suitable for children. Keep children
away to avoid accidents.
• To avoid damage, do NOT assemble horizontally on
the floor and li� to an upright posi�on. Assemble
product ver�cally as shown in instruc�ons.
• For addi�onal stability, we recommend placing
product against wall or corner.
• Inspect product regularly and re-�ghten screws as
necessary.
• Always supervise your pet when using this item.
• Inspect product for damage and discard if
• As with most furniture, do not place in direct
sunlight and/or
damp area-may cause discolora�on and poten�al
rust on metal surfaces
• It is normal for sisal posts to discolor over �me. Not
recommended for outdoor use.
• Spot clean only with gentle liquid detergent mixed
with water.
• Keep all tools and instruc�ons in a safe place for
future reference.
----- 2 -----
Hole for
installing the ladder
f
f
f
f
10 10
5
E
C
11
b
f
f
avoid personal injury to pet or property damage.
any part becomes
worn, loose or detached.
Advertisement
Table of Contents

Summary of Contents for Joy CAT TREE
- Page 1 ASSEMBLY INSTRUCTIONS INSTALLATION STEPS STEP1 STEP2 When assembling your cat tree, place on a flat, stable surface. Assemble ver�cally, star�ng on the base. Loose components will result in damage to the cat tree. Ensure Top Perch all screws are secure and �ghten them again a�er two days.
- Page 2 Step 9: Install Plate "②"+ the Hanging Rope Scratching Post "D" on the correct posi�on, Plate " 2 ". " 12 " onto to the Posts with two Screw "f" as shown. and two Screws "b". CAT TREE USER MANUAL M8x20*1 35cm*1 M8x40*8 22cm*4 35cm*1 35x30x25cm*1 Step 10: Install one Scratching Post "B"...
Need help?
Do you have a question about the CAT TREE and is the answer not in the manual?
Questions and answers