Table of Contents
Advertisement
Quick Links
INSTRUCTION MANUAL
Styles and colours may vary.
For after sales service, replacement parts or
general enquiries please contact:
Web: www.electricrideon.com.au
Toll Free Service Phone: 1800 224 094
Email: enquiries@hunterproducts.com.au
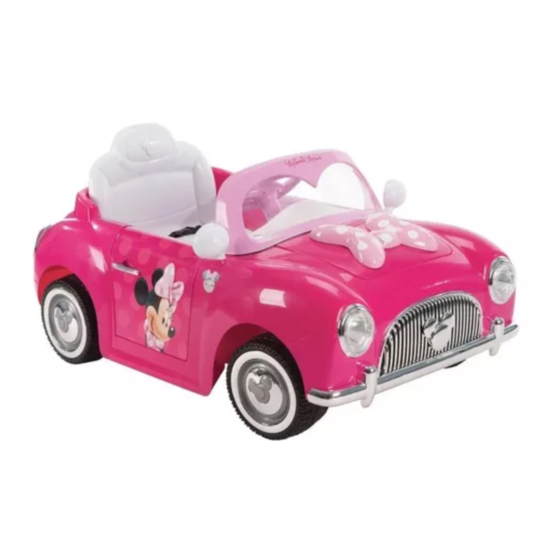
Minnie Mouse 6 volt Car
Item No.: 8453
Model No.: D8010
SUITABLE FOR AGES 3 YEARS +
MAXIMUM USER WEIGHT 30KG
ONLY 1 RIDER AT A TIME
Advertisement
Table of Contents

Related Manuals for Hunter Products D8010


Summary of Contents for Hunter Products D8010
- Page 1 INSTRUCTION MANUAL Minnie Mouse 6 volt Car Item No.: 8453 Model No.: D8010 Styles and colours may vary. For after sales service, replacement parts or general enquiries please contact: Web: www.electricrideon.com.au SUITABLE FOR AGES 3 YEARS + MAXIMUM USER WEIGHT 30KG...
-
Page 2: Table Of Contents
Contents Before First Use: ..................2. Product Specifications: ................ 3. Safety Precautions & Warnings: ............4-7. Parts Description: ...................8. Assembly Instructions:..............9-10. Direction of use:..................11. Charging Instructions: ............... 12 . Reset Fuse: ..................13. Maintenance: ..................14. General Care: ..................15. Troubleshooting: ................16- 17. -
Page 3: Before First Use: 2
Before First Use: 2 This Instruction Manual contains important safety information as well as assembly, use and maintenance instructions. This car must be assembled by an adult who has read and understands the instructions in this manual. Keep the packaging away from children and dispose of properly before use. -
Page 4: Product Specifications
3 Product Specifications: EXTERNAL POWER MODE 1070 x 651 x 525 mm Rechargeable DIMENSIONS 3+ years AGES FUSE SPEC 7 amp Thermal Fuse MAX WEIGHT 8-12 hours(charge) CHARGING TIME 30 kg LIMIT 1-2 hours (use) AC100-240V, 50Hz(input) CHARGING SPEC SPEED DC8V 800mA(output) BATTERY 6V 7AH SLA... - Page 5 Safety Precautions & Warnings 4 WARNING! The following safety hazards may result in serious injury or death to the user of the vehicle Minnie Mouse 6v Car Ride-on: • This product contains small parts that are for adult assembly only. Keep small children away when assembling.
- Page 6 5 Safety Precautions & Warnings (cont.) 3 to 7 years Age Range No more than 30kg Weight Range Before using the vehicle the child should understand the vehicle controls and safety issues. They must also demonstrate the capability to handle the vehicle and operate its controls.
-
Page 7: Safety Precautions & Warnings
Safety Precautions & Warnings (cont.) WARNING! The following safety hazards may result in serious injury or death to the user of the vehicle: Use of a battery or charger other than the supplied 6v rechargeable battery and • charger may cause a fire or explosion. Only use the supplied 6v rechargeable battery and charger with the vehicle. - Page 8 7 Safety Precautions & Warnings (cont.) WARNING! Battery posts, terminals and related accessories contain lead and lead • compounds (acid), chemicals and are toxic and corrosive. Never open the battery. • Tampering or modifying the electric circuit system may cause or explosion and permanently damage the system.
-
Page 9: Parts Description 8
Parts Description 8 INSTRUCTION MANUAL Minnie Mouse 6 volt Car Item No.: 55180 Model No.: ZP3999B Styles and colours may vary. For after sales service, replacement parts or SUITABLE FOR AGES 3 YEARS + general enquiries please contact: MAXIMUM USER WEIGHT 30KG Web: www.electricrideon.com.au ONLY 1 RIDER AT A TIME Toll Free Service Phone: 1800 224 094... -
Page 10: Assembly Instructions
9 Assembly Instructions 1: Install the steering wheel: Steering wheel Remove the bolt and nut from the steering wheel and fit over the steering rod. Place bolt and nut back through steering wheel and rod to fix in place. 2: Installing the windshield and rear view mirrors. Clip the wind shield into the recess holes on the dash. - Page 11 Assembly Instructions 10 5: Install the front left wheel: Make sure flat washer is fitted to front axle Slide the front wheel onto the axle ensuring it is clicked into place. 6: Install the front right wheel: Make sure flat washer is fitted to front axle Slide the front wheel onto the axle ensuring it is clicked into place.
-
Page 12: Direction Of Use
11 Directions of use Opening & Closing Doors Pull the door handle inside the door to open. Reverse this step to close the door. Driving the Vehicle Turn the car on via the power button. Select forward or back from the gear switch. Forward &... -
Page 13: Charging Instructions 12
Charging Instructions 12 To Charge the Battery: 1: Ensure the car is stopped and turned off. 2: Plug the round charge pin into the charge port located below the front of the driver seat. As per image below. 3: Plug transformer into a 240 V outlet. NOTE: First time charge should be for 16 hours Subsequent charges should be 8-12 hours. -
Page 14: Reset Fuse
13 Reset Fuse Thermal Overload Fuse: This car is fitted with a thermal overload fuse. If the car is overloaded the fuse will cut off power to the car for 10-20 seconds before resetting itself. To avoid the fuse activating please follow the below guidelines. -
Page 15: Maintenance 14
Maintenance 14 Important Battery and Charger Information Only an adult who has read and understands the safety warnings may handle and operate the battery and battery charger. Keep away from children. Charge the battery for 16 hours before using the vehicle for the first time. -
Page 16: General Care
15 General Care Regularly inspect all vehicle parts to ensure they are in good working condition. Regularly inspect the charger, cord, plug, and other related parts for damage. Remove any damaged parts and immediately contact Customer Service for replacement parts. DO NOT operate the vehicle if there are any damaged parts. -
Page 17: Troubleshooting
16 Troubleshooting Guide Completely read through the manual and troubleshooting guide before contacting Customer Service. Problem Potential Cause Solution Vehicle does not run Battery is low Recharge the battery Thermal fuse tripped Reset fuse Snap pins are loose Tighten snap pins Loose wires or loose Ensure the battery connectors connectors... - Page 18 17 Troubleshooting Guide Problem Potential Cause Solution Vehicle needs a push to Loose wires or loose Ensure the battery connectors start connectors are securely attached. If wires are loose, contact Consumer Service for repairs “Dead spot” on motor A “dead spot” means electricity is not being delivered to the terminal.
- Page 19 Service and Repairs 18 If your product requires service, repairs or replacement parts, please visit us online at www.electricrideon.com.au Or contact us at: Toll Free Service Phone: 1800 224 094 emall: www.enquiries@hunterproducts.com.au Hours: 9.00 AM - 5.00 PM (AEST), Monday - Friday...
-
Page 20: Warranty
Hunter Products Please retain your receipt as proof of purchase and contact further assistance on how to process any warranty claims. Hunter Products Pty Ltd Business name: Business address: Level 2, 424 Warrigal Road, Moorabbin VIC 3189, Australia Toll Free Phone: 1800 224 094 (Monday to Friday 9.00 to 5.00pm AEST)
Need help?
Do you have a question about the D8010 and is the answer not in the manual?
Questions and answers
Vehicle only goes forward, no reverse
A Hunter Products D8010 vehicle may only go forward and not reverse due to a faulty forward/reverse switch connection. Checking this switch connection is one of the first troubleshooting steps suggested.
This answer is automatically generated