Table of Contents
Advertisement
Advertisement
Table of Contents

Subscribe to Our Youtube Channel
Summary of Contents for Reka SR250G
- Page 1 User Guide SOUNDBAR WITH WIRELESS SUBWOOFER...
-
Page 2: Table Of Contents
Table Of Contents Table Of Contents Overview Scope Of Delivery Components General Information Reading And Storing The User Guide Intended Use Explanation Of Symbols Safety Explanation Of Instructions General Safety Instructions Product Description Description Setup Connecting Via HDMI (ARC) Connecting Via Optical Connecting Via Line In Setting Up The Subwoofer Using The Soundbar... - Page 3 Table Of Contents Trouble Shooting Product Care Storing Cleaning Replacing The Battery Technical Data Declaration Of Conformity Disposal Disposing Of The Packaging Disposing Of The Device...
-
Page 4: Overview
Overview Overview Congratulations! You have made an excellent choice with the purchase of this quality REKA product. ® By doing so you now have the assurance and peace of mind which comes from purchasing a product that has been manufactured to the highest standards of performance and safety, supported by the high quality standards of Quesh Ltd. -
Page 5: Scope Of Delivery
Scope Of Delivery Scope Of Delivery Components Soundbar HDMI 2.0 Cable Remote Control Wall Bracket (x2) Subwoofer Wall Plug 25mm (x2) 18V/2A Mains Adaptor (x2) Screw (x2) CR2025 Battery Paper Drill Guide (not shown) -
Page 6: General Information
General Information General Information This user guide is based on the standards and regulations that are valid within the European Union. Also the country specific directives and laws outside of the EU. Reading and storing the user guide This user guide belongs to this Soundbar With Wireless Subwoofer (referred to as the “product”... -
Page 7: Explanation Of Symbols
Safety Explanation of symbols The following symbols are used on the product and packaging: This symbol indicates additional information on the assembly or operation of the product. This symbol refers to the declaration of conformity. Products marked with this symbol meet all the applicable community regulations of United Kingdom. -
Page 8: Safety
Safety Safety Explanations of instructions The following symbols and signal words are used in this user guide. This symbol denotes situations that could cause WARNING! injury to yourself or others. This symbol denotes situations that could cause CAUTION! damage to the product or equipment as well as possible injury to yourself. -
Page 9: General Safety Instructions
Safety General Safety Instructions Please read this important safety information before you use this product. The following warning and caution information is to prevent injury to yourself or others and to prevent damage to your product or equipment. WARNING! Risk of electric shock! Failure to comply with safety warnings and regulations can cause serious injury or death. - Page 10 Safety WARNING! Risk of electric shock! Failure to comply with safety warnings and regulations can cause serious injury or death. • Avoid exposing your product to very cold or very hot temperatures. Extreme temperatures can damage the product and reduce the charging capacity and life of the installed battery. • DO NOT directly connect the positive and negative terminals. Doing so will cause the product to malfunction.
-
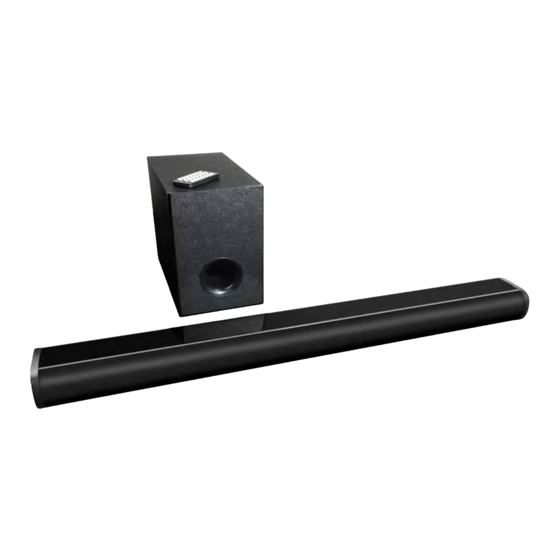
Page 11: Product Description
Product Description Product Description Description Subwoofer Air Intake Soundbar Speakers Subwoofer Speaker 18V/2A DC In Port 18V/2A DC In Port USB 2.0 Dataport Subwoofer On/Off Switch 3.5mm AUX In Port Soundbar On/Off Switch Optical In Port Volume Down HDMI (Arc) In Port Volume Up... - Page 12 Product Description Product Description Description Power On/Off News EQ Preset Mute Treble + Line In Audio Source Treble - Bluetooth Bass + Pairing Bass - USB Audio Source Volume + Optical In Audio Source Volume - HDMI Audio Source Skip Back Music EQ Preset Play/Pause Movie EQ Preset...
-
Page 13: Setup
Setup Setup There are 3 ways to setup depending on what output are available on the device you are connecting to. You can choose from HDMI, Optical and Line In. It is also possible to connect upto 4 devices to the Soundbar. First, place the soundbar in a suitable position center aligned to the device. -
Page 14: Connecting Via Optical
Setup Connecting Via Optical If your device supports optical audio you can connect to the Soundbar with a standard optical audio cable. Connect the optical cable to the ‘OPT In’ port the back of the Soundbar. Connect the other end of the optical cable to the device’s designated ‘Optical Digital Audio Out’... -
Page 15: Connecting Via Line In
Setup Connecting Via Line In Any device that has a headphone or Line out port can connect to the Soundbar via the 3.5mm ‘Line In’ port. Connect a 3.5mm AUX cable to the ‘LINE IN’ port on the back of the Soundbar. Connect the other end of the AUX cable to the device’s ‘Headphone’... -
Page 16: Using The Soundbar
Using The Soundbar Selecting A Source The current sound source is indicated by the colour of the LED light on the front of the sound bar. Source LED Colour Optical In HDMI Green Line In Yellow Bluetooth Blue Blue & Green To select a source press one of the source buttons on the remote. -
Page 17: Volume Control
Volume Control The soundbar’s volume is set in a small adjusting stepped range in -31 < 0 > +31. To adjust the volume either use the ‘ ‘ B 16 or ‘ ’ B 17 volume buttons on the remote or alternatively a quick press on the ‘ ‘... -
Page 18: Bluetooth
3 seconds until the LED is flashing blue. On the devices bluetooth ‘available devices’ list look for and add ‘REKA AUDIO’. Once paired the device will automatically connect next time providing the soundbar is still listed in the connected devices list of the device. -
Page 19: Usb
The soundbar includes a feature where you can play MP3 tracks from a USB stick. Transfer DRM free MP3 files to a USB stick that is no bigger than 8GB and formatted to FAT32. This can be done directly on a computer under the format options. A 10 Insert the USB stick into the USB 2.0 port on the back of the soundbar. -
Page 20: Mounting The Soundbar
Mounting Mounting The Soundbar Required Tools: • Cross Head Screwdriver • Tape Measure • 6mm Masonry Drill Bit • Spirit Level • Hammer Action Drill • Pencil • Masking Tape Placement Ideally the soundbar should be mounted to the wall either below or above the TV center aligned with the screen. Avoid placing the soundbar on hard surfaces that could cause resonance reducing the sound quality if wall mounting is not an option. - Page 21 Mounting Next, place the bracket on the back of the soundbar and line up the screw holes. Secure the bracket into place with the previously removed screws on the back of the Soundbar with a crosshead screw driver. The soundbar is ready to mount to the wall.
-
Page 22: Wall Mounting
Mounting Wall Mounting First find the center mark of your TV. Measure a minimum of 100mm down or up depending if you are mounting the soundbar above or below the TV. Draw a long horizontal line using the spirit level at the 100mm mark. Place 2 pieces of masking tape on the supplied drilling guide and place the top edge of the paper. Adjust the guide along the marked horizontal line so that the center line on the ... - Page 23 Mounting Drill the holes carefully to the depth marked by the tape. Insert the wall plugs and tap them into place until they are flush with the wall with the back of the screwdriver. Fix the screws in place with a cross head screwdriver leaving a couple of millimetres space between the wall and the screw head so the bracket can hook on to them.
-
Page 24: Mounting Tips
Mounting Mounting Tips The tips listed below are suggestions that will help your audio experiance with the product. • Make sure the soundbar’s cables are not running in close proximity to any electrical power cable. This is to ensure zero or minimal power interference. • The soundbar’s rear must have nothing in its immediate vicinity. It should be at least a 10mm away from anything. Blocking the space behind the soundbar is important for the equipment’s acoustics. • The soundbar must be positioned in a way that the speaker’s grille faces the room and not the wall. -
Page 25: Trouble Shooting
Trouble Shooting Trouble Shooting Problem Cause Solution Bluetooth dropping out after a • Full device cashe. Manually clear the device’s few minutes. cache & restart the device. Replace/Charge batteries • Low power. Stuttering/delay music. • Too many processes Close unused apps. running on device. • Corrupt bluetooth profile. Unpair & delete bluetooth profile, then re-pair device. -
Page 26: Product Care
Product Care Product Care Please read this important product care information before you store or clean this product. The following information is to prevent damage to your product and to keep it in good working condition. Storing It is recommended for long term storage that you do the following: ... -
Page 27: Replacing The Battery
Product Care Replacing The Battery This remote uses a CR2025 3V battery. This battery lasts typically for approximately 12 months. To replace the battery, slide out the battery tray from the remote body. Once the battery tray is removed replace the battery and insert it into the battery tray making sure that the positive symbol is facing up. -
Page 28: Technical Data
Bluetooth Bluetooth Ver: Frequency Range: 2.400GHz-2.483GHz Bluetooth Protocol: SPP, A2DP, AVRCP Bluetooth Range: Bluetooth Name: REKA AUDIO Speaker Speaker Size: 2 x 58mm, 1 x 120mm Speaker Channels: 2.1 Stereo Speaker Watts: 2 x 20W, 1 x 30W Max Speaker Output:... - Page 29 Disposal Information Disposal Information Packaging recyclenow.com The card used in the packaging is made from widely recycled material. Dispose of the box in the council approved recycle bin. Check with your local authority or at www.recyclenow.com to see which items are collected in your area. Product This product uses a CR2025 Li-Ion internal battery.
- Page 30 Warranty Conditions Dear Customer, This warranty offers you extensive benefits: Warranty period: 1 year from the date of purchase. 6 months for wear of parts and consumables under normal and proper conditions of use (e.g. Rechargeable batteries). Costs: Free repair/exchange. Refundable postage cost.
- Page 31 01270 508538 (GB) 1800 995 036 (IE) enquiries@quesh.co.uk PRODUCT CODE 709188 SERVICE CENTRE Quesh LTD. B7, First Business Park, First Avenue, Crewe, Cheshire, UK. CW16BG. MODEL: SR250G www.quesh.co.uk Description of malfunction: Your details: Date and location of purchase: Name: Address: Email:...
- Page 32 Great care has gone into the manufacturing of this product and it should therefore provide you with years of good service when used properly. In the event of product failure within its intended use of the course of the first year after the date of purchase, we will remedy the problem as quickly as possible once it has been brought to our attention.
Need help?
Do you have a question about the SR250G and is the answer not in the manual?
Questions and answers