Table of Contents
Advertisement
Available languages
Available languages
Quick Links
Advertisement
Chapters
Table of Contents

Summary of Contents for CELLALLURE Cool S2
- Page 1 Cool Instructions / Instrucciones English / Español...
-
Page 2: Table Of Contents
Contents PRECAUTIONS..............2 1. UNDERSTANDING YOUR PHONE........3 2. REMOVING BACK COVER/BATTERY INSTALLATION..4 3. INSERTING/REMOVING SIM CARDS......4 4. GETTING STARTED............5 5.TOUCH BUTTONS............6 6. HOME SCREEN..............6 7. SETTINGS MENU............7 8. MAKING AND RECEIVING CALLS........8 9. ANSWERING AND REJECTING CALLS......9 10. SENDING A MESSAGE..........9 11. -
Page 3: Precautions
PRECAUTIONS On the Road Using a phone while driving is illegal in many countries. Please refrain from using your mobile while driving. Near Sensitive Electronics or Medical Equipment Don’t use your phone near sensitive electronic equipment – particularly medical devices such as pacemakers – as it could cause them to malfunction. It can also interfere with the operation of fire detectors and other automatic-control equipment. -
Page 4: Understanding Your Phone
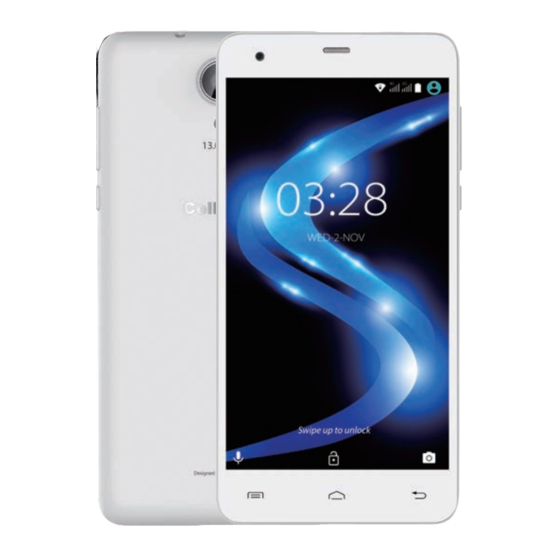
1. UNDERSTANDING YOUR PHONE 5MP front camera Sensor Speaker Volume up Volume down Power key Touch button/Opens recently visited pages Touch button/Takes you to home page Touch button/Moves back one step Flash/Torchlight 3.5mm headphone jack 13MP camera USB charging port Loudspeaker... -
Page 5: Removing Back Cover/Battery Installation
. REMOVING BACK COVER/BATTERY INSTALLATION 1. Lift and remove rear case as shown below on the bottom left corner of the phone. 2. Insert the battery matching up the gold terminals on the top left of the battery and clip in place. 3. -
Page 6: Getting Started
Inserting/Removing TF Card • The TF card slot is located next to the SIM card slots near the battery terminals as indicated on the phone itself. • Gently insert the TF card noting the correct direction as indicated on the phone and push until the TF card clicks in place. -
Page 7: Touch Buttons
5.TOUCH BUTTONS button displays a menu of recently opened applications. button returns immediately to the main screen. button moves back one step to the previous menu/page. Screen Lock To lock the phone’s screen, simply press the “POWER BUTTON”. Screen Unlock When the phone is in idle mode, press the “POWER BUTTON”... -
Page 8: Settings Menu
The status bar displays system information, such as current time, wireless connectivity and battery charge status. From the home screen, slide your finger from the top of the screen down to the centre to access the notification panel as illustrated below. Drag the notification menu down to display the second fast access menu. -
Page 9: Making And Receiving Calls
• Wi-Fi – Connect to/disconnect from wireless networks, view connection status • Data usage – Enable/disable mobile data, view current usage, set mobile data limit (note: this function is available only on devices supplied with 3G card functionality) • Bluetooth – Connect or disconnect Bluetooth devices •... -
Page 10: Answering And Rejecting Calls
9. ANSWERING AND REJECTING CALLS To answer a call – Slide your finger to the Green Call answer key. To reject a Call – Slide your finger to the Red Call End key. To message – touch the message icon. 10. -
Page 11: For Multimedia Message
11. FOR MULTIMEDIA MESSAGE 1. Input recipient number on the Type name or number bar. 2. Click Menu >Add Subject, then type the Subject. 3. Click Compose to start composing a message. 4. Click add Attach. Note: • You can select Capture picture, Pictures, Capture videos, Videos, Record audio, Audio, Contact, Calendar, Slideshow from the attachment list. -
Page 12: How To Connect To A Computer
13. HOW TO CONNECT TO A COMPUTER Note: • Turn on your phone before connecting it to a PC by USB cable. 1. Use a USB cable to connect the phone with a computer. The phone will automatically detect a USB connection. 2. -
Page 13: Bluetooth
Web Browsing Connect to the Internet and launch the browser. 16. BLUETOOTH Select “Settings”, select Bluetooth from “OFF” to “ON”. Search for the device you would like to pair with and select “PAIR”. You will see a message “Connected Successfully”. 17. -
Page 14: Trouble Shooting
1. Touch the icon to take a photo. 2. Touch the icon to start camera recording. 3. Touch the icon on the top right to see the previous picture and to delete, share or set it as wallpaper. Click return button to exit camera interface. 4. - Page 15 *32GB total memory 16GB + 16GB class 10 MicroSD card included Images used are for illustration purposes only and may differ from actual product. Thank you for your purchase of the CellAllure Cool S2 Smartphone. We hope you enjoy your new device.
-
Page 16: How To Insert The Sim Card & Memory Card
19. HOW TO INSERT THE SIM CARD & MEMORY CARD SIM card 1 SIM card 2 Memory card... - Page 17 Contenido PRECAUCIONES...............17 1. CONOCE EL TELÉFONO..........18 2. REMOVER LA CUBIERTA TRASERA/INSTALACIÓN DE LA BATERIA................19 3. INSERTAR/EXTRAER TARJETA SIM........19 4. INTRODUCCION............20 5. BOTONES TÁCTILES............21 6. PANTALLA INICIO............21 7. MENU AJUSTES............22 8. HACER Y RECIBIR LLAMADAS........23 9. RESPONDER Y RECHAZAR LLAMADAS......24 10. ENVIAR UN MENSAJE..........24 11.
-
Page 18: Precauciones
PRECAUCIONES En el camino Utilizar un teléfono mientras conduce es ilegal en muchos países. Por favor absténgase de utilizar su teléfono móvil mientras conduce. Equipos electrónicos o equipos médico cercanos. No utilice su teléfono cerca de equipos electrónicos – dispositivos médicos como marcapasos especialmente, ya que podría causar un mal funcionamiento del mismo. -
Page 19: Conoce El Teléfono
1. CONOCE EL TELEFONO 5MP Cámara Frontal Sensores Altavoz Subir Volumen Bajar Volumen Tecla de encendido Botón táctil/abre páginas recientemente visitadas Botón táctil /Te lleva a la pantalla inicio Botón táctil /Mueve un paso hacia atrás Flash/luz Antorcha Para el auricular 3.5mm Cámara de 13MP Puerto de carga USB Altoparlante... -
Page 20: Remover La Cubierta Trasera/Instalación De La Bateria
2. REMOVER LA CUBIERTA TRASERA/INSTALACION DE LA BATERIA 1.Levante y retire la tapa trasera como se muestra abajo en la esquina inferior izquierda del teléfono. 2.Inserte la batería emparejando los terminales dorados en la parte superior izquierda de la batería y presionando hasta que quede en su lugar. 3.Vuelva a instalar la tapa trasera y haga clic para que quede en su lugar. -
Page 21: Introduccion
Insertar o quitar la tarjeta del TF • La ranura para tarjeta del TF se encuentra al lado de las ranuras de tarjeta SIM cerca de los terminales de la batería como se indica en el propio teléfono. • Inserte suavemente la tarjeta del TF señalando la dirección correcta como se indica en el teléfono y presione hasta que la tarjeta del TF quede en su lugar. -
Page 22: Botones Táctiles
5. BOTONES TACTILES El Botón muestra un menú de aplicaciones recientemente abiertas. El Botón retorna inmediatamente a la pantalla principal. El Botón retrocede un paso hacia la página de menú anterior. Bloqueo de pantalla Para bloquear la pantalla del teléfono, simplemente pulse la tecla "ENCENDIDO". Pantalla de desbloqueo Cuando el teléfono está... -
Page 23: Menu Ajustes
La barra de estado muestra información del sistema, tales como hora, conectividad inalámbrica y estado de carga de batería. Desde la pantalla principal, deslice su dedo desde la parte superior de la pantalla hasta el centro para acceder al panel de notificación tal como se ilustra a continuación. -
Page 24: Hacer Y Recibir Llamadas
• El uso de datos-activar/desactivar datos móviles, uso actual de la vista, establecer el límite de datos móviles (Nota: esta función sólo está disponible en dispositivos de funcionalidad de tarjeta de 3G) • Bluetooth: Conecte o desconecte los dispositivos Bluetooth •... -
Page 25: Responder Y Rechazar Llamadas
9. RESPONDER Y RECHAZAR LLAMADAS Para contestar una llamada, deslice el dedo a la tecla de respuesta de color verde. Para rechazar una llamada, deslice el dedo a la tecla fin de llamada de color rojo. Para mensajes, toque el icono de mensaje. 10. -
Page 26: Mensajes Multimedia
11. MENSAJES MULTIMEDIA 1. Ingrese número de receptores en el nombre de tipo o número bar. 2. Haga clic en Menú > Agregar tema, a continuación, escriba el asunto. 3. Haga clic en redactar para comenzar a componer un mensaje 4. -
Page 27: Cómo Conectarse A Un Ordenador
13. CÓMO CONECTARSE A UN ORDENADOR Nota: • Encienda el teléfono antes de conectarlo a un PC por cable USB. 1. Utilice un cable USB para conectar el teléfono con un ordenador. El teléfono detecta automáticamente una conexión USB. 2. Una notificación aparecerá "USB conectado" – seleccione la funcionalidad deseada. -
Page 28: Bluetooth
Navegación por la web Conectarse a Internet y poner en marcha el navegador. 16. BLUETOOTH Seleccione "Configuración", seleccione Bluetooth en "ENCENDIDO" a "APAGADO". Buscar el dispositivo que desea emparejar con y seleccione "EMPAREJAR". Usted verá un mensaje "Conectado correctamente". 17. CAMARA Toque el icono para entrar en modo de cámara y la interfaz se muestra como lo siguiente:... -
Page 29: Resolución De Problemas
1. Toca el icono de para tomar una foto. 2 Toca el icono de para iniciar la grabación de la cámara. 3. Toca el icono de en la parte superior derecha para ver la imagen anterior y borrar, compartir o definirlas como papel tapiz. Haga clic en volver para salir de cámara interfaz . - Page 30 *32GB total memory 16GB + 16GB class 10 MicroSD card included Las imágenes utilizadas son sólo con fines ilustrativos y pueden diferir del producto real. Gracias por su compra del CellAllure Cool S2 Android teléfono nteligente. Esperamos que disfrute su nuevo dispositivo.
-
Page 31: Como Insertar La Tarjeta Sim Y La Tarjeta De Memoria
19. Cómo insertar la tarjeta SIM y la tarjeta de memoria. Tarjeta SIM 1 Tarjeta SIM 2 Tarjeta de memoria... - Page 32 Android www.cellallure.com...
Need help?
Do you have a question about the Cool S2 and is the answer not in the manual?
Questions and answers