Table of Contents
Advertisement
Quick Links
Advertisement
Table of Contents

Related Manuals for Zip Line Fun ZL70

Summary of Contents for Zip Line Fun ZL70
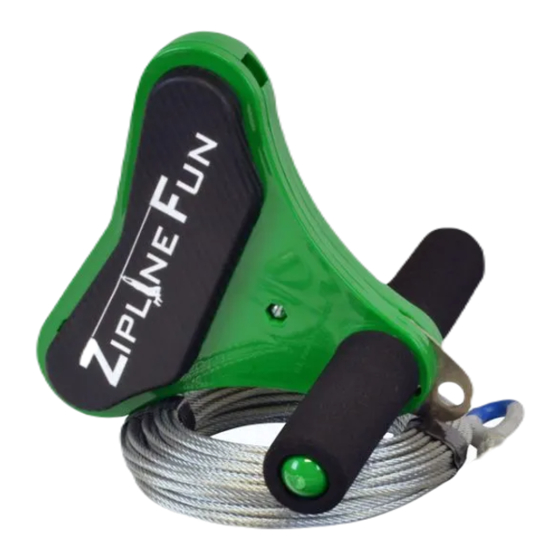
- Page 1 With Patented FingerSafe Trolley System ziplinefun.com ZL70 - 70’ ’ Ages weighing up to 225lbs Made in the for over years. includes all parts & hardware for easy assembly Only Residential Zipline to meet ASTM Home Playground Equipment Safety Standards.
-
Page 2: Liability Release
ASTMF1148 Standard Consumer Safety Performance Specification for Home Playground Equipment, and European Toy Safety equipment and accessories, all users of ZL70 will need proper instruction and supervision. ZL70 is intended to be used as a cable ride between two points. -
Page 3: Tools Required
Please Note: Observing the following statements and warnings reduces the likelihood of serious or fatal injury. ZL70 Zip Line has been designed to provide children and adults with all of the enjoyment and traditional fun of a smooth, safe and exhilarating ride through the air from one point to another. - Page 4 (see assembly instructions). 4. Do not install ZL70 Zip Line over concrete, asphalt, packed earth, grass, carpet or any other hard surface. A fall onto a hard surface can result in a serious injury or death to the equipment user. (See enclosed CONSUMER INFORMATION SHEET FOR PLAYGROUND SURFACING MATERIALS).
- Page 5 Assembly Instructions NEVER USE EYEBOLTS OR SIMILAR HARDWARE IN CONNNECTION WITH THIS PRODUCT! Illustration 1: Upright U-Bolts Thimble Turnbuckle Upright Clamps Lock Washers Nuts Incorrect Sling 1. Set aside Assembled Trolley (E). See instructions for proper mounting heights. Do not suspend cable over any hard surface. Carefully uncoil the galvanized aircraft cable (D).
- Page 6 INSTALLATION and ASSEMBLY SAFETY INSTRUCTIONS (continued) Please Note: Observing the following statements and warnings reduces the likelihood of serious or fatal injury. 3. Using three (3) of the cable clamps (B) provided with lockwashers and nuts, secure the cable at the starting point (high end) as illustrated below.
- Page 7 INSTALLATION and ASSEMBLY SAFETY INSTRUCTIONS (continued) Please Note: Observing the following statements and warnings reduces the likelihood of serious or fatal injury. 4. Using a hammer, fit the thimble (G) to the eyed end of the Turnbuckle (A) as illustrated. 5. Wrap the cable sling (C) provided around the other upright at the terminating point (or low end) at the height determined in Safety Instructions step 5b and place the loops at the end of the sling over the bolt inside the jaw end of the turnbuckle as illustrated.
- Page 8 INSTALLATION and ASSEMBLY SAFETY INSTRUCTIONS (continued) Please Note: Observing the following statements and warnings reduces the likelihood of serious or fatal injury. 8. Depending upon the length of your Zip Line, you may now have extra cable. This excess should be removed.
-
Page 9: Maintenance
At the End of Each Play Season/Temperature Drops Below 32 degrees Fahrenheit: o Uninstall and take the ZL70 Zip Line trolley, swing seats or other items inside. o Rake and check the depth of loose fill protective surfacing materials to prevent compaction and to maintain appropriate depth. - Page 10 THE SADDLE (CLAMP BASE). REMEMBER LIVE END 6. RE-TORQUE ALL NUTS AFTER APPLYING THE FIRST SADDLE, DEAD END U-BOLT. LOAD TO THE ZL70. WIRE ROPE CLAMPS SHOULD BE INSPECTED AND RETORQUED PERIODICALLY. 2. TIGHTEN U-BOLT NUTS EVENLY ON 1ST CLAMP TO 3 FOOT POUNDS OF TORQUE.
-
Page 11: Limited Warranty
LIMITED WARRANTY Zip Line Fun warrants to the first consumer purchaser, for a period of one (1) year from the date of purchase, that the Zip Line will be free from defective workmanship and materials, and agrees that it will, at its option, either repair the defect or replace the defective product or part thereof at no charge to the purchaser for parts or for labor. - Page 13 How to Install Zip Line without Trees 1) Determine if you will need to install post’s on one side of zip line ride or both sides (each side will require Qty. 2: 6’ x 6’ x 12’ long posts). 2) For each side you will be using post’s instead of trees: a.
- Page 14 SLOPE Tie a string between the two trees that you will set the zip line up on. Make sure that the string is level by using a leveler. Measure the high end (starting point) from the ground to the bottom of the string. Measure the low end (stopping point) from the ground to the bottom of the string.
Need help?
Do you have a question about the ZL70 and is the answer not in the manual?
Questions and answers